Jekyll2026-04-22T17:41:22+02:00http://volzo.de/feed.xmlvolzoChristopher GetschmannChristopher Getschmannchristopher@volzo.deHatching, Hachures, and Contour Lines - Shaded Reliefs for Pen Plotter Maps2025-04-25T00:00:00+02:002025-04-25T00:00:00+02:00http://volzo.de/posts/hatching-hachures-contoursIn mapmaking, one of the oldest problems is finding a visually pleasing way to represent elevation using just two dimensions (or as Edward Tufte would call it: trying to escape flatland).
Websites like shadedrelief.com, shadedreliefarchive.com, and reliefshading.com list map examples for good terrain and bathymetry (ocean depth) representations, but (almost all) of the modern techniques are designed for pixel-based printing techniques1.
Historically it was necessary to engrave or etch dots and lines in a metal plate for printing. When working with pen plotters, lines are the geometry of choice so it makes sense to spend some time with the historical methods:
Contour Lines
Contour lines (lines representing an elevation slice, crossing the slope direction at a 90-degree angle) are probably the most common method of representing terrain on maps.
The closer to each other the contour lines run, the darker the map appears. Thus, any dark areas indicate the steep slopes, not a shadow which should create some perception of depth.
To convey some sense of shading, hatching or hachure lines are used on top of contour lines, as in this tourist map of San Francisco:
However, there is a notable improvement on the classic contour lines called illuminated contours or Tanaka contours2. Creating the visual effect of a relief by using a lighter color for raised line segments perpendicular to the direction of a simulated sun.
Hachures on hachure maps are hatching-like lines along the elevation direction first standardized in 1799. The most prominent example are the Swiss topographic maps, also called Dufour Maps:
There are some proposals on how to automate these hand-drawn/carved hachure lines from historical copperplate prints for modern computer-generated maps:
Parallel lines in a fixed angle with varying distances. That’s what I used for my giant wall map:
Sometimes historical maps do not use parallel lines but make use of shrinking outlines, especially for coastlines:
Combinations
Hatching lines in combination with contour lines may make sense as well, as presented by Marjan Sikora:
Streamline-based hatchings
Using a Digital Elevation Model the angle and magnitude of elevation changes (basically the steepness of a slope and its direction) can be treated like a vector flow field. This allows to orient free-flowing hatching lines to align with the shape of the surface. The example above has been generated with my implementation of the algorithm in the paper Creating Evenly-Spaced Streamlines of Arbitrary Density by Bruno Jobard and Wilfrid Lefer.
Very similar results have been achieved by Daniel Huffmann in his projects.
In addition to that, there is a large body of work from the computer graphics community regarding hatching techniques and pen-drawing styles for 3d objects, but this would be out of scope for a short overview.
The first pen-plotter map I did in 2021 using only basic hatching
The simplest way is just to load a Digital Elevation Model in a 3d modeling software such as Blender and render the scene to capture highlights and shadows. Example tutorial↩
]]>Christopher Getschmannchristopher@volzo.deSpeeding Up Python with Rust and No Prior Knowledge2025-04-14T00:00:00+02:002025-04-14T00:00:00+02:00http://volzo.de/posts/rust-in-pythonPython is a great language and if you prioritize prototyping and getting results quickly (as I do with most of my projects) the trade-offs between programmer productivity and processing speed are fine for me. The really time-consuming parts are outsourced to numpy, OpenCV, or other “fast” libraries with compiled code, and the speed of my Python code (or lack thereof) is negligible. Ultimately, my time spent optimizing is limited, and CPU cycles are cheap.
Yet, a few times a year I am stuck with an issue where Python is prohibitively slow. Recently I was working on a piece of code computing hachures lines for vector maps and my Python implementation of the algorithm takes several minutes to complete. However, this is a task where I want to work interactively and experiment to find a visually pleasing result. This only works if I can compare input parameters, modify and observe quickly. In other words: it needs to be fast enough to keep me in the loop.
I am mostly writing Python, I do not enjoy touching C code and would rather avoid it. But there’s a new kid on the block (… for like, … 10 years) and that’s Rust. In combination with PyO3 (“Pythonium-Trioxide”) as a bindings framework, it should be a straightforward drop-in replacement for some relatively simple Python code. That’s at least what I hoped.
A quick summary of someone getting his first Rust program to run as a Python module:
1. Learning Rust:
Compared to Python, Rust the language and its standard library have a considerably steeper learning curve. Reading some basic info before starting and picking up what’s necessary on the go might not work out well. The Rust Book, however, is a good intro to the language and it made sense to read most of the chapters as a preparation.
Be aware: the book tends to err on the side of having a simpler explanation and be a bit lengthy rather than assuming a certain level of computer science knowledge. I think for this kind of book that’s the right choice, but it’s good to know that beforehand and adapt your reading style accordingly.
The Rust compiler does output some excellent error messages for common problems and is a remarkable help while learning the language. Even though Python has improved in this regard over the last few years substantially, rustc output goes the extra mile to point you in the right direction. However, given the complexity of the language in comparison to Python, this is necessary, though.
2. Tooling
Just to get started the necessary tooling is rather minimal:
Rust’s default package manager Cargo feels quite familiar if you’re used to uv.
As an IDE RustRover is the obvious choice. It is cut from the same cloth as all other IntelliJ IDEs and requires minimal effort if you ever used one of the others.
3. Project Structure:
Splitting the Rust code and the Python bindings into two separate crates (similar to what is recommended here) felt a lot “cleaner”, reduced the mental complexity, and allowed me to compile and test the Rust code without any Python bindings. That was a big plus in speed and “programming ergonomics”.
Build and run the rust code: cargo run --package project_rs --bin project_rs
Build and install the Python library (into the local virtual environment): maturin develop -m project_py/Cargo.toml
Run the Python test code: python test_python_bindings.py
4. Python Bindings:
PyO3 in combination with maturin did work out well. Ignoring the “first steps” and just going through the user guide is the approach I would recommend. Afterward, the PyO3 examples make more sense.
A downside of the duplication of objects (one set of “clean” rust structs and methods and one set of objects for PyO3 annotations) is the duplication. I found no simple way of avoiding this boilerplate code using Rust’s partial object-oriented features. This might be a rookie issue.
Though there are bindings for NumPy’s ndarrays as well, that did not work out for me as expected.
5. Python Documentation
At the time of writing type hints for mypy/the IDE need to be created manually as .pyi stub files (see PEP 484).
6. Performance:
Computing hachure lines for a full 3 meter map on an Intel Macbook 16 takes 24s with Rust and 317s running the Python version. That’s a 13x speed-up. Gains are not linear though, for a smaller canvas the Rust implementation is only 2-3x faster.
The main performance issue I faced as a Rust beginner is that I did not figure out how to pass OpenCV images (as numpy n-dimensional arrays) from Python to Rust without an additional copy.
I was slightly surprised by how large the gap between develop (no compiler optimization) and release (all optimizations enabled) builds is (about a 10x speedup as well).
7. Wrapping it up:
I was surprised about the quality of both the Rust book and the documentation. Notably, I had the impression that the Rust community is a pleasant group of people, which is not something that can be taken for granted.
For simple problems that can be boiled down to sequential data processing (passing/copying data from Python to Rust, waiting for the Rust code to finish the computation, and returning it), Rust is basically a drop-in replacement.
However, the typical Python user caveat applies: if you get too used to Python and its built-in support for type variable handling, it takes a conscious effort to make yourself use a “strict” language. Don’t underestimate the complexity and learning curve with Rust.
]]>Christopher Getschmannchristopher@volzo.deMotorized Spray Can Cap2025-03-15T00:00:00+01:002025-03-15T00:00:00+01:00http://volzo.de/posts/motorized-spray-canFor an art project I needed a lightweight way to trigger spray cans with a motor.
I am using a very lightweight (9g) SG-90 servo motor made for remote-controlled hobby planes. The trigger requires a lever to put enough force on the cap of the spray can. The length of the lever arm is bit of trade-off. When running the servo on 5V (6V is recommended for max torque on a SG-90) torque is sufficient to reliably trigger the release of paint but there is a bit of a delay till the servo has pressed the cap beyond the “paint-release” point. If that works for you depends on your application.
Total weight of full assembly including motor and screws: 28.7g
The plastic is slightly flexible and wraps around the metal bulge on top of the can. The whole assembly can simply be slid on and off without a lot of wiggling.
This post and all images are licensed under CC BY.
You are free to Share — copy and redistribute the material in any medium or format and Adapt — remix, transform, and build upon the material for any purpose, even commercially.
But you need to take care of Attribution — You must give appropriate credit, provide a link to the license, and indicate if changes were made.
]]>Christopher Getschmannchristopher@volzo.deA Simple Approach to Digital Solargraphy2023-08-17T00:00:00+02:002023-08-17T00:00:00+02:00http://volzo.de/posts/solargraphy2
Ultra-long exposure images or Solargraphy are photos that are taken over the span of a few hours, days or weeks or months. Usually, they include the bright arcs the sun takes over the course of at least one sunny day. In the case of analog Solargraphy images, the exposure often lasts from solstice to solstice for half a year, showing all arcs from the lowest to the highest point of the sun in the sky.
Doing even a single-day exposure with a digital camera requires some special software and hardware.
I built a dedicated camera for this in the past, made a video about it, and wrote a blog post.
While I am pretty happy about the camera, its image quality and versatility are a bit limited. Framing an image when setting up the camera is cumbersome1 and the sensor module does not output RAW files that are compatible with Adobe Lightroom.
A week before I went on vacation recently, I thought about how I could get my trusty mirrorless Sony a6000 to do the same job as the cameras I’ve built before.
Quick recap:
To create a digital Solargraphy image two image sequences are needed:
1: One sequence of correctly exposed images that include metadata (shutterspeed, f-number, ISO)
2: (at least) one sequence of extremely underexposed images that record very little light so that only the sun itself is visible
The main problem:
Remote control via PTP with gphoto2 is really slow. Doing a full cycle, adjusting the shutter speed from 1” to 1/4000 and back to 1” takes 42.16 seconds (on my Sony a6000, other cameras may handle those operations faster). Adding the time for exposing the photo and downloading it you’re way over a minute. But to avoid ending up with a sunstreak that looks like a string of pearls at most every 60s an image needs to be taken and that’s non-negotiable. On top of that there is a bug in the camera firmware (I’ll be nice and assume it’s a bug/an oversight), if you request the built-in exposure meter values, the software always reports 0, so the camera would need to run in manual mode and one would need to roll a DIY auto-exposure algorithm (not a lot of fun).
So, gphoto2 is off the table, sadly. There is an alternative: remote control over wifi. The a6000 features a (very old) barebones Android system that can be launched from the camera menu and executes some Sony apps. There never was a way to use regular Android apps or write your own software, only the so-called PlayMemories store by Sony offered some paid and free Apps (until Sony did shut it down and there was no way to download the apps again you paid good money for)2. One of the apps running on the device (the SmartRemote app) does offer the remote control functionality (for some reason I tried to find out how that actually works and it’s a webserver offering a Rest API using Java Servlets. And that stuff was already horribly old when I enrolled for my first semester…). Anyway, trying to set up a remote control over wifi which is supposed to be reliable and stable over the course of several hours is not something I intend to waste a lot of time with.
So, simple question: What is the least-complicated way of getting things done?
Make the camera switch modes manually. The camera can be configured separately in manual mode and in aperture-priority mode and those configurations are not reset when switching modes. Switching modes, however, can not be done in software. The only way to achieve that is to rotate the mode wheel on top of the camera. So we’ll do exactly that. Mechanically. For each image.
The first prototype was a bit rough, but overall the required hardware and software are surprisingly simple.
A 3d-printed piece of plastic is glued with superglue to the mode wheel on top of the camera.
A 3d-printed “hat” with a tiny hobby servo motor designed for remote-controlled planes is placed on top of it. A microcontroller rotates the mode wheel to the correct position and triggers the shutter via the remote cable.
I cobbled together the hardware and software in a matter of days while planning my vacation and took this photo on Heligoland:
(That’s about 4 hours of a nice sunny evening compressed into a photo)
The first prototype was hand-soldered wire and a 2.5mm audio jack for the trigger cable. It looks pretty rough and there was no way of telling how many exposures were already done.
Afterwards I spent a bit of time creating some “proper” hardware on a printed circuit board, realized it’s slightly more convenient if there is a display, and improved the housing a bit.
Does it work?
Yes. Surprisingly well and all things considered probably the easiest method of taking a “quick” solargraphy image. The downsides:
you’ll burn through a lot of battery power
the camera is not weatherproof
it’s not concealed. You will need to babysit the camera so it won’t get wet or stolen and meanwhile, there’s a high chance you will need to fend off some questions from curious bystanders
What do you need if you want to build your own:
The willingness to superglue a plastic part to your camera
A remote trigger cable for Sony cameras with a 2.5mm headphone plug
Raspberry Pi Pico microcontroller
The circuit board with a 2.5mm headphone jack to trigger the camera and an SG90 hobby servo motor that rotates the program selection wheel of the camera
A few 3d-printed parts and M2 screws
Dummy FP-FW50 battery with a DC barrel jack connector
A battery pack for your camera. I am using the TrustFire EB03 Battery Box. That’s a battery container for a total of six 18650 lithium-ion batteries. The batteries are in a 2S3P configuration (three batteries are wired up in parallel to triple the capacity and this is done two times to double the voltage output). The nice feature of this battery pack is an integrated 5V converter with a USB plug so it can power the microcontroller.
A charger for 18650 batteries
The CompressorCam software for post-processing image stacks.
EasyEDA files (including BOM) for the PCB can be found at the EasyEDA project page
Fine print:
This post and all images are licensed under CC BY.
You are free to Share — copy and redistribute the material in any medium or format and Adapt — remix, transform, and build upon the material for any purpose, even commercially.
But you need to take care of Attribution — You must give appropriate credit, provide a link to the license, and indicate if changes were made.
The camera has no display. One needs to turn it on manually and then screw the weatherproof enclosure shut. While the camera can create an ad-hoc wifi network and stream liveview data to a website you can open on your phone, it’s quite a hassle. ↩
Long tangent: Of course, the sensible option would have been to issue a firmware update that bundles all of the few apps that Sony had in this weird app store so anyone would have access indefinitely. No value would have been lost to customers or Sony themselves since they obviously have no intention of charging any money for these apps from now on, but I guess that’s not how the world works for MBAs in a large corporation. Fun fact: Sony is still selling the a6000, but obviously now as a product that loses and not gains features over time. Anyway, luckily someone reverse-engineered enough of the whole thing and offers a framework for writing your own apps plus a toolchain to upload them: https://github.com/ma1co/OpenMemories-Tweak ↩
]]>Christopher Getschmannchristopher@volzo.deMaking Flexible Lenses at Home2022-10-15T00:00:00+02:002022-10-15T00:00:00+02:00http://volzo.de/posts/flexiblelenses
Have you ever felt the need to make flexible and squishy lenses from silicone? Do you only have a 3d printer and a very basic CNC mill at home? Then you may be the target audience.
What I’m writing about here only works for concave molds which make convex-convex or plano-convex lenses and I admit that whole thing is certainly something of a niche topic, but I mean, that’s what the internet is for. Niche topics.
Making a lens or a lens mold on a CNC mill might not always be the best idea, but sometimes it may make sense. Especially if you are working with acrylic or aluminium as a material and your expectations are somewhat limited. Good enough is often all you need.
But, a quick disclaimer: I’m neither a machinist nor do I have a clue about optics, I am just someone with a problem and trying to solve it somehow. I’ll explain what did work well for me, if you know more about that stuff your feedback is much appreciated.
So, back to the problem: For a project I want to make some lenses from soft silicone. For that I need the inverted shape of the lens as a mold so you can pour the liquid silicone into it and once it hardens you got your soft lens.
The problem with any optical surface that should work as a lens is that you need both a perfect overall shape and a perfect surface quality. If your shape is distorted, your focal length may be off or you get some horrible imaging artifacts. If your surface is rough and has tiny scratches you will get fogging or loose contrast.
You can buy high-quality lenses for a bit of money covering most diameters and focal lengths from Thorlabs or Edmund Optics. You just buy the negative version of what you actually need and put it into your mold. That’s pretty nice because you get your perfect shape and optically clear surface as a part of the lens for an okay-ish amount of money. The problem is: it’s glass. Borosilicate glass. And that’s about three-quarters silicon dioxide. Silicone (with an E) basically just sticks to silicone and … silicon. So itself and glass.
Instead of glass lenses, you can purchase plastic lenses as well and they will be considerably less expensive, but I couldn’t really find a supplier with a decent catalog that actually sells to customers directly and not just business-to-business.
I did a few tests with mold release to coat a glass surface for silicone molding and see if I could make it work anyway, but the mold release agent (either sprayed wax or liquid wax) just messes up the optical surface (the lens on the top has been waxed, the bottom one is clean).
The molding and separation work fine, but the surface gets a texture so it’s not acting as a lens anymore.
So, almost done with the introduction but before I start, there are a few youtube videos on this topic that I can highly recommend:
All of them contain a ton of helpful info, but none of them did solve my problem completely, so that’s the reason why this video and post exist.
Mold Materials
First off: mold materials. I have made some molds from acrylic and from aluminium. Acrylic has a perfect optical surface on all areas that you are not machining and is a lot easier to work with. Aluminium is slightly more complicated to machine, but it’s a bit easier to polish because it’s harder.
When buying acrylic there are two varieties: GS and XT. GS is created by pouring liquid acrylic between two extremely flat glass plates. XT is extruded through a die and then pressed between rollers. GS is slightly more expensive and is only sold as plates and blocks, while XT is available in a variety of shapes. But GS has lower amounts of internal stress in the material so for milling that’s the reasonable choice.
When you want to work with Aluminium: buy an alloy that’s hard enough for milling. I have used an alloy without silicon, but I would guess that trace amounts in the alloy might not really be a problem for silicone molding.
Endmill
When milling – no matter the toolpath strategy – we will create some kind of steps in the material. The simple way to reduce that is to use a ball endmill.
The larger the radius, the smoother the transition between the steps. And every bit of smoothness we can achieve during milling saves us a lot of polishing effort later on.
I did test two carbide endmills, a 2-flute 6mm endmill, a 2-flute 8mm endmill, and a single flute 6mm endmill with a polycrystalline diamond tip. All of these endmills were brand new so the flutes should have been nice and sharp.
For comparison, I am looking at the acrylic surfaces right off the CNC and surprisingly the 3mm standard endmill looks best. Maybe that’s an issue with my speeds and feeds, so take this with a grain of salt.
Toolpaths
Anyway, let’s talk about toolpaths before moving on. I am using Fusion 360 for CAD and CAM and Fusion is basically giving us three different options:
A parallel toolpath, where the tool is just going back and forth in lines, varying the depth of cut.
A scalloping toolpath, going in circles, lifting the tool after each circle.
A spiral toolpath, lifting the tool continuously while spiraling.
But when looking at a few test pieces I couldn’t see much of a difference, so I am sticking to spiral.
An additional note: I am using a home-built CNC mill here. That’s certainly not a perfect machine. It has a non-negligible amount of angular error in all axes, there is a tiny bit of miscalibration in the steps per mm and it has some backlash. Basically, it’s what you would expect from a CNC machine at home. This does in a way affect what makes sense and what doesn’t. The error by the machine may be considerably larger than the difference between endmills or toolpath strategies. But the result is pretty clear: both the general shape and the surface quality directly off the CNC are not perfect.
For example: I am not quite sure who’s to blame for this circular pattern:
Maybe it’s Fusion360’s toolpath settings, maybe it’s Fusion’s Gcode generator, or maybe it’s my CNC controller. I still need to remove a bit of material to even out the spherical surface and get rid of the scratches afterwards.
Grinding
With a proper CNC or a lathe you can just go directly to polishing and the important part is only that the polishing tool follows the existing surface as closely as possible.
But when the geometry is not perfect yet you need something you can use as a tool and it needs to have exactly the curvature you want in the end, just inverted or mirrored. The most precise spherical surface I could find for a reasonable price was: precision ball bearings.
That’s hardened steel or ceramic, you’ll find quite a decent collection of different sizes and you can buy even the larger ones in small quantities pretty easily. Perfect.
Next step: to actually grind and polish the material some abrasives are needed.
Usually people will use silicone carbide and cerium oxide for glass, maybe something cheaper like aluminium oxide for acrylic. That’s what’s used in many acrylic polishing creams. But it’s pretty hard to get small quantities of these abrasive powders. Shopping around on Aliexpress or Amazon you can find lapping pastes with diamond particles. These are pretty expensive per gram compared to powders and probably overkill, but I won’t need much so that’s what I used.
Now we just need to press the bearing ball against the mold and move it for a few hours. Of course, I have very little interest in doing that manually so let’s modify a machine for that. You can use whatever you got, there is very little force involved, so a cheap 3d printer with a few additional printed parts totally does the job. I am using the CNC because that was the easiest option. I just remove the spindle and screw a fourth stepper motor to the bed which can spin a piece of plastic with the ball.
Instead of the spindle, I put a holder on the Z column that can slide up and down. The holder presses the mold on the ball bearing and has a ball joint so the mold can tilt. I am using a clamp to prevent the mold from spinning and a small weight on top of the holder but be careful, too much pressure prevents the parts from grinding properly.
If it’s working as expected you can actually hear the grinding.
I wrote a small script to generate gcode that moves the X and Y axes in a circular pattern to change the center of rotation.
If the table would not move the ball sideways, it would look something like this:
the ball bearing spins and would move the lapping paste at a high speed across the circumference while the center would not move at all.
When I move the ball bearing while spinning I can reduce that difference a bit. That’s how it looks in action:
The first and largest size, 40 microns, takes forever because the shape of the cavity is not perfectly spherical and the ball bearing needs to grind it down a lot before it makes contact evenly. But once that’s done about an hour or so per grain size is more than enough.
Once in a while, I am removing the mold, cleaning it, and putting it in front of a camera and under a microscope. Quick note: one thing that’s pretty annoying about acrylic: you shouldn’t use isopropanol for cleaning, that’s creating micro cracks in the surface. Soap and water works well.
Giving it a look under the microscope is a bit tricky because microscope objectives have a very shallow focal plane and the surface we want to inspect has a pretty decent curvature. One solution to that is simply to put the lens on a motorized macro slider and do some focus stacking.
By the way: we will be looking top down on this section of the part. In the microscope image we see that the rough surface reflecting the light gets finer and finer.
At 7 microns (image below) the acrylic is beginning to clear up, both on the camera and under the microscope. When all the scratches from the previous grain size are gone, we can move on to the next one.
When we go smaller getting rid of all the particles is not so easy. I lost a lot of time and I had to go back several grain sizes because I got big, fat scratches on my nice surface:
In the end, I just 3d-printed the part which holds the ball bearing several times and just use a fresh one when switching to smaller particles. Adding magnets to prevent the ball from moving helps to keep contamination to a minimum as well. Sometimes the lapping paste needs a bit of thinning so the oil film with the diamond particles is as thin as possible. I used WD-40 for that but probably any other mineral oil would work as well.
Eventually, at 2.5 microns I stopped. The surface is not perfect, you can still see the fogging and a bit of larger scratches if you look closely. Probably there is a limit to what you can achieve here anyway. Usually, when polishing or lapping, the tool should be softer than the object you want to polish. For example, when polishing lenses people use pitch which is technically not even a solid material. It slowly deforms and exactly mimics the shape of the surface. In our case, it’s the opposite, both aluminium and acrylic are softer than hardened steel and that may be an issue at this small scale.
I am very sure that the uneven material removal rate will have made this surface slightly wider around the rim. But I have neither tools nor knowledge to measure the deviation from a sphere perfectly but it’s obviously lightyears ahead of my hand-polishing attempts. I am gonna use the lens molded off this thing as a spherical singlet, so the imaging errors everywhere off-center would already be clearly visible even when the lens would be perfectly manufactured.
Silicone
Last step: make it squishy! I’m not gonna talk too much about pouring silicone, there are people who explained that way better than I could. Just the basics: we mix both components of the silicone and put that in a cheap vacuum chamber to remove the air bubbles, sadly that step is not optional. Once it’s degassed, we pour it and wait a few hours before removing it from the mold. That’s all. But we actually need a silicone that’s optically clear and reasonably soft and that’s more of an issue.
A lot of research papers that did something with soft optical sensors use a platinum-cure silicone called XP-565 by the company Silicones, Inc. but that was impossible to purchase for me in Europe. Some other researchers use Smooth-On’s Solaris, that’s a potting silicone, made for sealing solar cells and electronics, so it’s reasonably clear. Sadly that stuff was just absurdly expensive. The problem in general is that many silicones you find online are in some way described as translucent, transparent, clear, or optically clear, but only in the last case you can be sure about what you get. But even then… I tested one that looks pretty good at first glance, SILGLAS 25, but it is marketed as special effects silicone because it is extremely brittle and breaks like ice.
Sadly, that’s not what I need. After a few more candidates I settled on Trollfactory’s Type 19. Clarity is sufficient, price is okay-ish and it’s mechanically robust. The only problem: it’s very viscous and a bit fast-acting.
You got about 5 min for mixing, degassing, and pouring once you added the catalyst to the base component. Anyway, if you are in Europe, that may be your best choice.
But the problem with highly viscous silicone is getting rid of the trapped air. That’s true for both the bubbles created by mixing the components and the air trapped in the mold when pouring. I decided that I don’t want to use any thinner for the silicone and just fill the mold in the vacuum I need for degassing anyway. That’s not perfect since the vacuum pump I am using does only achieve about 90% of a vacuum or so, but it helps.
For that, I built this simple contraption of a cup clipped to a servo motor that perfectly fits inside my vacuum chamber. It’s a Raspberry Pi running on a powerbank, so I don’t need to put any holes in the vacuum chamber for cables.
Bonus: there is a camera to actually watch the pouring progress in the acrylic mold. I am using an Arducam Hawkeye camera for the Raspberry Pi that actually supports autofocus. Pretty convenient for testing.
So I just measure and mix the silicone and put it in the chamber. The vacuum pump takes about a minute to empty the chamber and the bubbles start rising on the surface. Once enough air is gone, I tell the motor to move the cup and pour the silicone into the mold. There are still a few bubbles, but doing a two or three cycles of pressurizing and removing the air again gets rid of those as well.
Once that’s done, it’s waiting for a few hours, and then removing the lens from the mold. I am using a 3d-printed part as a spacer for this mold because only top and bottom need to be really precise and I don’t care about the optical quality of the side of my lens. All parts of the mold are aligned with dowel pins and fixed with screws. That was the simplest design I could come up with.
So, that’s my flexible lens:
You can see a slight white-ish tint, that’s the cheap silicone. The lenses look pretty clear, the liquid silicone of course will be a bit forgiving and not perfectly replicate the tiniest scratches found in the optical surface. Everything smaller than a micron or so will probably be gone, maybe a bit more given the viscosity of this particular silicone. That’s a part of the reason for my “good enough” approach. Another reason is that the resulting lens will be flexible, so the dimensional accuracy requirements are kind of low anyway.
In case you are wondering what this lens is supposed to do:
The first surface of the lens (the one on the left) has a focal length that is equal to its width. Any light reflected by objects touching the other surface will be exiting the lens collimated. Basically, that means that we got a squishy magnifying glass that works at any distance as long as your camera or your eye is focussed at infinity.
Taking it from here:
Given this technique we can make optical quality (to an extent) molds for silicone. But if you made the part from acrylic you can directly use it as a lens with a negative focal length as well. If you made it from aluminium, you can use it as a tool to grind and polish another CNC-milled part with a positive focal length. Errors may add up and increase in the process, but you get the gist.
Usually I am publishing CAD files and code as well for my projects because someone might find it useful. In this case I am not doing that because the attachments to my CNC mill or the makeshift vacuum pour contraption will only work with the stuff I use. But sometimes (especially when global supply chains go haywire) it’s hard sourcing the part one needs, that why I am listing this:
Where did I get the materials?
I am located in Germany, depending on where you live the following section may be helpful or not work at all for you. Some of these links will slowly become obsolete over the next weeks, months, and years. These are not affiliate links, I do not earn any money if you buy something.
]]>Christopher Getschmannchristopher@volzo.deMicroscope Focus Stacking for Part Inspection (on a Budget)2022-10-14T00:00:00+02:002022-10-14T00:00:00+02:00http://volzo.de/posts/microscopeRecently I found myself on a yak shaving detour in dire need to look at some very small things. In my particular case: to assess scratches after consecutive grinding and polishing steps of a lens mold. Basically, I polished a cavity and needed to know if the scratches of the prior grind size have been removed by the current grain size so I can move on to the next one. For that, I needed some cheap microscope objectives with a bit of magnification (4x to 10x). The problem: the focal plane of these objectives is very, very shallow. Since I want to look top down at the curved cavity meant for molding lenses, I needed to cover quite a bit of distance.
The simple solution to this problem is focus stacking. Just take several images while moving the microscope lens just a fraction of a millimeter and combine only the sharp areas of those images afterwards.
There are a few noteworthy microscopy projects out there that work towards more accessible and open-source imaging:
The OpenFlexure project developed a 3-axis movement stage with micrometer precision, based on deforming a cheap 3d-printed part. They have some options for microscope objectives based on cheap Raspberry Pi cameras and that stuff seems to work well for biology samples, ie. looking at tiny cells on a small glass slide with 50-100x magnification.
UC2 (or you see, too), is a wide collection of building blocks (like, literally blocks) for modular microscopes. Documentation looks pretty extensive and they seem to have a lot of options for rather fancy imaging techniques.
However, both projects did not really have a simple solution for my particular problem (large parts, low magnification), so I set out to build my own very simple microscoping rig.
For that a bit of electronics, hardware, and software is necessary:
Electronics & Sensor
The first version of the DIY microscope made use of a Sony A6000 with a 3d printed spacer for the microscope lens. This did work fine and the large APS-C sensor covered quite a field of view with the microscope objective. I controlled the camera using gphoto2 from a Raspberry Pi. But moving the camera, taking a picture, and loading it from the internal storage to the pi is slow and tedious. In addition to that, I don’t want to torture the mechanical shutter of the camera excessively.
The easier solution is using a Raspberry Pi HQ camera module and 3d-printing a spacer for the objective. The sensor is considerably smaller so the field of view is narrower, but it’s faster, is controlled directly by the pi, and doesn’t have a mechanical shutter.
The motor responsible for moving the microscope objective closer to the camera is controlled by a Fysetc E4 running fluidNC. That is basically a grbl-compatible firmware for ESP32 boards instead of the good old AtMega328. The big advantage of fluidNC on the Fysetc E4 board is that you can just load a config file with steps-per-mm and motor current settings and fluidNC takes care of configuring the very silent TMC2209 stepper drivers on the board accordingly. It’s a very versatile combination that requires minimal effort.
I am not using a gcode sender but my own camera slider python script, which works well for this simple job. General procedure: use picamera to take an image, tell fluidNC to move the Z axis by a few steps, take the next image, and so on…
Hardware
As a linear actuator, I am using components I originally intended for a macro rail (which kind of makes sense). A 270mm 40x20 aluminium extrusion with a 250mm MGN12H linear rail from Aliexpress. A 1.8-degree stepper motor with a GT2 belt spins an 8mm ACME leadscrew. The pulleys for the GT2 belt have a 3:1 gear ratio, and the leadscrew has a 2mm pitch. This gives us a theoretical resolution of 3.33 microns per step.
The 3d-printed tube holding microscope objective, camera module, and Raspberry Pi are clamped with an Arca Swiss plate to the linear rail carriage. Both Arca plate and clamp are from Mengs Photo, my preferred purveyor of low-price photo parts.
The X and Y axes are controlled by a micrometer XY-stage from Aliexpress. I got the Idea and purchase information from UC2, you can find them in the UC2-MicronStage repository. However, mostly I am just moving them manually to set the position once, not making use of the stepper motors.
The microscope objectives I use are just some cheap generic ones from Amazon for about 20 Euro each (4x, 10x). They come with an RMS thread as their only mounting option, so they need to be screwed either in an RMS adapter or an RMS thread needs to be cut into a machined holder (Thorlabs is selling the correct tap). I just printed a sufficiently similar thread with the 3d-printer and used a bit of force, so the metal thread on the objective cuts its way into the plastic. Not the most elegant solution but it works well.
Illumination
I tried to be clever and use an RGB ringlight mounted around the microscope objective. By selectively mixing colors and controlling the direction of light you can highlight the direction of scratches.
The problem is that the geometry of the ring light (position and diameter) only work well in a rather narrow set of situations and even then it is slightly dim.
While the camera sensor could just expose a bit longer and compensate for the dim LEDs, that’s a pain with the Raspberry Pi camera driver, so I tried to avoid that.
The simplest solution was just too use a very bright lamp (1000 lumen) and flood the whole area with light at an angle.
Software
I tested a few pieces of software in the process of finding something that works for me:
Helicon Focus is apparently the first choice for many macro photographers. It’s fast and results are okay, however, the cheapest lifetime license was 119 Euro at the time of writing and that’s a bit too expensive for what I intent to use it for.
Zerene Stacker has a 30-day trial and I was pleasantly surprised. Very easy to use, reliable, and has keyboard shortcuts to speed up the workflow. However, it’s a bit expensive for my taste as well.
ImageJ is the well-established (Java) software for microscopy image analysis. However, it is horrible to use. Fiji (Fiji Is Just ImageJ) is an installer and add-on bundle that should make using ImageJ more convenient and it does alleviate the pain a bit, but only a bit. I tried focus stacking using the Extended Depth of Field plugin by the Biomedical Imaging Group. It looks pretty fancy at first glance and there are a lot of features like 3d depth maps, but I couldn’t find settings for the built-in algorithms that produced stacked sequences of the same quality as Helicon Focus or Zerene Stacker.
hugin and enfuse, two open-source tools made for HDR and panorama image processing, did work very well in the end. I am using align_image_stack from hugin for aligning image stacks (no surprise, here) and enfuse to combine the in-focus regions. The results are not as robust when input data is bad, but I can easily use a shell script for batch processing and save a lot of work processing dozens of image stacks.
Excerpts from my shell script:
Align images:
$APPDIR/align_image_stack -v -m -a aligned $1/*.jpg
APPDIR is on my mac APPDIR=/Applications/Hugin/tools_mac when hugin is installed via the official installer.
That’s certainly not the most convenient workflow for people who would rather use a graphical user interface, but for me that’s perfect. When I do a dozen polishing steps and want to have a focus-stacked image in between each one, I don’t want to manually copy images, click on five buttons in the user interface and assign a name to the resulting image. I can write a script for that once and don’t need to worry later. The only truly manual step:
While the Zerene Stacker and Helicon Focus seem to manage that fine, enfuse is a bit susceptible to images in the stack that are completely out of focus. If you have a bit of overshoot in your image stack, ie. move the camera beyond the object and there is no part in the image that is in focus, you may need to delete these manually. If you don’t do that, aligning and stacking might fail.
]]>Christopher Getschmannchristopher@volzo.deA Digital Toy Camera2022-04-19T00:00:00+02:002022-04-19T00:00:00+02:00http://volzo.de/posts/digitaltoycamera
It’s silly. It’s slightly impractical. It’s a toy camera. More about that here.
]]>Christopher Getschmannchristopher@volzo.deLighthouse Lamp2022-01-27T00:00:00+01:002022-01-27T00:00:00+01:00http://volzo.de/posts/lighthouselampJust as an afterthought to the Geodesic Light: The Lighthouse Lamp
Recently I had a bit of fun playing around with an ultra-big nozzle for 3d-printing. The nozzle in question is a Bondtech CHT nozzle with a 1.2mm opening.
This allows to print clear PETG with these very visible ultra-thick lines:
What I am printing there is a circular Fresnel lens as a lamp shade. The lamp shade is working as a diffusor and a lens at the same time.
Running at full intensity.
The bulb is an Ikea Tradfri “smart” bulb. Being able to dim the light output is a nice extra.
I felt like making a stupid lamp and that’s how it looks like. More about it here: /thing/geodesiclight
]]>Christopher Getschmannchristopher@volzo.dePerlin noise for 3d-printed parts2021-10-08T00:00:00+02:002021-10-08T00:00:00+02:00http://volzo.de/posts/perlin-printing
Recently I spent a bit of time thinking about visually improving non-functional areas of a 3d-printed part. Some generated pattern which could be imprinted on some parts of the object while not creating any issues with geometries that are required for functionality and still being (somewhat) printable.
Disclaimer: I started this inquiry with very little knowledge about 3d stuff (point clouds, meshes and surface reconstruction algorithms) and there may be way better solutions if you’ve got a basic understanding of these topics.
What I ended up with is Perlin noise. That’s a pretty simple way of generating continuous noise patterns on a plane, in a 3d space or any other dimension. In the two-dimensional case you get a pretty nice landscape-like output with hills and valleys (but no caves, no overhangs). That’s one of the many usecases of Perlin noise: generate landscapes in games.
Alternatives to classic or improved Perlin noise are apparently Value noise and Simplex noise, but I just went with the classic flavour.
The hard part is understanding the algorithm since there are a lot of explanations of varying quality on differnet algorithms (new and classic). Picking and combining explanations from the posts by Adrian Biagioli and Raouf did work out somehow.
I refactored a bit of code from StackOverflow (as one does) with a slightly different set of gradients. (Python code is available here)
Once you’ve got the algorithm running you get a set of Z values for an XY coordinate grid. How do we make anything 3d-printable from this data? The problem is that STL files are polygon meshes with vertices, edges and faces, but all we’ve got at this point are raw coordinates.
Now we can either generate meshes by directly creating polygons in after computing the noise, or we can continue working with points.
Option A: Meshes
To obtain a mesh, we just connect every set of 4 points to two triangles. The script generates an STL by specifying a filename.
Example:
The most convenient software for visualizing point clouds I could find is MeshLab. I did write the XYZ coordinates of my perlin noise computation to a file, one coordinate tuple per line.
MeshLab can open that via File > Import Mesh.
The nice thing about MeshLab is that it comes with a set of common algorithms for point cloud/mesh problems.
Apparently the correct term for getting from a point cloud to a mesh is “Surface Reconstruction” and the most straightforward way of doing this is a Screened Poisson algorithm. One requirement for that is to have the normals for all points and MeshLab can compute that easily by selecting Filters > Normals, Curvatures and Orientations > Compute normals for point sets.
Now one can just run Filters > Remeshing, Simplification and Reconstruction > Surface Reconstruction: Screened Poisson and hit Apply.
That looks already pretty good! Apparently the algorithm creates a bit of padding at the edges of the point cloud, but that’s not a show stopper. The problem is that our mesh is not actually a body but just a surface.
Maybe there is totally conventient way of just extruding this and remeshing or something similar, but I did not find an easy way to do this. What I did instead is change my Perlin noise script to just create point coordinates for “walls” on all four sides and a bottom.
Same steps as before and then hit File > Export Mesh As and select STL.
And now we’ve got an STL file that we could just print.
No matter in what way we created an STL file, the following steps are the same:
Result
But how can we use this STL file to modify another STL?
What I did was create another body in my CAD software which encompasses all the non-functional parts of the component. Everything bit of space that this body occupies could be kept or removed depending on the perlin noise output.
I exported this as an STL as well and combined these meshes with the simplest tool available: boolean operations in OpenScad.
The preview looks pretty awful because OpenScad (or CGAL) is not able to deal well with meshes that have overlapping points/faces. The output is not perfect, but can be repaired with a mesh repair tool or a slicer.
Loading the resulting STL in the slicer looks like this:
To be able to actually make the perlin noise pattern printable upside down I did cut off all noise values >= 0 (only the valleys, not the hills remain).
]]>Christopher Getschmannchristopher@volzo.deRaspberry Pi Power Via USB2021-08-03T00:00:00+02:002021-08-03T00:00:00+02:00http://volzo.de/posts/raspberry-pi-backpower-adapterSometimes it’s not possible or really tedious to get a USB cable to the USB connector for power input on a Raspberry Pi. Since the 5V pins, the USB power connector, and the USB hub share the same power rail, it doesn’t matter where the electrons enter and exit. The only difference is that the Pi has a few capacitors, a resettable fuse, and a diode directly behind the USB input. When powering the Pi via the 5V pins on the 40pin header, this protection and the capacitors to deal with sudden power draws won’t work. This applies as well to the USB hub.
To make back-powering the Pi via the USB hub a bit more convenient, I made these backpower adapters that contain the same resettable fuse, capacitors and diode as the Raspberry Pi design.
You can find the schematics and EasyEDA design files here.
]]>Christopher Getschmannchristopher@volzo.deThe ever-extending list of really weird cameras2021-08-01T00:00:00+02:002021-08-01T00:00:00+02:00http://volzo.de/posts/weird-camerasI have a soft spot in my heart for really weird contraptions to take pictures. A non-exhaustive list of at least slightly unusual cameras which may get updated from time to time…
The Brancopan - A 3d-printed panoramic camera that was crowdfunded to make the plans available to everyone
(made by the pretty cool Cameradactyl people)
The GameBoy Camera (of course) - the smallest and cheapest digital camera of it’s time
]]>Christopher Getschmannchristopher@volzo.deDigital Solargraphy or the Art of Taking a Photo for a Day2021-07-31T00:00:00+02:002021-07-31T00:00:00+02:00http://volzo.de/posts/solargraphy-video
Finally managed to do a video on digital solargraphy and explain the concept a bit more visually.
Sometimes one may require a non-planar mirror. Usually you can do that by turning and polishing a chunk of metal on a lathe until it is so smooth that the metal works like a mirror.
Or you can achieve a mirror surface by grinding a piece of glass or coating plastic in a vacuum chamber. All of that is pretty slow and expensive.
But is there maybe an easier or faster way at the cost of a bit of precision? (yes)
In general there are three different types of shapes:
The material I use is laminated and metallized polystyrene. Since there is already a mirror surface on the material we don’t need to coat it as a second step. And as a thermoplastic is easily deformable and at room temperature pretty stiff so it keeps its shape.
Before I settled on Polystyrene I did a quick test of different mirror-like materials:
Coated acrylic glass
Metallized polystyrene
PVC foil with an aluminium layer
and Rustoleum Mirror Spray on a PETG sheet
Comparing this works pretty easy by bouncing light against different mirror materials onto a sheet of paper.
My reference material is a silver-coated glass mirror, which is pretty standard stuff and the highest quality mirror you’ll find in your household.
The reflection of the projected test pattern is already looking pretty good.
But if we subtract the image from the reference mirror, we just see the differences, so all the tiny imperfections and errors.
We can see that acrylic glass looks quite ok, but has a few tears or cracks in the reflection surface.
Laminated polystyrene causes a bit of color banding and has some issues, but these are well distributed among the whole surface and not as local as acrylic
PVC foil is just straight-up garbage and the mirror spray even worse.
So, we’ve got a winner. The laminated polystyrene is something you can usually get this at a half millimeter or 1 millimeter thickness pretty much everywhere around the world. Sometimes in small arts and crafts shops, sometimes online. One valid alternative is vinyl which may be easier to get in some countries. If you go thinner your mirror gets imprecise, if you go thicker you will have a hard time deforming the material.
So, back to the mirror: You can model that in any CAD program and just pretend you are doing metal sheet bending with a 1mm thick material. When you’ve got your desired geometry, you can just export the drawing or generate CNC tool paths from the contours (that’s what I did).
With a simple CNC milling operation, I carve and cut the part from the polystyrene sheet. I can spare myself a lot of frustration by using a 90-degree chamfering endmill to pre-carve the bending lines. Less hassle, more precision. If you don’t have a CNC handy, print the drawing on a sheet of paper and cut it manually with a hobby knife. Works totally okay, but is slightly less cool, of course.
So, back to our mirror shapes. How can we make double-curved surfaces? First, we need to model something again and offset the surface by the thickness of the metallized plastic sheet. Then we can 3d-print the offsetted model as a mold for vacuum forming.
For vacuum forming you just need a few basic tools:
I am using slightly undersized screw holes in the mold, so I can drill a small hole in the mirror after vacuum forming to fit a screw and permanently fix the mirror to the plastic. Glue would probably do the job as well, but the screw holes make it easier for air to escape as well, so the vacuum forming is a bit easier.
Then we just need to heat up the sheet of polystyrene, press it on the mold, turn on the vacuum and wait a few seconds till it’s hard again. Cut away the excess plastic and permanently bond the polystyrene to the mold.
The resulting mirror is quite okay when it comes to precision, pretty good in terms of reflection, and extremely good concerning manufacturing time and price.
A few caveats:
Do not use PLA! PETG works okayish with a few extra perimeters and anything that’s more heat tolerant works even better. In any case: If your plastic sheet transfers too much heat into the printed mold, it’s game over so do not overheat the sheet.
The metallized polystyrene can handle a bit of stretch but at some point it will rip. In most cases that’s probably not an issue.
Other videos which might be interesting:
Smoothing 3d-printed parts with resin and coat them chemically with silver.
A bit of theory and a lot of making mirors with glass blanks.
]]>Christopher Getschmannchristopher@volzo.dePico Projectors for Raspberry Pis2021-05-20T00:00:00+02:002021-05-20T00:00:00+02:00http://volzo.de/posts/raspberry-pi-projectorsWhen building prototypes that require tiny projectors capable of projecting an okay-ish image over short to mid-sized distances, finding something decent is not easy. In my case I needed something that is as small as possible, has a wide field of view and should ideally be compatible with a small Raspberry Pi Zero.
Texas Instruments DLP LightCrafter Display 2000 EVM for BeagleBone Black
Thats an evaluation kit for the smallest of the TI “LightCrafter” projector units, meant to be used as a Beaglebone Black hat. Luckily with an adaptor PCB this can easily be adapted for a Raspberry Pi as well. The Raspberry Pis GPIO pins can be repurposed as a parallel display interface (DPI) to get the image data to the projector, so no HDMI is required.
Pinout and I2C commands to configure the projector interface can be found on the website of Frederick van den Bosch
Another very nice build that includes an adapter board made by MickMake can be found on MickMake’s website
Keep in mind: we are talking here about a DLP projector, so manual adjustment of the focus plane is necessary.
This can be done with this ultra-unhandy tiny lever that moves a part of the optical assembly (there is no way to fix it in position).
A tiny laser projector, running at 1280x720 pixel. Full-sized HDMI input, requires 5V/1.5A via micro USB.
To save a lot of space, an HDMI-to-FFC adapter comes in handy, but may degrade the HDMI signal.
The tricky part is getting the HDMI settings right:
In ‘boot/config.txt’ the HDMI modes can be set. The Ultimems chipset supports (among others):
One nice advantage of having separate modules for projector and control stage is to be able to just fold it for a close fit (removing the projector stage with the TI LightCrafter 2000 EVM is a pain since the cable is connecting cable is quite stiff).
]]>Christopher Getschmannchristopher@volzo.deCustom Raspberry Pi Camera Cables2021-05-19T00:00:00+02:002021-05-19T00:00:00+02:00http://volzo.de/posts/custom-camera-cablesSometimes one just needs a custom flat flex cable. In my case this was a Raspberry Pi Zero camera cable. A quick search told me that flex PCBs have fancy stuff like polyamide stiffeners to make certain parts more … stiff (obviously). This increases the PCBs thickness slightly so connectors are chosen to accomodate that.
Flex PCBs are apparently really expensive. Not so much the per-unit price but the base price. PCBway charges about a hundred USD minimum. That’s slightly too expensive for my little test project.
Luckily OSHpark is offering a flex PCB service as well at 10 USD per square inch, exactly twice as expensive as their regular PCBs. Sadly, OSHpark flex PCBs come without stiffeners. Luckily, … I came across this handy tweet.
Add a copper area on the backside of the connector part and you’re good. Except that the ZIF connectors used for Pi cameras require 0.3mm thickness.
What worked for me well was adding two layers of Kapton tape (which is basically the same group of chemical compounds as polyamide) and trim the excess with a pair of sharp scissors.
Not pretty but works like a charm.
]]>Christopher Getschmannchristopher@volzo.deA Giant Map drawn with a Pen2021-01-10T00:00:00+01:002021-01-10T00:00:00+01:00http://volzo.de/posts/plottermap
For quite some time I entertained the thought of having a wall-sized world map. Maybe it started when I read the blog post by Dominik Schwarz about his map, maybe a bit earlier. Exactly as Dominik I soon realized it’s really hard to buy a map which is neither ugly nor has a low resolution/amount of details.
There are a few maps I enjoy visually and probably on the top of the list is the bathymetry map of Heezen and Tharp, drawn by Heinrich Berann. While the sea floor depth data itself is accurate and this is meant to be a scientific documentation, the map and its status as an art object benefits a lot from the artists execution.
However, the process of getting from information to image involves in this case a manual artistic process. This is especially visible when having a look at the continental shelf.
I for one would prefer something a bit more automatic, after all I am not a professional illustrator. Like all things in life, something is considerably more complicated the closer you look at it and this is true for the process of turning geo-info into a map at a certain zoom-level. Here is a nice blog post reflecting on how much better Google Maps handles all these intricate details compared to other map software.
I experimented a bit with different map data sources, thought about inkjet printing and wrote a script to scrape google maps tiles and stitch them. That works kinda okay-ish, but the the classic Google Maps style did not really fit. For OpenStreetMaps you can find different map styles, the most beautiful (at least in my opinion) of those is StamensToner.
But using either google maps or Stamen’s Toner OSM tiles, this would basically result in me trying to print the largest image possible. But maybe Inkjet printing is not the best way to move forward. So, given our means of production how can we get a really large wall-sized world map? I did built some drawing machines (pen plotters) in the past, so why not do that?…
Data:
First step: how to get the data? Best data source is OpenStreetMap. No discussions. However, a dump from the OSM DB (the planet-file) is a whopping 50GB (compressed) and 1200GB uncompressed! Whew… No.
Luckily, there are already pre-processed extracts for certain features and that’s all we need. Namely the land- and water-polygons, the coastline, a selection of cities including meta-data (population) and … the ocean floor depth. Luckily one doesn’t need to scrape Digital Terrain Model data by hand, but can rely on GEBCO.
Main problem: when working with pen plotters, we don’t deposit tiny droplets of ink based on pixel data, but draw lines with pens, based on vector data described as coordinates. So our whole image is basically just a gigantic assortements of lines. Drawing maps with pixels has one huge advantage: you can overwrite pixels. You draw the oceans, on top of that the land, on top of the land the streets, etc. When using pens and lines, you see if there is a line underneath the line underneath another line.
So when processing each polygon on each layer needs to be subtracted from all underlaying layers, repaired, simplified and written to an SVG file. That took me a while to figure out. Luckily there is Shapely, an incredibly well working python library for polygons. After creating a map, all the lines need to be sent to the pen-plotter in a order that makes sense. Drawing with the pen is quite fast, but lifting the pen to move to the start of the next line is extremly slow compared to drawing. So main objective is to optimize the pen’s path to minimize pen lifting movements and the travel distance in-between lines.
Luckily, a long time ago, when starting to study computer science there is usually a course like “Introduction to Algorithms and Data Structures” (which almost all freshmen hate).
The problem of “walking” along a certain set of streets in between cities (line start and end points) while taking the shortest route is the Chinese Postman Problem.
So what’s the minimum number of edges that need to be added to graph to traverse the graph on the shortest route while visiting every node exactly once? Yeah, now do that for two million nodes…
Ok, it worked well for smaller graphs but in the end it was very little fun to optimize my crude implementation of an algorithm solving this problem and I dropped it.
The greedy approach, however, did work well: draw a line, check which line’s start or endpoint is closest to the current position and draw that line. That seemed to be about 10 percent slower than the almost optimal solution, but heck, I just want to have something working well enough to get it done.
Hardware:
When I started building the plotter quite a while ago I was rather concerned about the size of the machine and how I could stow it efficiently. The plotter is made from Openbuilds V-Slot and 3D-printed connection elements. It’s a rectangle with belts in CoreXY-configuration and when removing the belts and undoing 2 screws per corner the plotter can be disassembled in a matter of minutes.
Popular plotter designs (Axidraw) commonly use small servos to move the pen up and down. That’s inexpensive and totally suitable for something like lifting a pen but the sounds the servo generates are extremly nasty. When using a pancake stepper and some decent drivers, the plotter is almost silent.
I did use the TMC5160 steppers from watterott. They are expensive as hell but extremly quiet and have a built-in stall detection that can be used for sensorless homing.
To control the motors I use GRBL, but GRBL can’t make use of any of that since you need to talk to the drivers via SPI. One can either patch GRBL (uargs…) or just use a second microcontroller. The second controller talks to the driver, checks for stall detection events and then acts like a physical endstop switch (by pulling down the first microcontrollers endstop pins). Yay, if you’re too lazy for software, just throw another bunch of hardware at the problem…
The plotter requires only a minimal amount of torque, so running the motors on CAT5 cables works well and is extremly convenient. Each wire-pair drives one motor phase. Several meter of cable length are not an issue and no stepper motor looses steps.
Plotting:
To actually get the lines on the wall I initially planned to draw directly on the wall with a slightly different pen-plotter build. However, in the end I spared my neighbours weird moments hearing the mysterious sounds of scratchy pens on the other side of the wall. I settled on plotting on cardboard sheets as tiles and used 2x4 (2 by 3 meters in total) to fit the map to the wall.
To draw text I made use of Hershey fonts, stroke-based fonts originally developed for vector displays back in the ol’ days.
While elevation data for land is drawn as countour lines, I did not want to do the same for bathymetry (ocean depth) data. Here I used hatchings of increasing density to display
deeper regions as more blue-ish in color.
That resulted in a few issues since the 45 degree hatching lines are really sensitive to placement.
Every mechanical system only runs up to certain level of precision and blacklash in the drive system is one of main reasons for this. Since I am using almost 5m long belts to control the movement of the pen in the pen-plotter, there is a quite an amount of slack. Every other line is slightly too close to it’s neighbouring line. That results in a kind of banding effect for large monotonous hatching-regions.
Plotting took about a day per tile and all in all I used up quite an amount of pens:
A Stabilo ballpoint pen is good for about 250m of lines (quite impressive). The lines are split into files to automatically pause after a certain number of meters for pen replacement.
Afterwards the cardboard tiles are screwed to 3d-printed connectors which are sitting on the wall and allow for a bit of alignment (in hindsight this was a very good idea).
All in all I would say I am quite happy with the results:
Hardware and software can be found on github:
plotmap repository: Python code to generate SVG maps and scripts to convert SVG paths to GCODE instructions
There are wonderful pen-drawn terrain maps by Michael Fogleman (see here). Highly recommended if you appreciate the visual style of these kind of maps.
For large-scale plotting people often refer to the Polargraph. If you are new to pen plotting, you can find a lot of inspiration there.
When just wanting to have a stab at pen plotting without worrying too much about hardware, the Axidraw is an excellent choice. An inkscape extension allows for easy drawing and sketching. EvilMadScientist is now even selling a nice litte DIY kit.
The twitter hashtag plottertwitter is highly recommended.
Update: occasionally people reach out to me asking if they can buy this plotter. I usually respond that I don't build things that are ready-to-use products which are suitable to be sold.
I am always happy to recommend the Axidraw A3 plotter which is the largest modern pen plotter you can buy right now and it has excellent software support via Inkscape.
]]>Christopher Getschmannchristopher@volzo.deNeutral Density Filter on CS-Mount Fisheyes2020-12-28T00:00:00+01:002020-12-28T00:00:00+01:00http://volzo.de/posts/nd-filter-for-fisheyeGetting a neutral density filter on a fisheye is a horrible mess. Some fisheye lenses solve this in a sane manner by having an integrated filter mount somewhere in the lens barrel (usually in between some lens elements close to the camera, not the front). That’s about the worst possible solution for the problem. Some people use tape, glue or magnets to fit ND filter foils to the rear element of their lens. For all the other lenses, there are … curved, globe filters. Since I plan to use the lens on a fixed camera, smoked acrylic domes used for surveillance cameras may be an option as well.
But … maybe there is an alternative: the camera I use is a Raspberry Pi HQ Camera Module with a screw-thread-type CS-mount. Maybe there are screw-type filters for the mount itself?
Yes! Indeed, there is one company which is selling exactly what I need: Midopt.
The issue: really hard to get if you are not a business customer and do not have an address in the United States.
So, time for a homebrew solution:
I ordered a plain 20mm glass piece coated with an ND filter from Aliexpress and 3d-printed a springy friction-fit holder. Designing the holder is a bit tricky since it needs to be easily removable while keeping the glass piece from moving around (causing abrasion and chipping).
The holder is printed with a 0.25mm nozzle on a Prusa Mini:
I did print it with a 0.25mm nozzle at 0.15mm layer height. Material is PETG. It might work with a standard 0.4mm nozzle as well, but I haven’t tested that.
]]>Christopher Getschmannchristopher@volzo.deRaspberry Pi Wide Angle Lens Comparison2020-09-22T00:00:00+02:002020-09-22T00:00:00+02:00http://volzo.de/posts/raspberry-wide-angle-lensesA few months ago the Raspberry Pi HQ camera module was released. 12MP resolution, 1/2 inch (8mm) sensor, all in all: sounds ok. The interesting thing: you can change the lenses. The mount is apparently called a CS-Mount and is simply a screw thread. (Modern) CS lenses however are mostly CCTV/surveillance camera lenses and that’s a rather suspicious market if you want to go shopping (lots of moderately shady web shops).
There are two official lenses sold alongside the camera module, a 16mm telephoto-lens and a 6mm wide-angle one. Given that the module has a 1/2 inch sensor, the multiplication factor to compare to full-frame cameras would be 5.4, so the 6mm lens is equivalent to focal length of 32.4mm on a regular camera… Maybe there is something that’s a bit more … actually wide-angle?
Let’s compare three lenses:
Official 6mm Lens
Inexpensive and easy to purchase. The aperture can be set manually, but there are no markings (so it’s a guessing game)
Available at several online shops with various brandings or directly from Aliexpress.
Very long barrel, wide field of view. Nice crisp and sharp image without a lot of chromatic abberations. Distortion is very visible.
Update: a number of people got in contact with me after writing this blog post inquiring how exactly they can get or build their own camera. The hardware and software described below is not very compatible with people that are not exactly me. I did change a lot in the meantime and now I am quite confident that the whole thing is a bit easier to use. I did set up a page to describe how to get your own kit for assembling the new camera:
If you want to capture your own digital solargraphy images, have a look: Digital Solargraphy
Solargraphies (pinhole images on photograhic paper that capture months of the sun arching across the horizon) were a thing starting sometime in the 200Xs (the first decade of the century(?), whatever…). When this caught on broadly in the early 201Xs it got a lot of people excited for film again. Quite a few people apparently started dropping cans with paper and pinholes in woods and the public urban space and I very much like this idea. Solargraphy.com (run by Tarja Trygg) is collecting hundreds of wonderful examples.
People are even doing timelapses with them: petapixel.com
one of the very few examples (actually the only one I could find) of digital day-long sun exposures: link
Some Solargraphies I very much like are from Jip Lambermont: Zonnekijkster
Most of the analogue landscape/city images of Michael Wesely could be called Solargraphies, too.
While these pinhole cameras built from beer cans and sewer plumbing tubes have a very appealing DIY character, you can even buy them off-the-shelf by now (boo!).
No, I’m kidding. Offering pre-assembled kits makes solargraphies way more accessible and having easy-to-build hardware is certainly something this project lacks.
However, I really like film (or paper in this instance) but I got rid of all my analogue equipment. For a reason: it’s horrible to handle. So, how about doing the same but without film?
Theory
The problem:
It’s easy to create digital long exposures. Reduce the sensors’ exposure to light and let it run for a few seconds. If you want to go longer you will realize that after a few seconds it will get horribly noisy. The next step up in the game is taking many single exposures and averaging them. This way an arbitarily long exposure can be simulated quite well in software. When using a weighted average based on exposure value from the single images, even day long exposures are possible. Nice! Except that won’t work for solargraphy images. While the sun burns into the film and marks it permanently, the extremly bright spot/streak of the sun is averaged away and won’t be visible in the digital ultra long exposure. Darn…
24 hour digital long exposure:
result:
So, how can we solve this problem? While taking single exposures we need to keep track of the spots of the film that would be “burned” or solarized. For every image we take (with the correct exposure) we take another image right away with the least amount of light possible hitting the sensor. We assume that every bit of light that would have hit the sensor in our second, much darker exposure would have been sufficiently bright to permanently mark the film.
Lets take a step back for a moment and talk about EV or Exposure Value. A correctly exposed image done at 1s with f/1.0 and ISO 100 has an EV of 0. Half a second with the same aperture and ISO settings is EV 1, quarter of a second EV 2, …
So Wikipedia lists a scene with a cloudy or overcast sky at about EV 13, a cloud-free full sunlight moment at EV 16.
A standard (DSLR/mirrorless) camera reaches about 1/4000th of a second exposure time, most lenses f/22 and the lowest ISO setting is either 25, 50 or 100. 1/4000s @ f/22 and ISO 100 is equal to EV 20 to 22.
So we can use EV as a way to describe the amount of brightness in a scene (if we would expose it correctly) and – at the same time – as a measure of whats the maximum amount of brightness a camera can handle without overexposing. Basically how many photons are hitting the camera and how many photons can the camera successfully block during exposure.
Whats the EV value to (reliably) determine which parts of the film would have been permanently marked? Generally, as a rule of thumb: the clearer the sky, the less clouds, the less haze, the less particles and water droplets in the atmosphere that reflect light, the lower the max EV value of the camera may be.
So, can a camera at 1/4000s with aperture 22 and ISO 100 capture so few photons that we can assume that a certain part of the image is extremly bright: sometimes. Every piece of cloud that gets backlit by the sun gets incredibly bright and if the camera is not able to step down/reduce the brightness sufficiently it’s impossible to reliably determine if this spot would have been bright enough to leave a mark (spoiler, it wouldn’t, but it’s impossible then to differentiate between a bright cloud and an unblocked view of the sun.)
To step down to EV 20 suffices only for very clear days, if unknown conditions are to be expected (nearly always in europe sadly), then at least 24 is required in my experience.
However, there is an easy way to move the window of min/max possibly capturable EV values by the camera: a neutral-density filter. That reduces the amount of light that hits the sensor considerably, so the camera won’t be able to capture images in the dusk or dawn or the night, but that’s not a problem in our case since these images wouldn’t be relevant for a multi-day long exposure anyway (compared to the bright daytime their impact on the overall image is negligible). When using a ND64 filter (64 or 2 to the power of 6) it takes away about 6 EV (ND filters are never precise) and thus gives us 26 as the max EV value. How does that look?
Correctly exposed image (EV: 11)
Slightly darker (EV: 14)
Close to what most DSLRs achieve out of the box (EV: 19)
Aaaand here we go (EV: 26)
Does that suffice: I would say, yes.
Software
So, how to process this? Take a correctly exposed photo every X seconds and a second photo at EV 26 right away too. From all the first photos the long exposure image is calculated by doing a weighted average based on metadata. We can calculate the EV value from the EXIF data of the image, apply an offset to the value and use 2 to the power of the offsetted EV value as our weight for averaging pixel values.
For the set of second images we can’t do that, we would average out all burned image sections/pixels. There we just overlay every image and keep the brightest pixels of all images.
Afterwards we take the long exposure image and burn all the bright pixels with the data from our sun overlay:
Terrific! But how many images are required and how fast do we need to take them?
Interval duration depends on the focal length (the wider the image, the smaller the sun, the longer the time in between images may last). In my case for a wide angle image (about 24mm) 60s seem to be the minium and 45s would be preferrable. If the interval exceeds 60s the arc of the sun is reduced to overlaying circles and finally just something like a string of pearls. One way to cheat is by applying a bit of gaussian smooting on the sun overlay image to help break up the hard edges and smooth out the sun circles.
90 second interval:
(gaps are caused by a partially clouded sky which blocked the sun)
The number of images for the long exposure depends on the amount of movement but a number of 60 to 90 images works well even for tiny details.
Hardware
Tada?…
Nice. We got a feasible way of creating a digital solargraphy. Except, we need to actually take/make one. How to get a (relatively) disposable camera out there that may be snatched away by pesky birds or even peskier public servants at any moment? Some solargraphy enthusiasts report 30 to 50 percent loss of cameras when placing them out in the wild for half a year (winter to summer solistice, i.e. highest to lowest point of the sun). I won’t do six months, but being prepared for losing a camera or two might be a good idea.
The smallest and least expensive camera I (you?) can build is basically a Raspberry Pi Zero with a Pi Camera Module. That’s featuring a whoppy 8 megapixels but I guess that’s ok, we don’t want this to be ultra-sharp glossy fine-art prints.
Combined with some electronics for turning it on and off to take a picture-pair at given intervals, a battery, a smartphone attachment lens and some horribly strong neodym-magnets we wrap this in a 3D-printed enclosure.
A bit of technical details: a Raspberry Pi hat featuring a SAMD21 microcontroller (the Arduino Zero chip) draws power from two 18650 batteries and switches the Pi on every 60s (if it’s bright outside) or at slower intervals if the camera reports less light. The pi boots, takes a few images and powers off again. The system is powered by the batteries for 2.5 days, generating about 10gb of data per day. In order to be fast enough to boot the system, measure the light, take several images, save them and power off in less than 60s the pi runs buildroot, a minimal linux distro instead of the bloated Raspbian.
Getting the 3d printed box weatherproof is the hardest challenge when building this. I’ve had good results with a seal of 3mm very soft EPDM rubber string in a 3mm cavity.
Images
Examples from Weimar:
Caveats and flaws:
To determine burned parts/pixels I use a one-shot approach. Either exposure on a single image did suffice to permanently leave a mark or it didn’t. No cumulative measure is used in any way. If there is traffic and cars in the image, this results in a low-fidelity reproduction of the behaviour of film exposures. While reflections by glass and metal of the cars would result in a flurry cloud of tiny specks of burn-ins over a long amount of time on film, the punctual noise of only a few dozen or a hundred digital exposures using the one-shot method is less appealing to the eye. A good example of how this looks on a film image is this image from Michael Wesely.
But: that’s something for another day.
“I want to do this too!”
Cool! However: Some assembly required.
I may write a post with some more detailed info at some random time in the future.
Resources for now:
The software I use for stacking, averaging and peaking is on github but please be advised: it is not exactly plug’n’play.
Eagle board files and schematics for the 2S Lipo Battery Raspberry Pi Hat can be found here
Fusion360 files for the watertight enclosure can be downloaded here
]]>Christopher Getschmannchristopher@volzo.dePedestrian Detection Visualization with Drones2019-12-20T00:00:00+01:002019-12-20T00:00:00+01:00http://volzo.de/posts/pedestrians-and-dronesPedestrian movement data based on drone footage. 20min time snippets taken at 60-65m height.
Given 2.7k 25fps video data that works quite well. Cyclists and pedestrians are detected as pedestrians alike and cars only create few false positives. All in all way faster than object detection networks and totally OK for a quick visualization.
Raw video with detection overlays (red: foreground, colored squares: distinct detections)
August-Baudert-Platz
Herderplatz
Frauenplan
Goetheplatz
Marktplatz
]]>Christopher Getschmannchristopher@volzo.deGphoto2 as a buildroot package2019-12-02T00:00:00+01:002019-12-02T00:00:00+01:00http://volzo.de/posts/gphoto2-buildrootFor everyone who needs to run gphoto on a buildroot system and wants to save some time:
Create a new package named gphoto2 in the package dir and add these two files:
package/gphoto2/Config.in
config BR2_PACKAGE_GPHOTO2
    bool "gphoto2"
    select BR2_PACKAGE_POPT
    select BR2_PACKAGE_LIBGPHOTO2
        help
          gPhoto2 is a free, redistributable, ready to use set of digital
          camera software applications for Unix-like systems, written by
          a whole team of dedicated volunteers around the world.
          It supports more than 2500 cameras.

          http://www.gphoto.org/
]]>Christopher Getschmannchristopher@volzo.deA word about switching USB ports on and off2019-10-21T00:00:00+02:002019-10-21T00:00:00+02:00http://volzo.de/posts/usb-power-switchingFor various reasons it may be beneficial to be able to turn off or toggle an USB connection or a USB port.
Basically you got three options:
Hubs with manual switches
No, not really an option.
Using the Per-Port-Power-Switching (PPPS)
USB 2.0 Specification contains a part about disabling/enabling power (the VBUS line) on USB-Hubs. Most (if not nearly every) Hub uses a chip that either does not support switching or the manufacturer saves a few cents and omits the external components on the circuitboard to switch power.
(Then you can tell the hub chip to disable a port but nothing will happen).
One of the few hubs that does support that is D-Link’s DUB-H7 in the older (gray) revision
Great Hub, by the way. Allows PPPS, has LED indicators for every single port, has overcurrent protection, etc.
Only mounting holes are missing, cheap bastards…
No, for sure: It’s reasonably priced and performs well in it’s intended function as a regular USB hub.
uhubctl allows listing and toggling PPPS and works great for that reason.
Turn off a port:
uhubctl -a off -p 2
Only problem: the DUB-H7 is quite strict about the current limits in the USB specification. When using large loads (>500mA) the hub is not able to supply enough power and turns off the ports.
In addition to that this blog post claims that even when switching off a port, the output voltage of the port is just reduced to slightly above 1 volts (depending on the voltage converter in the USB device, that still allows operation).
See uhubctl’s github repository for a list of known and tested hubs.
Apple Thunderbolt Displays and Apple Keyboards with integrated Hubs support PPPS out of the box, by the way.
If you are using one of those, just test uhubctl to see if that suffices for you.
Raspberry Pi
One special case are Raspberry Pi’s. Some versions (models B+, 2B, 3B, 3B+ and 4B) do not support PPPS but allow turning off/resetting the USB-Controller (and thus let you turn on and off all connected USB-devices).
See this forum post for more info.
External hardware: Yepkit / ykush
The portugese company Yepkit sells USB-hubs with a PIC microcontroller and a TI load switch.
They provide their firmware code and example programs as well as their schematics.
Yeah, that’s always an option, though not quite sure if it’s worth the hassle. But if you don’t need to physically disconnect the actual data lines but you just want to cut power I regularly use the AP2553 IC from Diodes. It has an adjustable current limit and is reasonably well solderable by hand. Big plus: no additional mosfets required, only up to 4 capacitors and 2 resistors.
(However, don’t trust me, I’m not an electrical engineer)
]]>Christopher Getschmannchristopher@volzo.deChewchew2019-01-03T00:00:00+01:002019-01-03T00:00:00+01:00http://volzo.de/posts/chewchew]]>Christopher Getschmannchristopher@volzo.detracking walking patterns of pedestrians in public spaces2018-10-01T00:00:00+02:002018-10-01T00:00:00+02:00http://volzo.de/posts/trackingTo understand and quantify the usage of public places and plazas, I developed a tracking tool using smartphones as my Master’s Thesis.
]]>Christopher Getschmannchristopher@volzo.deRandom images from Brussels2017-03-06T00:00:00+01:002017-03-06T00:00:00+01:00http://volzo.de/posts/randombrussels]]>Christopher Getschmannchristopher@volzo.deAntwerpen2017-01-25T00:00:00+01:002017-01-25T00:00:00+01:00http://volzo.de/posts/antwerpen]]>Christopher Getschmannchristopher@volzo.deHamburg2016-12-27T00:00:00+01:002016-12-27T00:00:00+01:00http://volzo.de/posts/hamburg]]>Christopher Getschmannchristopher@volzo.deDinant2016-11-26T00:00:00+01:002016-11-26T00:00:00+01:00http://volzo.de/posts/dinant]]>Christopher Getschmannchristopher@volzo.deOutdoor Camera Housing v22016-11-15T00:00:00+01:002016-11-15T00:00:00+01:00http://volzo.de/posts/timebox2I’ve built a medium-sized camera housing a while ago for a stationary multi-day/week installation.
Version 2 of the outdoor camera housing is intended to be a little bit more portable.
Changes to version 1:
runs on battery, no grid access needed
is more or less a ‘dumb’ housing without a full linux machine inside. The brain is just an microcontroller (–> no control over camera exposure settings)
Problems to solve:
Battery
The original component is a 1040mAh Lithium battery, listed as 7.2v output (NP-FW50).
So the best replacement with a litte bit more capacity is a LiPo 2S battery for RC-cars and planes. 2S means 2 cells in series, each one provides 3.7v, so 7.2v for the whole unit. The usual RC-LiPo is made for really high output, provding insane levels of current. That’s not really needed in this case, so a cheap one with less ultra/extreme ratings is probably not a bad choice. I opted for a 5000mAh model by the brand Dymond.
How to check if the battery is empty
LiPos with more than one cell have a balancer cable which gives direct access to every single cell. It’s used to level the cells while charging, but you can also use it to check voltage levels to prevent total discharge.
How to release the shutter
The Sony a6000 I use has a Micro USB-Port with additional pins called Multiport Connector for the remote control function. Some cheap intervalometers use a camera cable with a 2.5mm Audio-Jack which you can buy separatly and that’s probably the easiest way to get the a6000 hooked up to your controller board.
Housing
Pelicase 1150, second to smallest case in the ‘normal’ pelicase series.
Fastening
Initially I planned to use 20x20mm aluminium extrusions to build an L-bracket which can be adjusted in Y direction. In the end that took up too much space, so I used 20x60mm aluminium extrusion as a rail to adjust the height of a 4mm Aluminium bracket with drilled holes to fasten the Arca Swiss clamp.
The housing itself is mounted on a cheese plate with 1/4 and 3/8 screw threads. Certainly not the cheapest option if you need more than one, but easier than buying the tools to create screw threads in a raw metal plate yourself.
The battery is fastened with 3M Dual Lock velcro substitute. It’s not perfect, but really sturdy. The downside is the heavy price tag, ~12€ per meter.
Hardware
Camera
Sony a6000 bought used. Probably the best thing you can get for this job. 24MP sensor, quite small and easy. Lens is a 12mm f/2.0 Samyang with manual focus. It’s relatively small, set to infinity focus at f/8.0 and works like a charm.
Electronics
A microcontroller (atmega328) switches on the camera and triggers the shutter via the shutter remote cable. To adjust settings without the need for a laptop, there is even a display and 3 (three!11) buttons on the board. Switching the camera off and on is done by a P-Channel Power Mosfet which works with 5 and 3.3v too.
PCBs ordered at OSHpark. Great quality, no shipping costs and reasonable 5$ per square inch (and you get 3 copies of the board). Only downside it takes about a month.
Actually the expenses were - of course - a bit higher since I bought materials that I didn’t use in the end or bought extra quantities just to be sure.
Building steps
Basically the same as for the Outdoor Housing v1, but this time containing a bit more smartness and less dumb mistakes.
Drilling the Holes
Things that didn’t really work out:
For my first controller board I used an N-channel Mosfet as a Low-Side Switch (cutting off ground to switch the camera off) and had to learn that the camera can get ground via it’s shutter cable.
Besides that: no problems. I’m happy this time 🎉
Things I learned
Be careful about acrylic glue. If you inhale the fumes you will regret it really soon. Headache and nausea, just like a hangover but without drinking alcohol and all the fun.
Don’t waste your time with plastic. Just use raw aluminium plates, ideally 4-6mm strength.
Designing PCBs can be frustrating and rewarding at the same time.
Extensions
I want to have a bit more control over the image capturing process. Especially doing exposure bracketing and – maybe – having a live view for composing while the housing is already closed.
The controller board has an extension connector to fit an external Linux Chip and I’ve got a Raspberry Pi Zero here which would be a likely candidate to do the job, but having something a bit more ‘barebone’ would maybe preferable. Basic idea is that the Zero takes care of adjusting camera parameters and releasing via the USB connection while the microcontroller wakes the Zero up.
Plus: I would need to power the camera only while it’s really taking an image. Right now I power the camera for 50s (10s init, up to 30s exposing, 10s writing including error margin) even when the camera exposes just a 1/100th second.
Bonus content: first testrun on the window. That’s a depressing 7 days of Brussels weather in one image.
]]>Christopher Getschmannchristopher@volzo.deDover2016-11-01T00:00:00+01:002016-11-01T00:00:00+01:00http://volzo.de/posts/dover]]>Christopher Getschmannchristopher@volzo.deBuilding an outdoor camera housing2016-07-23T00:00:00+02:002016-07-23T00:00:00+02:00http://volzo.de/posts/timeboxFor the Summaery 2016, the annual exhibition of the Bauhaus-University Weimar I made a long exposure project. The plan was to expose an image for about four days. In the end the camera failed and just managed to record 16 hours, but the part about the camera enclosure may be interesting.
Idea:
Put a decent camera in a weatherproof housing and place it on the roof. The camera shall be remote controllable, i.e. it should upload single pictures. The single pictures are used as an input for my long exposure software and the result is displayed live.
Related Work:
Other people or projects that have built something similar (a weatherproof outdoor housing for a DSLR):
Pelco sells the EH5700 series of housings which are roomy enough for a decent camera, but they are hard to find in Germany. The Peli Stormcases are nice, but way to expensive here, compared to the slightly older and harder to handle Pelicase series. The Pelicase 1300 is just big enough to fit everything and can be bought for 60€. In the end a good compromise.
How to control the camera?
I could use a standard intervalometer which just triggers every X seconds the camera. Powered by 2 AAA batteries, runs basically forever. But that would make it impossible to adjust the interval depending on the time of the day or upload pictures directly.
Hence, a little more brain is needed. Controlling the camera, taking pictures and uploading is done by a Raspberry Pi. Alternatives would be using a BeagleBone Black (more expensive) or an TL-MR3200 (runs just openwrt). Sony offers a crappy API to control your camera via Wifi, but that’s unreliable, power consuming (the camera gets really hot) and just nasty; although, it’s quite nice when it comes to coding. Alternatively: with the good ol’ gphoto2 the camera can be controlled via USB, which is way more reliable, but it’s still a bit nasty since gphoto2 is awful to use. Nevertheless, sometimes there is no perfect solution, so I decided to stick with the latter.
How to power the whole thing?
Camera and Raspberry Pi require to be powered. By using Power Over Ethernet I just need a single (ethernet) cable and can use half of the wires for data, half of them for power.
TP-Link sells some cheap Injector/Splitter combo which works just fine. The splitter can output 5, 9 or 12v, but the camera runs on 7.2-7.5v and Raspberry Pi on 5v. By using 9v output two buck converters change the voltage. But there is one problem: when the camera takes a picture, power draw peaks for a split second and PoE supply fails. A 4700uF capacitor between camera and buck converter solves this.
Network
There is wifi in every building of the university. The raspberry uses my account to connect to the network and establishes with autossh an reverse-ssh connection to the server. By ssh-ing into my server, I can piggyback on the reverse-ssh connection to the raspberry on the roof, even if it’s hiding behind the walls of the university network.
Actually the expenses were - of course - a bit higher since I bought materials that I didn’t use in the end or bought extra quantities just to be sure.
Building steps
Drilling the Holes
Drilling the front hole is done using a 81mm hole saw (remember the step down filter adapter has an 82mm end). The hole saw which I ordered was one of the cheap models and lasted exactly 2 front holes. Job done.
Glueing the Filter Adapter
I used two component acrylic glue. Worked fine on ABS plastic and metal.
Attaching the Base
The knob of the clamp would touch the bottom of the case, so a 6mm spacer was needed. Basically just two 3mm MDF cutouts.
Securing the Camera
A simple cheese plate with 1/4 inch screw threads, made for securing displays on a video camera rig works just fine. Sturdiness is fine as long as no strong winds are hitting the enclosure.
Power Supply and Computing Hardware
Soldered on to a proto board, screwed to open beam T-slots, stuffed loosely into the enclosure.
Things that didn’t really work out:
everything. Well maybe not everything, but the camera didn’t run as expected.
Power
Running on Power over Ethernet was a constant struggle to stay withing consumption limits. Camera, Raspberry Pi and Buck converter were always scratching at max.
The power peaks while taking an image could initially be managed by using those giant 4700uF capacitors and everything seemed fine at the test setup. But as soon as I put everything together, things started to fail. I reduced consumption by removing the wifi adapter and blocking the viewfinder of the camera so that the camera disabled the display. This worked out okay and even while testing with a 30m ethernet cable, the camera seemed to work. Up on the roof, the power supply failed…
Command and Control
autossh and supervisord. Unreliable as shit. Next time try a constant VPN connection.
Arca Rail and Double Clamps
My original idea was to screw an arca rail to the bottom of the case and fasten the camera with a single or double clamp to the rail. As it turns out, the camera would be a bit too high above the ground to put an ultra wide angle lens behind the front hole.
Not a big problem, I just used a big clamp.
Things that may be good to know
camera equipment uses weird imperial sizes. The right screws for tripod plates are 1/4” and 3/8” UNC screws (american unified coarse thread series) with 20 threads per inch.
always use the newest version of gphoto2 (evil bugs for exposure times above 10s)
Wishlist for version 2
dramatically increase power supply (either IEEE802.3at (30 Watt) PoE or 24v via a dedicated cable)
use VPN instead of a reverse ssh connection
use a broader base plate to get a sturdier housing
use a separate microcontroller as a hardware control unit (switch power, toggle usb connection)
think of a comfortable way to set and adjust focus
]]>Christopher Getschmannchristopher@volzo.deSummaery 20162016-07-19T00:00:00+02:002016-07-19T00:00:00+02:00http://volzo.de/posts/summaery2016]]>Christopher Getschmannchristopher@volzo.deEduroam Uni Weimar wpa_supplicant.conf2016-06-30T00:00:00+02:002016-06-30T00:00:00+02:00http://volzo.de/posts/eduroam-weimarErinnerung für mich selbst, wenn mal wieder ein Raspberry Pi ans Uni-Netz angebunden werden muss:
]]>Christopher Getschmannchristopher@volzo.deCompressed Time2016-05-07T00:00:00+02:002016-05-07T00:00:00+02:00http://volzo.de/posts/compressedtimefinally online: my new project compressed time.]]>Christopher Getschmannchristopher@volzo.deWhen stitching a panorama goes wrong.2016-04-08T12:34:58+02:002016-04-08T12:34:58+02:00http://volzo.de/posts/when-stitching-a-panorama-goes-wrong]]>{"login"=>"volzo", "email"=>"christopher@volzo.de", "display_name"=>"volzo", "first_name"=>"", "last_name"=>""}christopher@volzo.deInternet in Japan2016-03-13T11:45:45+01:002016-03-13T11:45:45+01:00http://volzo.de/posts/internet-in-japanEs ist schwierig in Japan halbwegs günstig und komfortabel an Internet zu kommen, was natürlich auch daran liegen mag das meine Messlatte für 'komfortabel' recht hoch liegt. Die erste Hürde ist das "Prevention of Improper Use of Mobile Voice Communications Services Act" [*], ein Gesetz, das Verkauf von SIM-Karten an Ausländer und Touristen unter Geldstrafe verbietet. Wie es nunmal ist, haben sich ganze Geschäftsmodelle aus irrationaler Gesetzgebung entwickelt und es gibt unzählige Anbieter zum Mieten von Pocket-WiFis, WLAN-Access-Points mit Akku und LTE-Chip, die auf den Namen der Firma oder des Gastgebers eingetragen sind.
Das ist natürlich ein ordentlicher Klotz an Hardware, dessen Miete einen nicht zu unterschätzenden Betrag verschlingt, der zusätzlicher Taschenkapazität bedarf und - gar das Übelste - nocheinmal seperat geladen werden muss. Will man das irgendwie vermeiden, kann man nur eine Data-Only Prepaid SIM kaufen. Dafür gibt es natürlich Anbieter, meist Vermieter von Pocket-Wifis, die auch etwas stiefmütterlich SIM-Karten als Reseller im Angebot haben [1, 2]. Eigentlich als Plan ganz in Ordnung. Der Komfort dabei wäre nun allerdings lediglich die Möglichkeit mir die SIM-Karte nach Deutschland schicken zu lassen und nicht am Post-Office des Flughafens oder in der Unterkunft abholen zu müssen, was natürlich, also das Zusenden ins Ausland, nicht geht.
An den Flughäfen stehen Automaten zum Ziehen von SIM-Karten für 7 oder 14 Tage (zum Premiumpreis), was natürlich aber nicht funktioniert wenn man gedenkt länger zu bleiben.
Also, ohne Internet in die nächste Elektronikmarkthölle und SIM-Karten per Hand kaufen. Wie so ein Tier! Per Hand!!1
]]>{"login"=>"volzo", "email"=>"christopher@volzo.de", "display_name"=>"volzo", "first_name"=>"", "last_name"=>""}christopher@volzo.deRoom with a View2016-03-12T16:42:53+01:002016-03-12T16:42:53+01:00http://volzo.de/posts/room-with-a-viewTokyo, Ikebukuro, erste Woche
Sendai, zweite Woche
Sendai, zweite Woche
Tokyo, Shinjuku, dritte Woche
Tokyo, Ikebukuro, dritte Woche
Tokyo, Kawasaki, dritte Woche
]]>{"login"=>"volzo", "email"=>"christopher@volzo.de", "display_name"=>"volzo", "first_name"=>"", "last_name"=>""}christopher@volzo.deYamadera2016-03-08T13:36:28+01:002016-03-08T13:36:28+01:00http://volzo.de/posts/yamadera]]>{"login"=>"volzo", "email"=>"christopher@volzo.de", "display_name"=>"volzo", "first_name"=>"", "last_name"=>""}christopher@volzo.deWas einem so an Japan auffällt.2016-03-07T12:47:46+01:002016-03-07T12:47:46+01:00http://volzo.de/posts/was-einem-so-an-japan-auffaelltDurchsichtige Regenschirme.
Wunderbare Idee. Sieht bescheuert aus, aber macht die lästige Verwendung um so vieles angenehmer.
Bezahlung im Restaurant am Automaten.
Am Automaten vorm Restaurant wählt man Gericht, zahlt und zieht einen Zettel den man im Restaurant lediglich vorlegen muss um seine Suppe zu bekommen. Kurz irritierend, aber effizient.
Warteblöcke zum Einsteigen.
In Tokyo sind auf den Bahnsteigen jeweils die exakten Haltepositionen der UBahn-Türen aufgemalt. Zur Rush-Hour werden diese Bereiche penibel freigehalten. Neben der Aussteigeschneise sind weitere Quadrate markiert, in denen sich Menschen in Reih und Glied aufstellen. Kommt eine Bahn und die letzte Person ist ausgestiegen, setzt sich der erste Block in Bewegung, besteigt den Waggon und der zweite Block schiebt sich zur Seite auf Position des ersten Blocks. Wunderbar zu beobachten, bis man realisiert das man verpeilt hat sich rechtzeitig mit seinem Block zu bewegen.
Alleine Essen.
Lebensmittel sind teuer. Hinreichend teuer, dass es wohl wirtschaftlich ist für ein Single beinah jede Mahlzeit in einem Restaurant oder einer Nudelbar einzunehmen, statt selbst zu kochen. Viele Ramen-Shops bestehen ausschließlich aus einer Theke in der Büroangestellte sich abends noch eine Suppe reinschaufeln bevor sie um 8 oder 9 nach Hause kommen.
Getränkeautomaten und die fehlende Abzocke.
Automaten an jeder Ecke mit Wasser, Softdrinks und Kaffee in Dosen und Flaschen. Die Preise sind nicht übertrieben und nur minimal höher als im Späti oder Supermarkt.
Auch interessant: bei jedem Restaurantbesuch wird (Leitungs-)Wasser mit Eis oder Tee in beliebiger Menge gratis gereicht.
Dazugehörig: Hinter der Sicherheitsschleuse im Flughafen werden ja auch noch mal Essen undGetränke verkauft. Üblicherweise mit strammen Aufschlag, irgendwas um die 2,50 bis 3,50 für eine simple Flasche Wasser. Japanische Preise rangieren da eher um 1,20€, etwa das, was man auch am Automaten zahlen würde.
Mülleimer.
Oder eher das Fehlen derselbiger. Es gibt keine öffentlichen Mülleimer. Neben den Getränkeautomaten sind meist welche zu finden ausschließlich für PET-Flaschen oder Dosen, vermutlich aufgestellt vom Automatenbetreiber und in den Bahnhöfen sind vereinzelte Allzweckmülleimer, aufgestellt und geleert von der Eisenbahngesellschaft. Die einzigen Mülleimer in freier Wildbahn wurden gesichtet in Hiroshima an den Tourist-Spots.
Schuhe.
Schuhe sind schmutzig. Direkt hinter der Wohnungstür befindet sich eine Stufe, hinter dieser Stufe wird das Tragen von Hausschuhen erwartet, dabei ist man penibel. Das Innere der Wohnung ist ein reiner Bereich, daher gesondertes Schuhwerk. Für den Gang ins Badezimmer steht dabei ein spezielles Paar Hausschuhe hinter der Badezimmertür, das nur und einzig im Bad getragen werden darf, denn dieser Bereich ist wieder unrein.
Milchglasfenster.
Klassische Privathäuser, meist zweigeschossig, haben Schiebefenster mit undurchsichtigem Glas. Licht dringt hindurch, aber die Privatsphäre bleibt gewahrt.
Überfluss an Arbeitskraft.
Wann immer etwas von nur einer Person erledigt werden könnte, steht noch jemand daneben und wird für die gleiche Arbeit bezahlt. Die Liste an Beispielen wäre lang und absurd, aber eines: das Schieben einer Sackkarre wird üblicherweise von zwei Menschen ausgeführt, eine Person schiebt, die andere Person läuft vorneweg und entschuldigt sich bei Passanten für das notwendige Ausweichen.
Tüten.
Nie ohne. Flasche Wasser gekauft? Tüte. Schon eine Tüte in der Hand? Noch eine. Hygieneartikel für die Damenwelt käuflich erworben? Zwei Tüten! Eine ist dabei schwarz und undurchsichtig und dient einzig dem Zweck den Erwerb von Hygieneartikeln - und damit das öffentliche Eingeständnis von weiblichen Körperfunktionen - zu verbergen. Japan ist viktorianischer als man vermuten mag.
Wachs.
Restaurants haben nicht nur Fotos der Gerichte in der Auslage sondern recht akkurate Wachs-Replika jedes der wichtigen Gerichte.
]]>{"login"=>"volzo", "email"=>"christopher@volzo.de", "display_name"=>"volzo", "first_name"=>"", "last_name"=>""}christopher@volzo.deVerbrechen in Weimar2016-02-02T19:05:44+01:002016-02-02T19:05:44+01:00http://volzo.de/posts/verbrechen-in-weimar
Als Teil einer Vorlesung an der Bauhaus-Universität. Maschinelles Kategorisieren und Verorten von Polizeiberichten der Polizeidirektion Weimar, inklusive Visualisierung mit OpenStreetMap-Daten.
]]>{"login"=>"volzo", "email"=>"christopher@volzo.de", "display_name"=>"volzo", "first_name"=>"", "last_name"=>""}christopher@volzo.decalcifer2015-11-19T23:35:26+01:002015-11-19T23:35:26+01:00http://volzo.de/posts/calciferSince I somehow never finish what I start, I can publish it anyways: I don't want to get (all) my mail pushed to my phone but nonetheless I am using email for urgent matters. calcifer is a simple python daemon, reading your mail and sending you notifications of (important) mails via Pushover. Using native notifications via the Apple Push Notification Service wouldn't be hard, but Pushover is a great service, especially since Apple is billing you 99€ annually to access their Push-service directly.]]>{"login"=>"volzo", "email"=>"christopher@volzo.de", "display_name"=>"volzo", "first_name"=>"", "last_name"=>""}christopher@volzo.deA Wearable Tactile Input and Output Device for Non-Vision Based Interaction with Smartphones2015-11-19T00:00:00+01:002015-11-19T00:00:00+01:00http://volzo.de/posts/a-wearable-tactile-input-and-output-device-for-non-vision-based-interaction-with-smartphones
More than a year ago I finished my bachelor thesis about wearable tactile displays. The aim was to assist visually impaired people in their mobile usage of a smartphone. Over the course of six month I developed a concept and a prototype for a tactile I/O device, embedded in a gauntlet-like piece of clothing.
Notifications from the smartphone, encoded as Braille-characters, are displayed as vibration patterns directly on the skin of the forearm.
]]>{"login"=>"volzo", "email"=>"christopher@volzo.de", "display_name"=>"volzo", "first_name"=>"", "last_name"=>""}christopher@volzo.deNovation Launchpad as a Home Automation Input Board2015-06-17T23:28:18+02:002015-06-17T23:28:18+02:00http://volzo.de/posts/novation-launchpad-as-a-home-automation-input-boardI really like physical buttons.
And well documented hardware, that comes with the option to tinker around. Novation Launchpads are MIDI-Controllers for live perfomances and electronic music stuff. 8x8 Buttons, 2 LEDs each and a simple MIDI communication interface. Novation released a short, but sufficient documentation about how to talk to your device and makes it very easy to use your hardware for your own purpose (some kudos to novation here!).
Since Touchscreens are a hassle when it comes to simple tasks like hitting a specific button to switch lights in a nearly unconsciousnes state, resulting from waking up moments ago, I needed another solution for my home automation system.
Launchpad-Connector is a python daemon to bind python scripts to Launchpad-buttons. Connect a launchpad to your computer/pi/whatever and run the daemon. Scripts can be registered as subscribers to button events.
]]>{"login"=>"volzo", "email"=>"christopher@volzo.de", "display_name"=>"volzo", "first_name"=>"", "last_name"=>""}christopher@volzo.devisualizing GPX runlogs2014-10-16T01:11:09+02:002014-10-16T01:11:09+02:00http://volzo.de/posts/visualizing-gpx-runlogsA few month ago I started running with the Zombies, Run! 5k Training app. The data from the app is synced with the webservice and online you can see a few graphs which are quite ok, but I wanted a bit more than that.
You can download a GPX-File from every run, but there is no way to download an archive. So I scraped the logs from the "Zombies, Run!"-backend using their REST API.
GPX parsing is done with gpxpy. Since the app produces GPX 1.1 files, the 1.1-branch is used. Datetime parsing is a bit broken in gpxpy (at least for dates with timezone), dateutil fixes that. The stacked bar chart is created with D3.js, which means much more fun than gnuplot.
Red areas represent walking, green are above the running speed threshold.
Over the course of the last few months, I've spend some spare time for a new project:
howl is a web-based modular home automation software, written in python/django. Modules (sensors, actuators or interfaces) are added as django apps.
A ruleset can be defined to control interactions of modules (e.g. if sensor.livingroom.temperature drops below 15°C, send a notice via xmpp/email/... )
Nodes used in my setup are for the most part cheap arduinos, a kindle as a weather display and some remote controllable main sockets.
Source code is available on github under MIT license.
The software is provided "as-is", without any claim of usefulness.
]]>{"login"=>"volzo", "email"=>"christopher@volzo.de", "display_name"=>"volzo", "first_name"=>"", "last_name"=>""}christopher@volzo.dePentacon Six Objektive an der Großformatkamera2014-06-22T13:34:37+02:002014-06-22T13:34:37+02:00http://volzo.de/posts/pentacon-six-objektive-an-der-grossformatkamera
Vor ein paar Jahren mal gemacht und eigentlich auch drüber schreiben wollen, aber im Entwürfe-Ordner vergessen.
Kurzfassung: Funktioniert, ist aber eher unpraktisch. Das Photo wurde mit dem Flektogon 50/4.0 gemacht und deckt etwa 9cm Bildkreis ab. Hat man es nicht auf den Kreisrund-Effekt abgesehen, croppt man letztendlich doch nur wieder auf 6x6cm.
]]>{"login"=>"volzo", "email"=>"christopher@volzo.de", "display_name"=>"volzo", "first_name"=>"", "last_name"=>""}christopher@volzo.deJim Rakete im Stadthaus Ulm2013-07-22T19:00:42+02:002013-07-22T19:00:42+02:00http://volzo.de/posts/jim-rakete-im-stadthaus-ulm
Aus der Kategorie Ausstellungsempfehlungen:
Jim Rakete stellt mit "Stand der Dinge" noch bis zum 8. September im Ulmer Stadthaus aus. Sehr sehenswert dazu:
]]>{"login"=>"volzo", "email"=>"christopher@volzo.de", "display_name"=>"volzo", "first_name"=>"", "last_name"=>""}christopher@volzo.deAusstellung in der Uni Ulm2013-05-10T22:18:12+02:002013-05-10T22:18:12+02:00http://volzo.de/posts/ausstellung-in-der-uni-ulm
Ab heute ist die neue Ausstellung des Musischen Zentrums der Universität Ulm zu sehen. Unter anderem auch mit einigen von meinen Bildern. Möglich gemacht wurde das Ganze durch unermüdliche Arbeit und Begeisterung von Klaus und Christine vom MUZ, Dankeschön hierfür.
Parallel zur Vernissage habe ich die Großformatkamera aufgestellt und mit den Gästen knapp ein Dutzend Polaroids gemacht. Es ist immer wieder schön Menschen für anfassbare Analogphotographie zu begeistern.
Noch bis Mitte Juli zu sehen im "Laboratorium" (Gebäude M24).
Schon ein wenig länger her, aber ich kam nicht dazu es zu verbloggen: Gegen Ende des Sommers gab es den jährlich wiederkehrenden Meteorschauer der Perseiden und da zeitgleich passendes Wetter vorhergesagt wurde, gings in die Berge. Das Fellhorn (2.038m) in den Allgäuer Alpen bietet einen ordentlichen Ausblick und ist nahe genug an einem weiteren Berg, der Kanzelwand, gelegen, so dass man auch nachs die Position wechseln konnte.
Mit dabei waren meine Großformatkamera und eine Kiev 88 mit Arsat 30mm 3.5 Fisheye.
Vor fast einem Jahr war ich zum ersten Mal auf der Westlichen Karwendelspitze, nicht wirklich gut vorbereitet und weniger warm ausgerüstet als notwendig war. Zwischen drei und vier Uhr nachts wurde es mir zu kalt und ich stieg über das Dammkar nach Mittenwald ab. (Ein Abstieg über das rutschige, mit Geröll überfüllte Dammkar bei Dunkelheit ist auch nochmal eine Geschichte für sich...) Seitdem hatte ich das Gefühl mit der Karwendelspitze noch nicht durch zu sein.
Drum gings vorletztes Wochenende ein weiteres Mal hoch auf 2.385m, diesmal inkl. Thermowäsche und 5kg mehr Kamera.
Sowohl Richtung als auch Dauer des Mondes waren mit flachem Stand über dem Horizont und 4h nicht ideal, aber ein anderer Termin war nicht machbar.
Aufstieg wie immer über die Seilbahn. Die Bergstation der Karwendelbahn hat übrigens als Besonderheit das Naturinformationszentrum Bergwelt Karwendel (der Anbau in Form eines Fernrohrs).
Dank kurzzeitigem Sommerwetter gings vor kurzem hoch auf den Aggenstein (1.986m). Der Berg an der österreichisch-deutschen Grenze im Allgäu ist von der deutschen Seite her mit der Breitenbergbahn vergleichsweise einfach zu erreichen. Vergleichsweise einfach natürlich nur ohne Kamerarucksack. Außer Mittel- und Großformatkamera hatte ich diesmal auch den Schlafsack im Gepäck, womit ich auf rund 19kg Rucksackgewicht kam. Nach den ersten Metern habe ich es schon bitterlich bereut...
Nach ein paar beinahe waagerechten Metern des Weges von der Bergstation zum Fuß des Aggenstein, geht es steil aufwärts. Aufstieg über die Route "Langer Stich" im 45° Winkel (meist gefühlt mehr) serpentinenartig den Berg hoch (auf dem Bild, die rechte Flanke des Berges). Die ausgesetzten Stellen sind mit Drahtseilen gesichert, tatsächlich notwendig war es aber - zumindest bei dieser Witterung - nicht.
Da ich bevorzugt den Mondschein zur Nachtphotographie nutze und Bereiche der Nacht, in der sich der Mond unter dem Horizont befindet für mich nicht lohnen, habe die Stunden zwischen Sonnenuntergang und Mondaufgang erschöpft und dankbar dösend im Schlafsack verbracht.
Durch die kleine Mondsichel (Viertelmond) und 4h der Nacht komplett ohne Mond war diesmal die Ausbeute deutlich geringer als in einer vollständigen Vollmondnacht.
Fazit fürs nächste Mal: ich muss das Gewicht der mitgenommenen Kameraausrüstung deutlich reduzieren.
Letztes Wochenende war zum ersten Mal seit Ende Oktober das Bergklima wieder ausreichend aufgetaut für einen Ausflug über Nacht. Ziel: der Herzogstand (1.731m), ein etwas kleinerer Gipfel in den bayrischen Voralpen.
Aufstieg per Herzogstandbahn zur Bergstation auf dem Fahrenberg (1.600m) und von da aus die kurze Strecke per Fuß zum Herzogstand. Dank einigen warmen Tagen vorher war der Pfad größtenteils schneefrei, die wenigen noch zugeschneiten Stellen ließen sich halbwegs sicher überwinden.
Aufgrund der Jahreszeit war eine Nacht mit komplett wolkenlosem Himmel und gleichzeitigem Vollmond beinahe unmöglich, letztlich landete bei der Planung die Priorität klar beim Vollmond. Die Wolkenschicht war allerdings glücklicherweise nicht sehr aufdringlich und letztendlich zu verkraften. Dank einer beinah luxuriösen Webcam, ließ sich der Wetterbericht allerdings im Vorfeld auch sehr angenehm mit der Realität abgleichen.
Nach Abendessen auf dem Gipfel und den ersten belichteten Rollen Film blieben mit Einbruch der Nacht die Temperaturen auf einem erträglichen Niveau, irgendwo knapp oberhalb der 10°C-Grenze. Zwei Stunden vor Sonnenaufgang aber kam eisiger Wind auf und über wärmende sportliche Betätigung beim Abstieg war ich letztendlich sehr glücklich.
Ausnahmsweise auch mal wieder ein wenig Digitales, gestitchte Panoramen auf Basis von Negativen gehen ein wenig zu sehr ins Geld. Links im Bild der bewanderbare Grat zum Heimgarten, rechts der Kochelsee. Die Lichtglocke über dem Kochelsee ist das sechzig Kilometer entfernte München.
[gallery link="file" include="516, 484, 521"]
Die Tatsache der erste Bergstation-Seilbahn-Fahrgast des Tages zu sein hat auch immer wieder den interessanten Nebeneffekt mit dem Gondelführer ins Quatschen zu kommen, der diesmal begeistert auch von anderen "Sternenphotographen" berichtet hat, die einige Wochen vorher unterwegs waren, was wohl diesebeiden gewesen sein dürften. Immer wieder angenehm das Ergebnis Anderer von der gleichen Location zu sehen.
]]>{"login"=>"volzo", "email"=>"christopher@volzo.de", "display_name"=>"volzo", "first_name"=>"", "last_name"=>""}christopher@volzo.deStuttgart2012-03-28T15:32:11+02:002012-03-28T15:32:11+02:00http://volzo.de/posts/stuttgartVor zwei Wochen stand ein Nachmittag in Stuttgart auf dem Programm. Verschiedene Locations wurden abgeklappert und zwei Rollen Film belichtet:
Das Mercedes-Benz Museum in Stuttgart. Inhaltlich zwar eher wenig ansprechend, Architektonisch dafür aber umso mehr. Mit dabei die Kiev 88 mit dem Arsat 30mm 3.5 Fisheye.
Außerdem noch die Chamonix 45N-2 mit dem ebenfalls neuen Schneider Kreuznach 90mm 6.8 Weitwinkel. An die dunkle Mattscheibe mit Blende 6.8 zum Fokussieren und Komponieren muss ich mich erstmal noch gewöhnen.
Die neu gebaute Stadtbibliothek am Mailänder Platz. Von außen ein großer Würfel, von innen zwei kleine Würfel (unter der quadratischen Bodenplatte des Raumes befindet sich noch ein weiterer würfelförmiger Raum).
Neu im Haus, die Chamonix 45N-2. Eine chinesische 4x5-Feldkamera - aber trotz womöglich gehegter Vorurteile - wunderbar präzise gefertigt und stabil. Trotzdem gefühlt etwa zwei Drittel leichter als die Graflex Speed Graphic und bedeutend flexibler. Tatsächliches Gewicht beträgt (ohne Objektiv) knapp 1,5kg. Wandern dürfte sich damit in Zukunft bedeutend angenehmer gestalten.
Chamonix ist ein kleiner chinesischer Betrieb der Großformatkameras von 4x5" bis zu extremen Größen fertigt. Die kleinen Modelle haben noch ein Kohlefaserboden, die Größeren bestehen ausschließlich aus Holz mit Edelstahlelementen. Produziert wird in kleineren Chargen alle paar Monate, wenn man eine möchte kontaktiert man per Mail den Vertreter der Firma und lässt sich auf die Warteliste setzen. Bestellwebseite oder offizielle Rechnung gibt es nicht, alles ein wenig "unbürokratisch", aber problemlos.
Die Ausführung ist übrigens Teak mit Edelstahl (Walnuss wird erst bei der nächsten Charge wieder verwendet), inkl. Universal-Balgen.
Nach über einem Jahr habe mit der Mamiya 645 PRO habe ich sie nun wieder verkauft und kehre dem Format 6x4,5 den Rücken. Ich will allerdings ein wenig darauf eingehen, in wie weit sich die Mamiya 645 für Langzeit- und Nachtphotographie eignet und einen kleinen Erfahrungsbericht online stellen.
Technische Eckdaten: Die Mamiya 645 in der PRO-Ausführung ist eine 6x4,5 Mittelformatkamera, die als modulares System aufgebaut ist. Magazin, Sucher, Mattscheibe, Winder, Objektiv. Magazin, Winder und Sucher lassen sich jeweils nur zwischen den neuen Modellen (Super, 645E, PRO, PRO TL) oder den alten (645, 645J, 645 1000S) wechseln.
Bei mir in Benutzung war die 645 PRO mit dem AE-Prisma Sucher FK402 / Lichtschachtsucher, dem Mamiya 645 45mm f/2.8 Weitwinkelobjektiv und einem 110mm 2.8 für Portraits.
Adaptierung von Fremdobjektiven
Problemlos lassen sich 6x6 Objektive per Adapter an der M645 verwenden. Bei mir im Einsatz waren mit einem Pentacon Six Adapter das Carl Zeiss Biometar 80mm f/2.8. Mit einem weiteren Adapter von Kiev Salyut auf P6 gingen noch weitere verschiedene Kiev 88 Linsen. Insbesondere das Arsat/Zodiac 30mm Fisheye ist genial.
Einziges Manko, alle adaptierten Objektive müssen mit Arbeitsblende betrieben werden, Springblende funktioniert natürlich nur bei den Mamiyas. Belichtungsmessung mit entsprechenden Prismen ist dabei jedoch kein Problem, während bei Originalobjektiven ein Blendenhebel die momentan ausgewählte Blende an Kamera und Prisma weitergibt, wird ohne Verwendung des Blendenhebels von der Kamera bzw. dem Prisma das einkommende Licht einfach ohne Umrechnen gemessen.
Ärgernisse
Es fehlt ein Anschluss für einen herkömlichen Kabelauslöser. Stattdessen verbaute Mamiya eine ziemlich primitive Steckvorrichtung mit vier Pins an die ein teures Mamiya-Elektromagnetikauslösekabel angeschlossen werden kann. Der Vorteil dieser technischen Weiterentwicklung hält sich stark in Grenzen und die Kabel sind teuer, sowie schwer zu bekommen. Abhilfe schafft ein ein simpler Plastik-Aufsteckadapter der nichts anderes tut als ein Gewinde zum Anschrauben eines Kabelauslösers zu bieten und Kontakt zwischen Pin 1 und Pin 3 herstellt. Könnte man mit Leben, wenn die Adapter nicht fast so viel kosten wie die Kabel und gleich selten anzutreffen sind. Für mich insgesamt ein grober Designfehler.
Der Lichtschachtsucher ist grausam. Im direkten Vergleich zur Pentacon Six oder Kiev 88 ist die Vergrößerung der Lupe kleiner und die klappbaren Schachtbegrenzungen irgendwie störender. Mit dem Lichtschacht der M645 fällt mir das ausrichten bedeutend schwerer als mit jedem anderen. Wirklich an einem Merkmal alleine festmachen kann ich es nicht, es ist mehr eine sehr subjektiv empfundene Abneigung.
Erfahrungen in der Praxis
Gewicht und Packmaß für sind für eine 6x4,5 Mittelformatkamera mit Prisma angenehm klein. Zum Verstauen im Kamerarucksack schnell das Prisma abnehmen und fertig. Vor Ort angekommen lediglich fix das Prisma wieder einrasten, die Kamera mit Schnellwechselplatte aufs Stativ klemmen und man kann direkt loslegen. Das vergleichsweise geringe Gewicht ist besonders praktisch beim Wandern. In den Blitzschuh an der linken Seite lässt sich angenehm eine Wasserwaage mit zwei oder drei Libellen setzen und der Horizont perfekt gerade ausrichten. Der Kabelauslöseadapter hat ärgerlicherweise seinen Anschluss in Richtung Objektiv, aber das lässt sich verkraften (selbst bei riesigen Objektiven wie einem 30mm Fisheye stößt nichts an).
Praktisch bei Portraits jedoch bei Landschafts- und Nachtphotographie eher zu vernachlässigen ist die Möglichkeit Magazineinsätze innerhalb weniger Sekunden auszutauschen und so Filme schon vorher auf bereitgelegte Einsätze aufzuspulen. So muss man nicht jedes Mal ein Magazin umständlich neu laden oder um das zu verhindern ein mehrere teure Magazine kaufen.
Der riesige und enorme Pluspunkt dieser Kamera bei der Nachtphotographie ist das Mamiya 45mm 2.8 Weitwinkel. Mit Blende 2.8 hat man ein ausreichend helles Sucherbild um mit ein Minimum an Beleuchtung noch etwas durch den Sucher erkennen zu können.
Insbesondere auch die Eigenschaft aller Mamiya-Objektive für die 645er, dass ein Fokusring auf Anschlag die unendlich-Eintellung markiert und nicht darüber hinausgeht (um beispielsweise Ausdehnung der Materialien unter Hitzeeinfluss zu kompensieren) ist mir extrem wichtig zu bemerken. Ohne diesen Komfort müsste man nach jedem bewegen des Stativs kontrollieren ob man nicht unabsichtlich gegen den Fokusring stieß und an einer hellen Lichtquelle im Bild (die es manchmal einfach nicht gibt) wieder den Fokus kontrollieren.
Mit dem Blende 2.8 und Portra 160VC komme ich bei annährend voll aufgegangendem Vollmond meist auf Belichtungszeiten um die 8 bis 16 Minuten. Das ermöglicht so schnell und effektiv zu arbeiten wie mit kaum einer anderen Mittelformatkamera bei solchen Lichtsituationen. Bei solch geringer Belichtungszeit ist es nicht weiter tragisch mal einen Frame zu verlieren, man kann es sich zeitlich ruhig leisten nochmal einen auf Reserve zu belichten.
Fazit
Ich werde die Mamiya 645 vermissen, keine andere Kamera die ich bisher benutzt habe ist so einfach in der Handhabung gewesen. Sie verzeiht beinahe jeden Bedienungsfehler und ist angenehm unkompliziert. Andererseits, was zu Einfach ist hat keinen Charme. Jetzt lieber erstmal mit der Pentacon Six rumwursteln die bei jedem zweiten Bild rumspackt...
]]>{"login"=>"volzo", "email"=>"christopher@volzo.de", "display_name"=>"volzo", "first_name"=>"", "last_name"=>""}christopher@volzo.deDer erste Abzug2012-02-13T13:37:40+01:002012-02-13T13:37:40+01:00http://volzo.de/posts/der-erste-abzug
Zum ersten Mal einen eigenen Abzug produzieren ist schon was Tolles. Aufgrund der Beschränkung auf Schwarz-Weiß-Negative, von denen ich nicht allzu viele rumliegen hatte, wurde es dann auch ein Portrait und kein Landschaftsbild.
Schon seit einiger Zeit stand die Zugspitze auf meiner Wunschliste. Anfang der Woche ergab sich nun erfreulicherweise die Gelegenheit. Das Wetter war wolkenlos, Uni-Vorlesungen standen keine an und Werktags dürfte vermutlich der Besucheranteil deutlich geringer sein als am Wochenende (vollgestopfte Seilbahnkabinen sind nicht gerade angenehm).
Mit einer Jahresdurchschnittstemperatur von -4,8° bietet sich ein Besuch im Winter an, da man sich sowieso dort oben was abfriert. Mit dabei waren, wie immer in letzter Zeit, die Graflex 4x5 und die Pentacon Six.
Von Garmisch-Partenkirchen aus geht es mit der Zahnradbahn bis beinahe auf 2600 Meter. Die Endstation ist direkt in den unter der Zugspitze gelegenen Gletscher, das Zugspitzplatt, gebaut. Per Seilbahn kommt man zum komplett zugebauten Gipfelplateau rauf.
Kurzer Abstecher in die nahegelegene Klosterbibliothek Wiblingen. Für ein paar Euro Eintritt ist Samstags und Sonntags jeweils für drei Stunden eine kleine Ausstellung zu besichtigen. Klein bedeutet, ein halbes Dutzend Kämmerchen mit Exponaten und dem - einzig - interessanten Raum der Klosterbibliothek.
Mit dabei war die Graflex 4x5 und ein paar Filmhalter mit seit 13 Jahren abgelaufenem Agfachrome RSX 100.
]]>{"login"=>"volzo", "email"=>"christopher@volzo.de", "display_name"=>"volzo", "first_name"=>"", "last_name"=>""}christopher@volzo.deErste Schritte mit der Großformatkamera2012-01-13T23:31:27+01:002012-01-13T23:31:27+01:00http://volzo.de/posts/erste-schritte-mit-der-grosformatkameraNachdem letzte Tage der neue Scanner ins Haus kam, kann ich nun endlich auch Großformat (4x5 und 8x10) scannen. Yay.
Vom letzten Ausflug zum Branderschrofen:
Graflex Speed Graphic 4x5 Zoll Großformatkamera mit Kodak Ektar 127mm 4.7 Objektiv. Belichtet auf Kodak Ektachrome 100+ Diafilm, vor einiger Zeit bei eBay erstanden und seit 11 Jahren abgelaufen.
Nach dem Scannen der ersten Dias ist ziemlich klar, dass etwas weitwinkligeres her muss. Mindestens ein 90mm (35mm äquivalente Brennweite: ca. 28mm), wenn möglich vielleicht sogar noch etwas weniger.
]]>{"login"=>"volzo", "email"=>"christopher@volzo.de", "display_name"=>"volzo", "first_name"=>"", "last_name"=>""}christopher@volzo.deBranderschrofen2011-12-17T19:12:11+01:002011-12-17T19:12:11+01:00http://volzo.de/posts/branderschrofenDa Aufgrund der etwas widrigen Wetterverhältnisse ersteinmal keine neuen Ausflüge anstehen, fange ich mit den alten an. Mitten im November, am letzten noch brauchbaren Herbsttag, ging es in die bayrischen Voralpen, genauer gesagt nach Füssen auf den Tegelberg. Direkt an den Tegelberg (der eigentlich nur ein Bergrücken ist), schließt sich der Branderschrofen (1880m) an, der immerhin so etwas wie einen Gipfel aufweist. Zum ersten Mal war ich auch nicht allein unterwegs, sondern in Begleitung von Jan, einem Kommilitonen.
"Aufstieg" der Faulheit halber per Seilbahn (letztes Betriebswochende vor der Herbstrevision). Von da aus ist man innerhalb von 30-45 Minuten den Bergrücken bis zum Branderschrofen hochgewandert (sofern man nicht alle paar Minuten stehen bleibt und die Kamera auspackt). Gelegentliche kniffligere Stellen sind gesichert mit Stahlseil, also alles gut machbar, auch mit schwerem Kamerarucksack. Bezüglich Kamerarucksack: diesmal das erste Mal unterwegs mit dem Kata Bumblebee 220.
Auf der Spitze angekommen hatten wir noch mehr als eine Stunde bis Sonnenuntergang und dementsprechend gut besetzt war es dort auch.
Dank der Tatsache das ich den Grauverlaufsfilter zuhause gelassen hatte, konnte ich den gesamten Sonnenuntergang ziemlich vergessen. Lediglich mit der Holga Lochkamera sind ein paar interessante Sachen rausgekommen.
Nachdem das Licht endlich weg war, fing der interessante Teil des Ausflugs an. Zum ersten Mal habe ich den Kodak Ektar 100 und new Portra 400 (Portra 400-2) in der Mamiya 645 (mit Mamiya 45mm 2.8 Sekor-C) für die Nachtphotographie verwendet. Den Ektar und seinen Schwarzschild-Effekt habe ich völlig unterschätzt, dementsprechend war so ziemlich der gesamte Film konstant um etwa 2 Blenden unterbelichtet (8 Minuten bei Blende 2.8 waren deutlich zu wenig). In Bereichen über 4-8 Minuten muss wohl mindestens 1 bis 1½ Blenden länger belichtet werden.
Sehr positiv überrascht war ich jedoch vom neuen Portra 400. Mit der Verlängerung um eine Blende war der Film ziemlich genau auf den Punkt belichtet. Außerdem zugunsten kam die Tatsache, dass nachdem ich den Ektar durchgezogen hatte, der (Voll-)Mond bereits halb aufgegangen war.
Beim Abstieg (weiße Linie), sind wir einmal falsch abgebogen und unfreiwilligerweise den "Panoramaweg" über die Marienbrücke am Schloß Neuschwanstein vorbei. Das Schloß selbst ist mit Baugerüst und Flutlichtstrahlern nicht wirklich ein erhebender Anblick. Allerdings führte der Weg dahin über einen kleinen Felsvorsprung und während der Dauer des Abstiegs ist langsam Nebel im Tal aufgezogen.
Dank Umweg ein wenig später als erwartet/erhofft haben wir es dann doch noch zum Parkplatz geschafft. Zuhause habe ich dann einige Zeit später zum ersten Mal die Filme selbst entwickelt (C41 mit dem Tetenal-Kit und der Jobo CPE2), aber das ist vielleicht einen anderen Blog-Beitrag wert...
Fazit:
der Rucksack ist seinen (unverschämt hohen) Preis wert, ausnahmsweise hielten sich die Rückenschmerzen mal in Grenzen.
Der neue Kodak Portra 400 wird vermutlich mein bevorzugter Film für Nachtphotographie und Langzeitbelichtungen (löst damit den Portra 160VC ab).
Mein Zeh ist blau. Keine Ahnung warum, wirklich gedrückt haben die Wanderschuhe nicht, aber er ist blau und geschwollen. Irgendwas mache ich noch falsch.
]]>{"login"=>"volzo", "email"=>"christopher@volzo.de", "display_name"=>"volzo", "first_name"=>"", "last_name"=>""}christopher@volzo.deHallo Welt!2011-12-17T02:17:32+01:002011-12-17T02:17:32+01:00http://volzo.de/posts/hallo-weltEndlich. Nachdem die Wordpress-Installation gefühlt mehrere Jahre auf dem Webspace rumlag, bin ich nun endlich mal dazu gekommen alles einzurichten und das Blog anzupassen. Völlig festlegen will ich mich da nicht, aber hautpsächlich wird es wohl um Photographie gehen. Irgendwo muss ja hin was bei flickr & ähnlichem nicht mehr in die Bildkommentare reinpasst.]]>{"login"=>"volzo", "email"=>"christopher@volzo.de", "display_name"=>"volzo", "first_name"=>"", "last_name"=>""}christopher@volzo.de
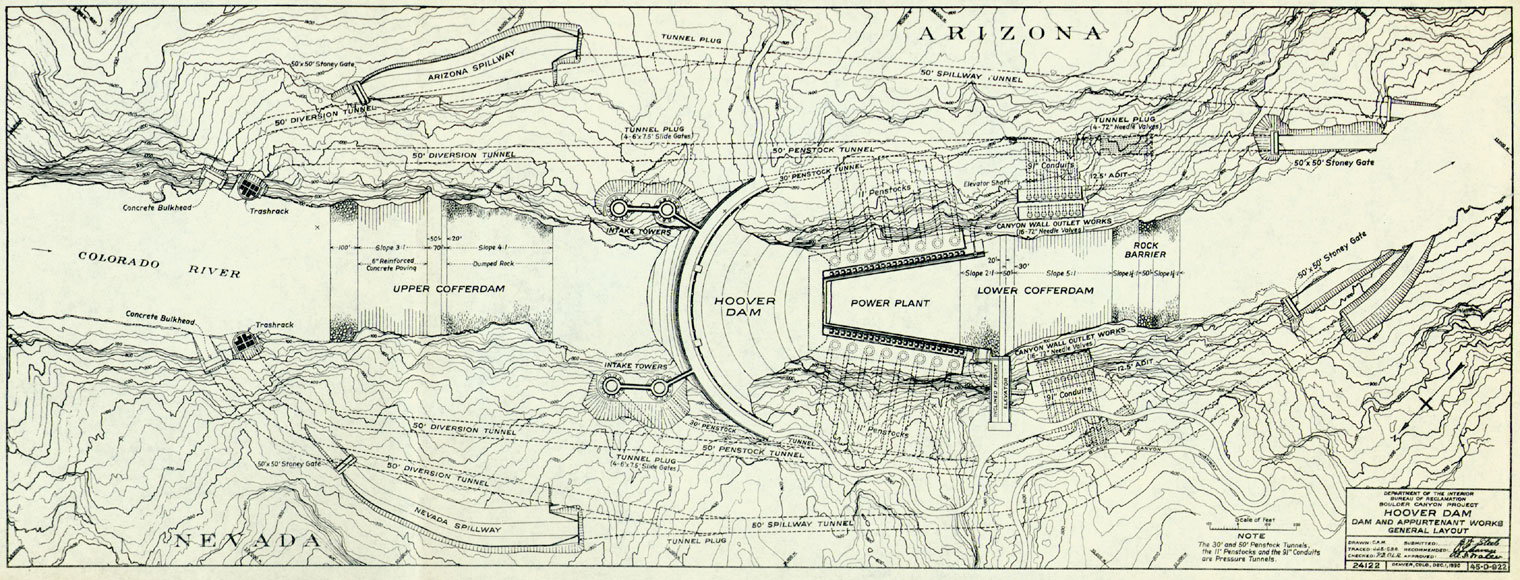
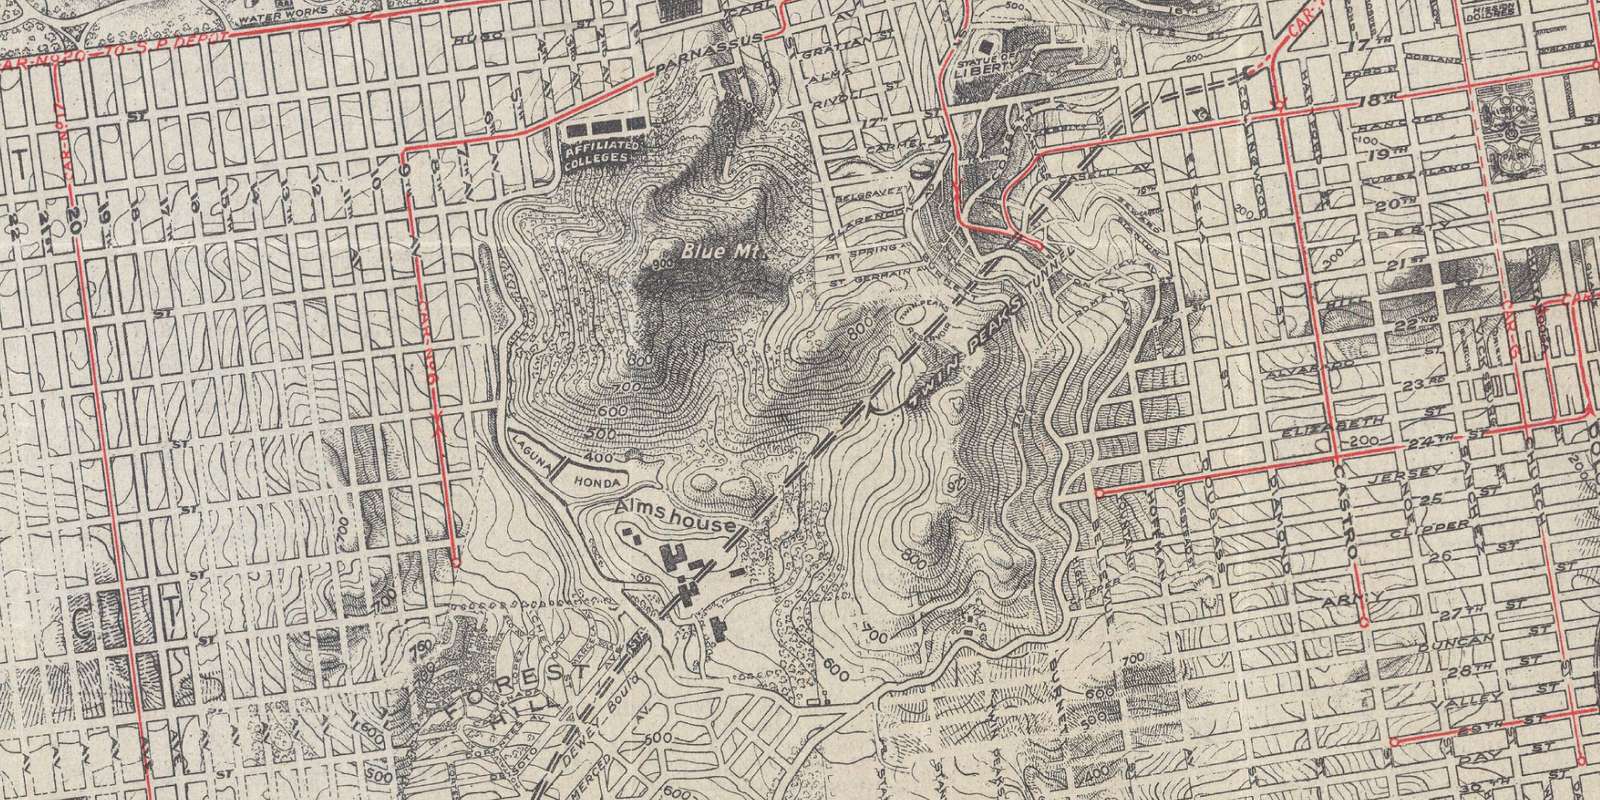
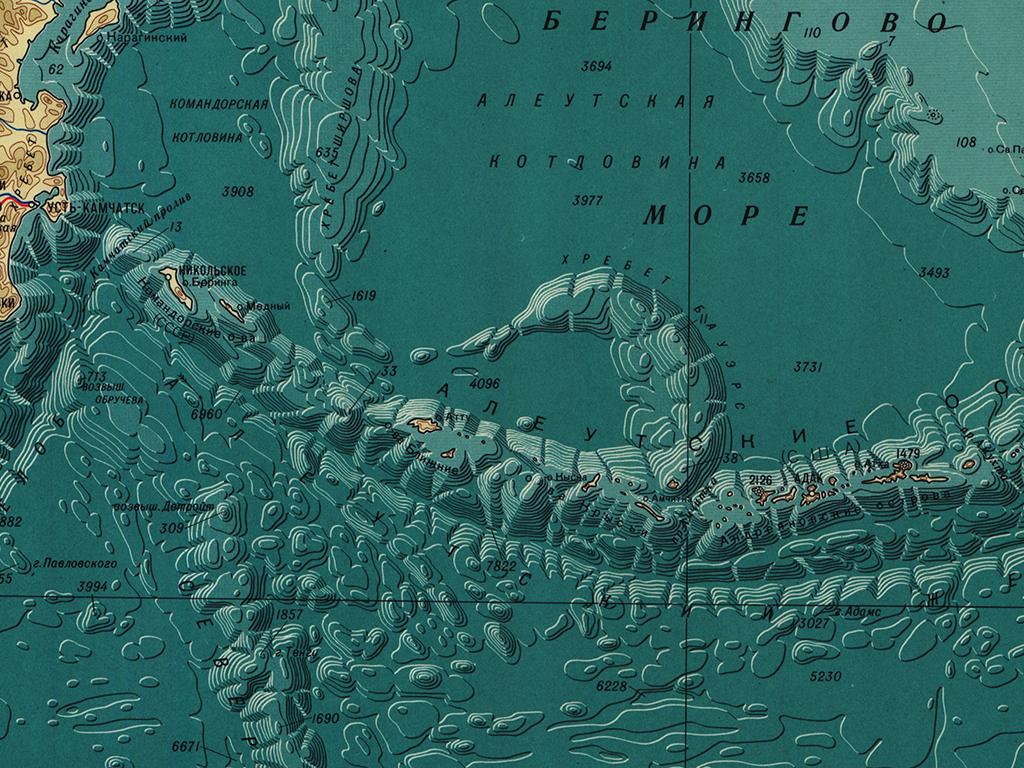
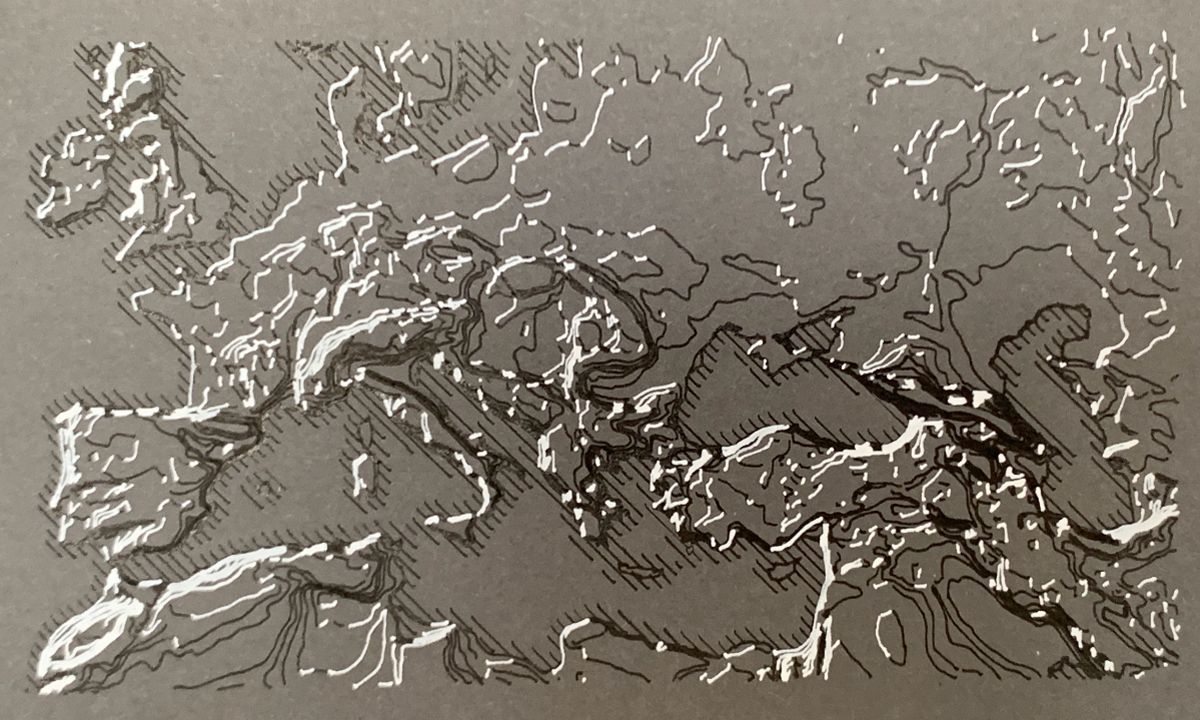
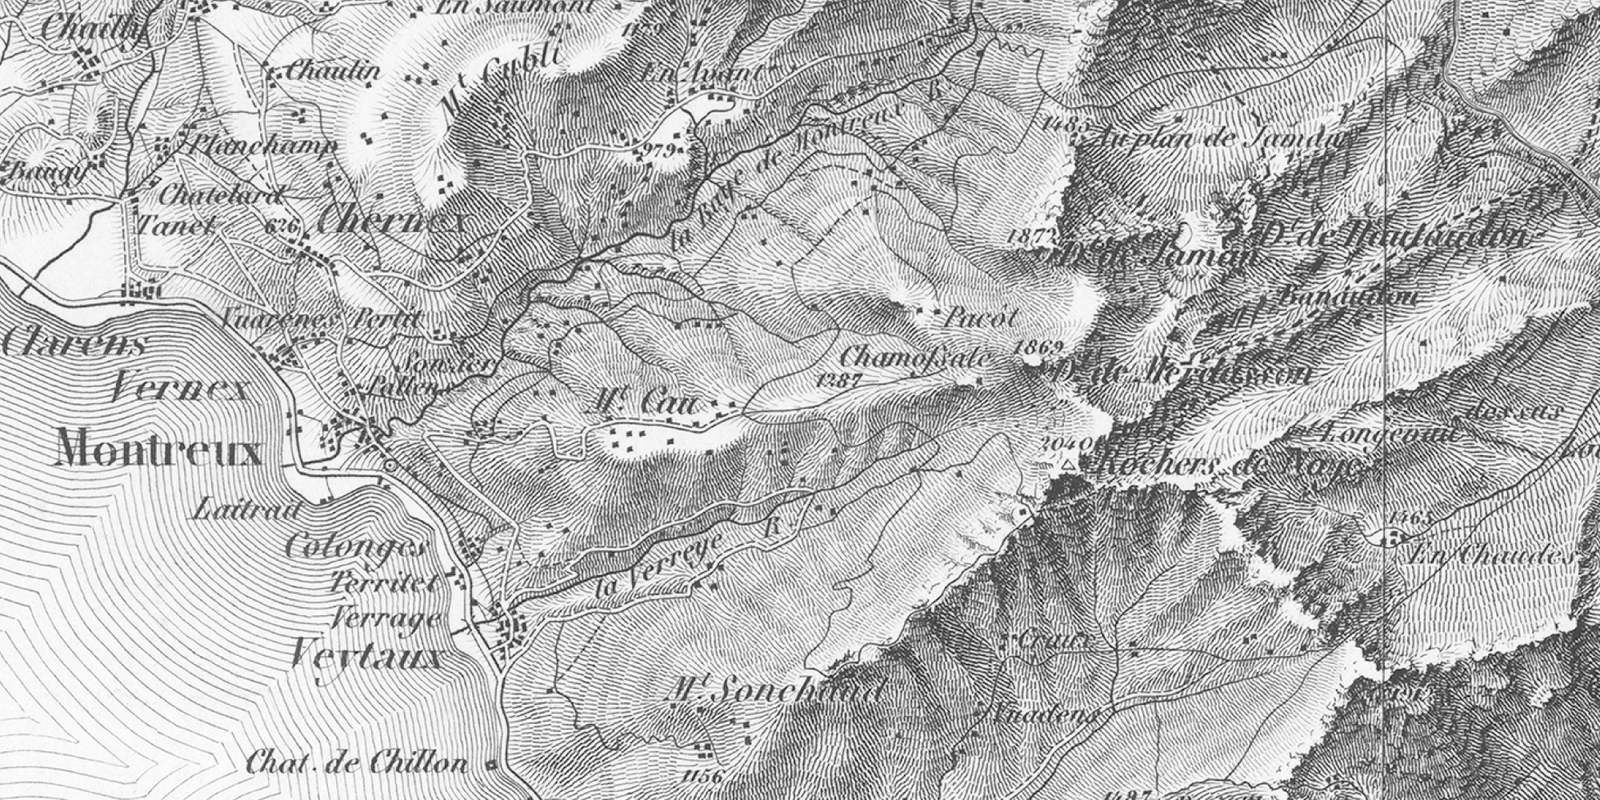
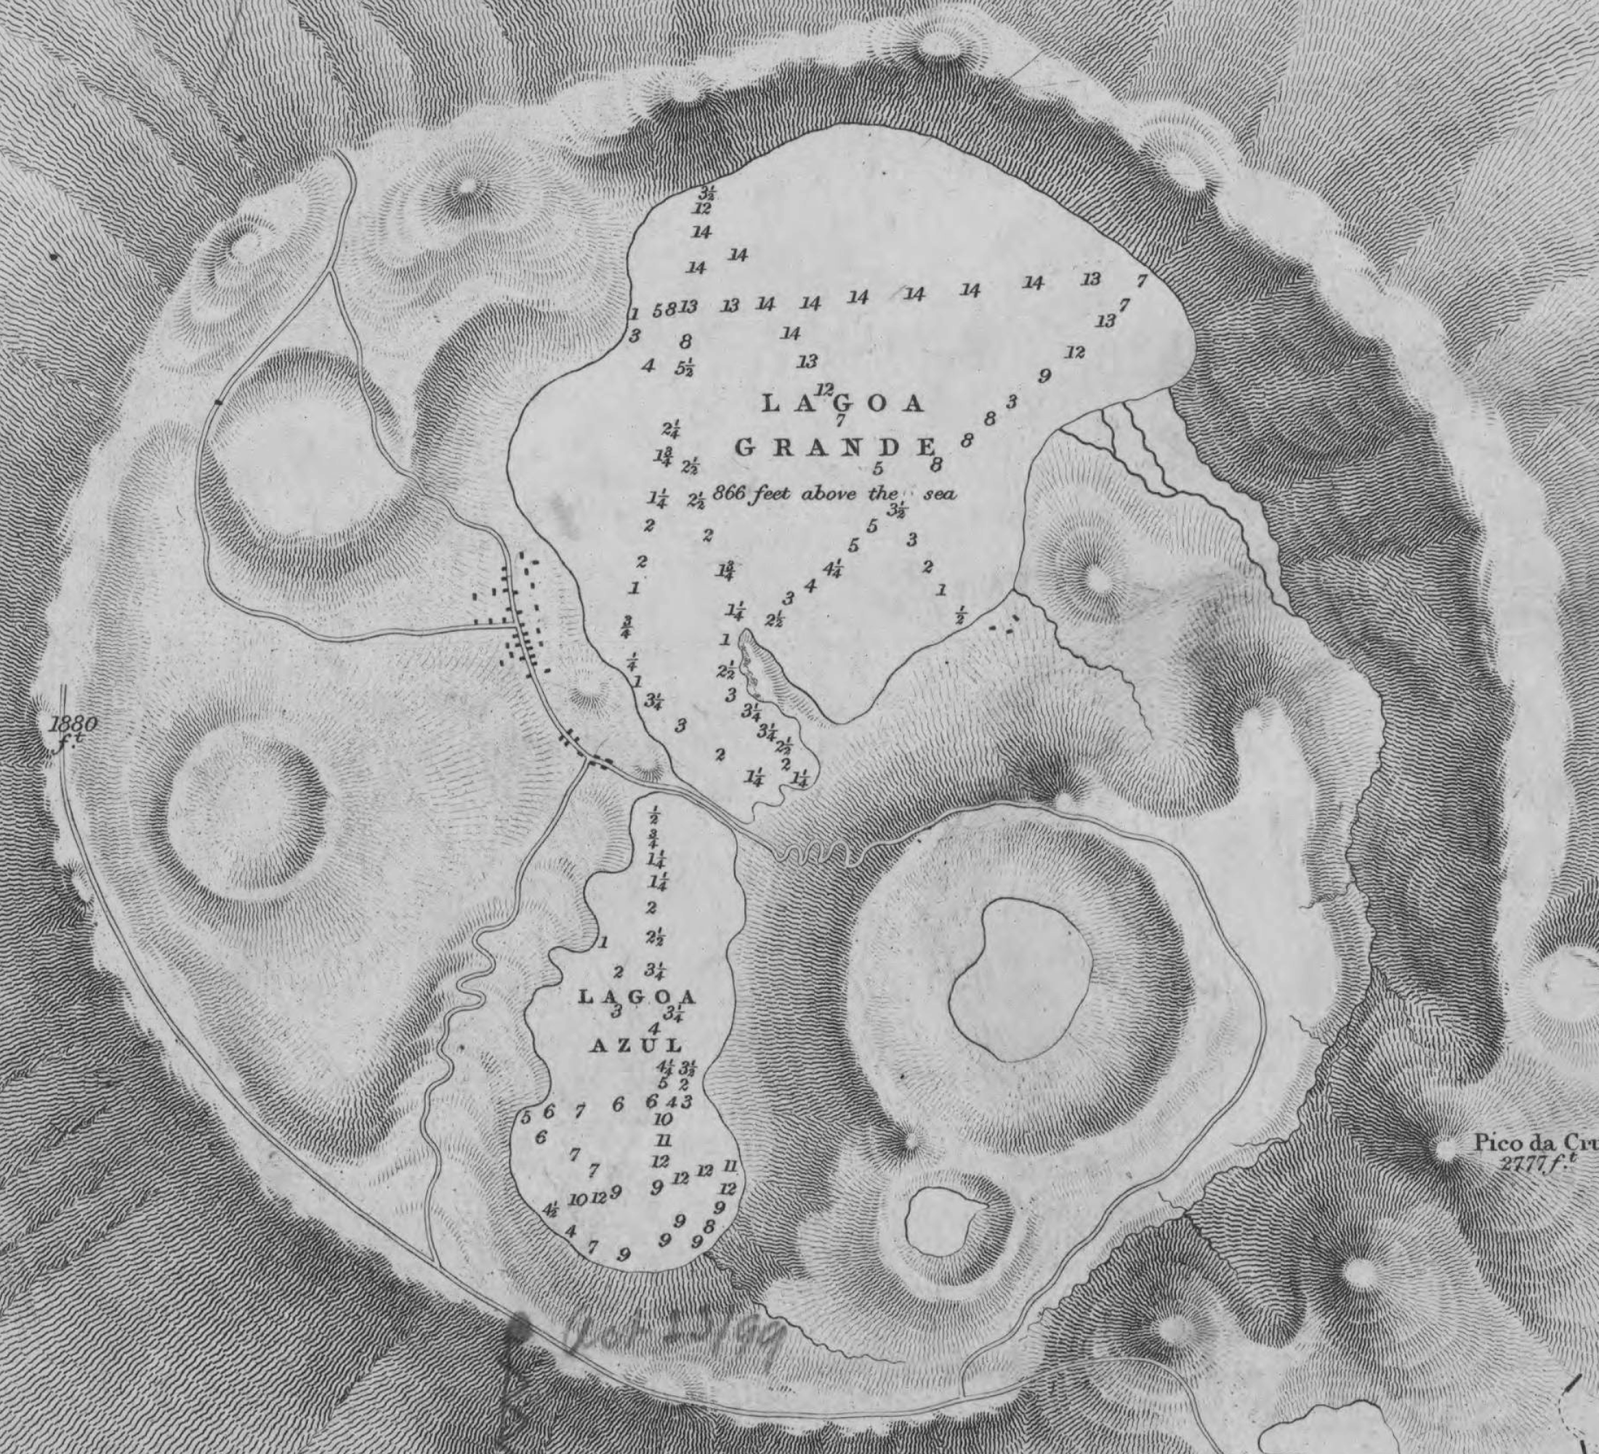
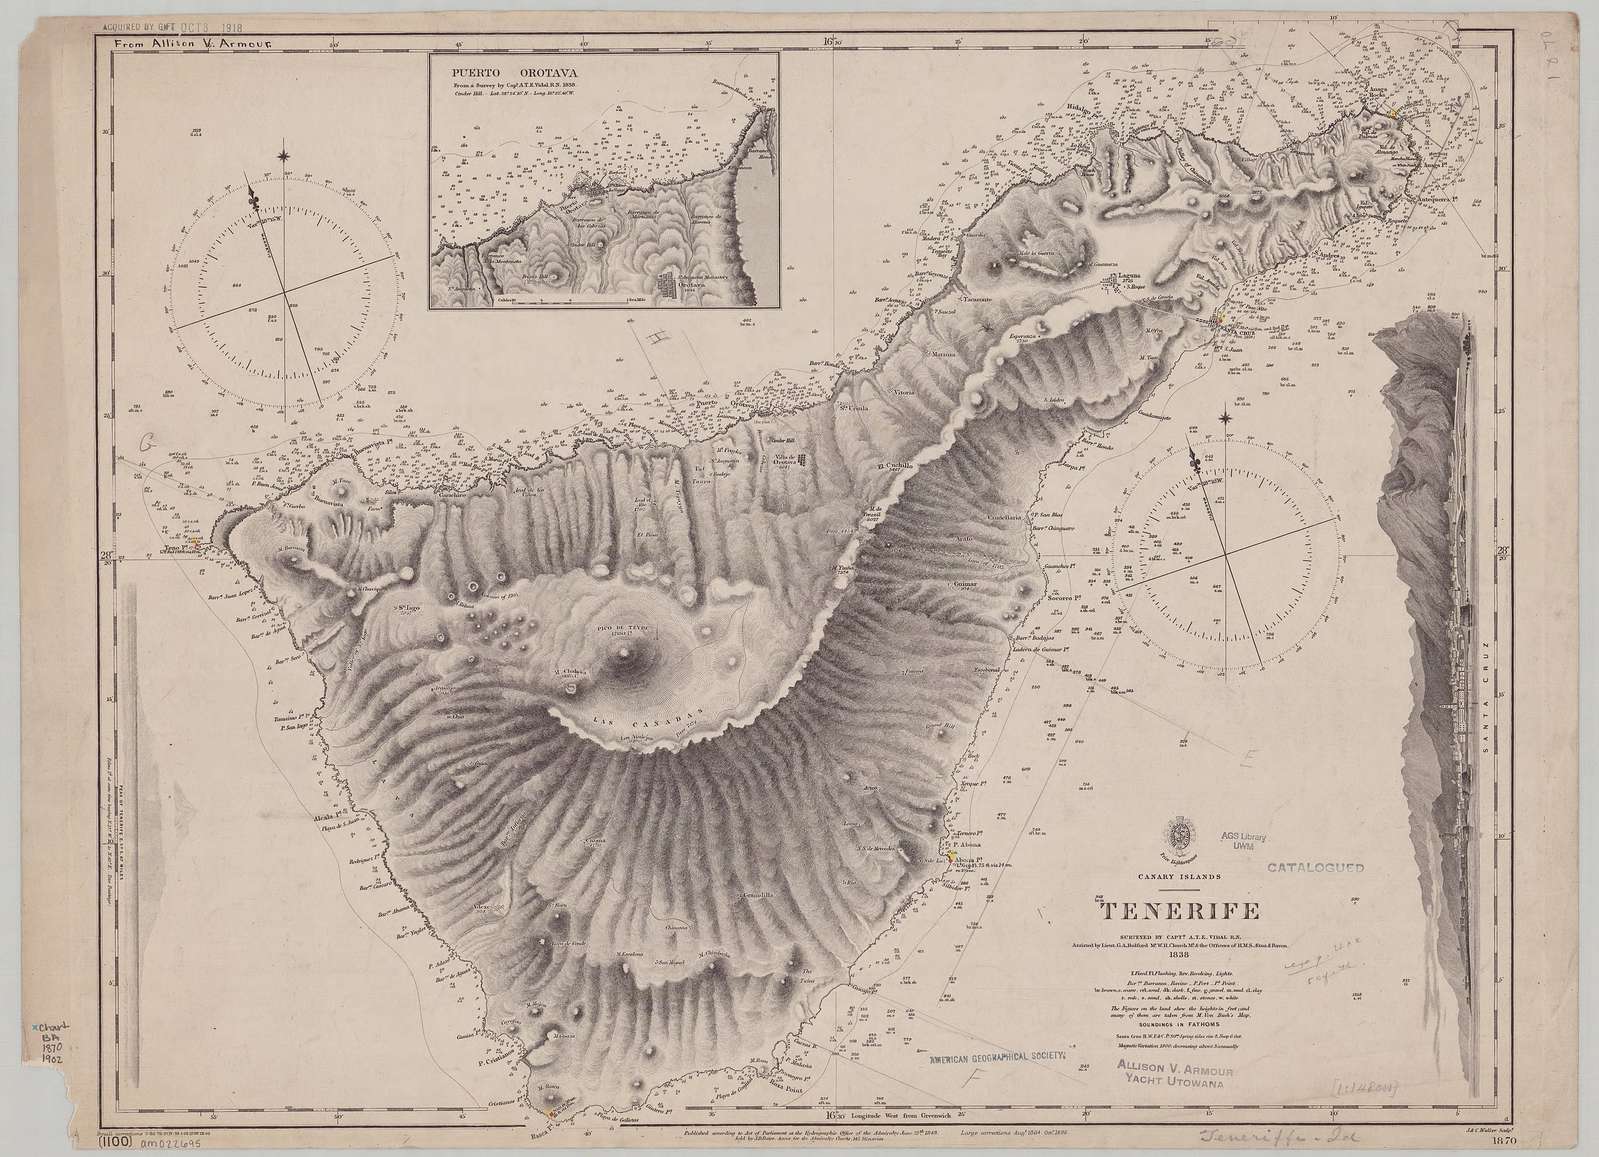 Admiralty Chart No 1870c Tenerife, Published 1848
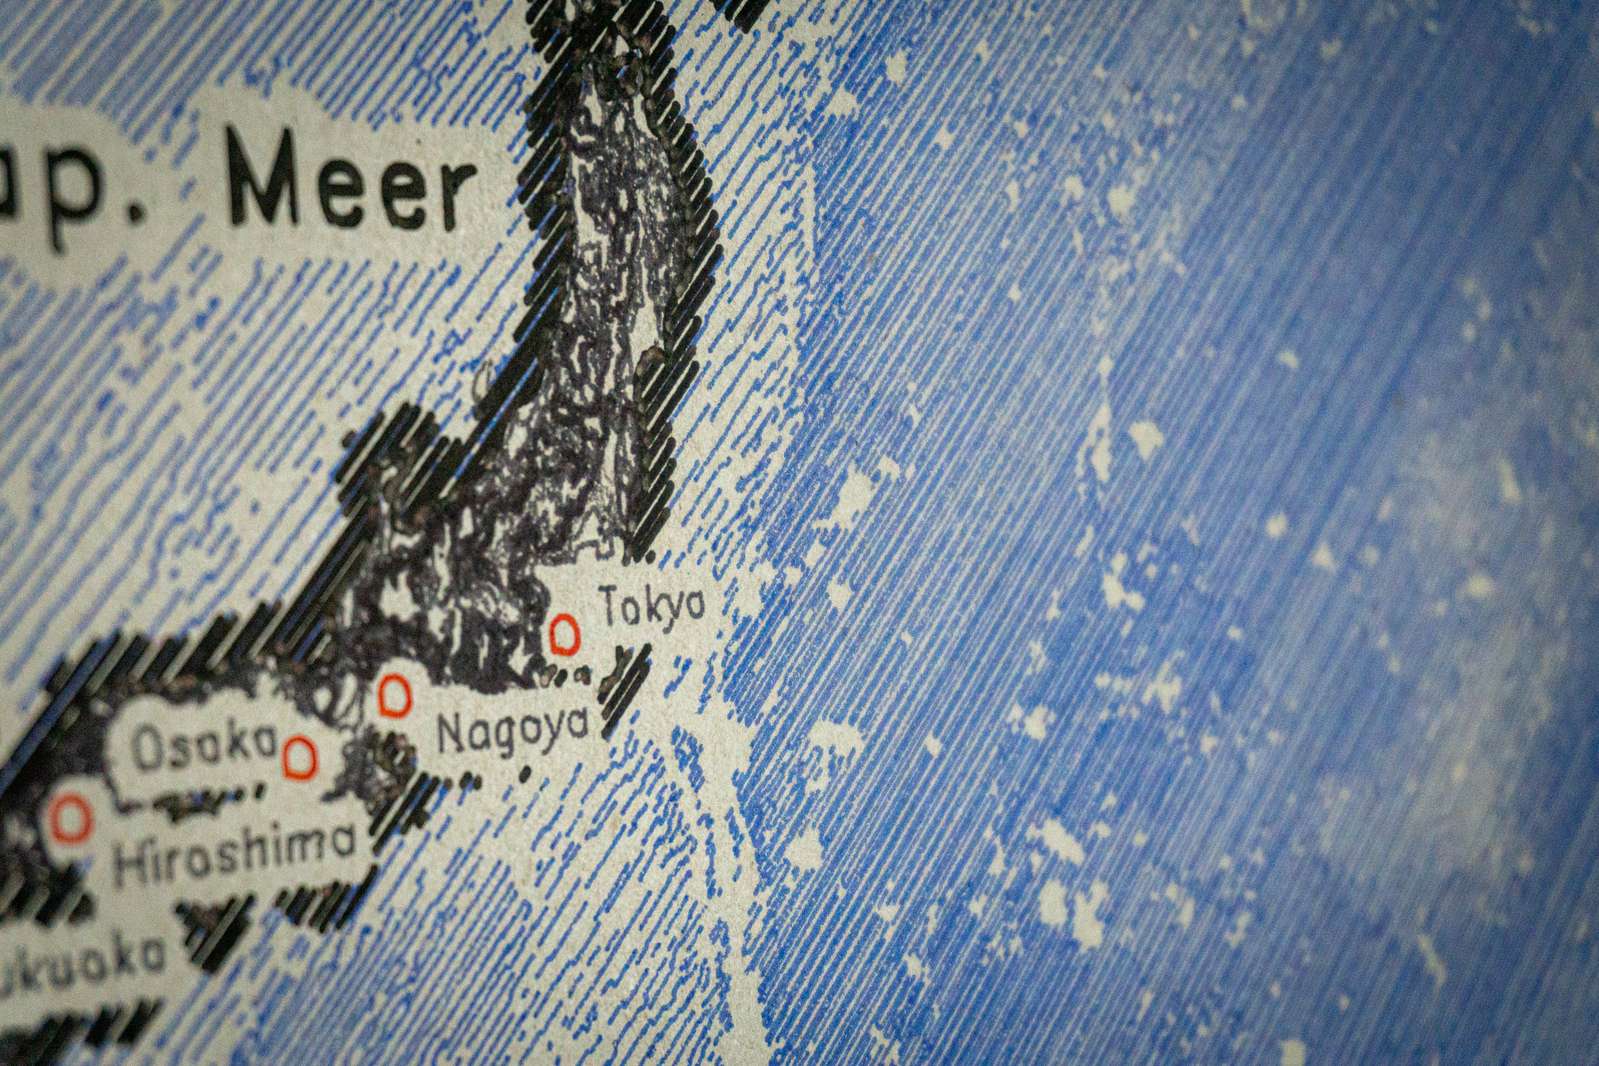 Sometimes historical maps do not use parallel lines but make use of shrinking outlines, especially for coastlines:
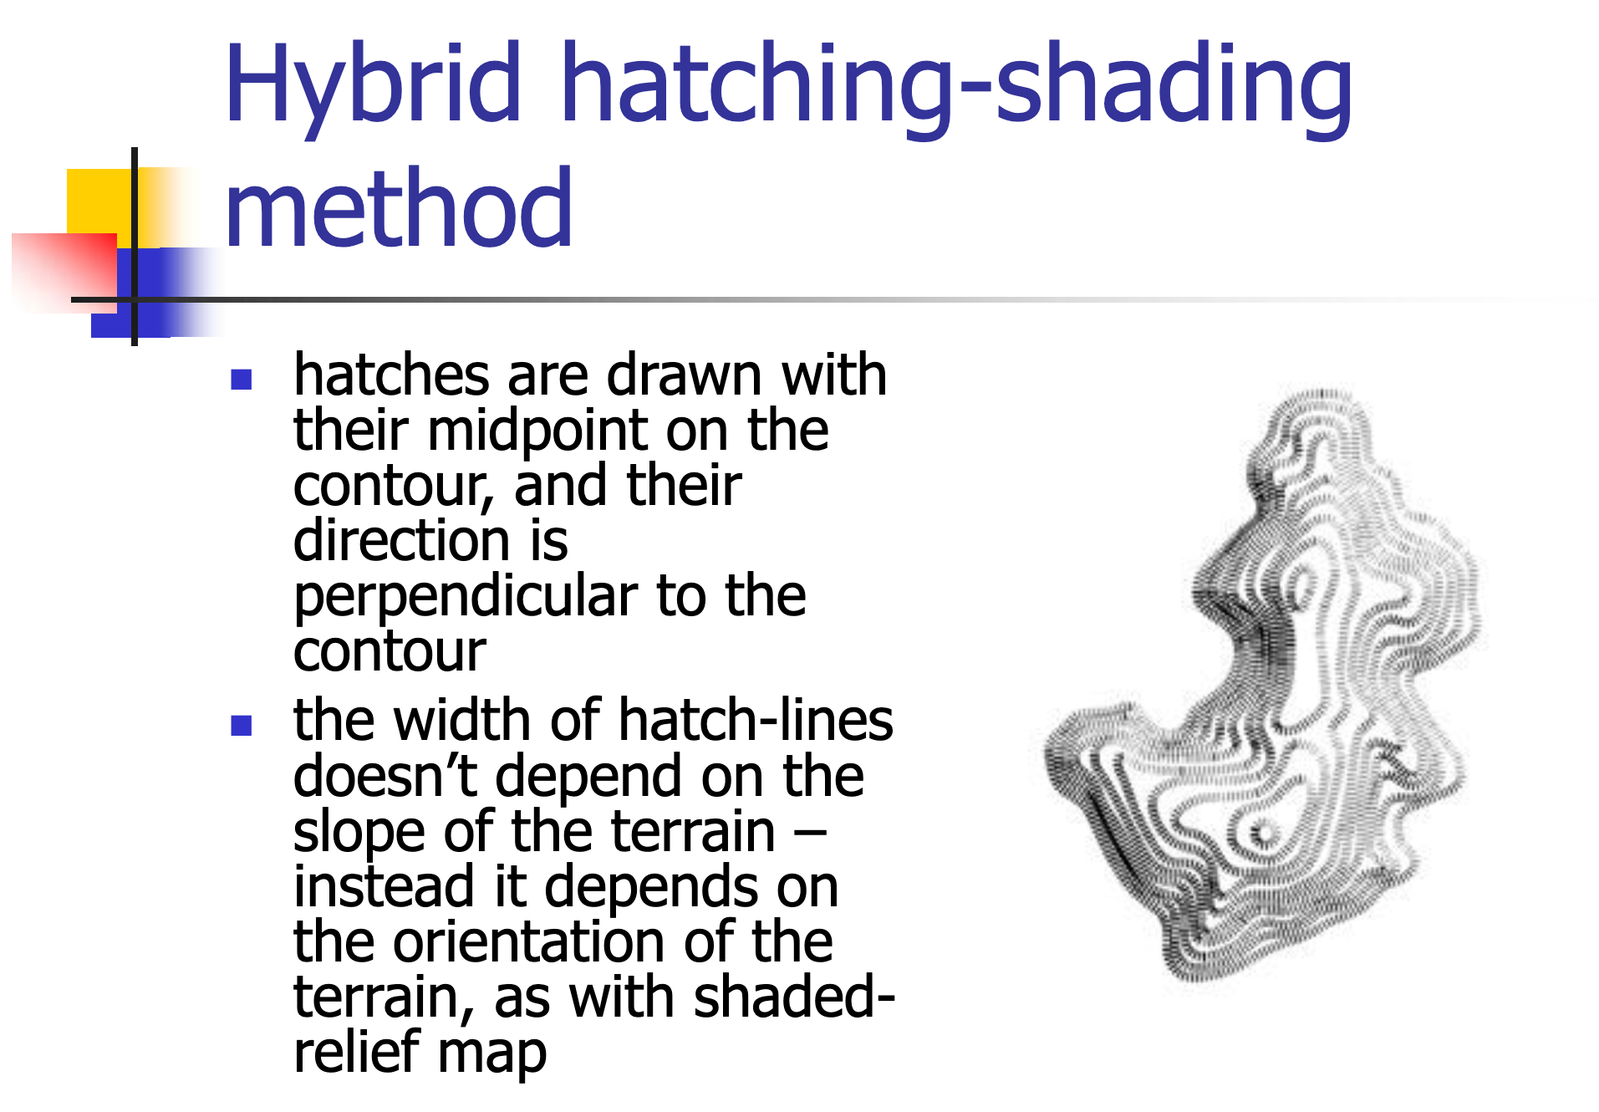
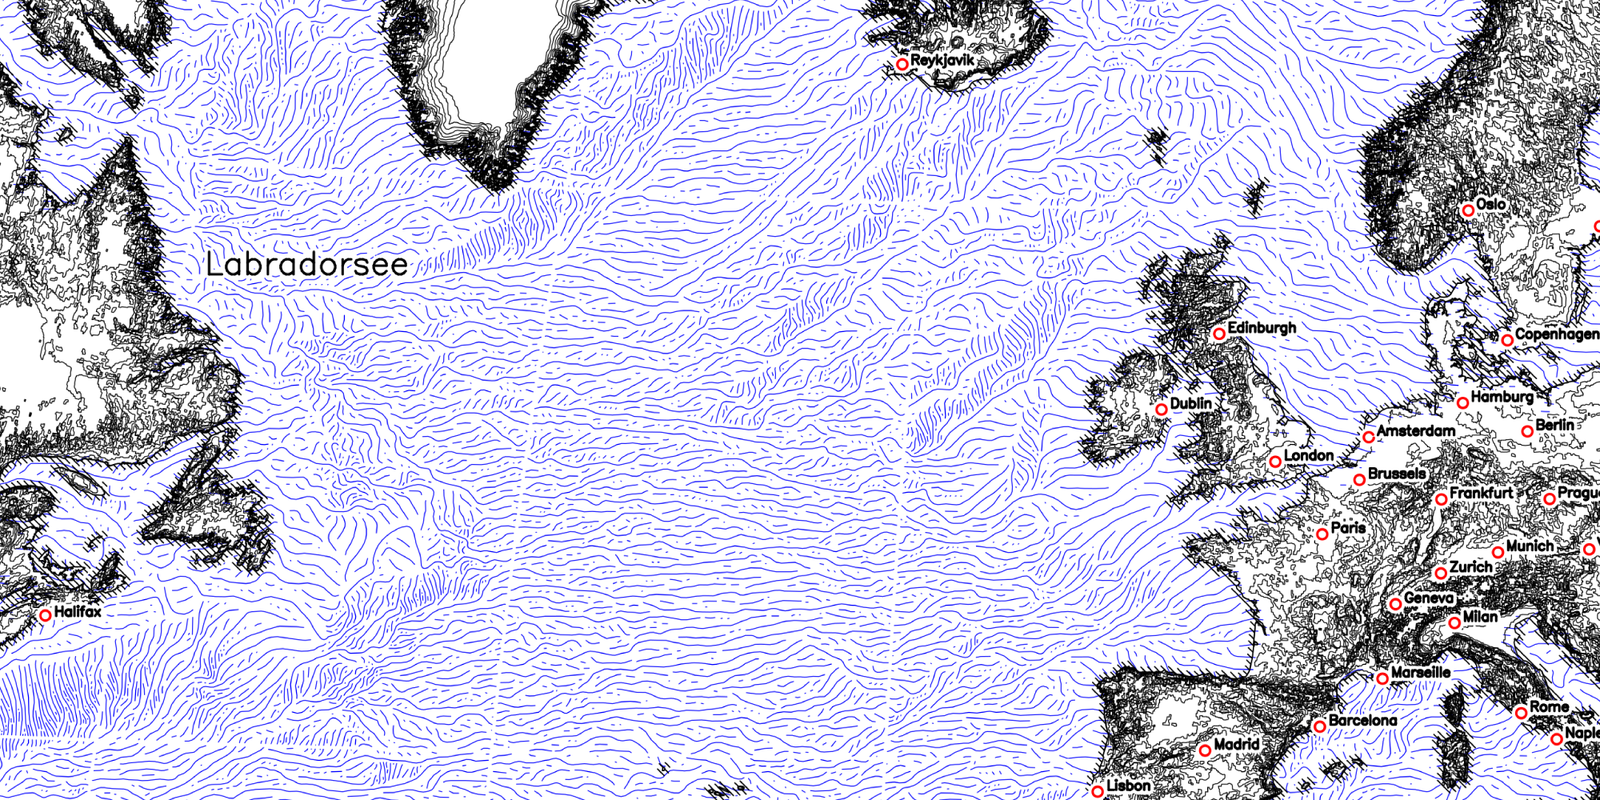 Using a Digital Elevation Model the angle and magnitude of elevation changes (basically the steepness of a slope and its direction) can be treated like a vector flow field. This allows to orient free-flowing hatching lines to align with the shape of the surface. The example above has been generated with my implementation of the algorithm in the paper Creating Evenly-Spaced Streamlines of Arbitrary Density by Bruno Jobard and Wilfrid Lefer.
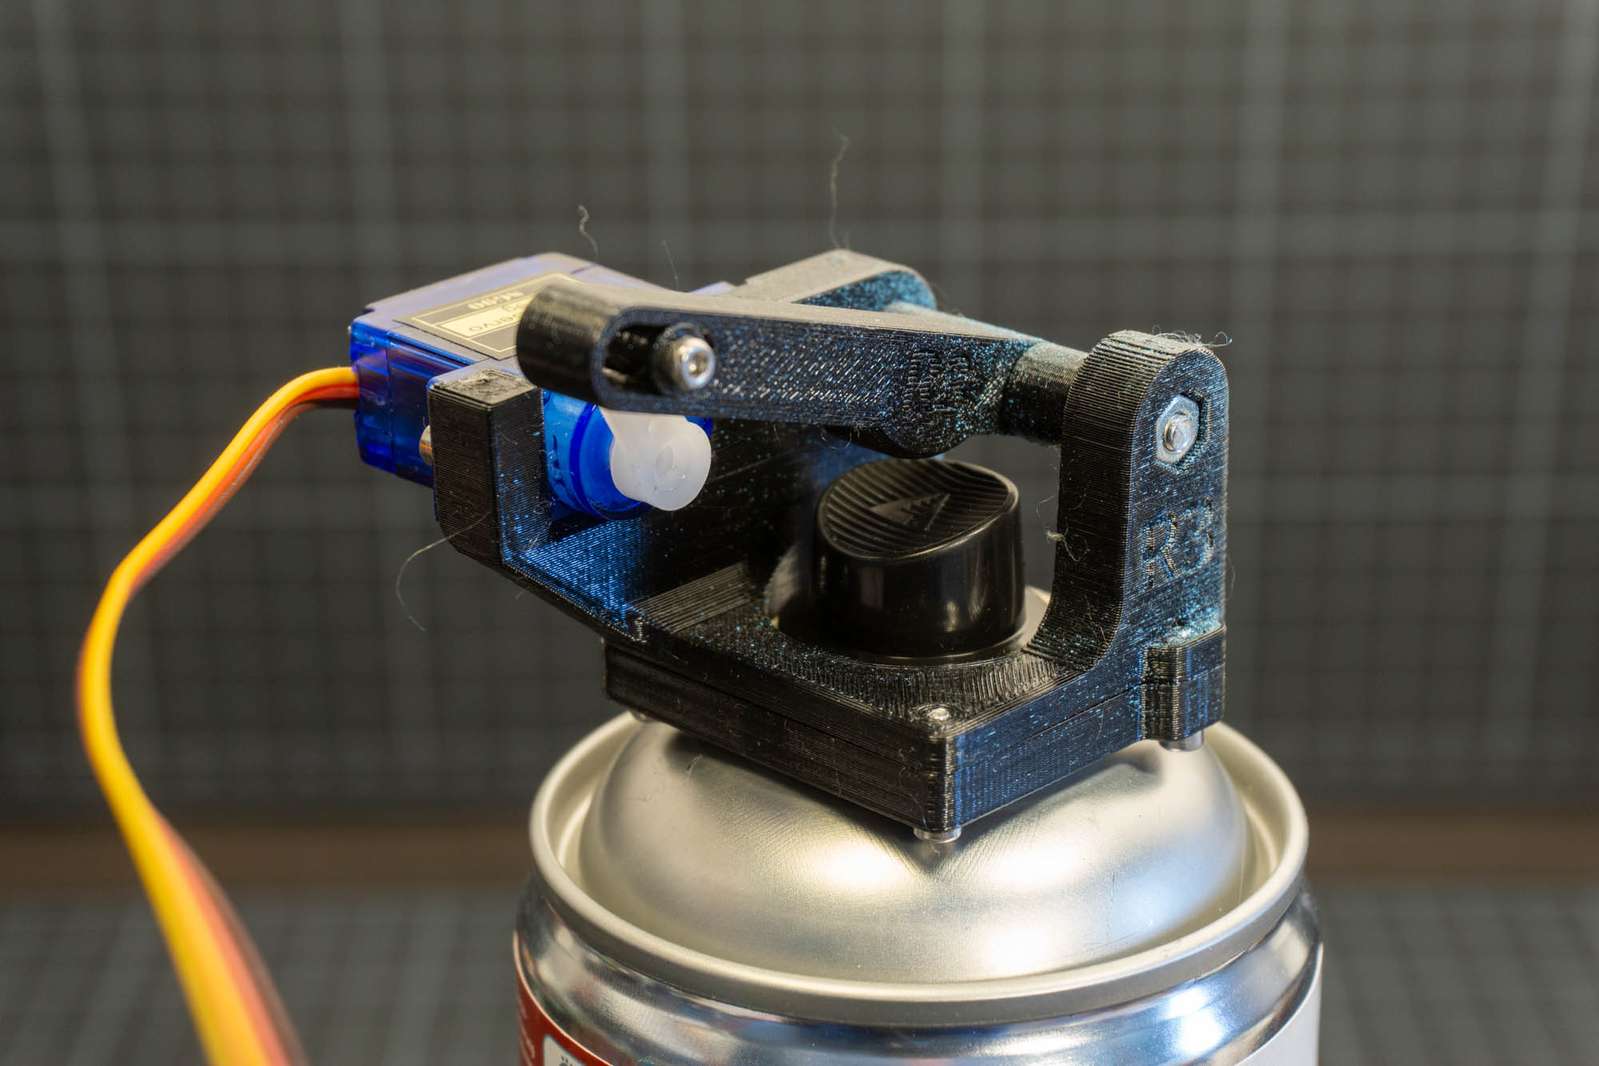
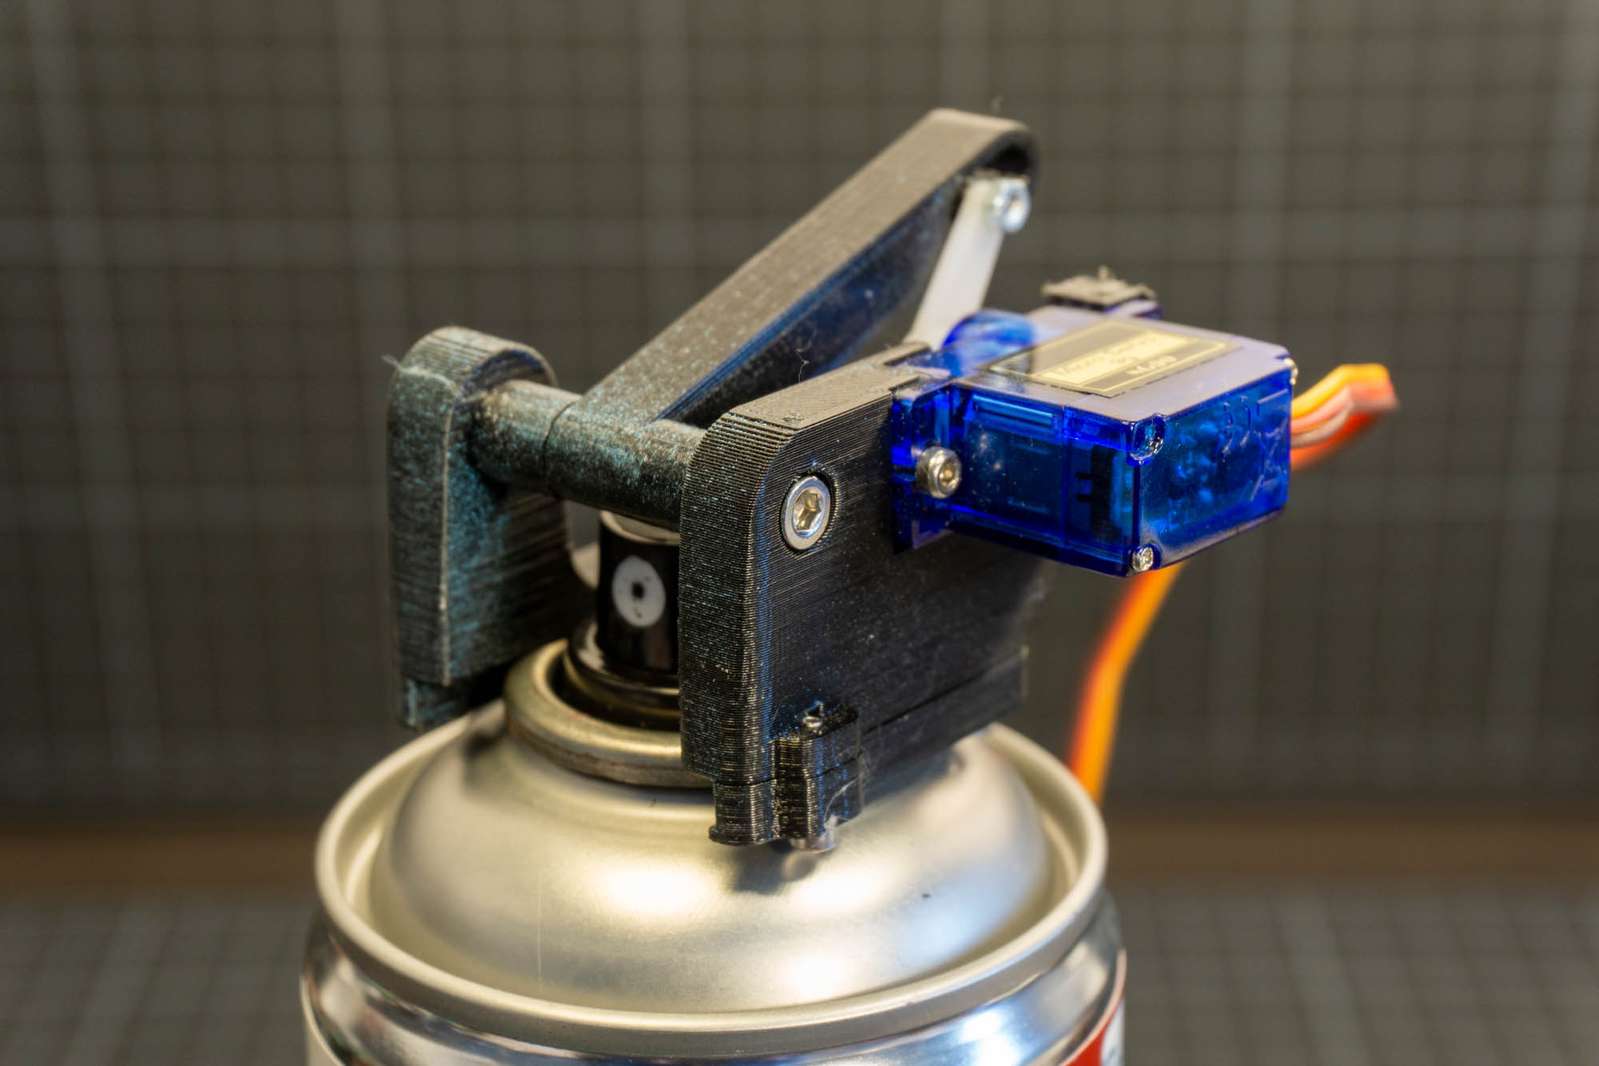
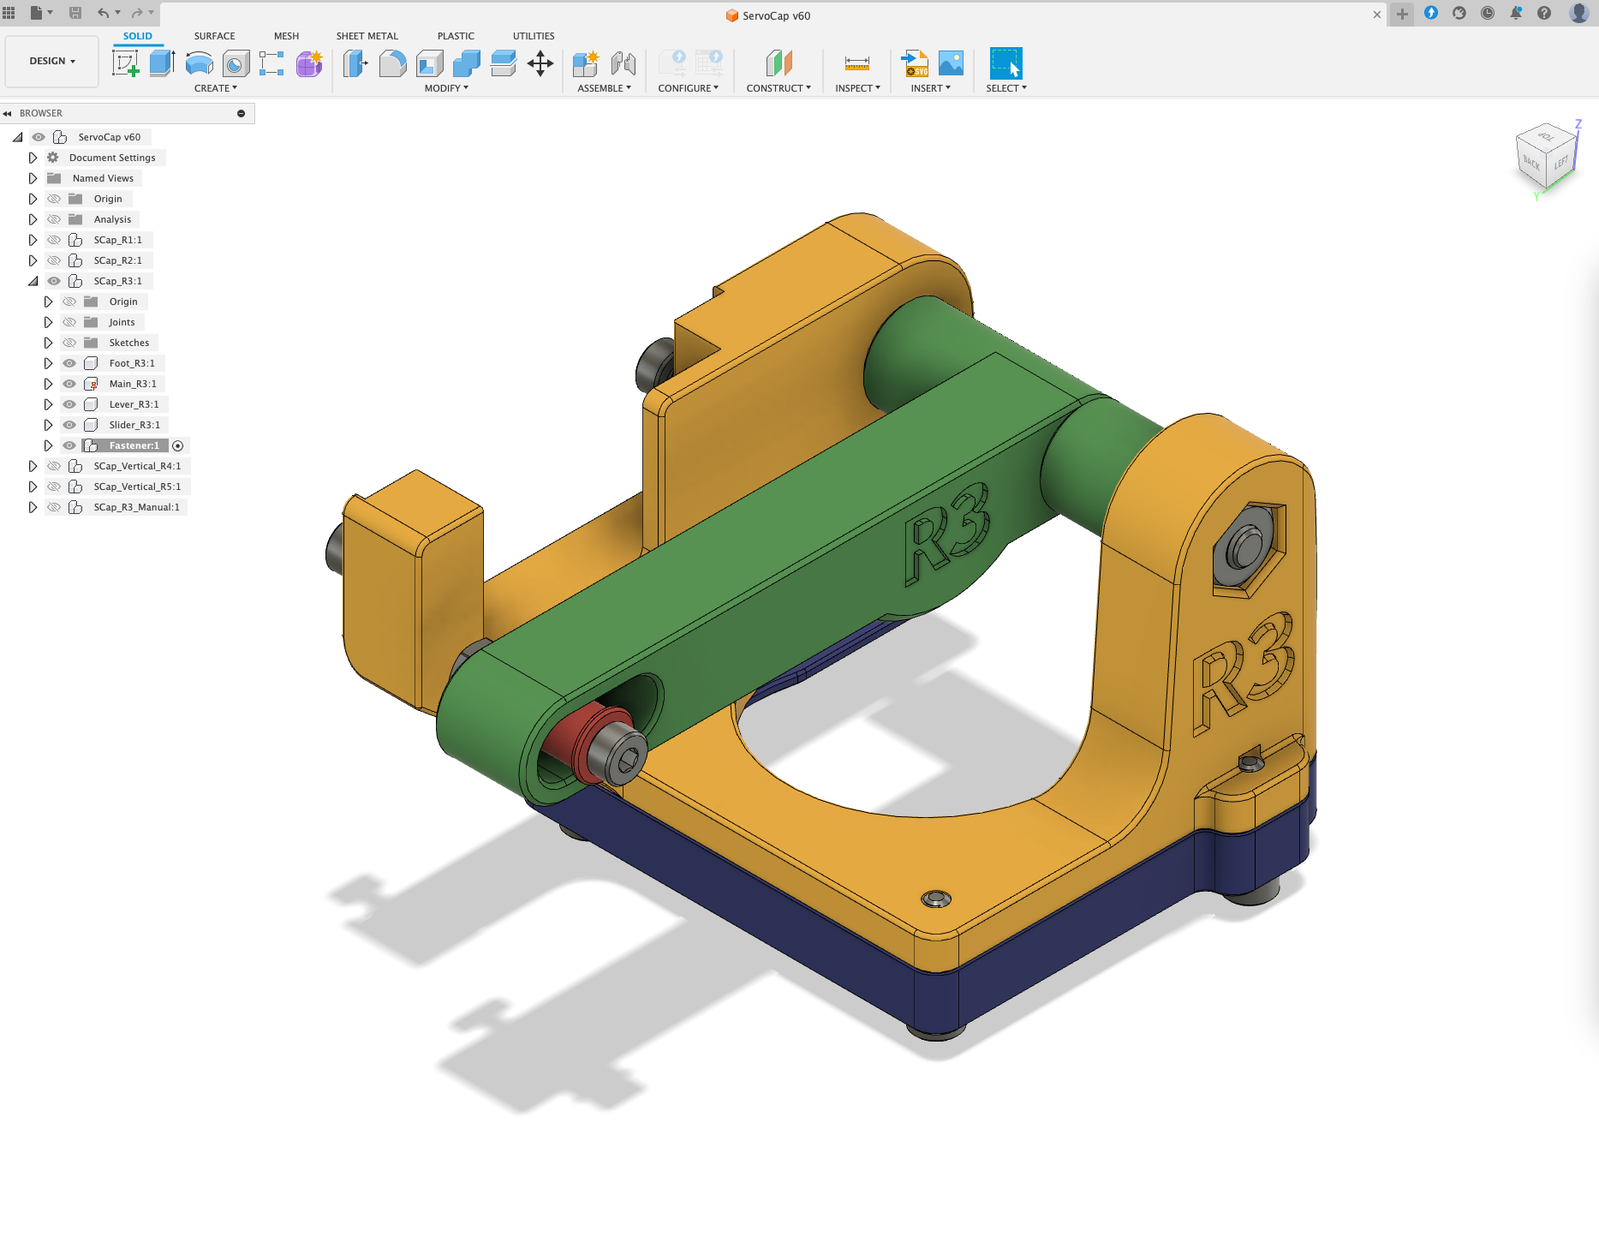

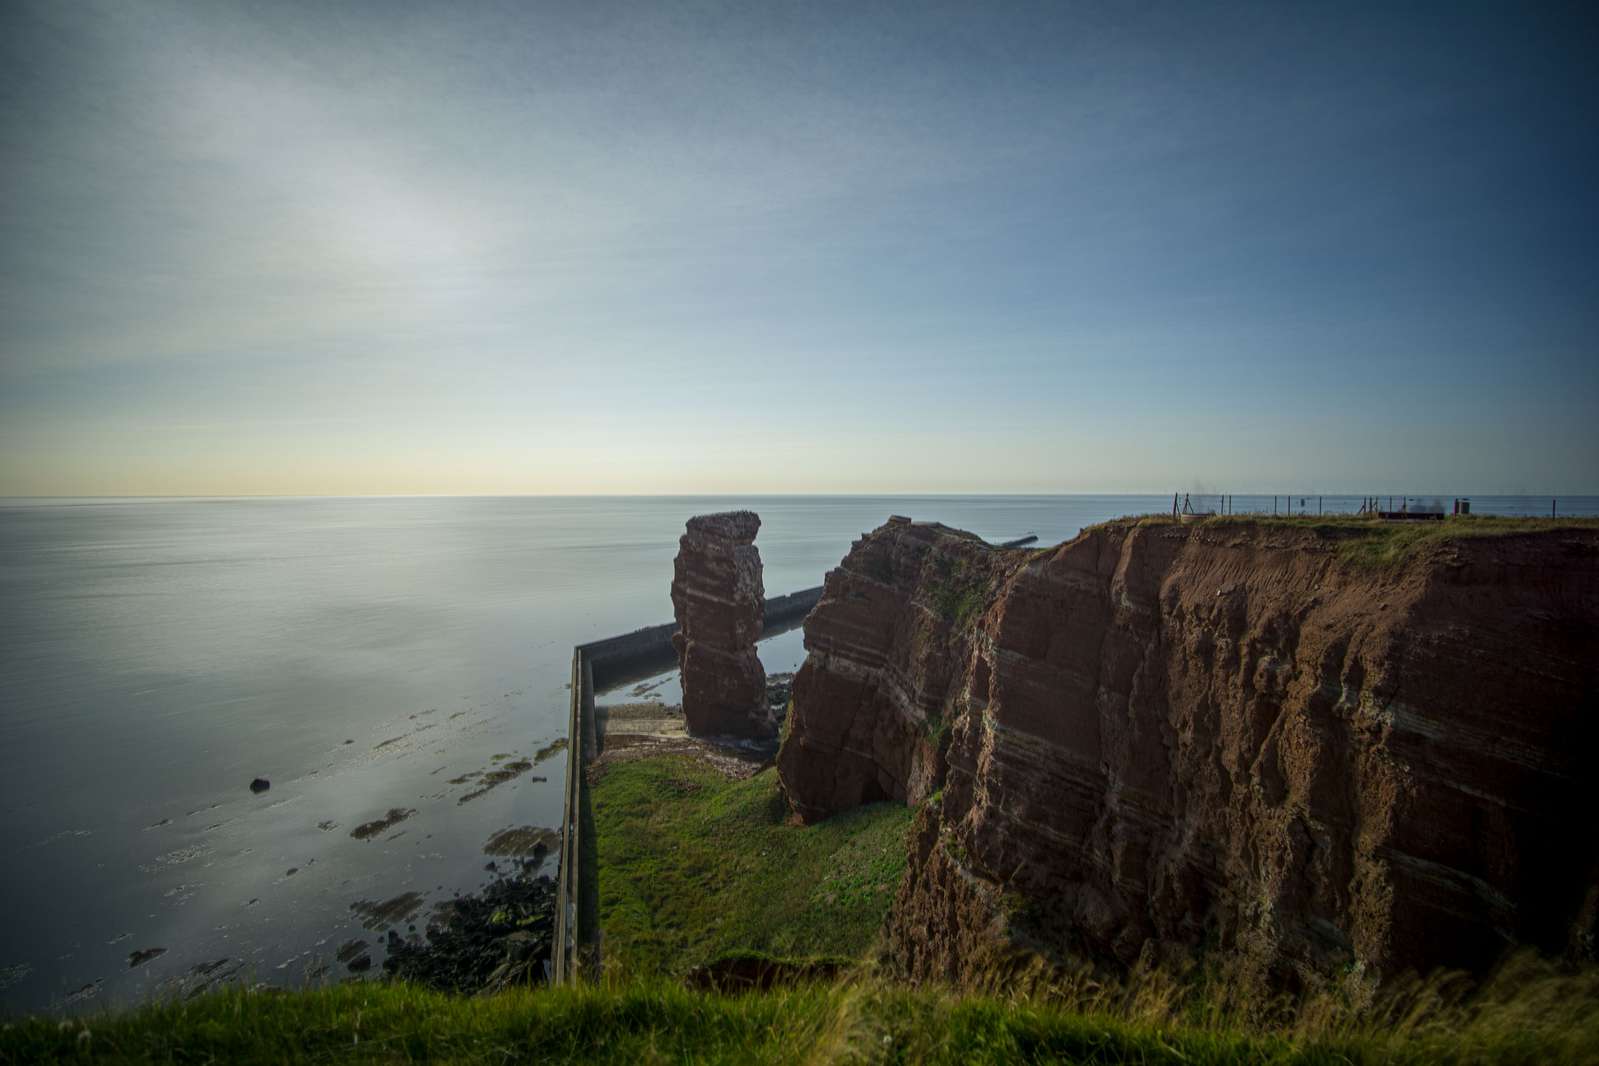
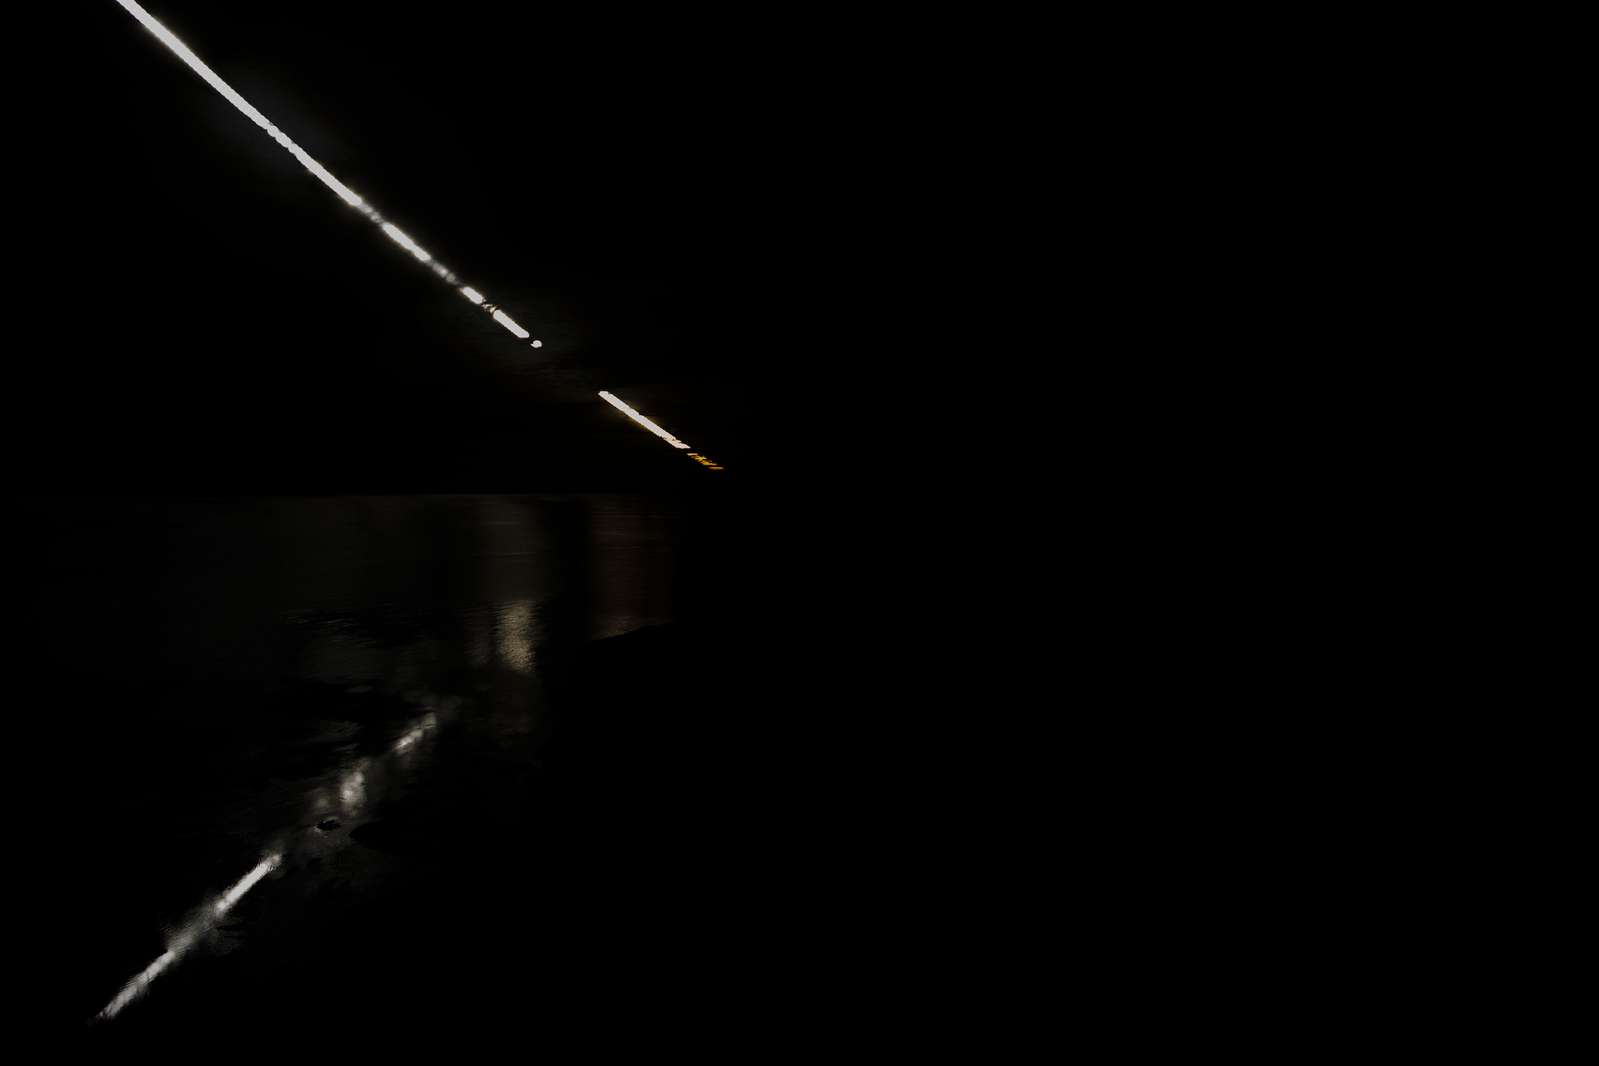
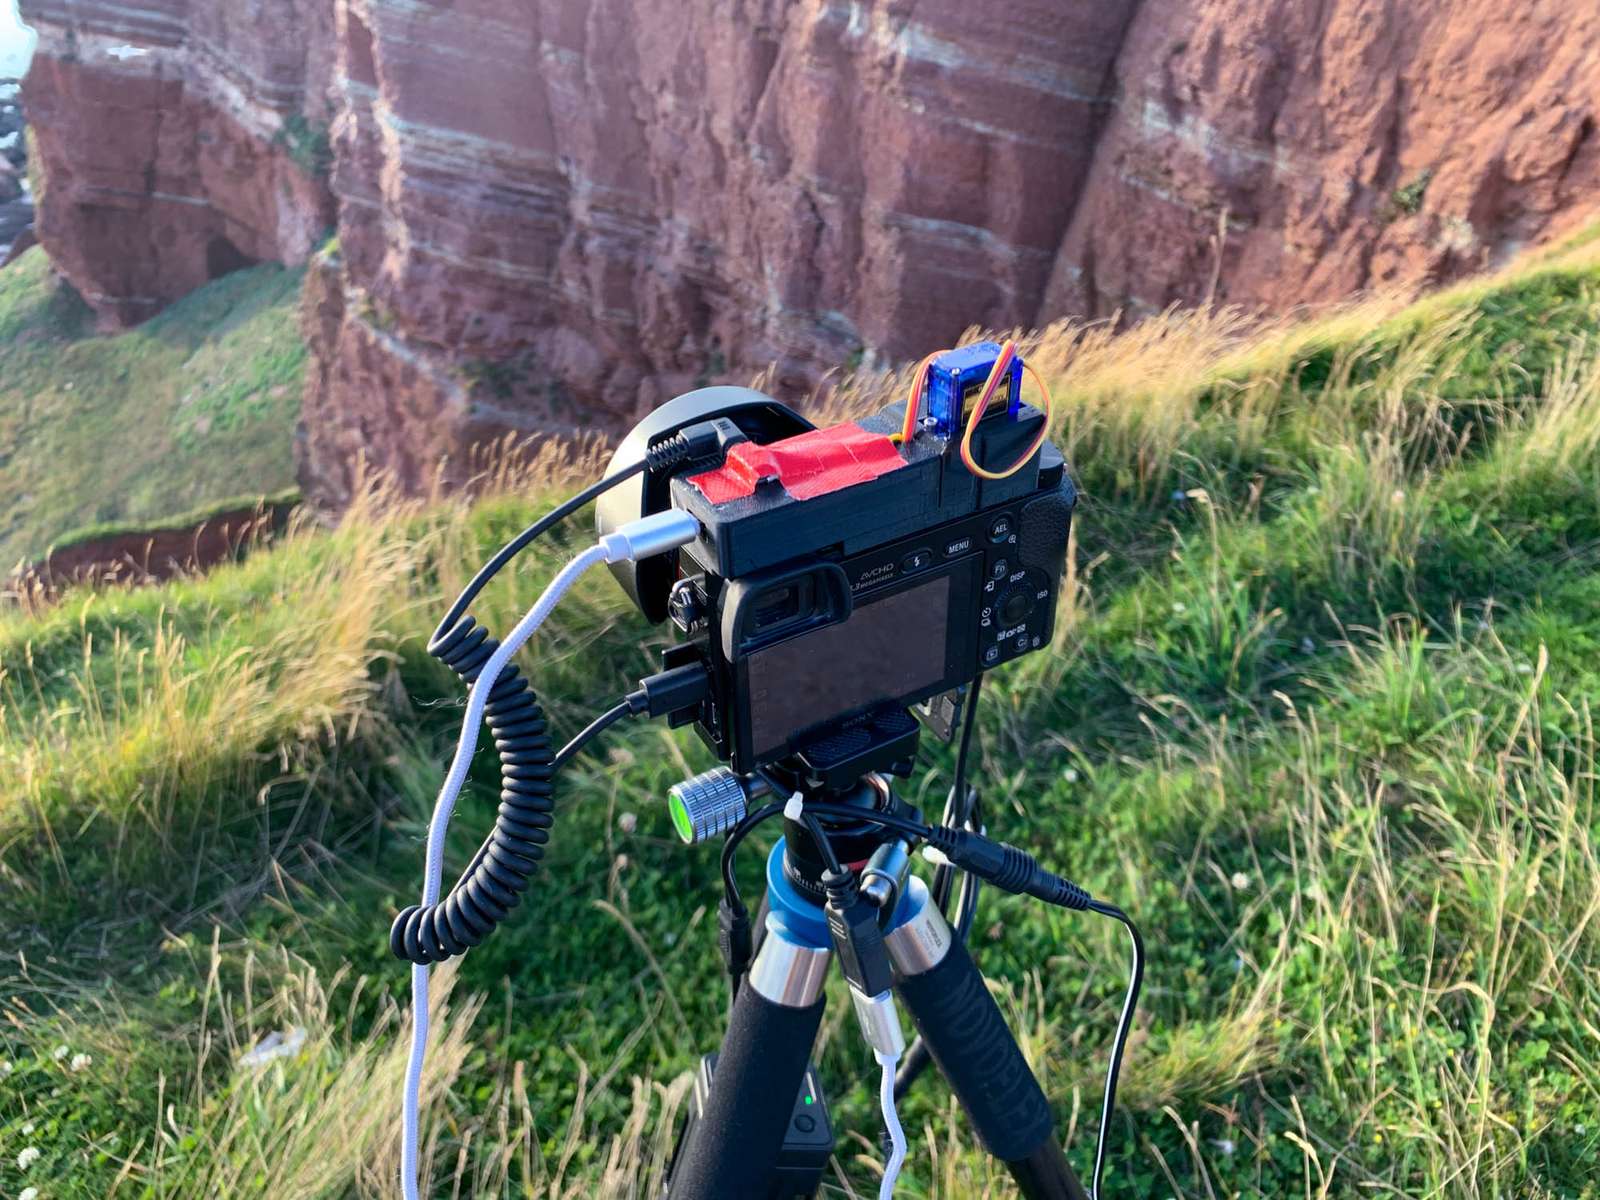

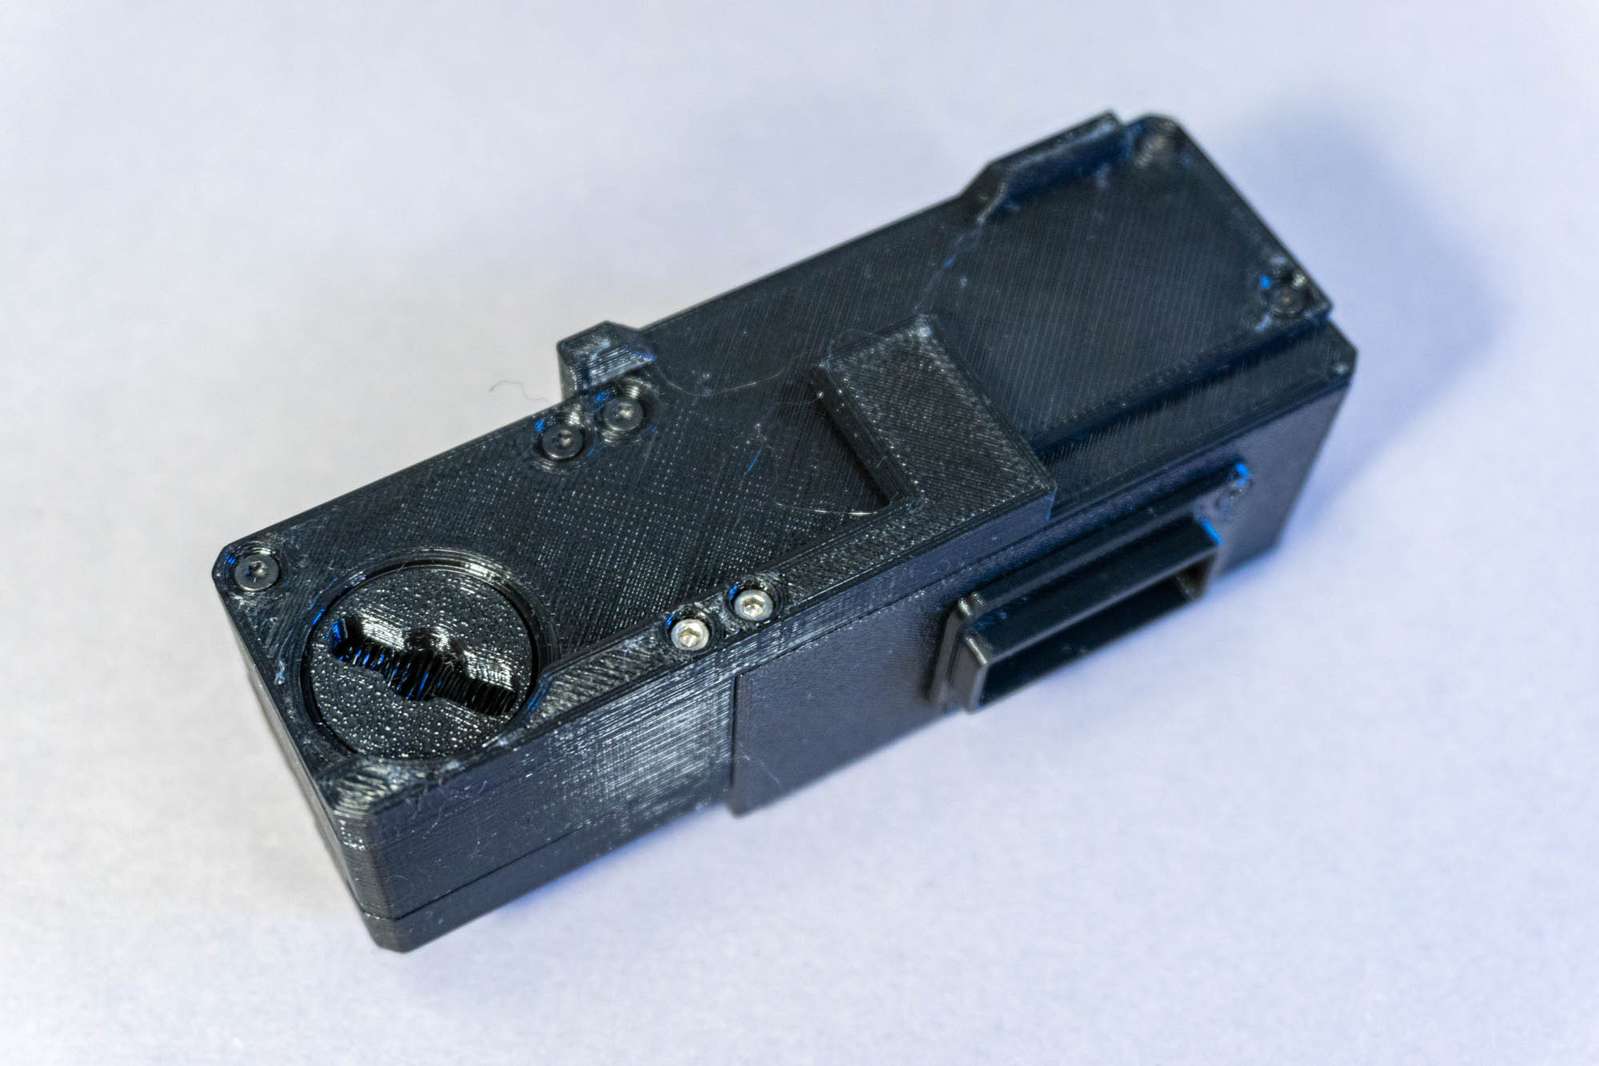
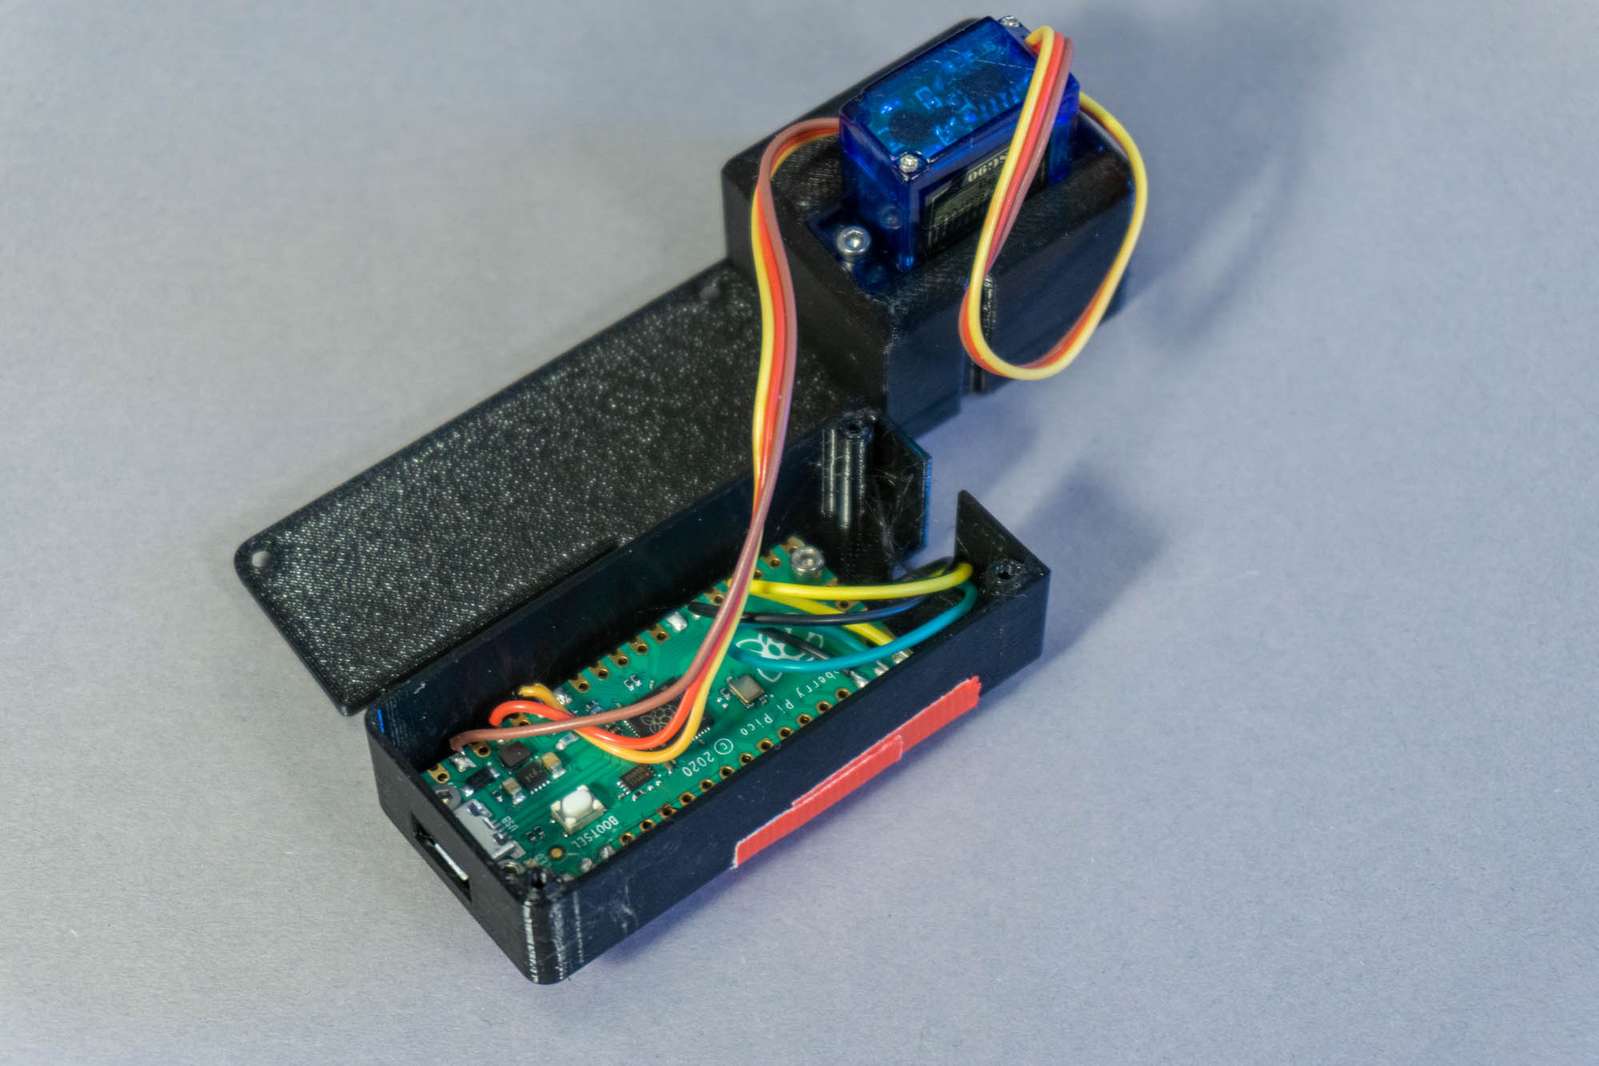
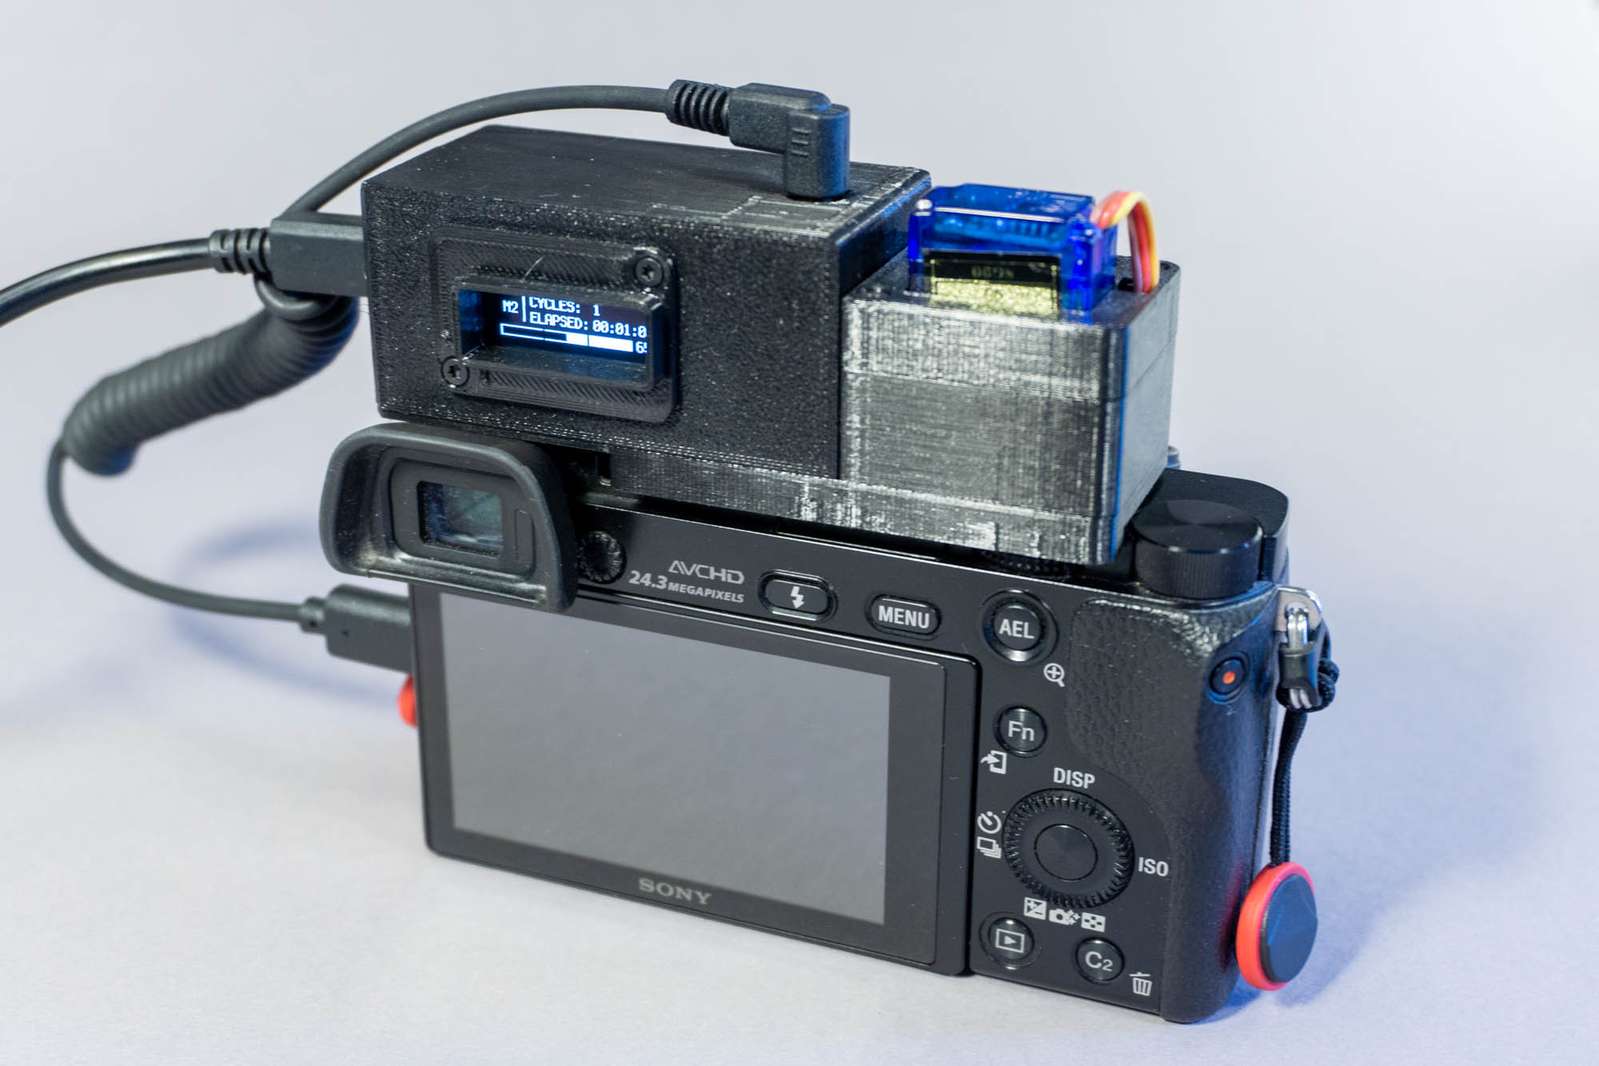
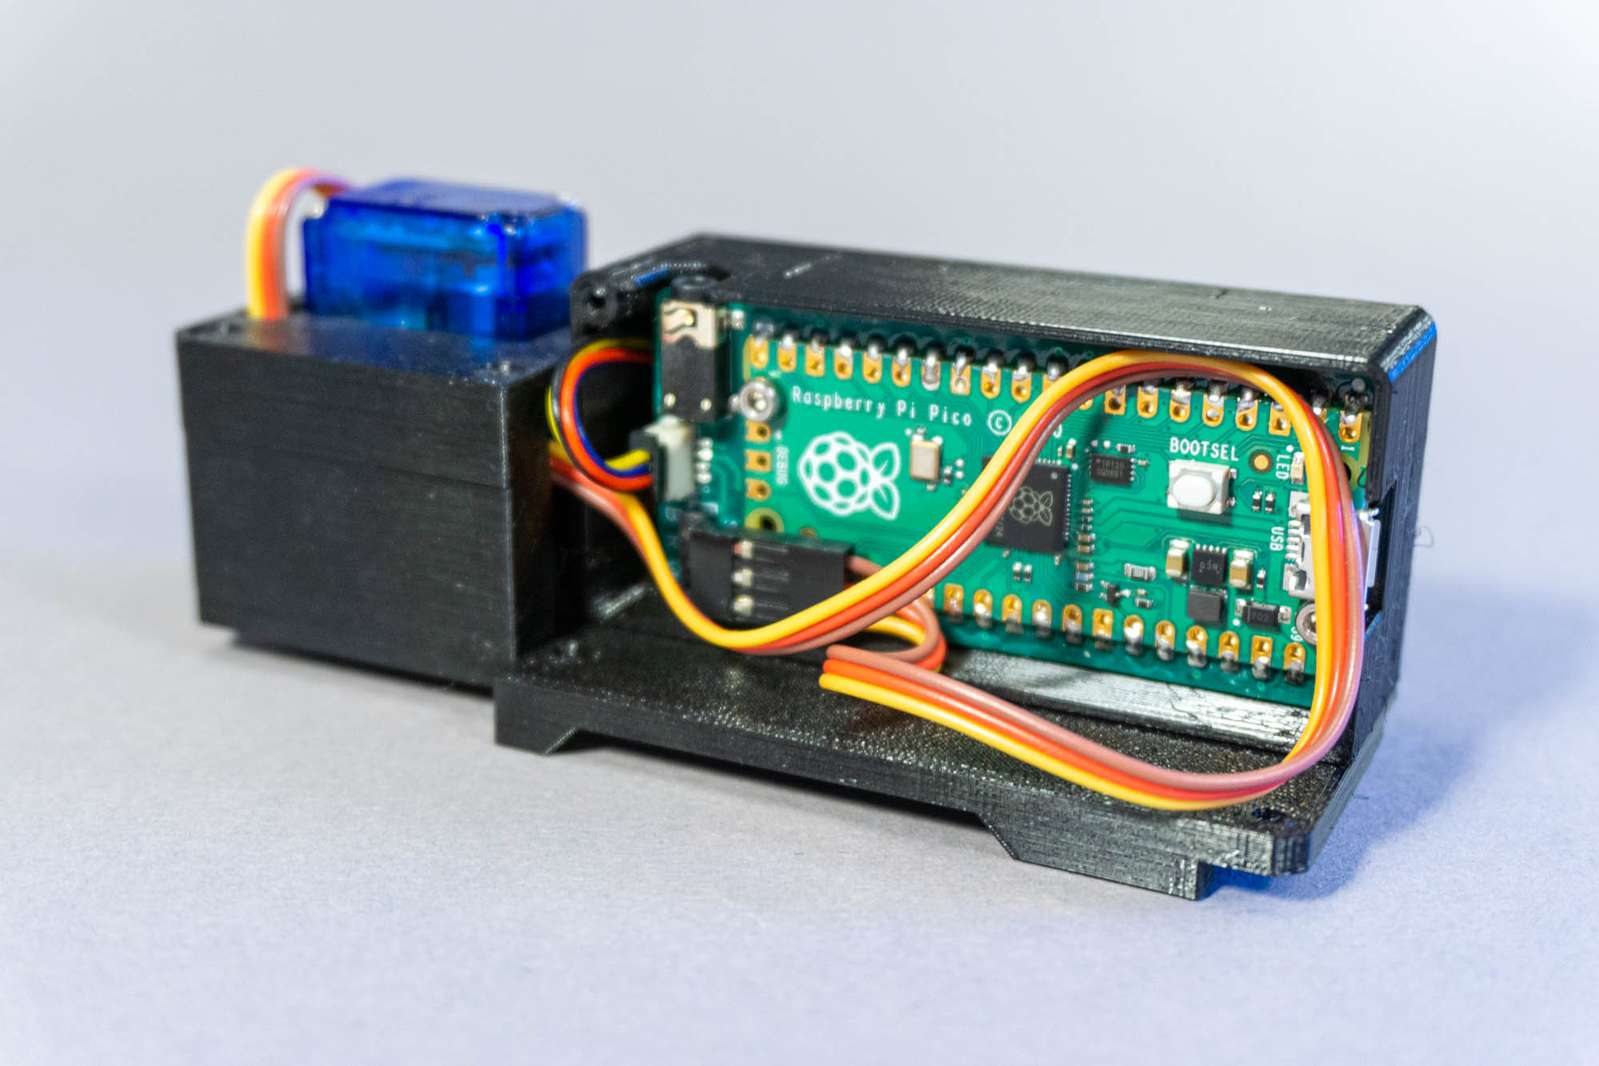
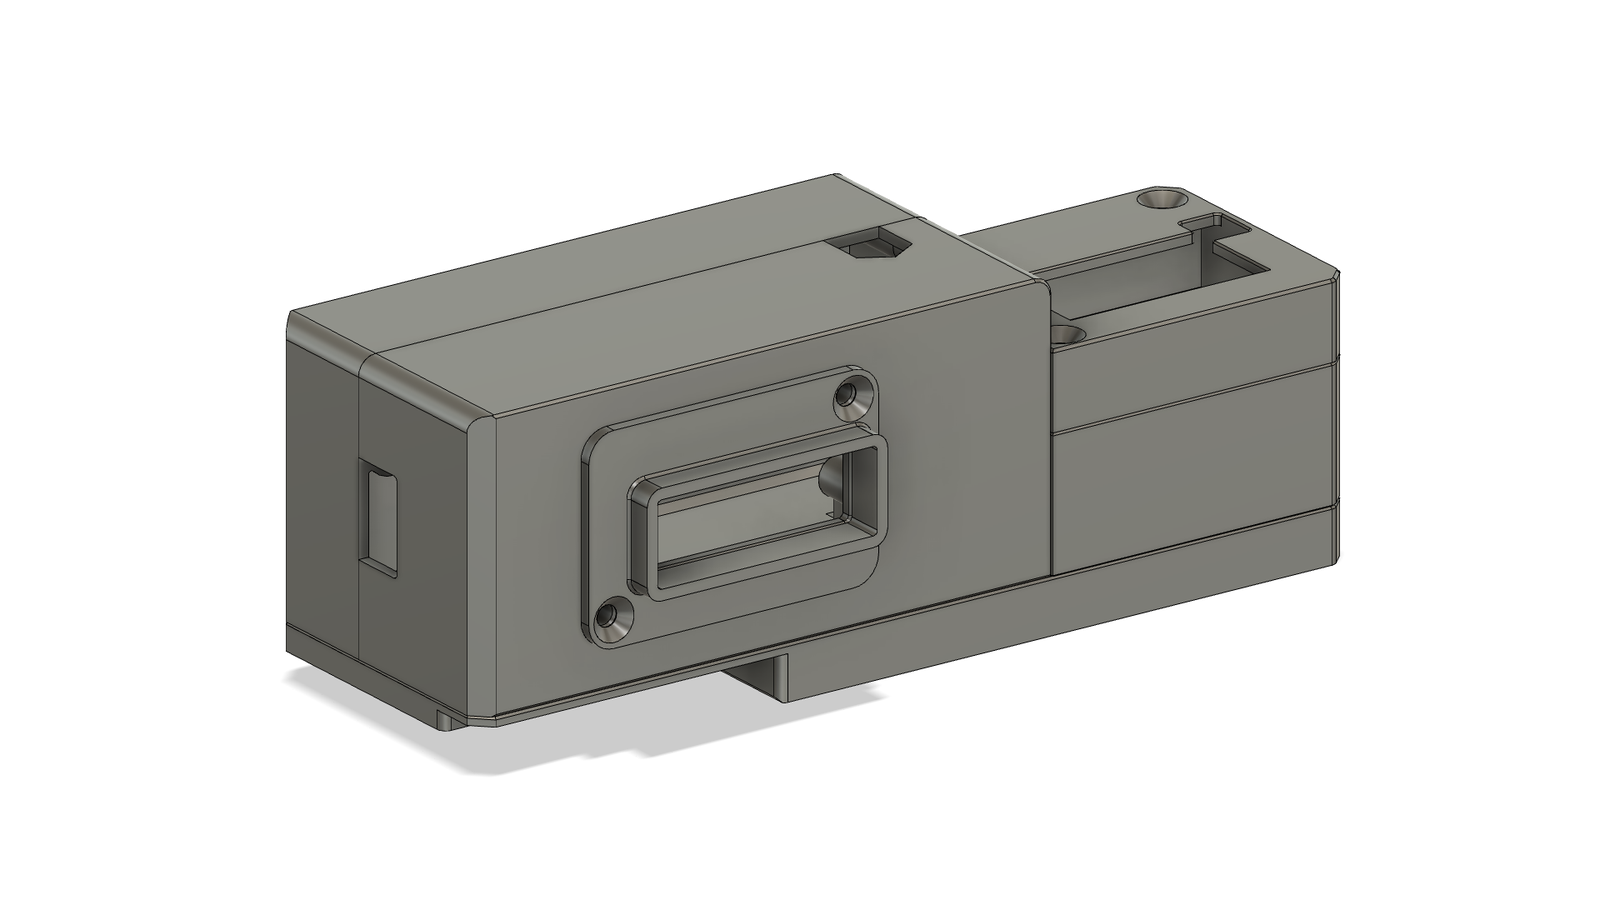

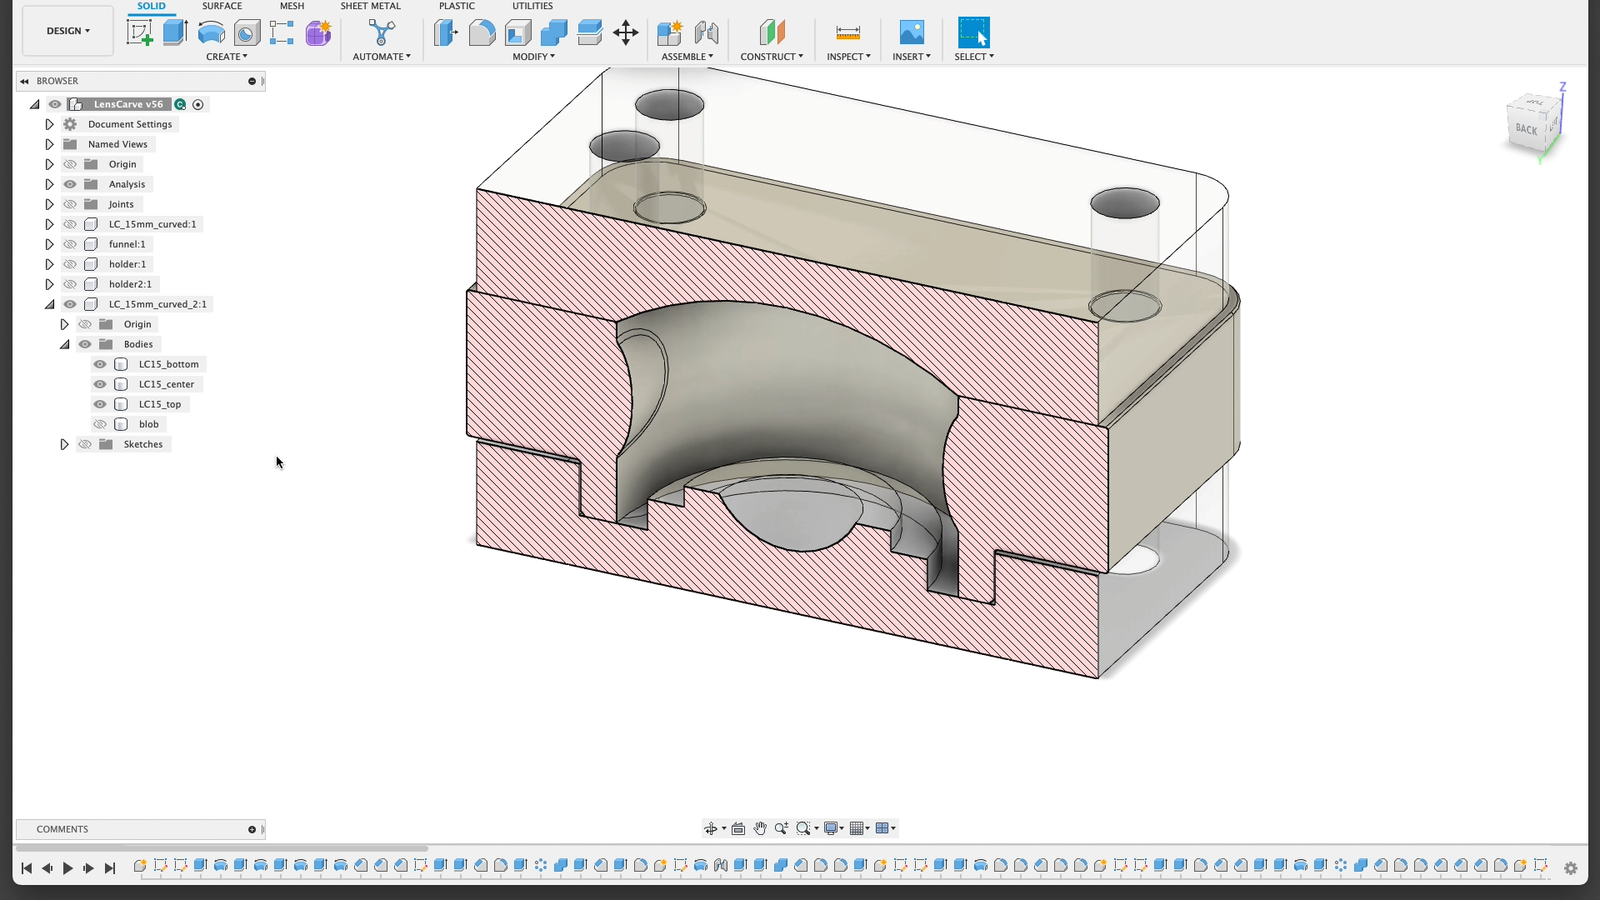
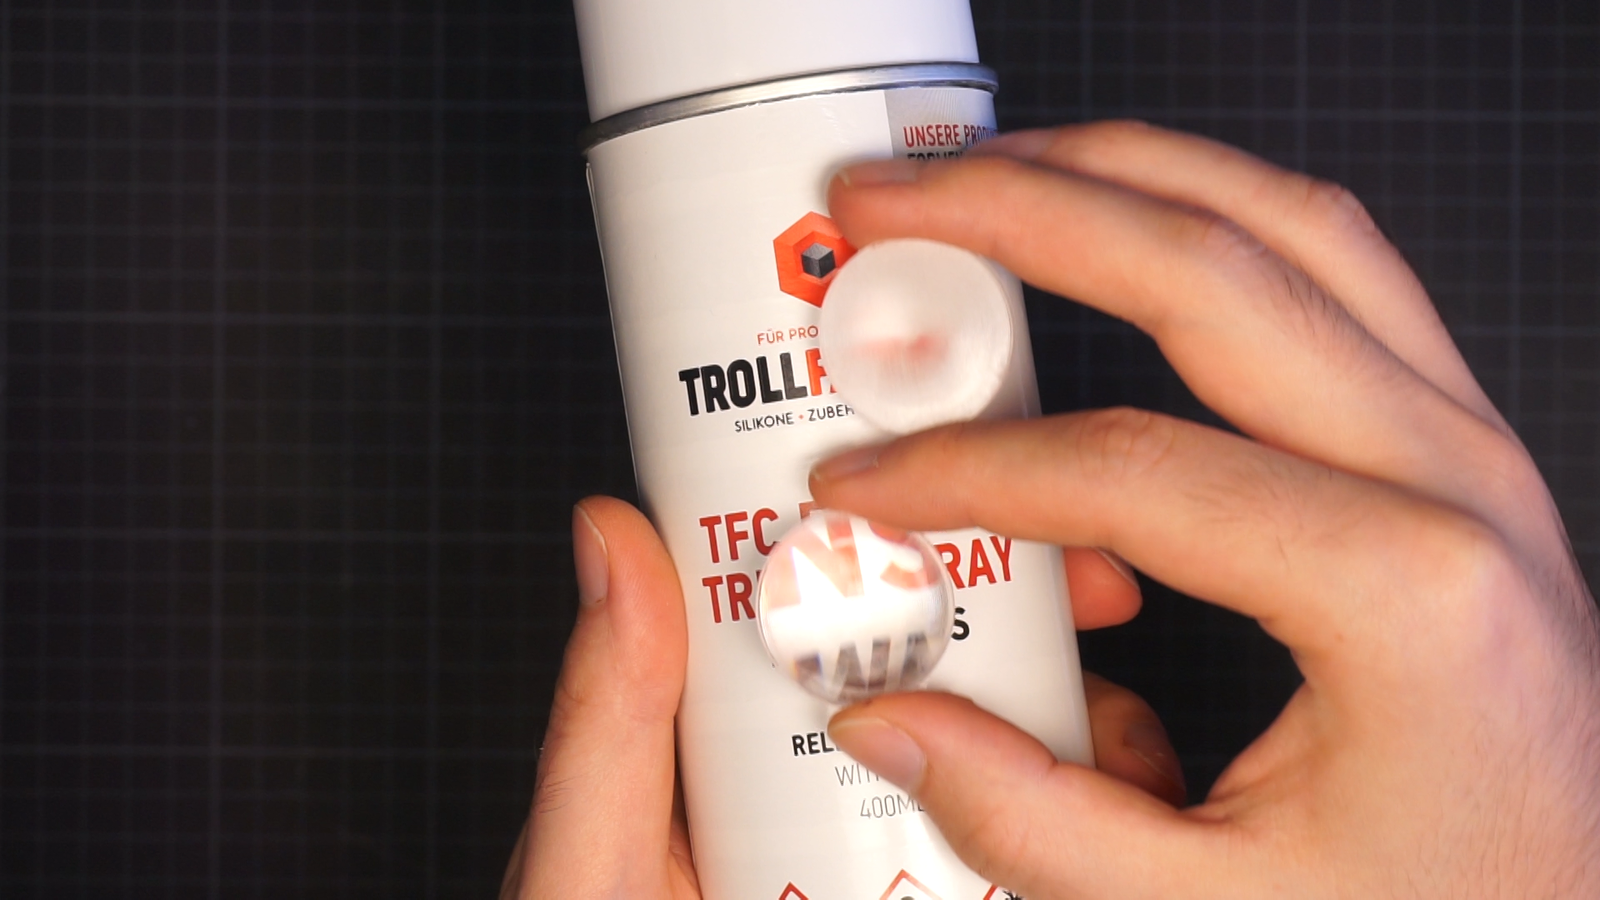
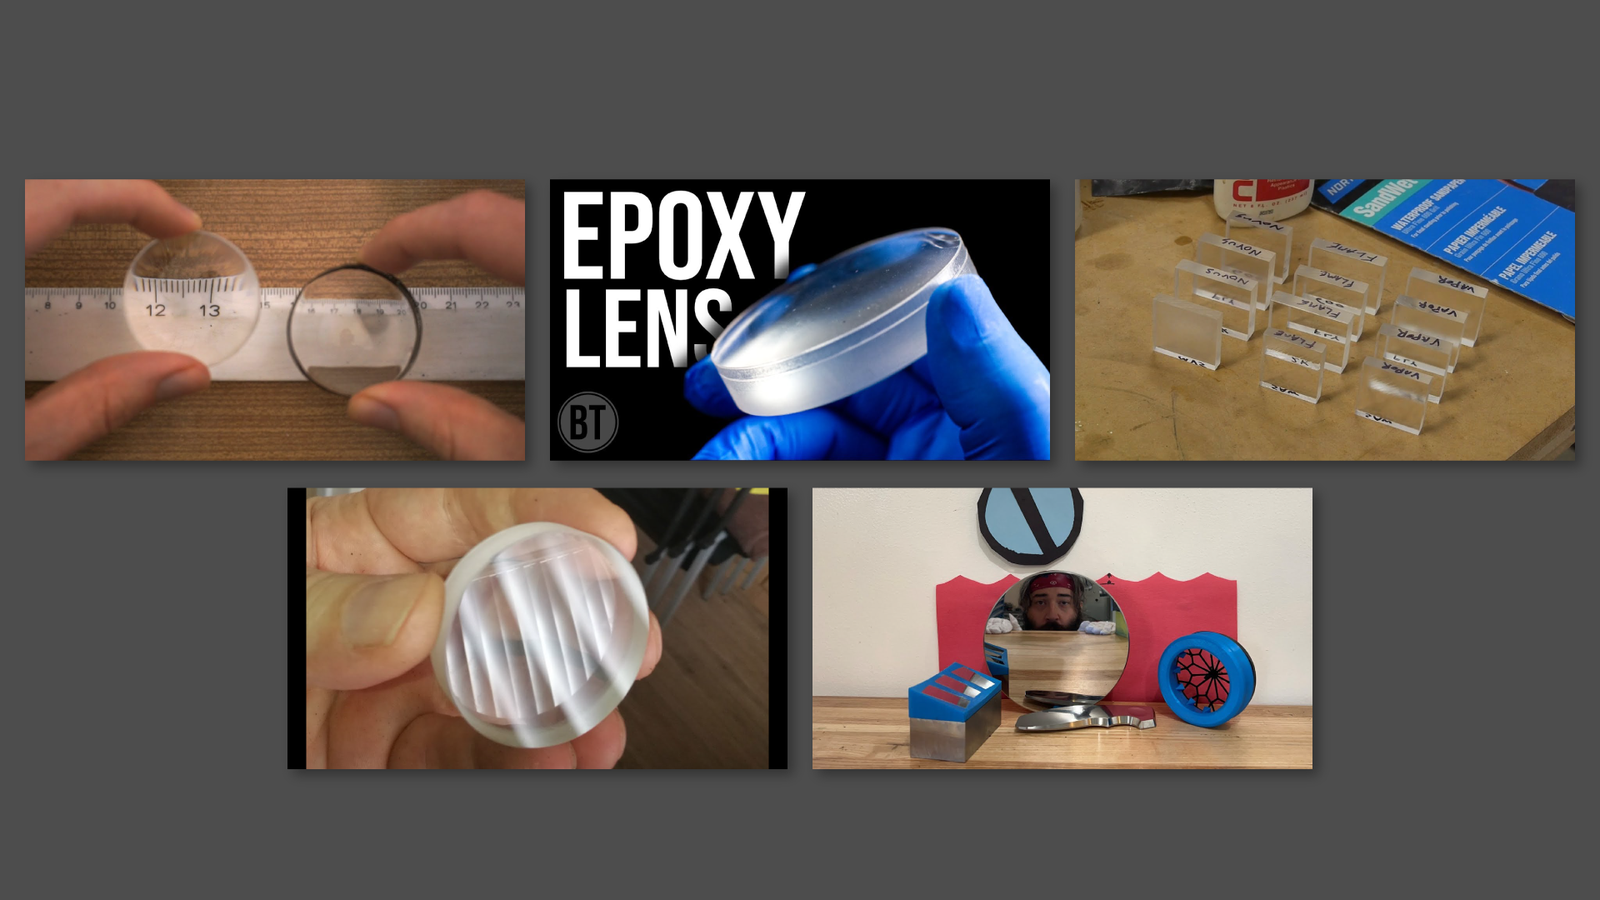
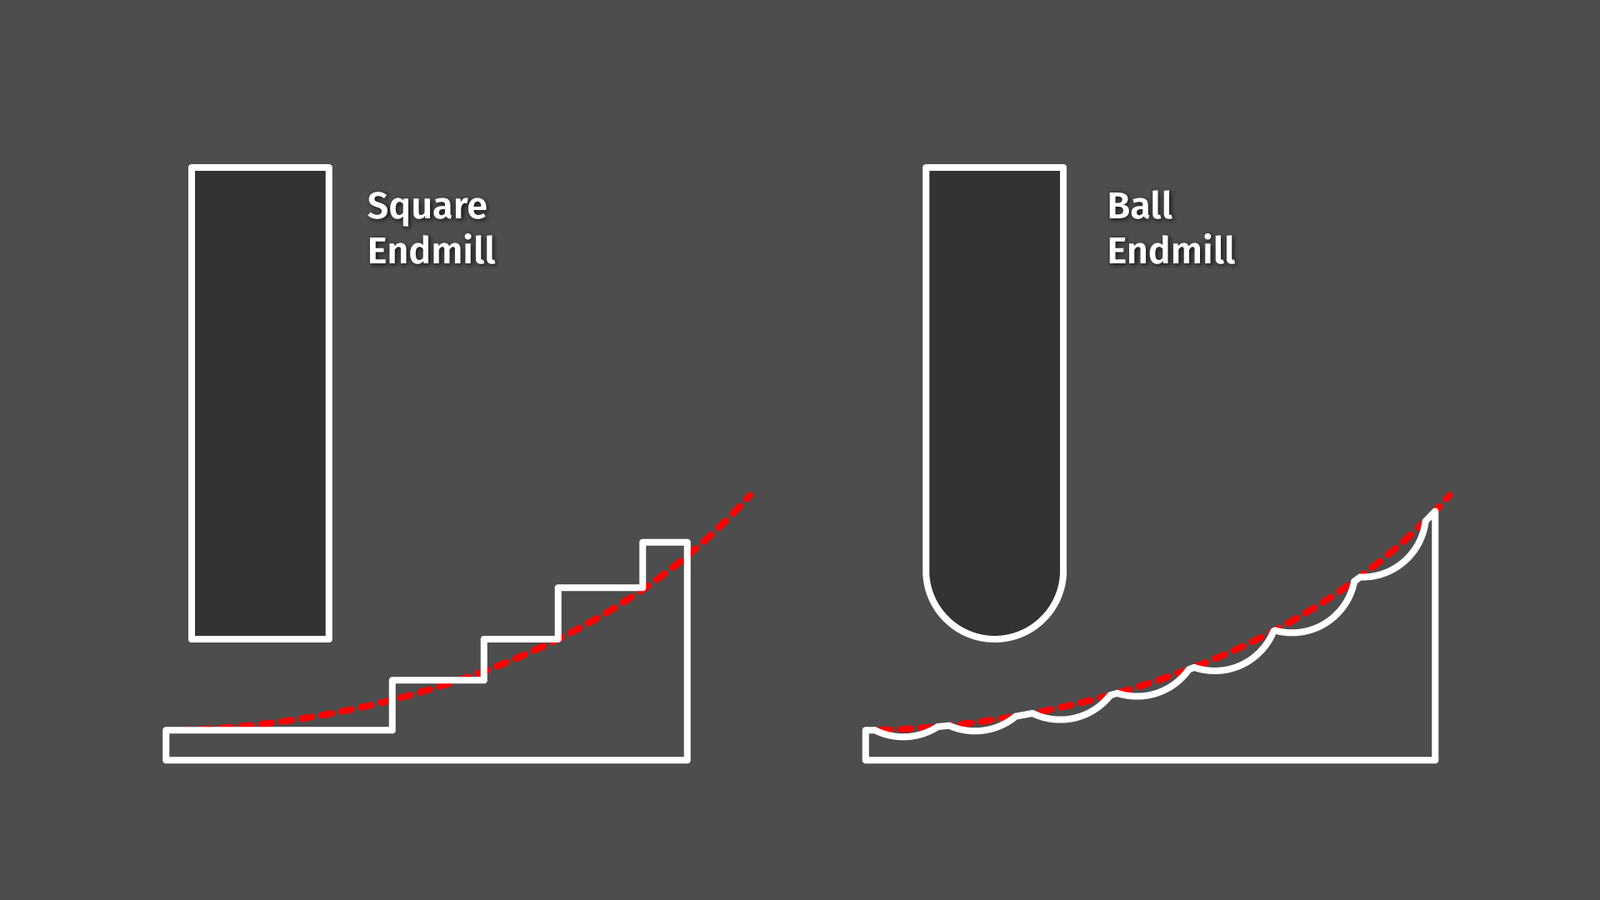
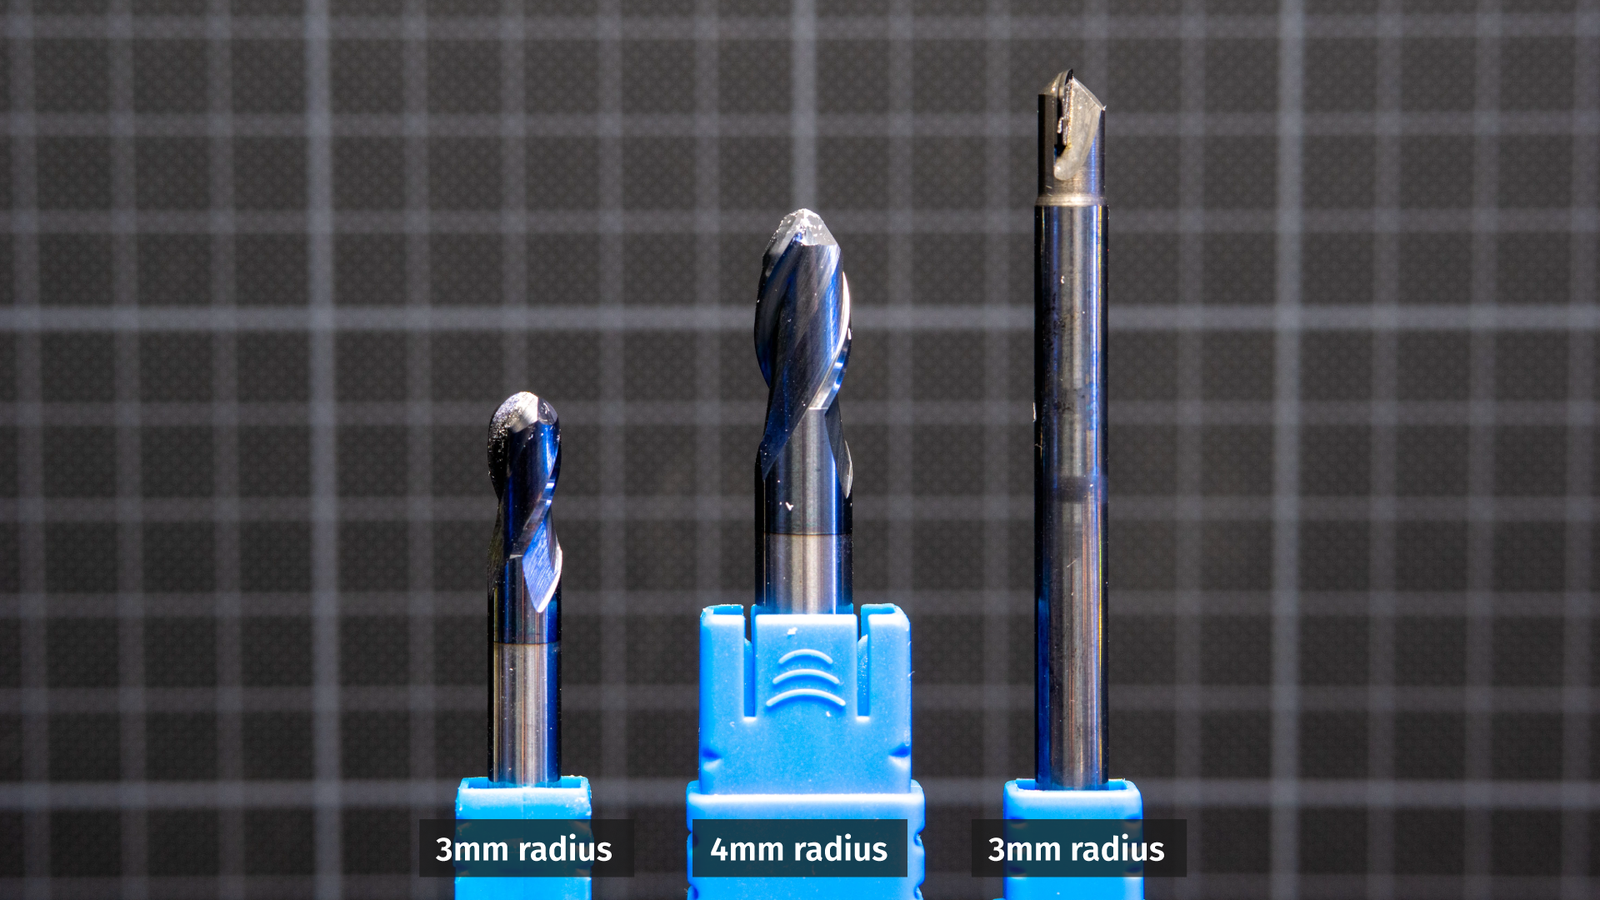
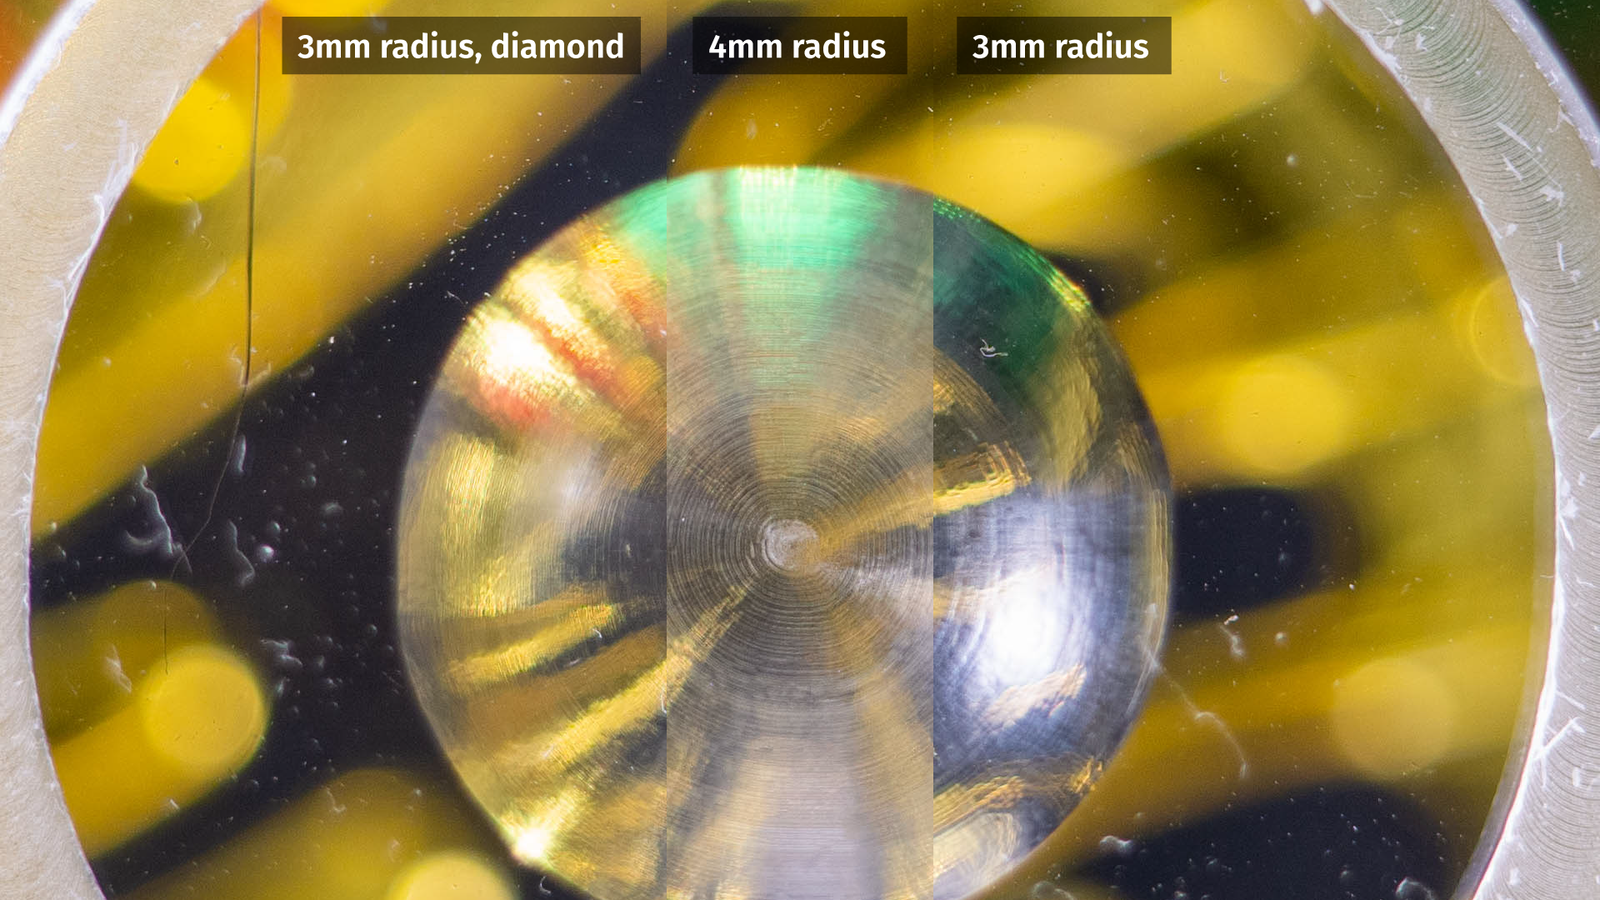
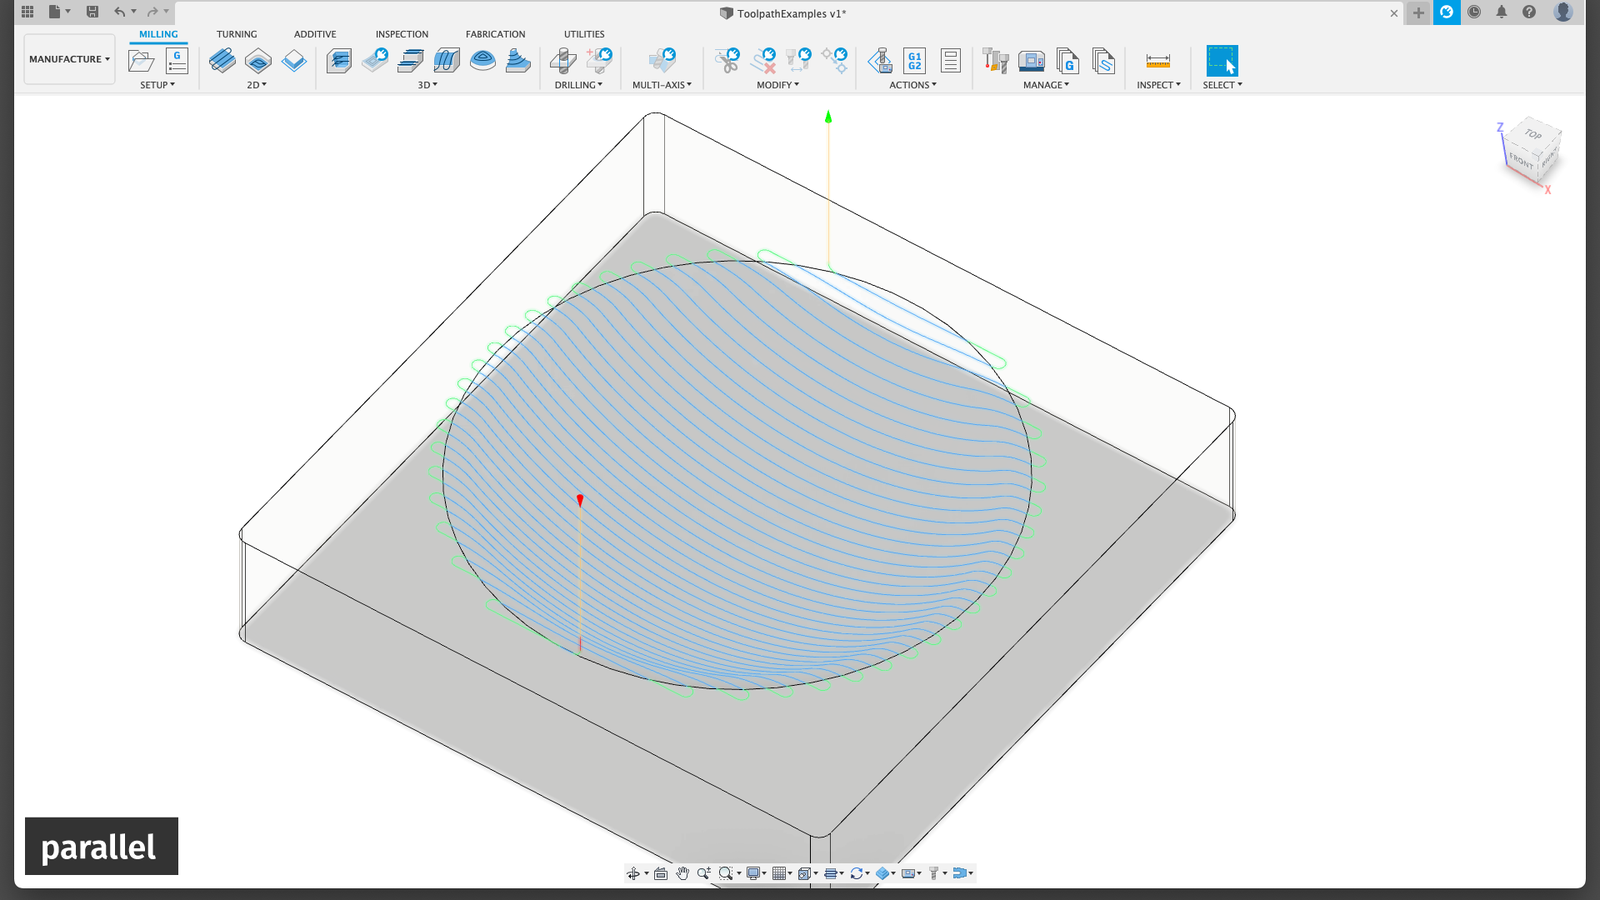
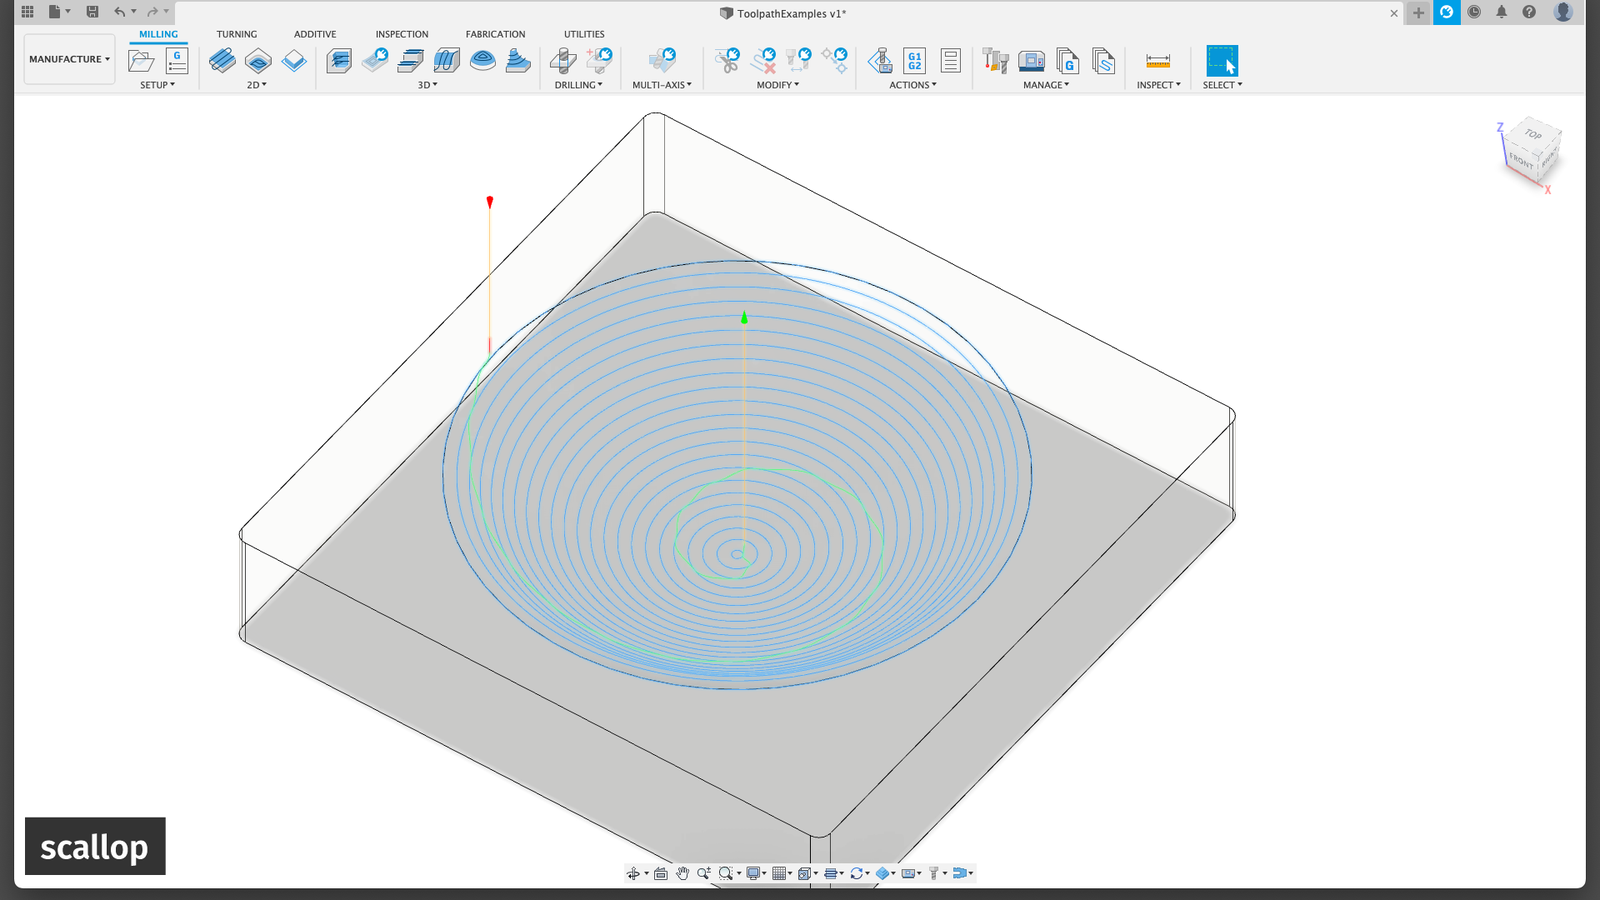
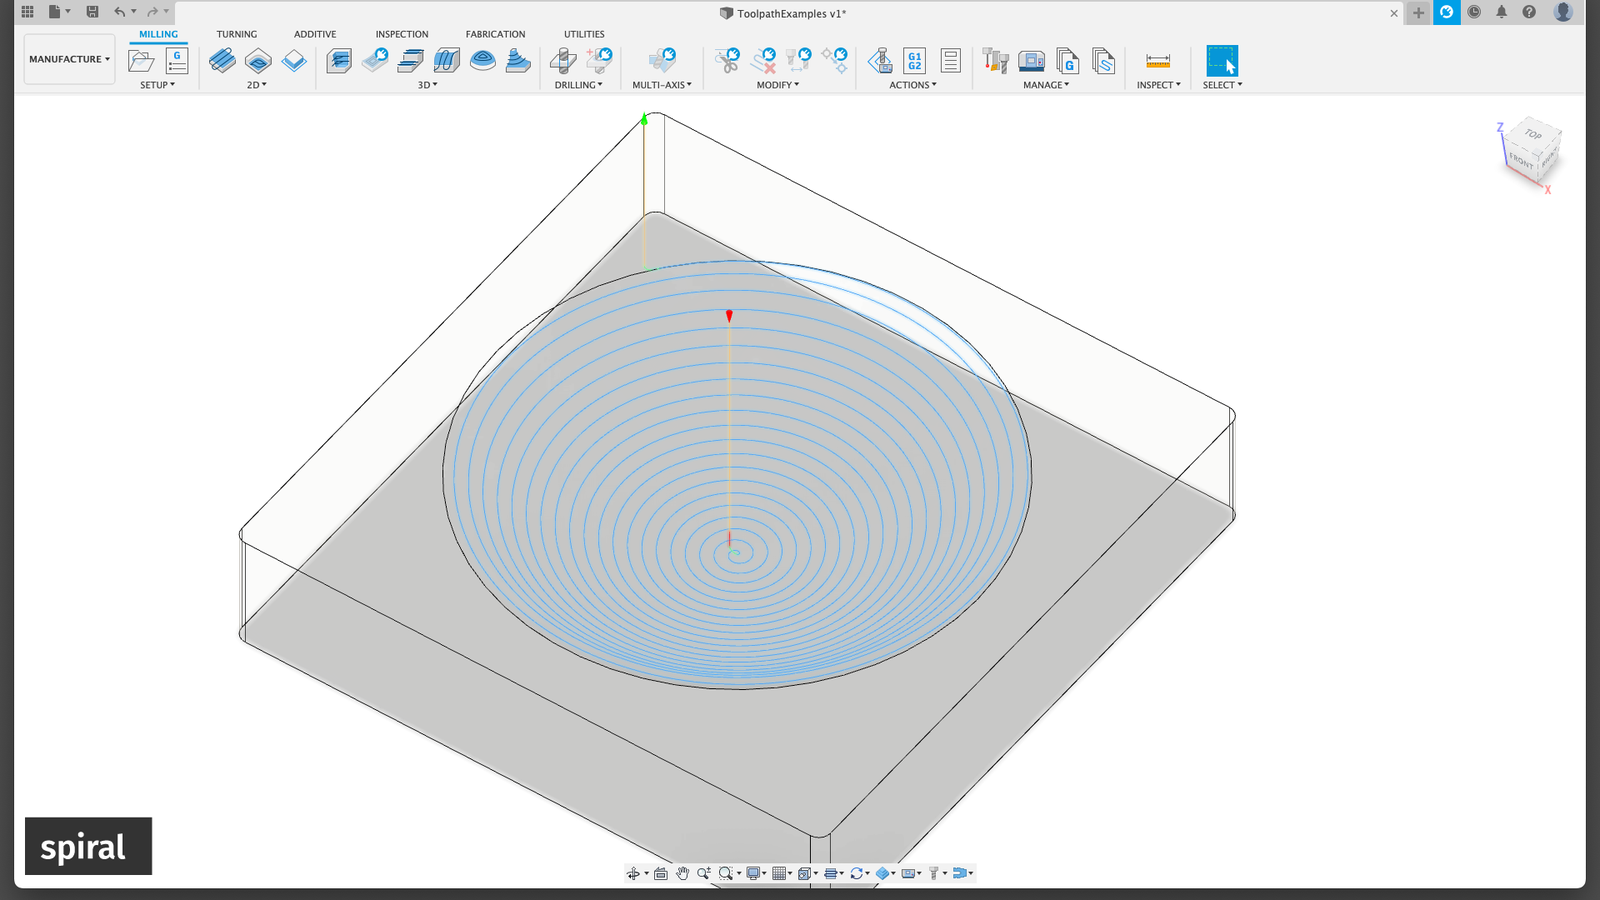

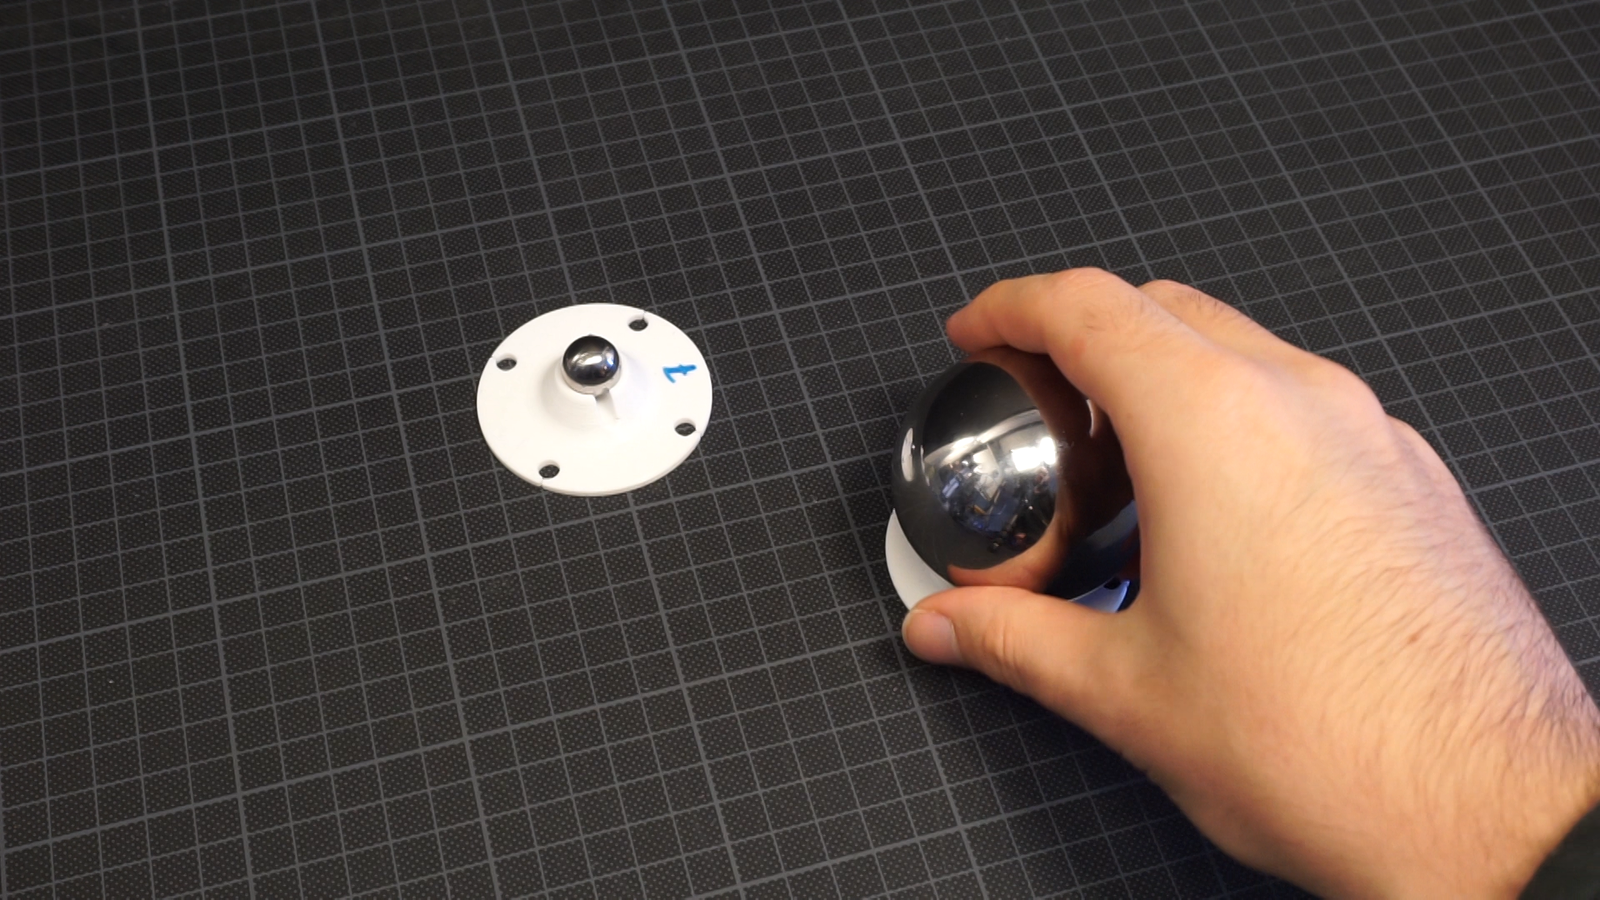
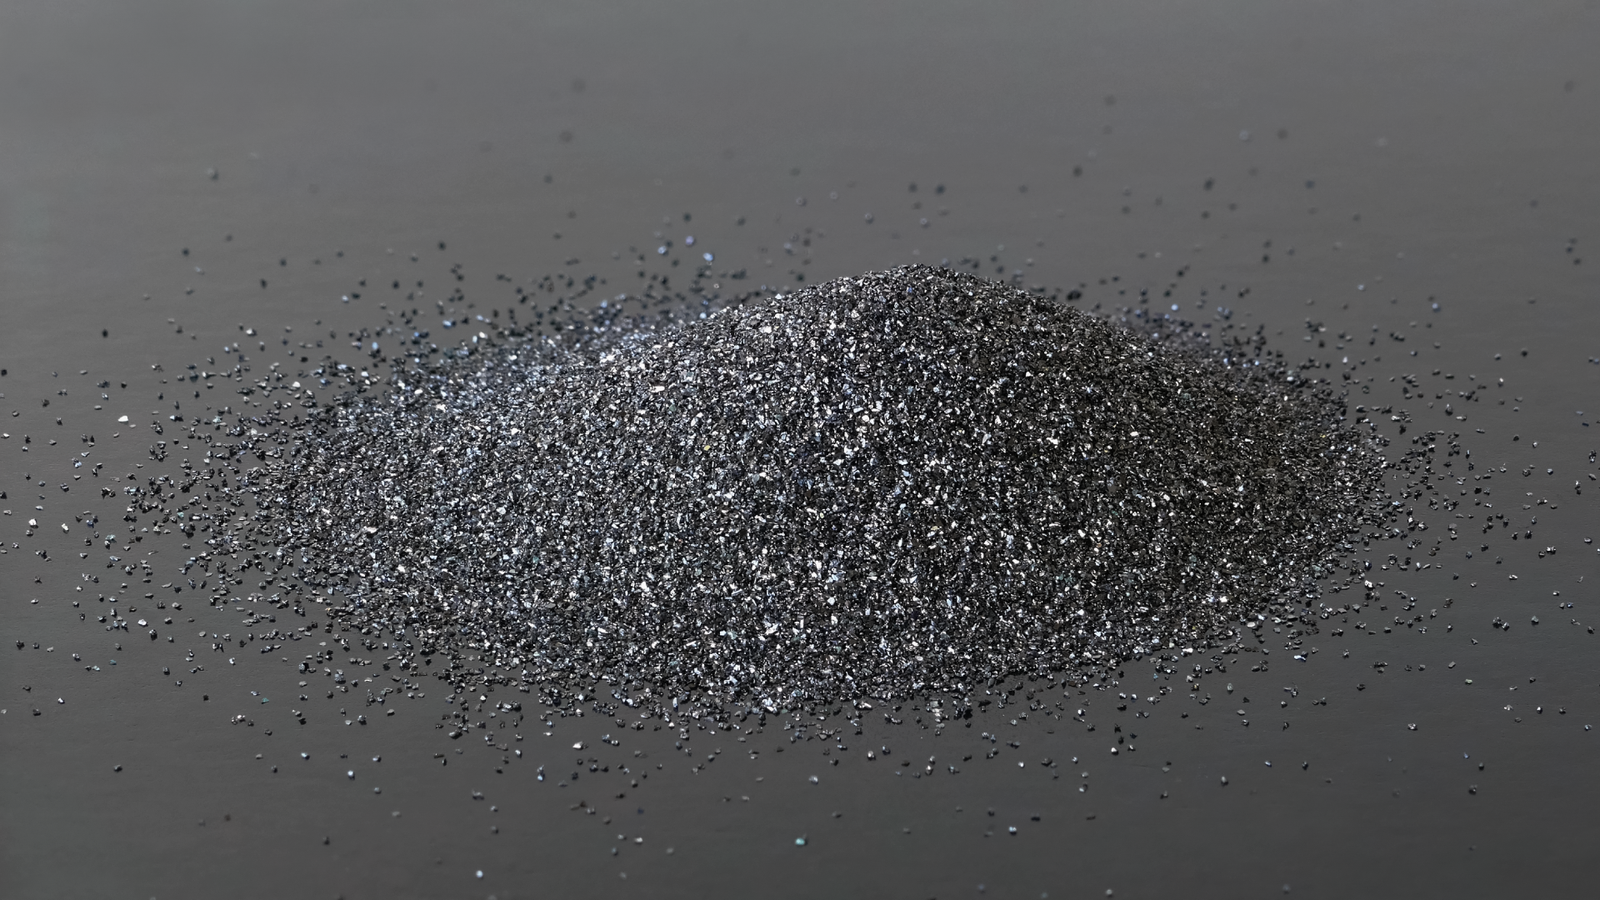
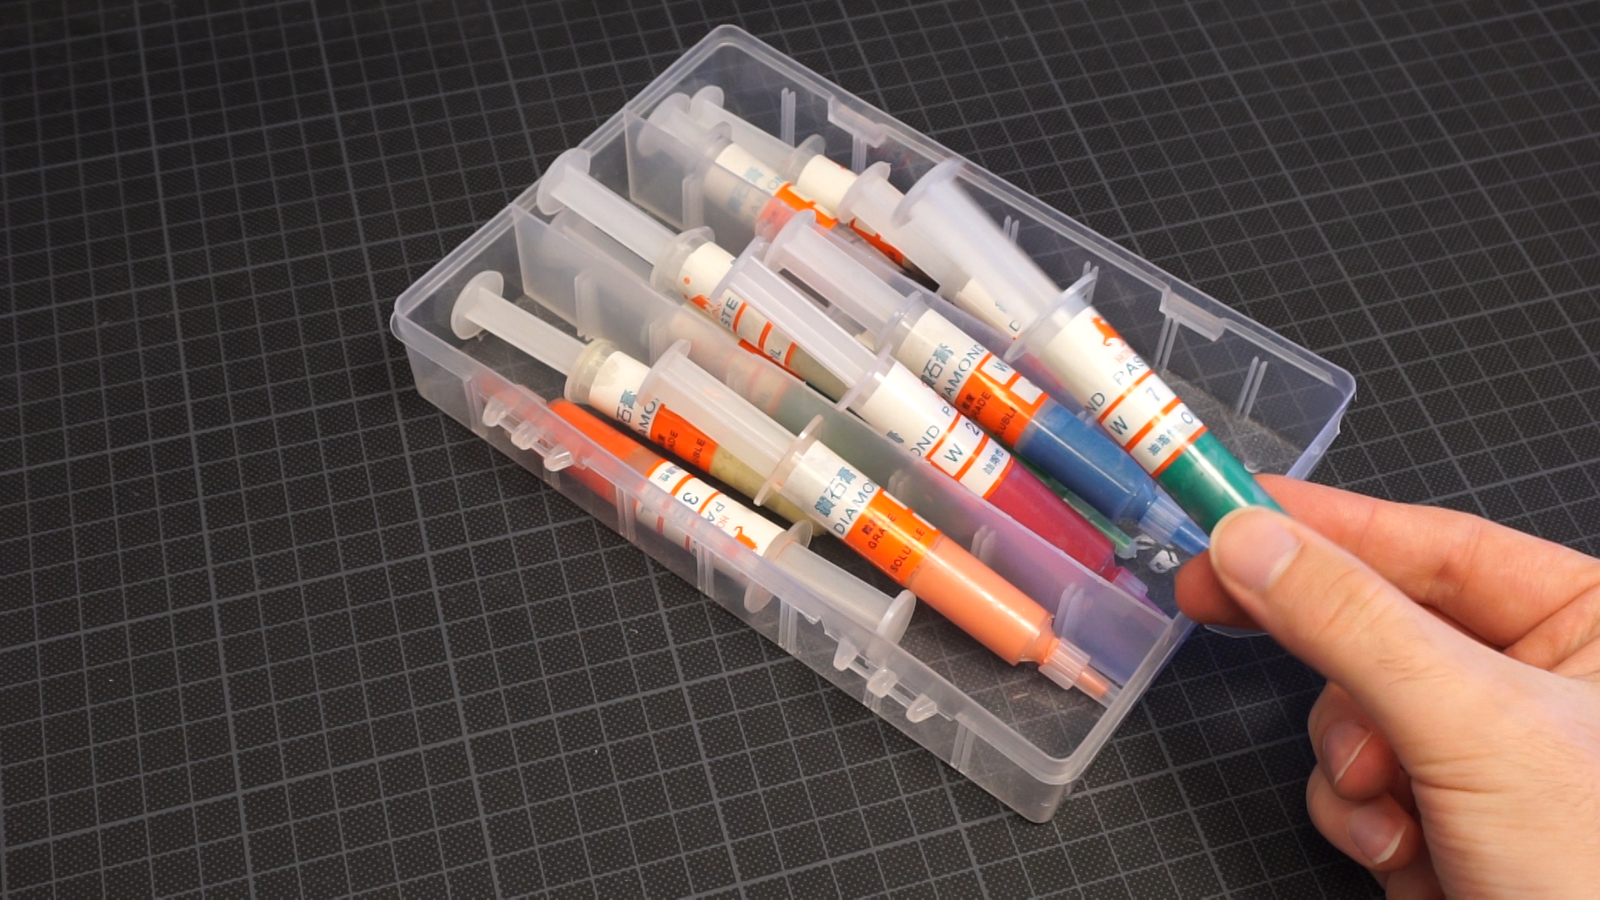
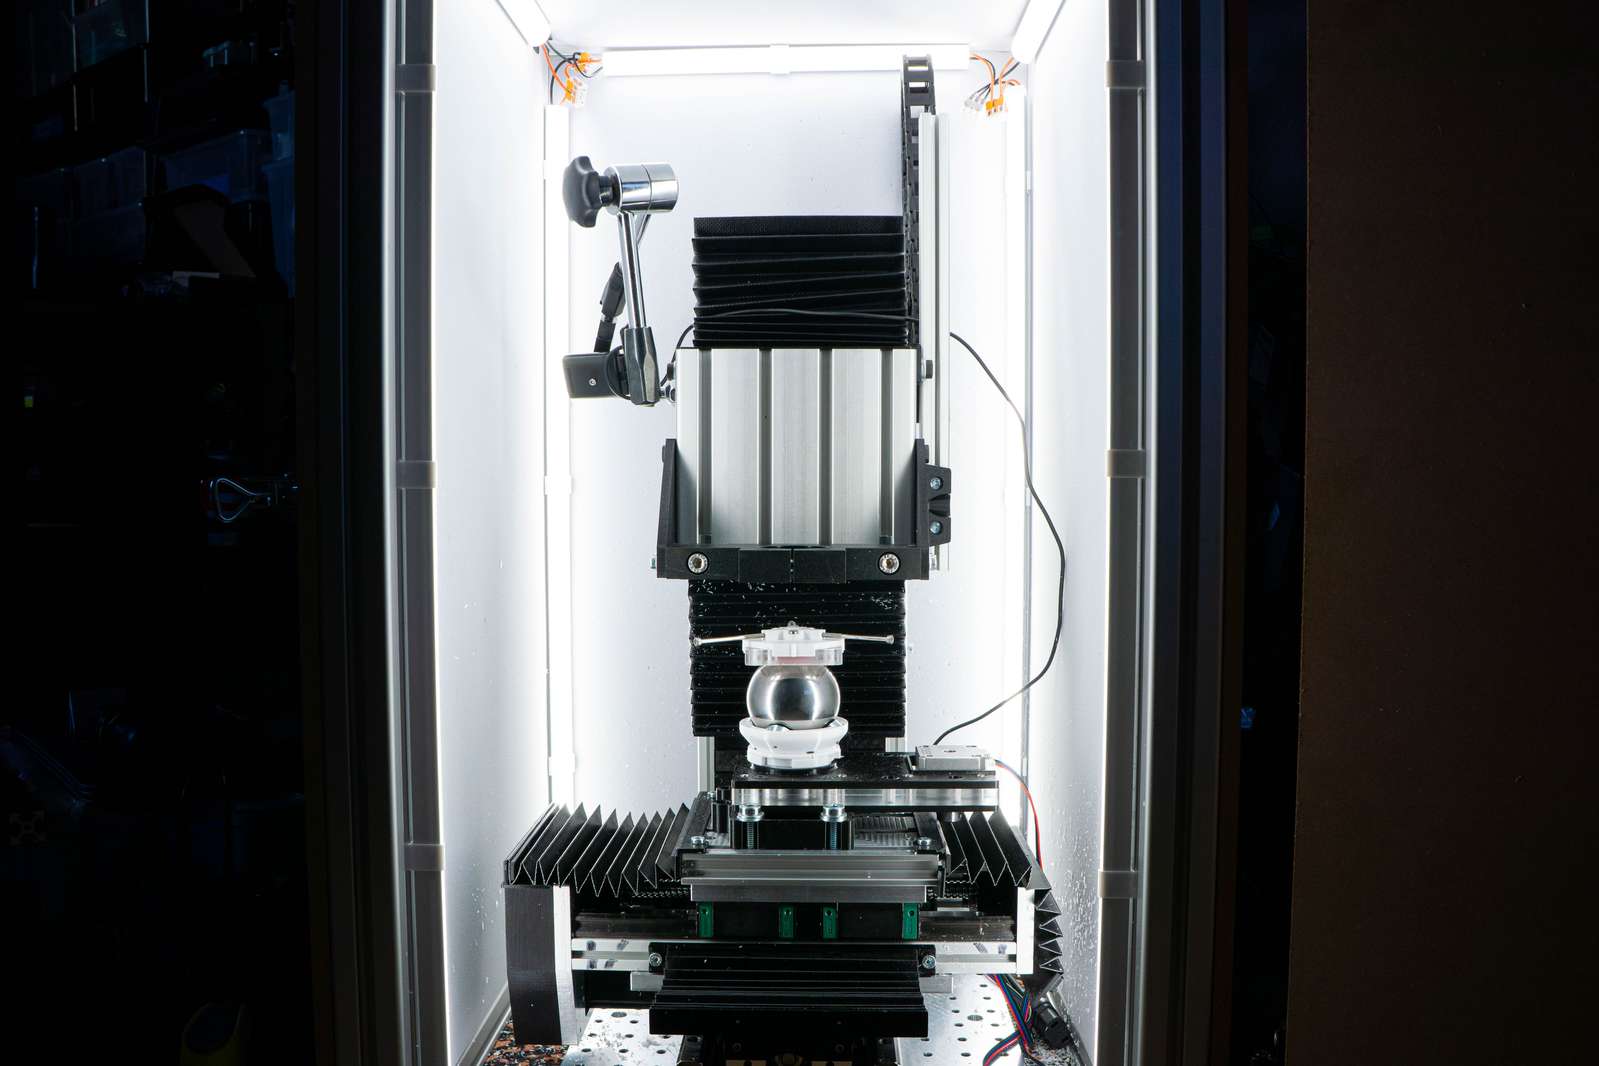
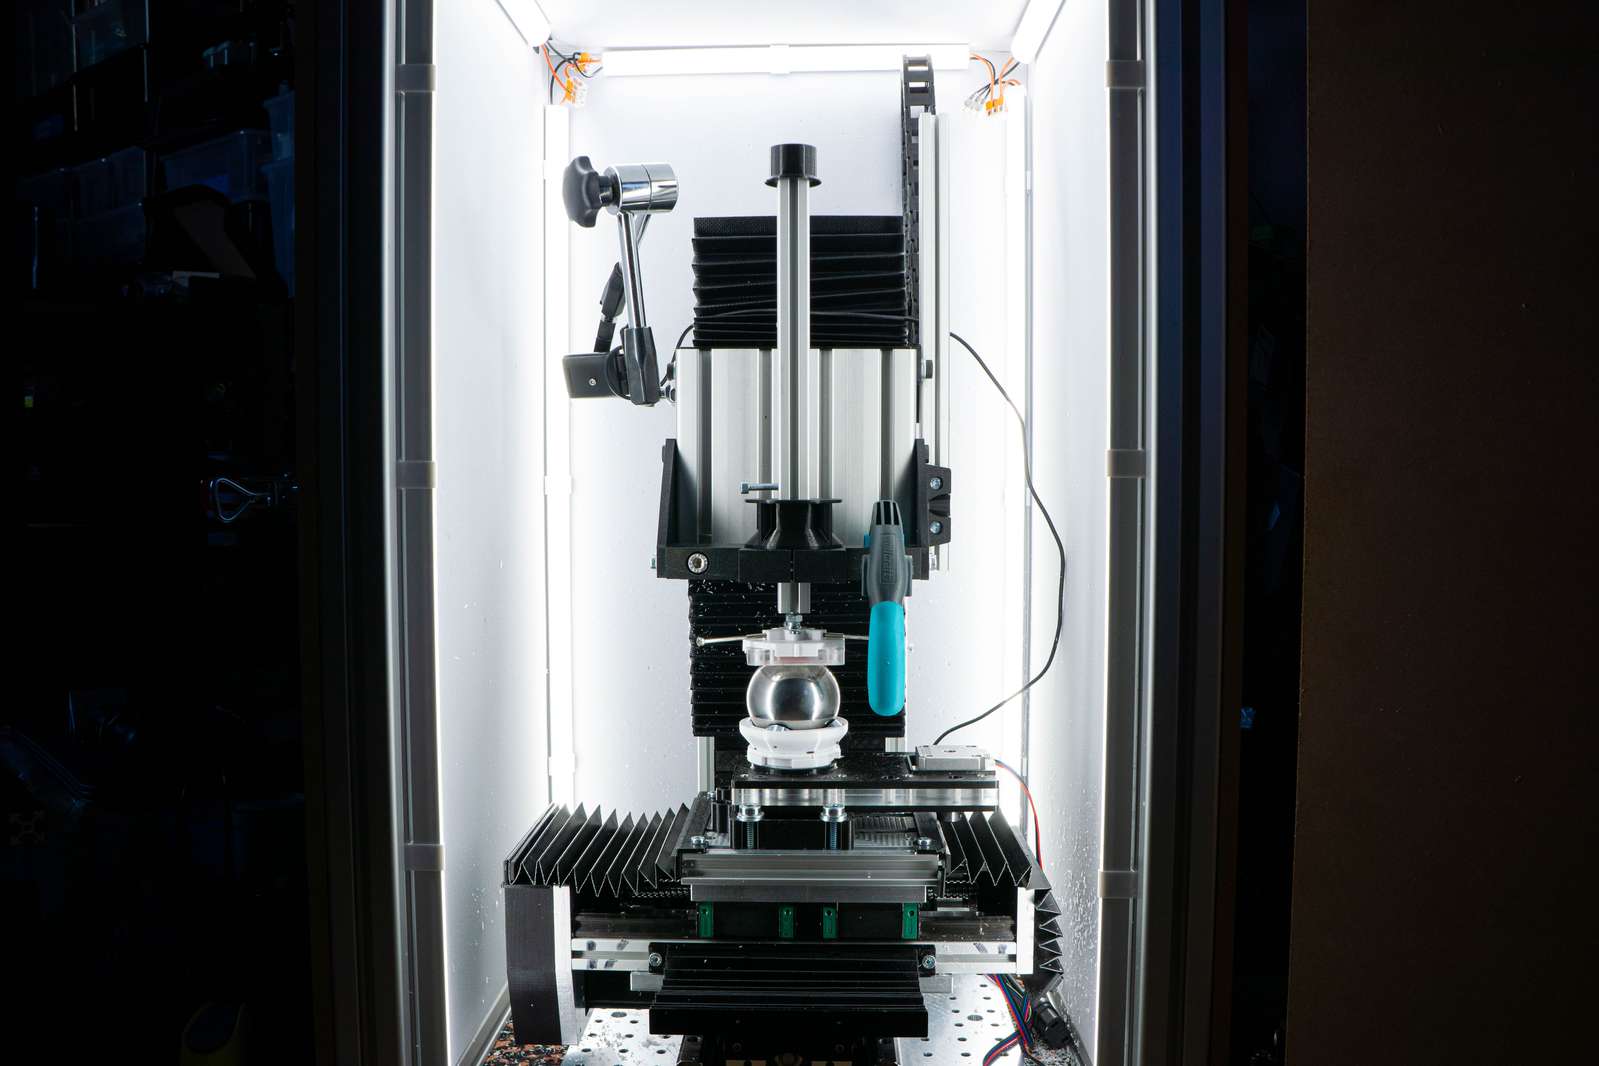
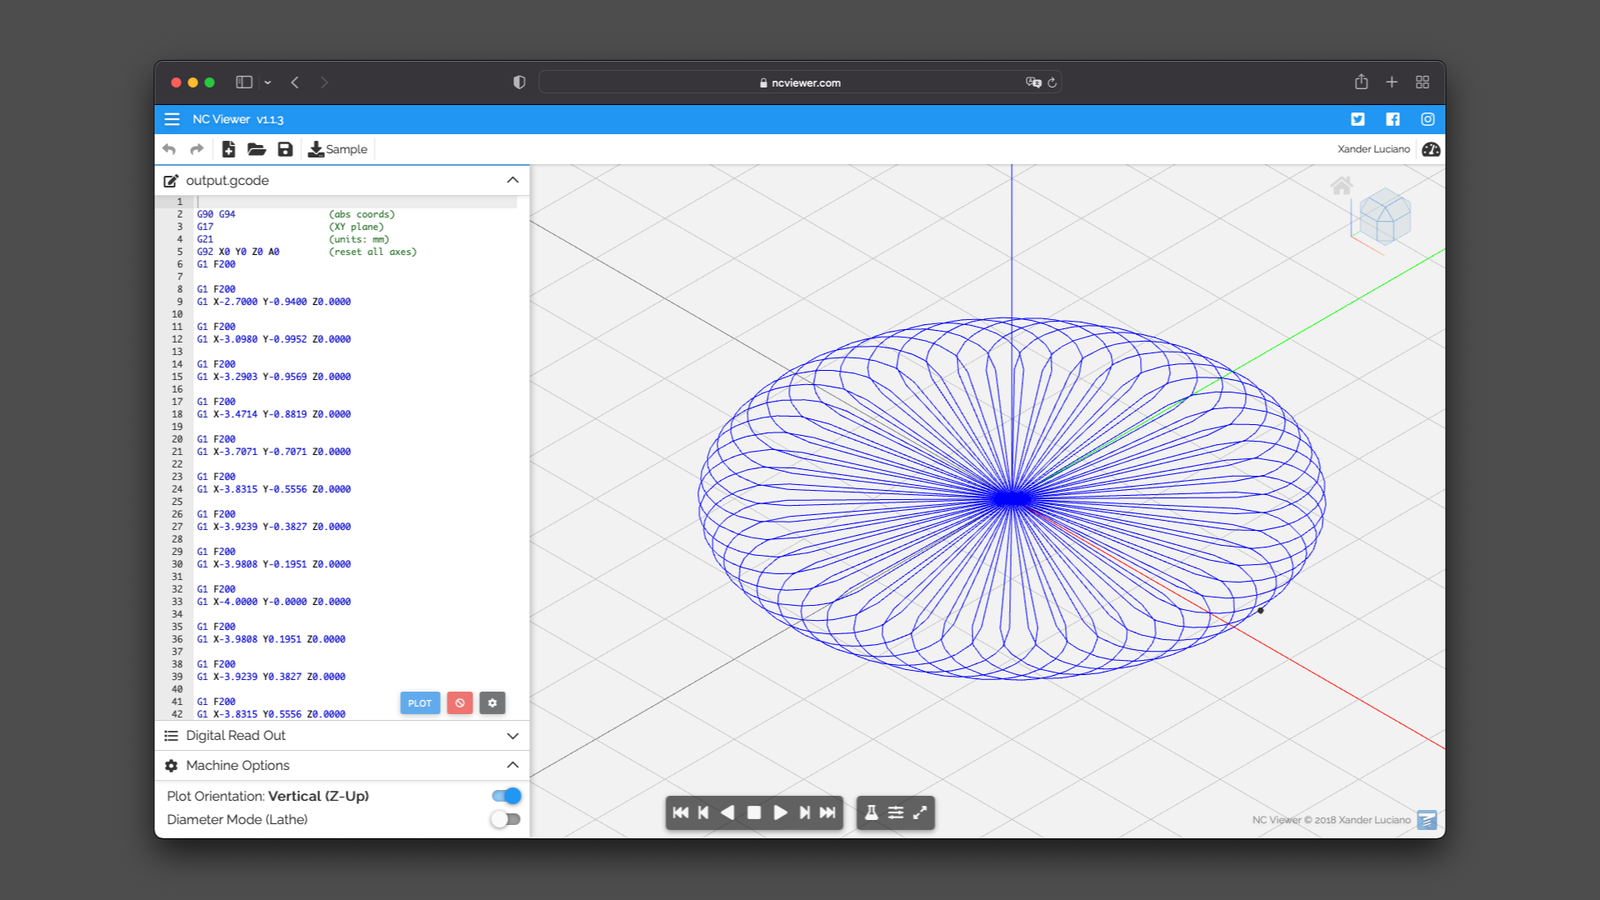
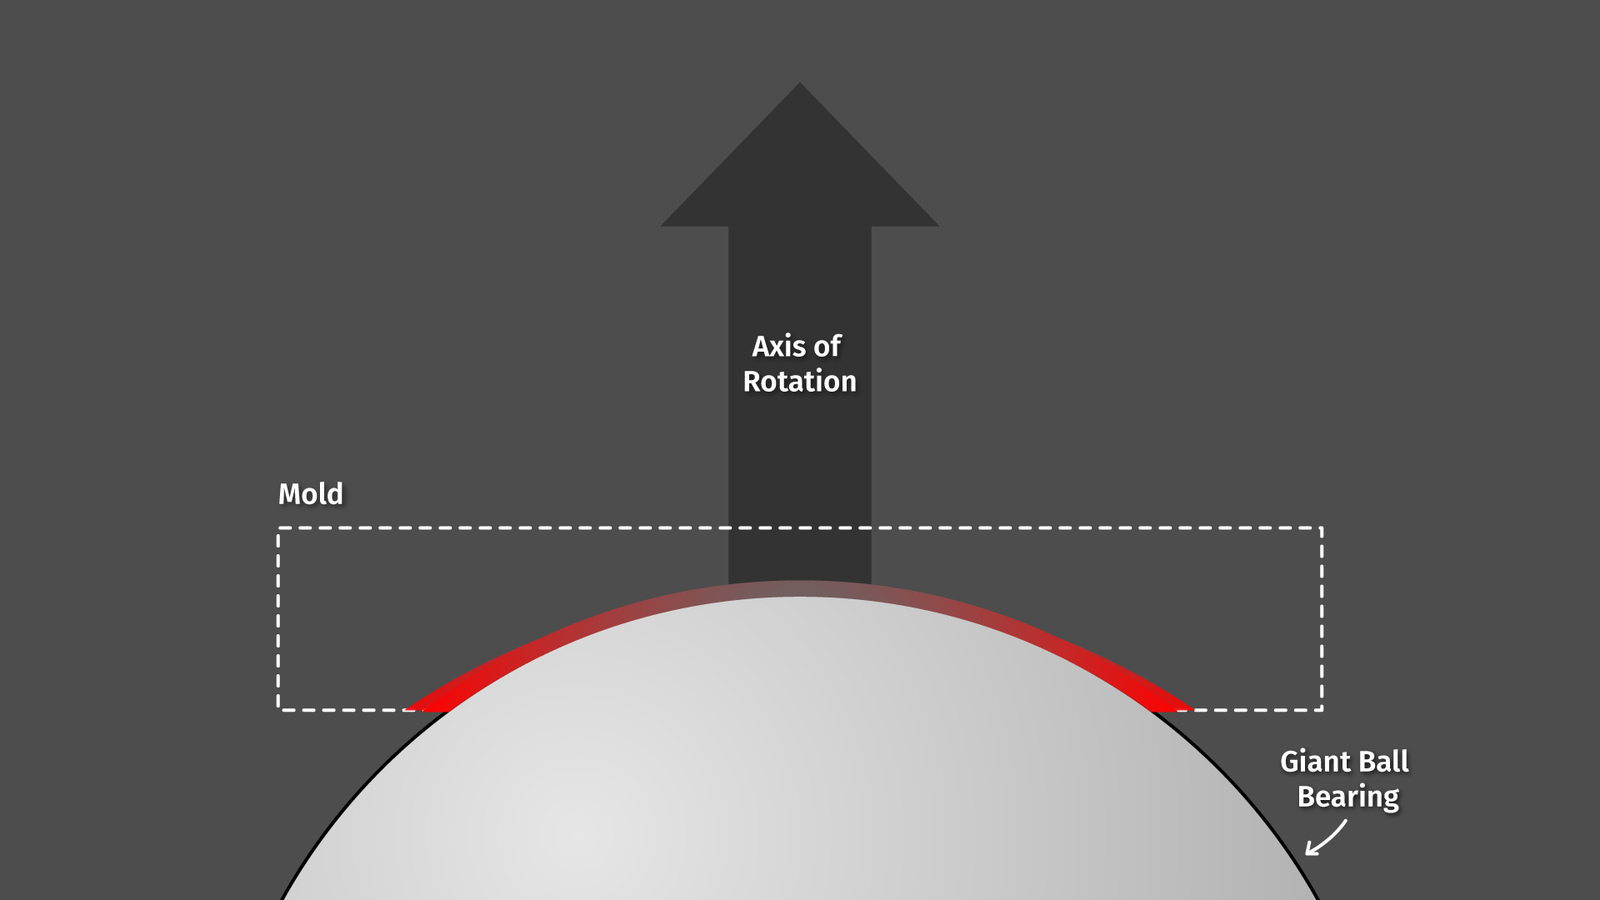
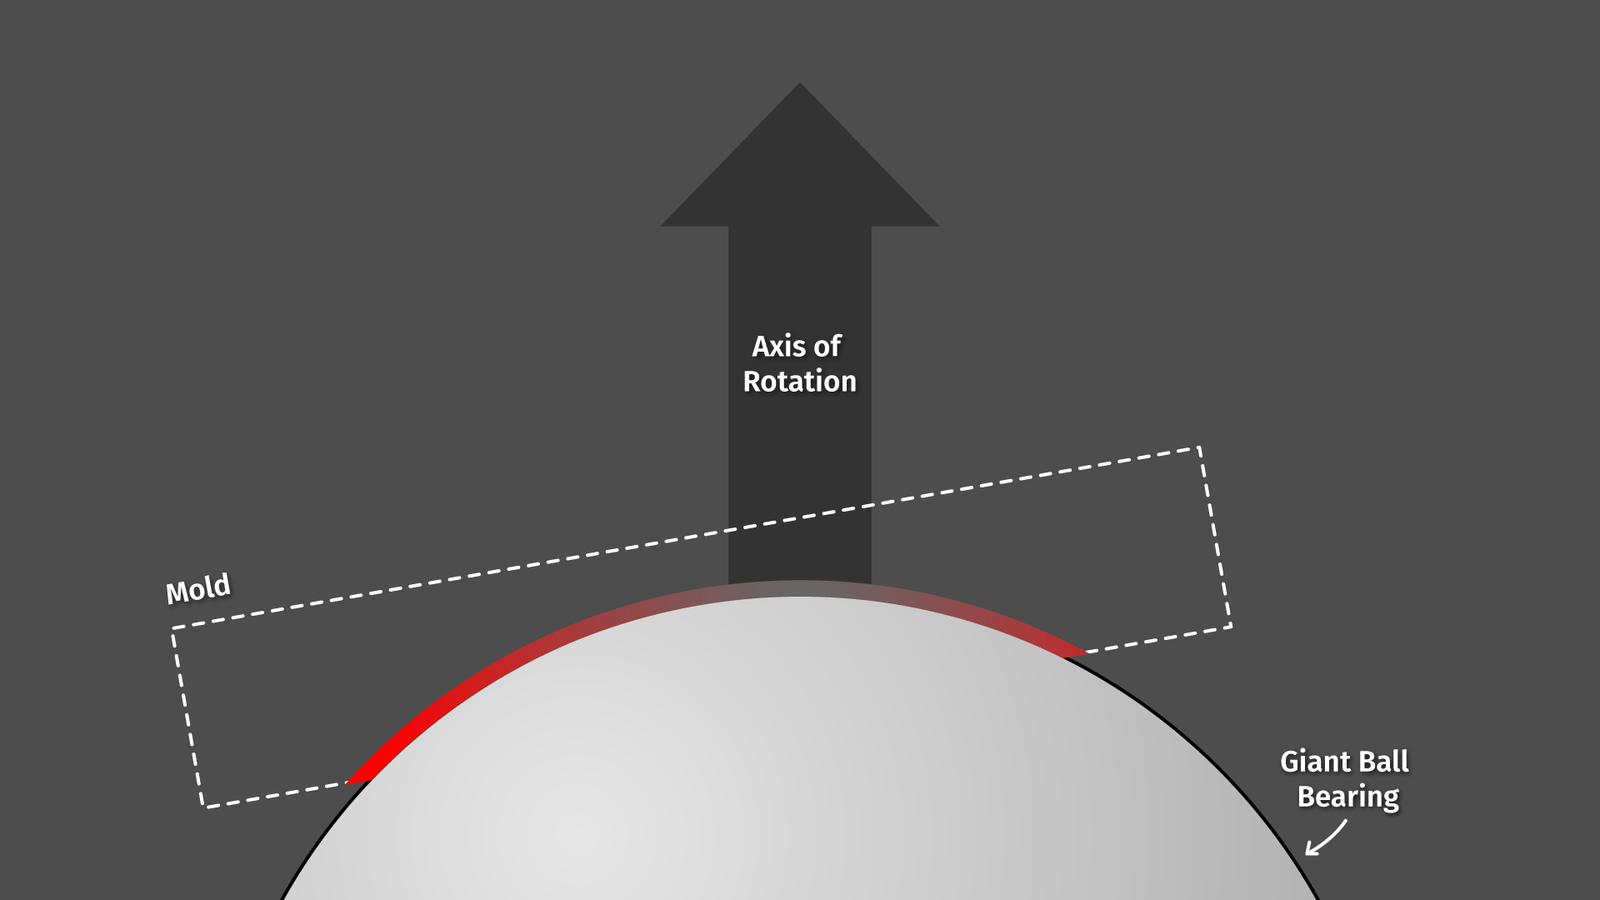
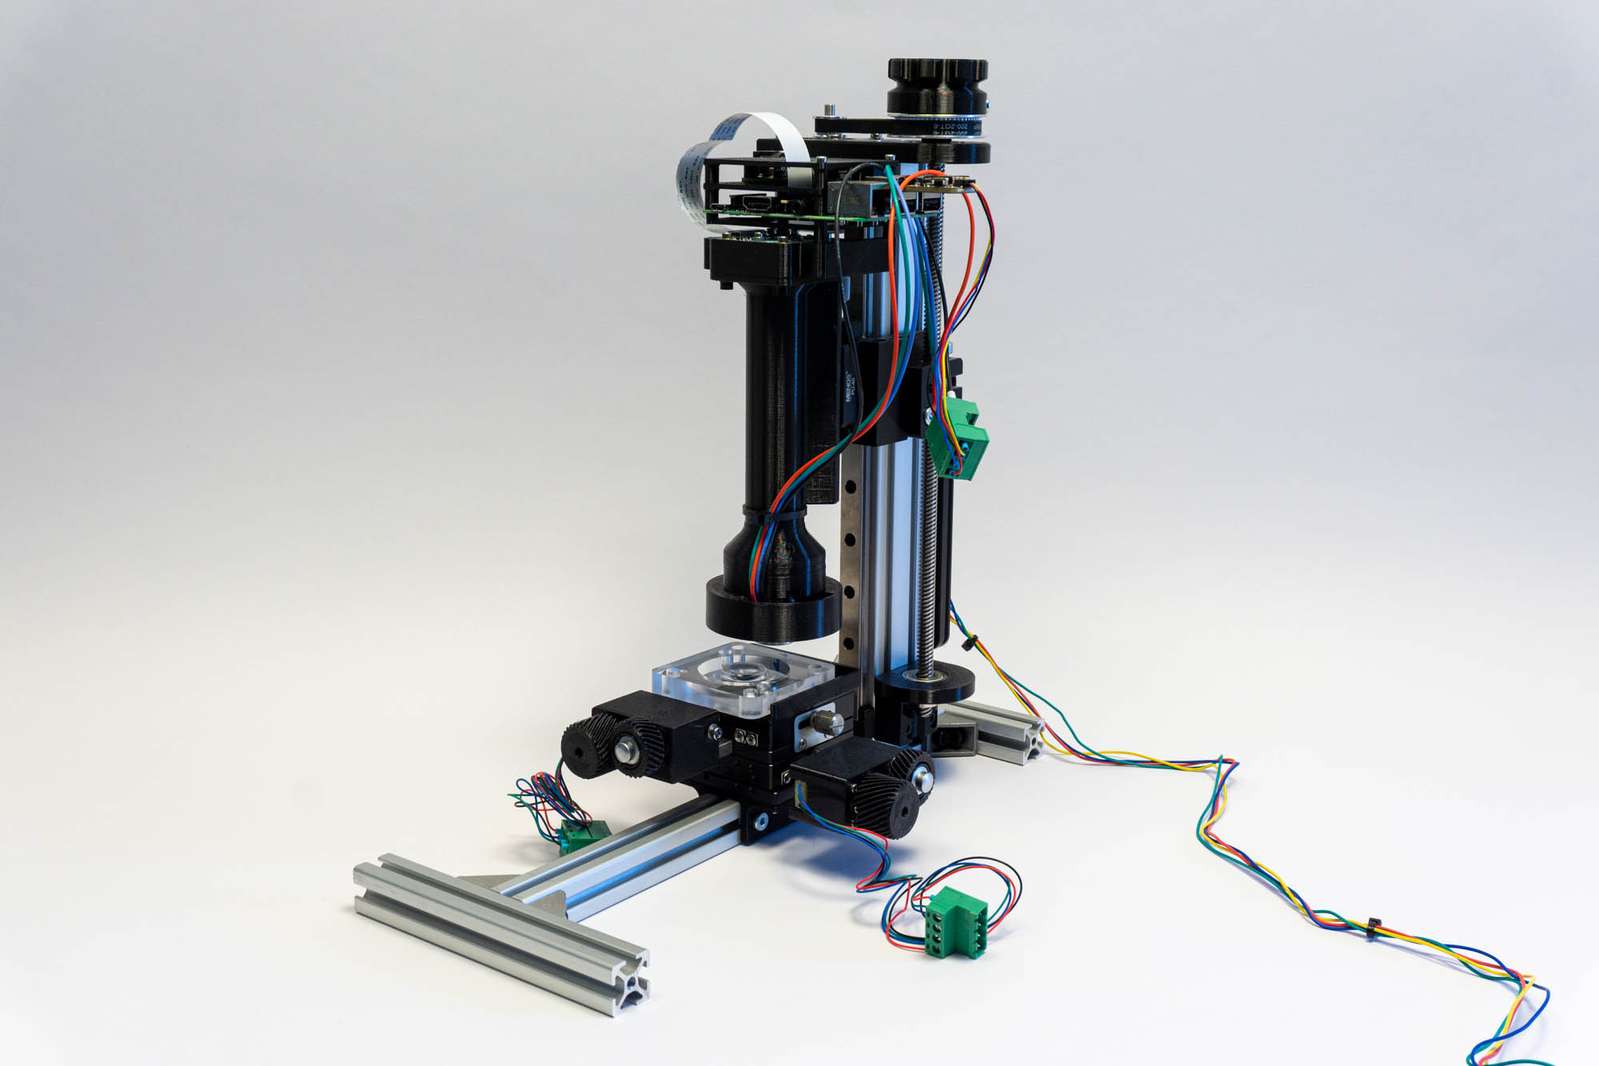
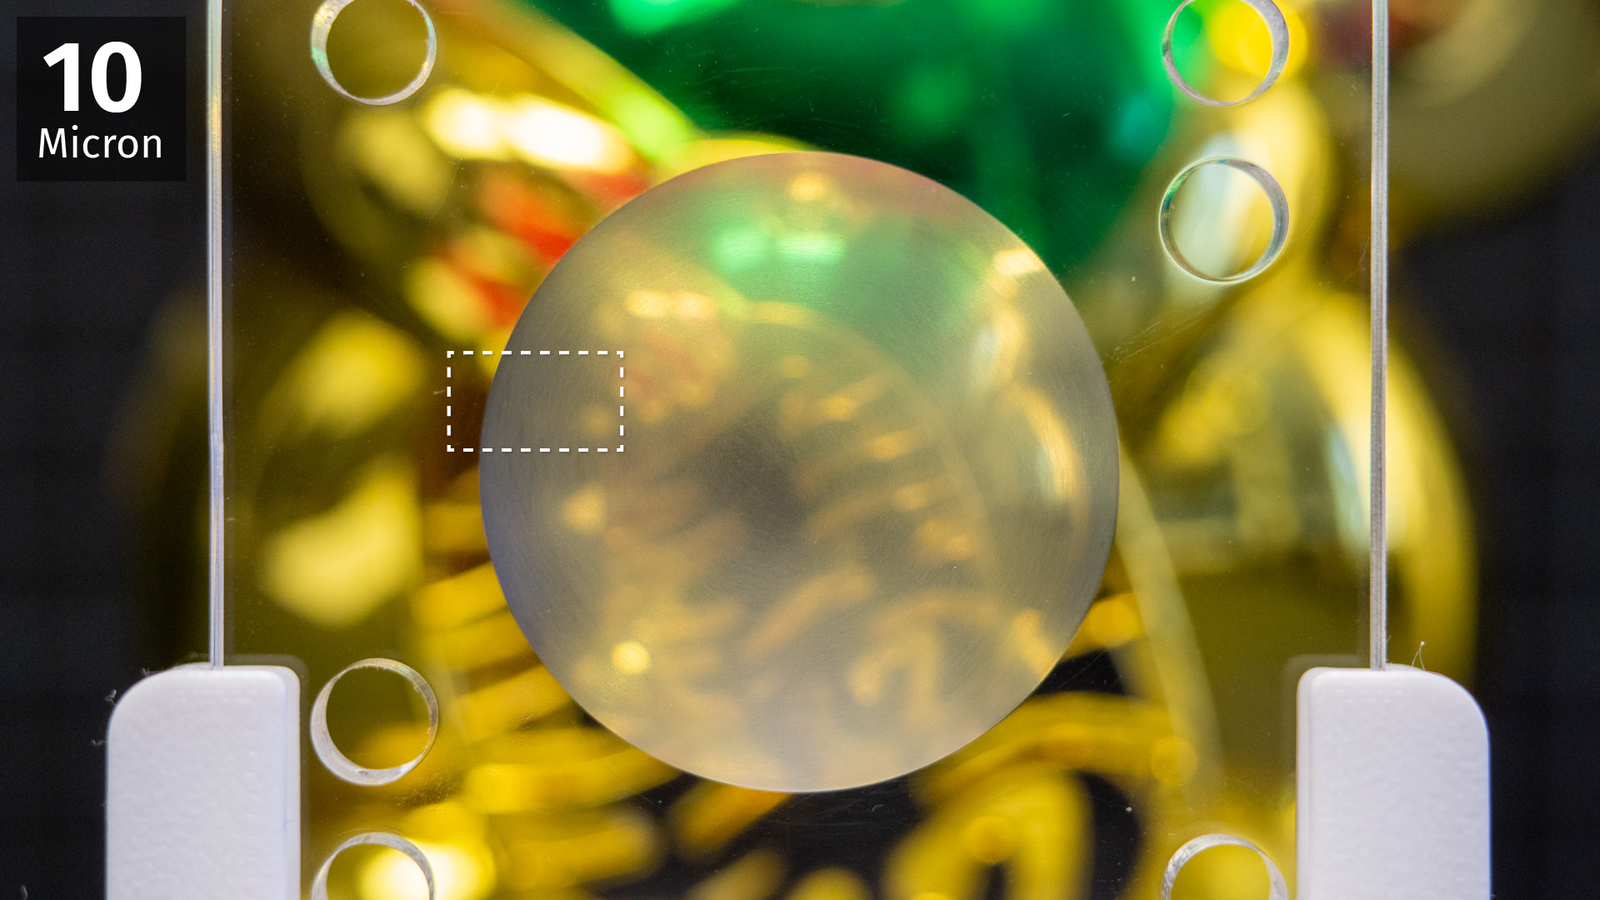
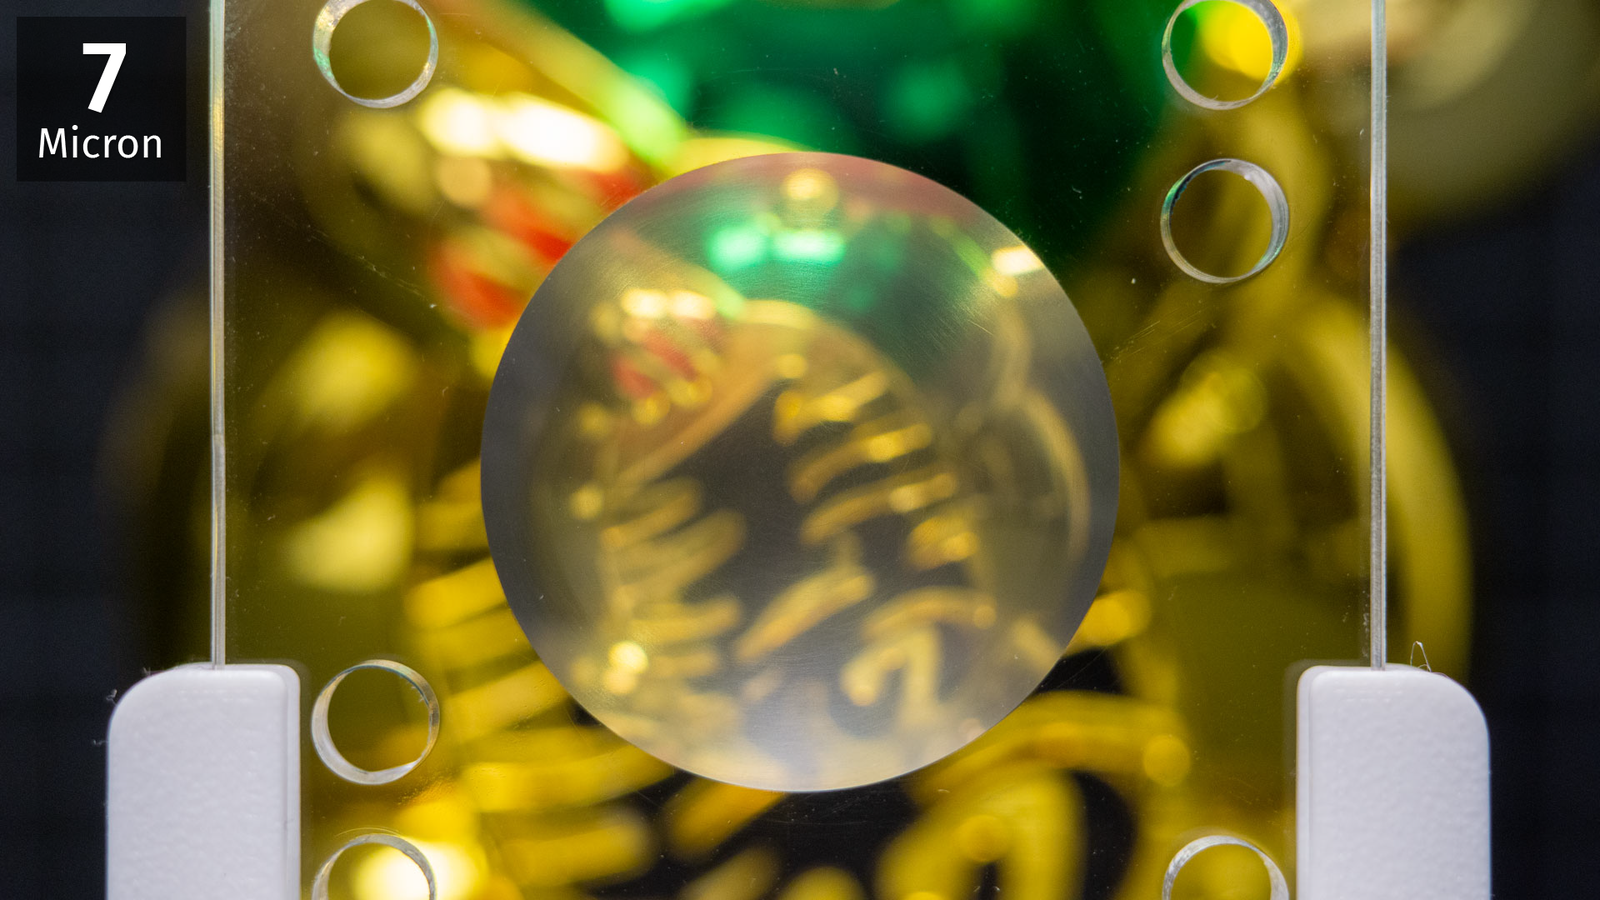
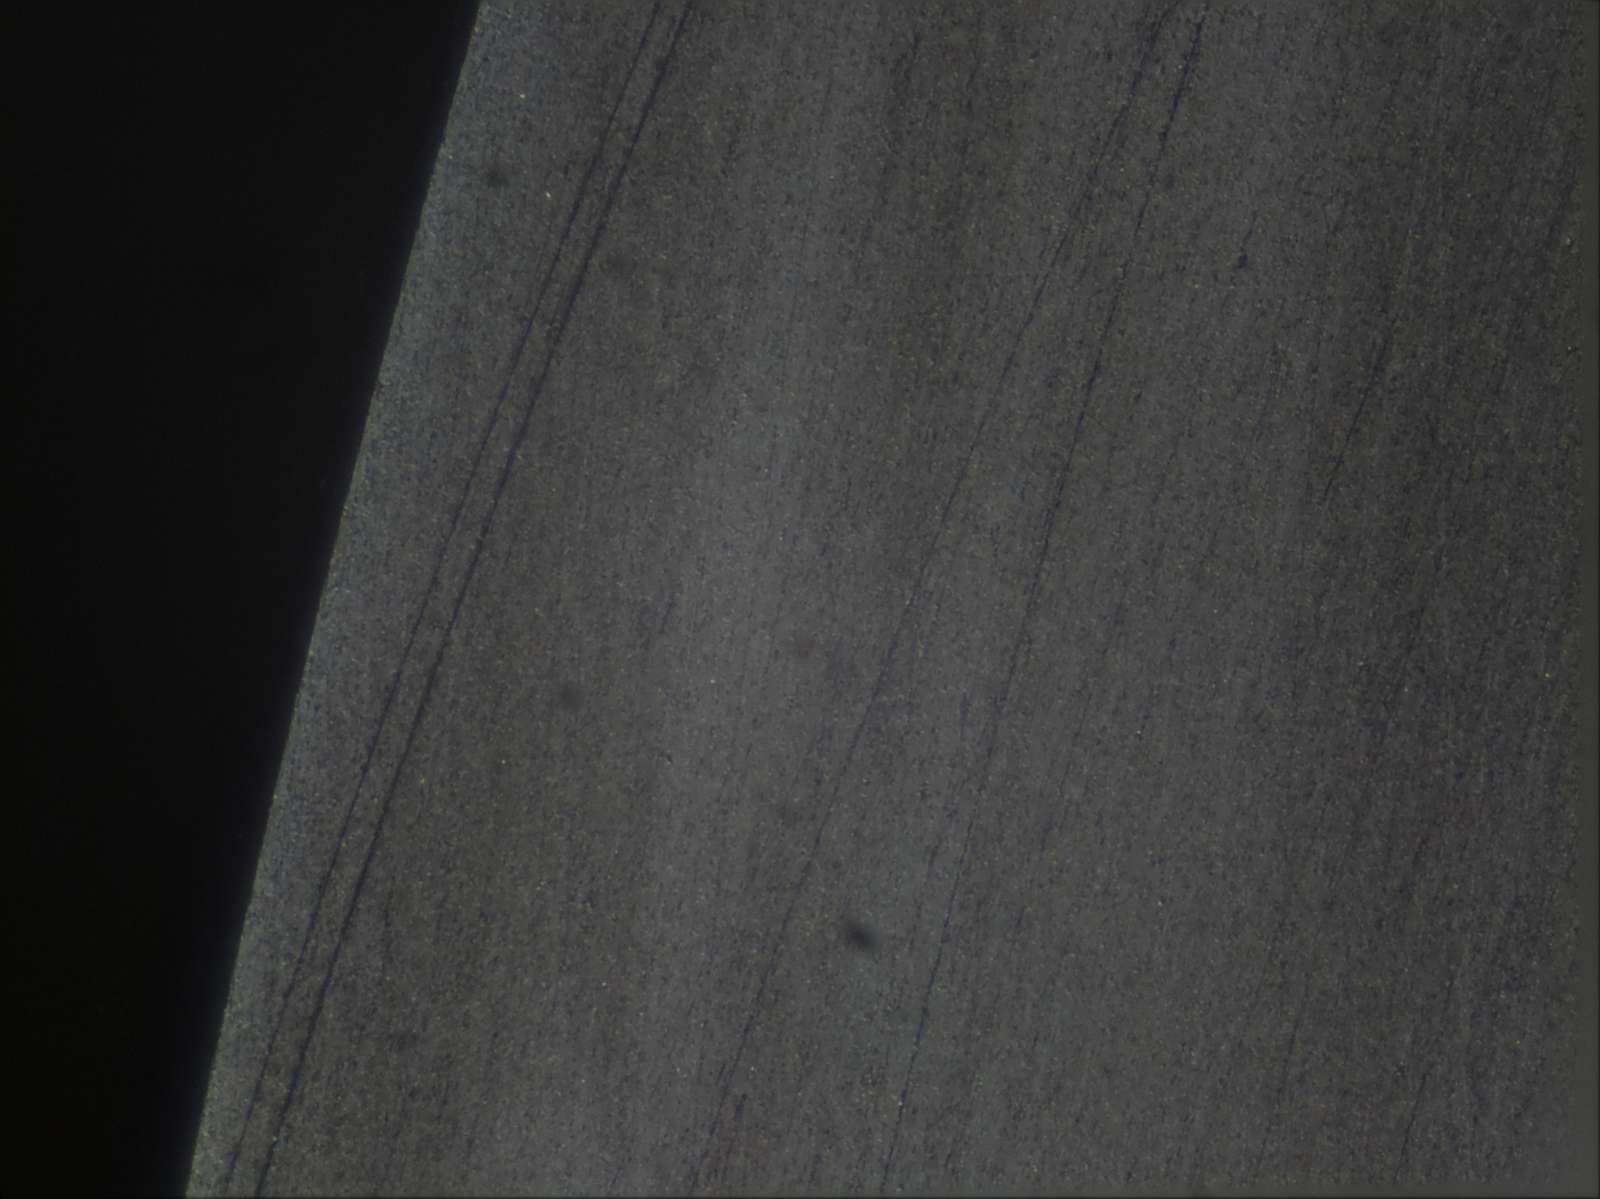
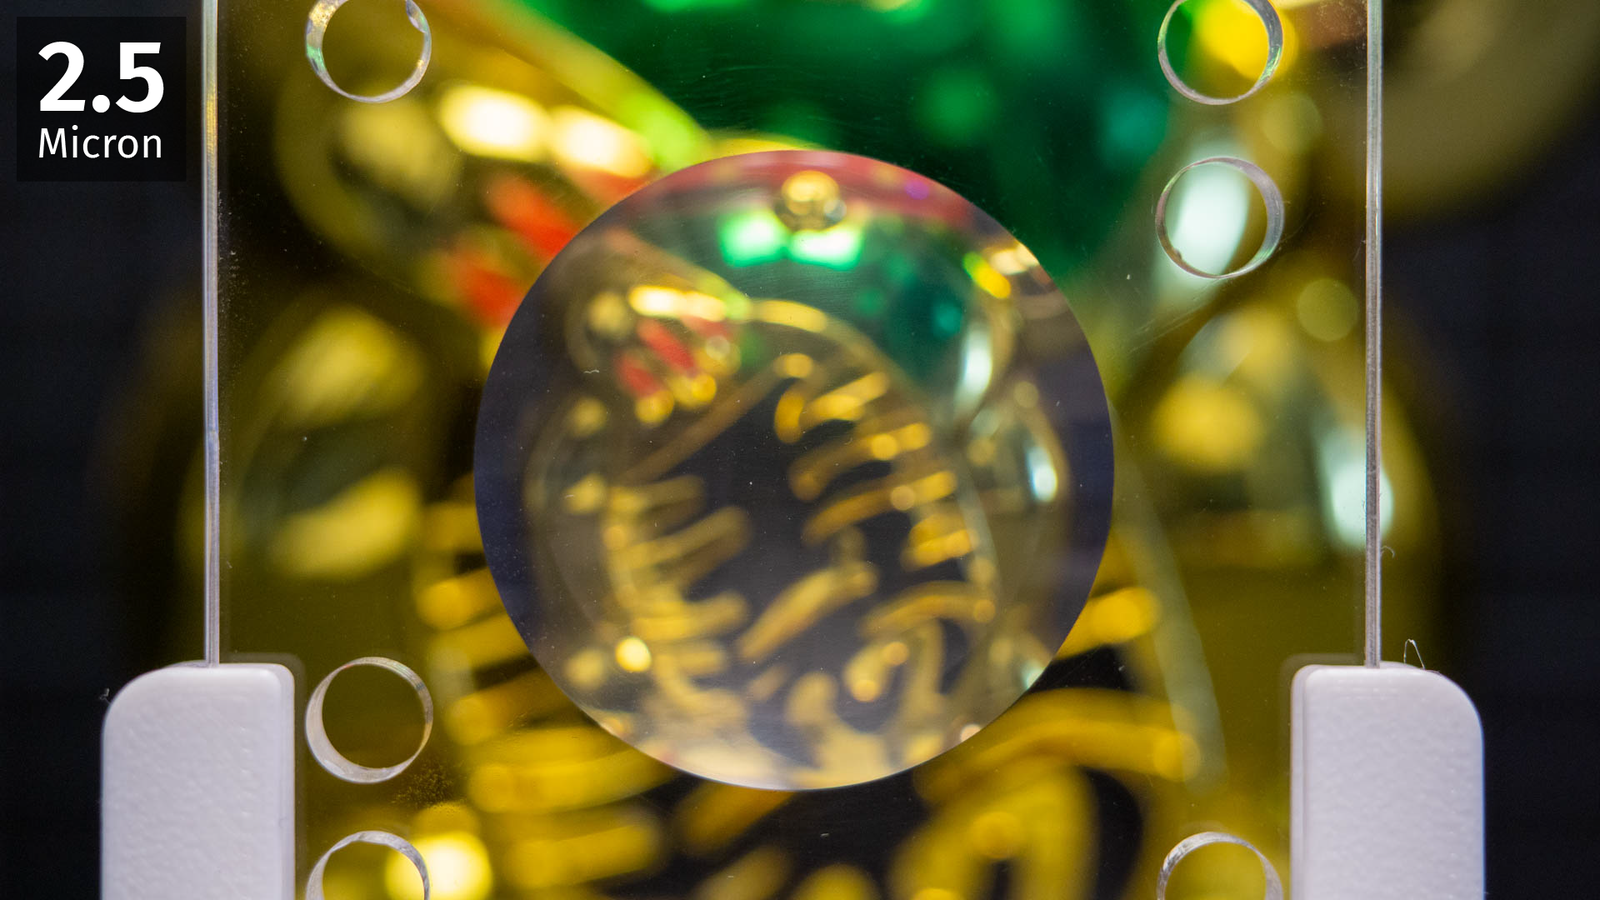
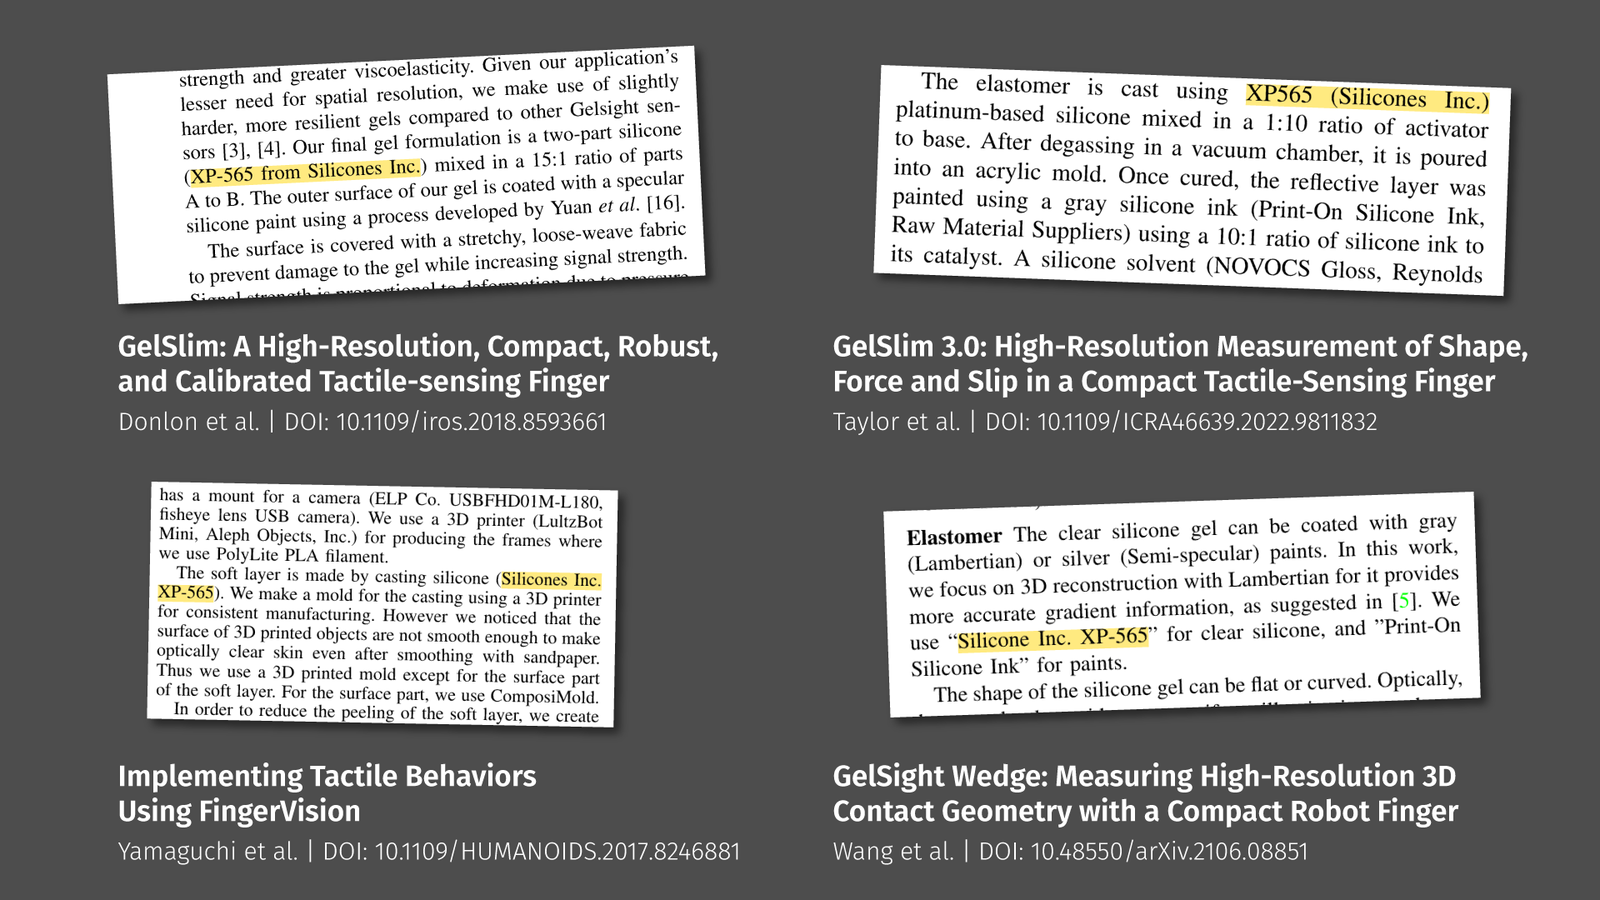
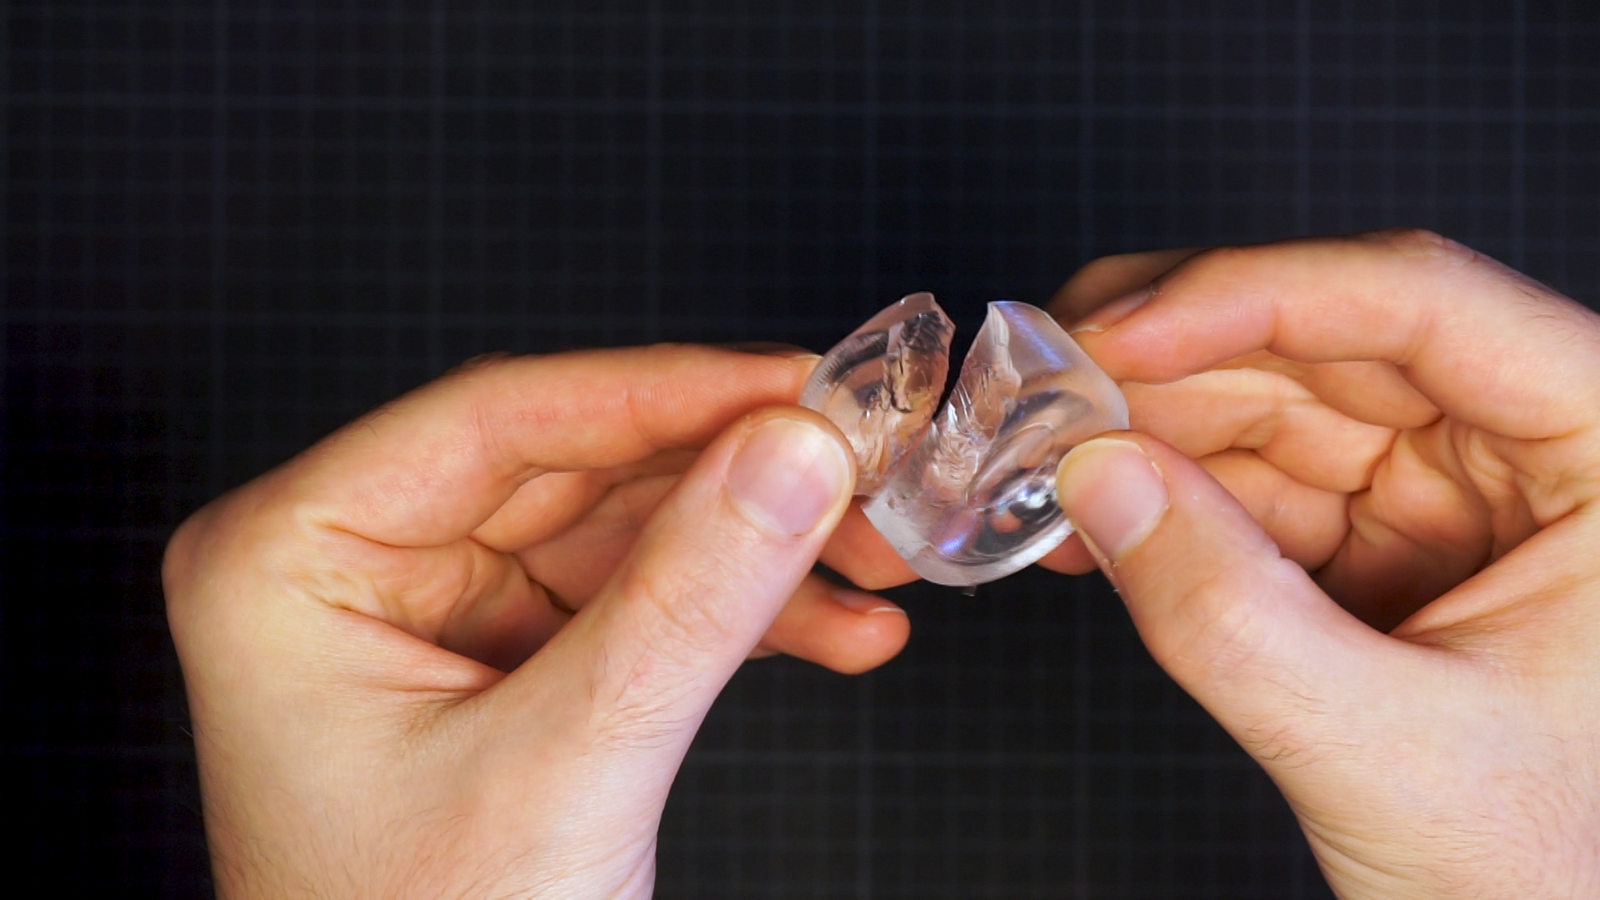
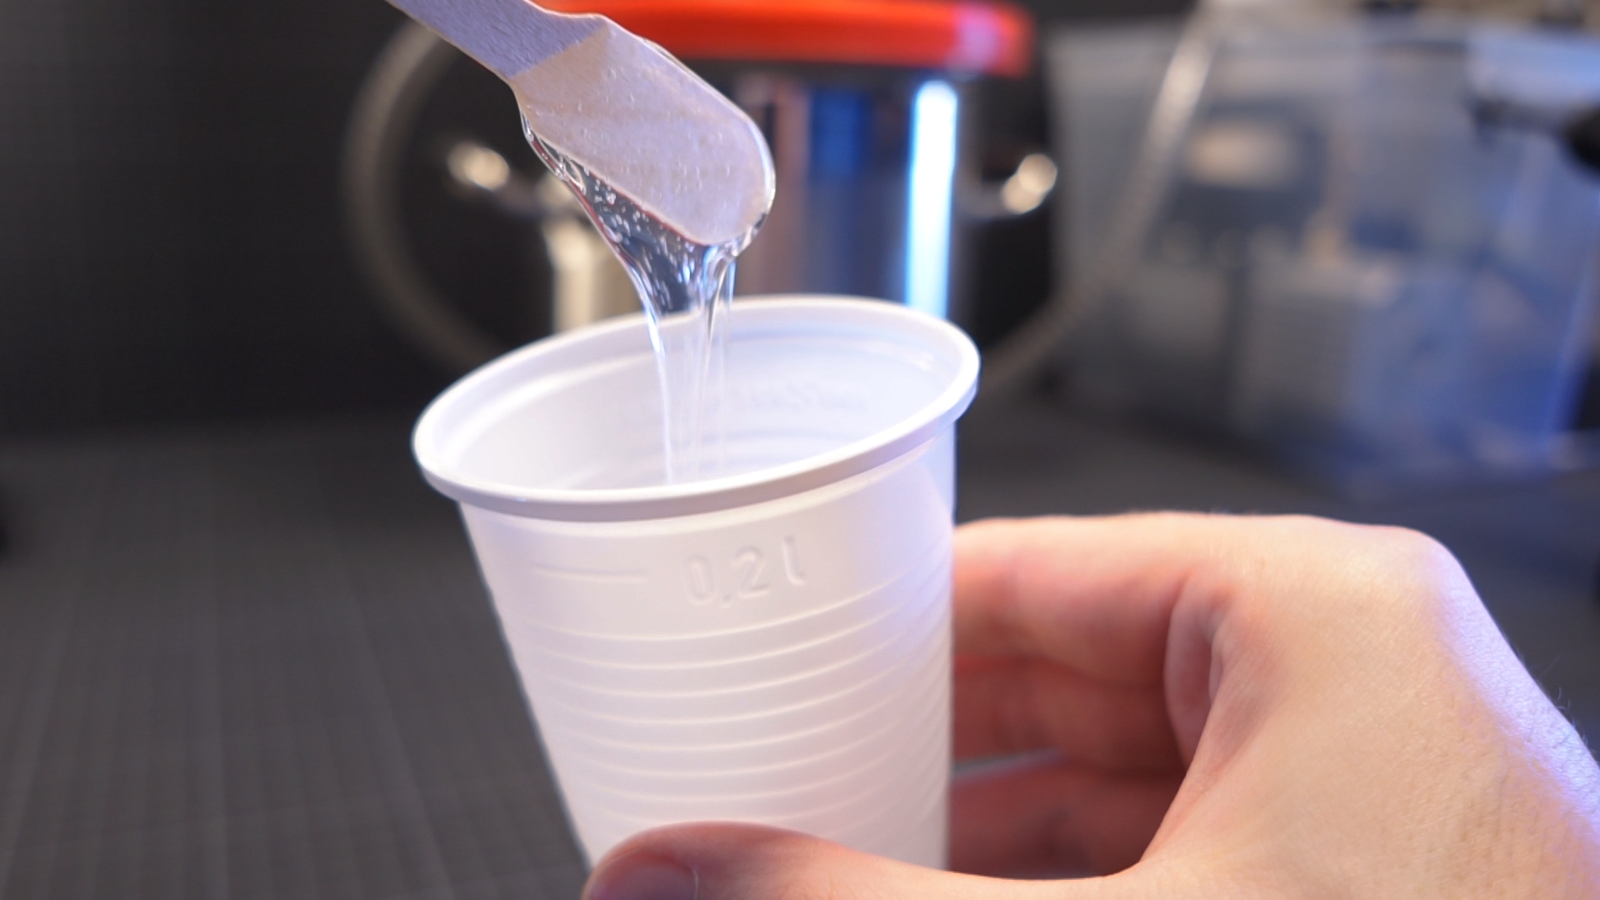
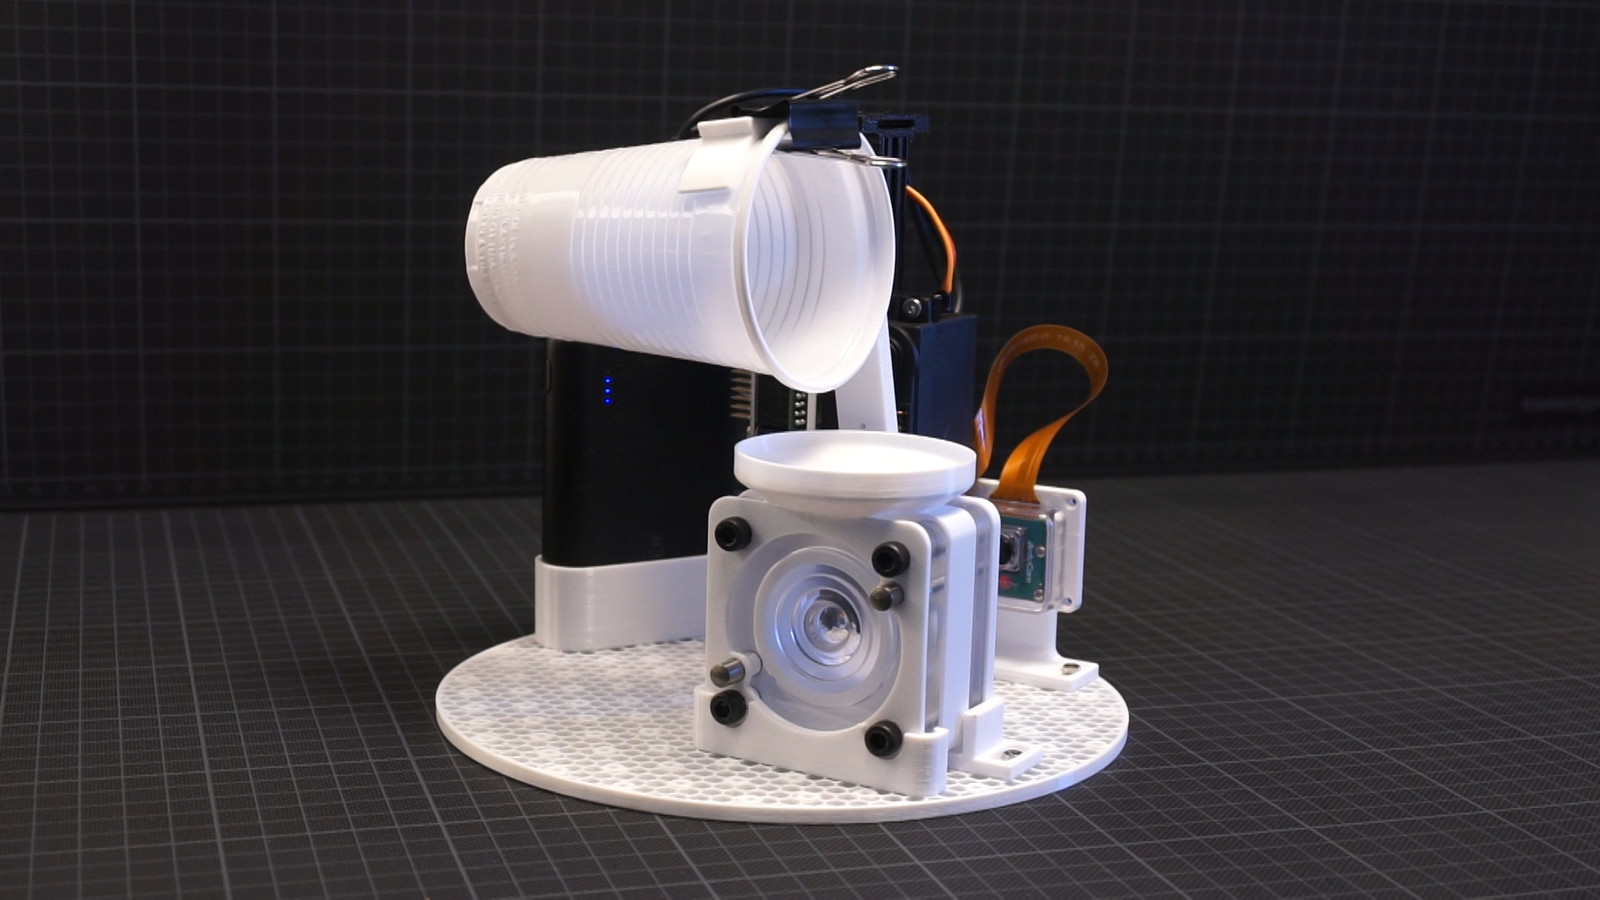
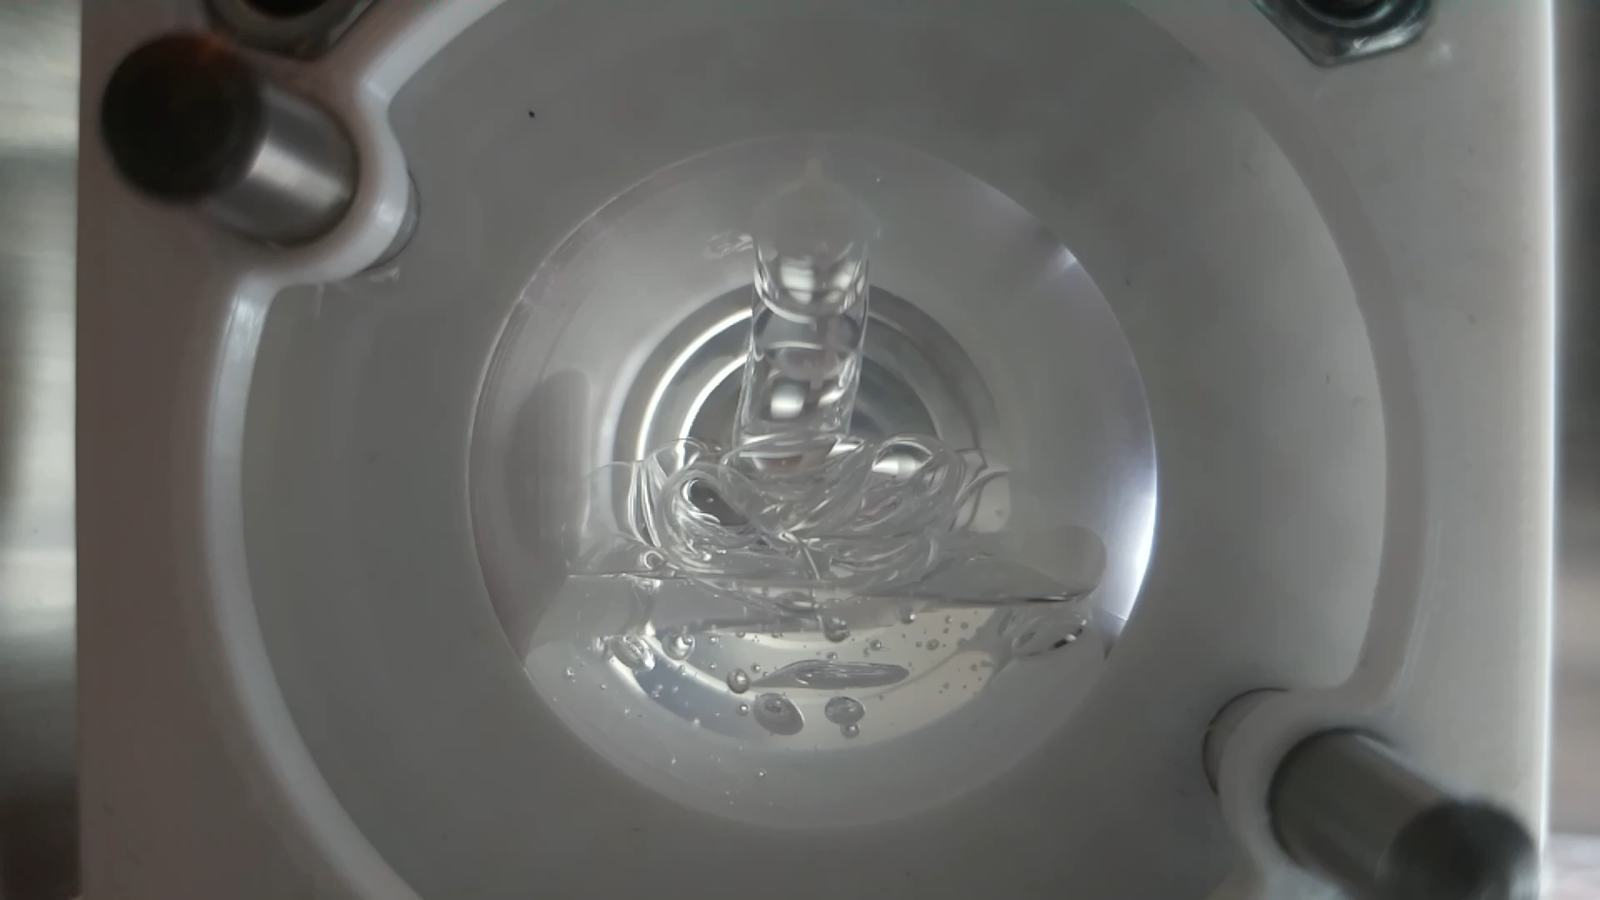
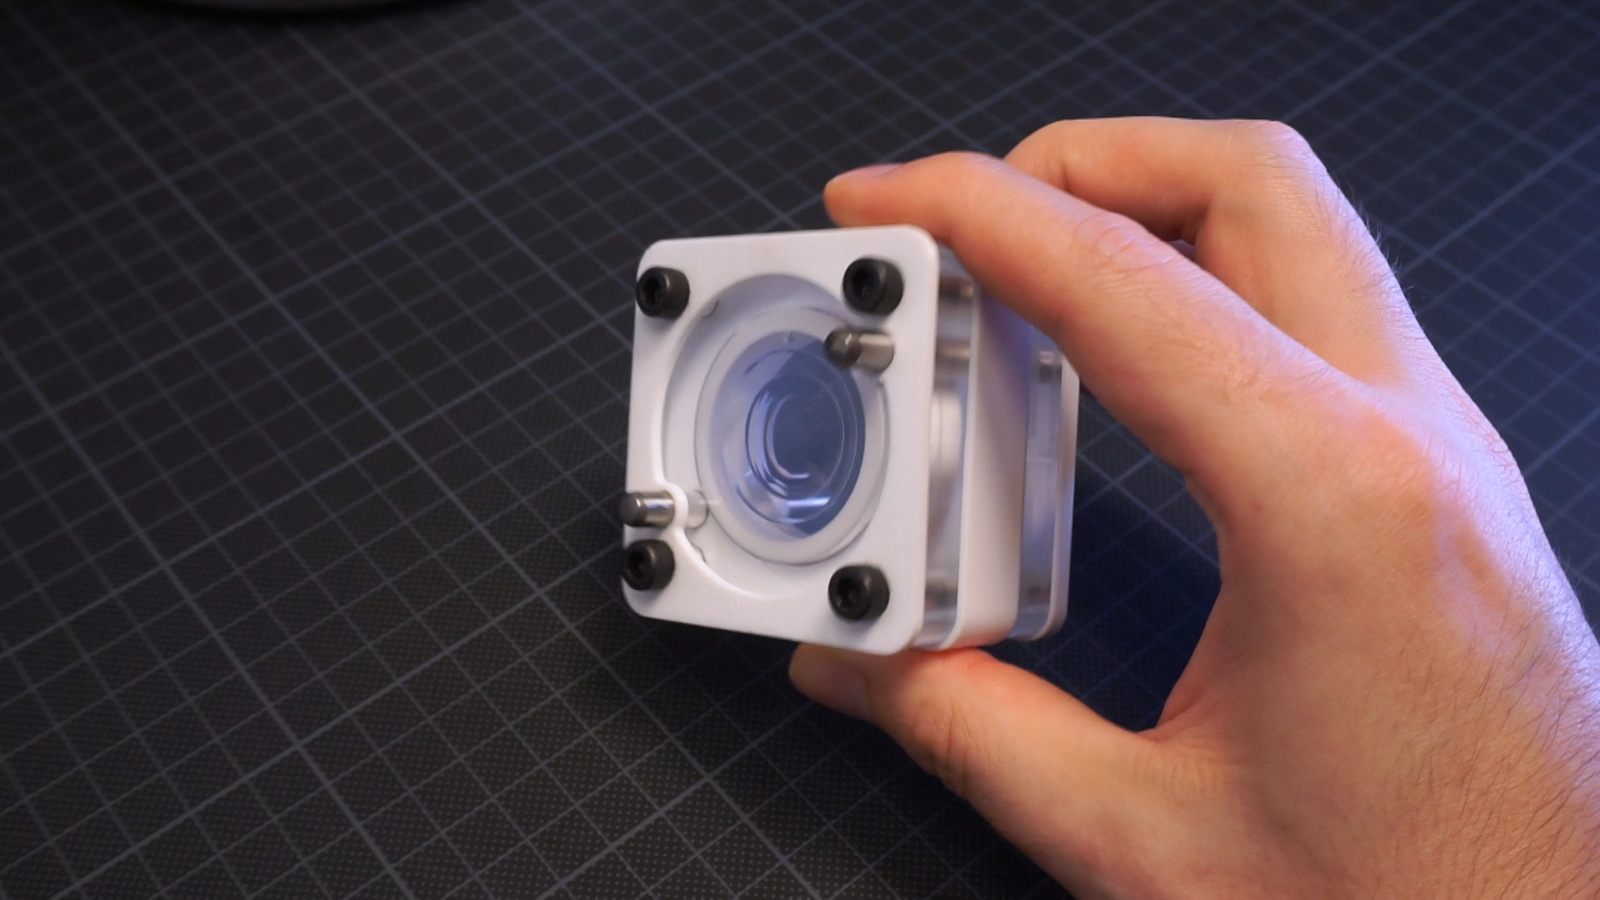
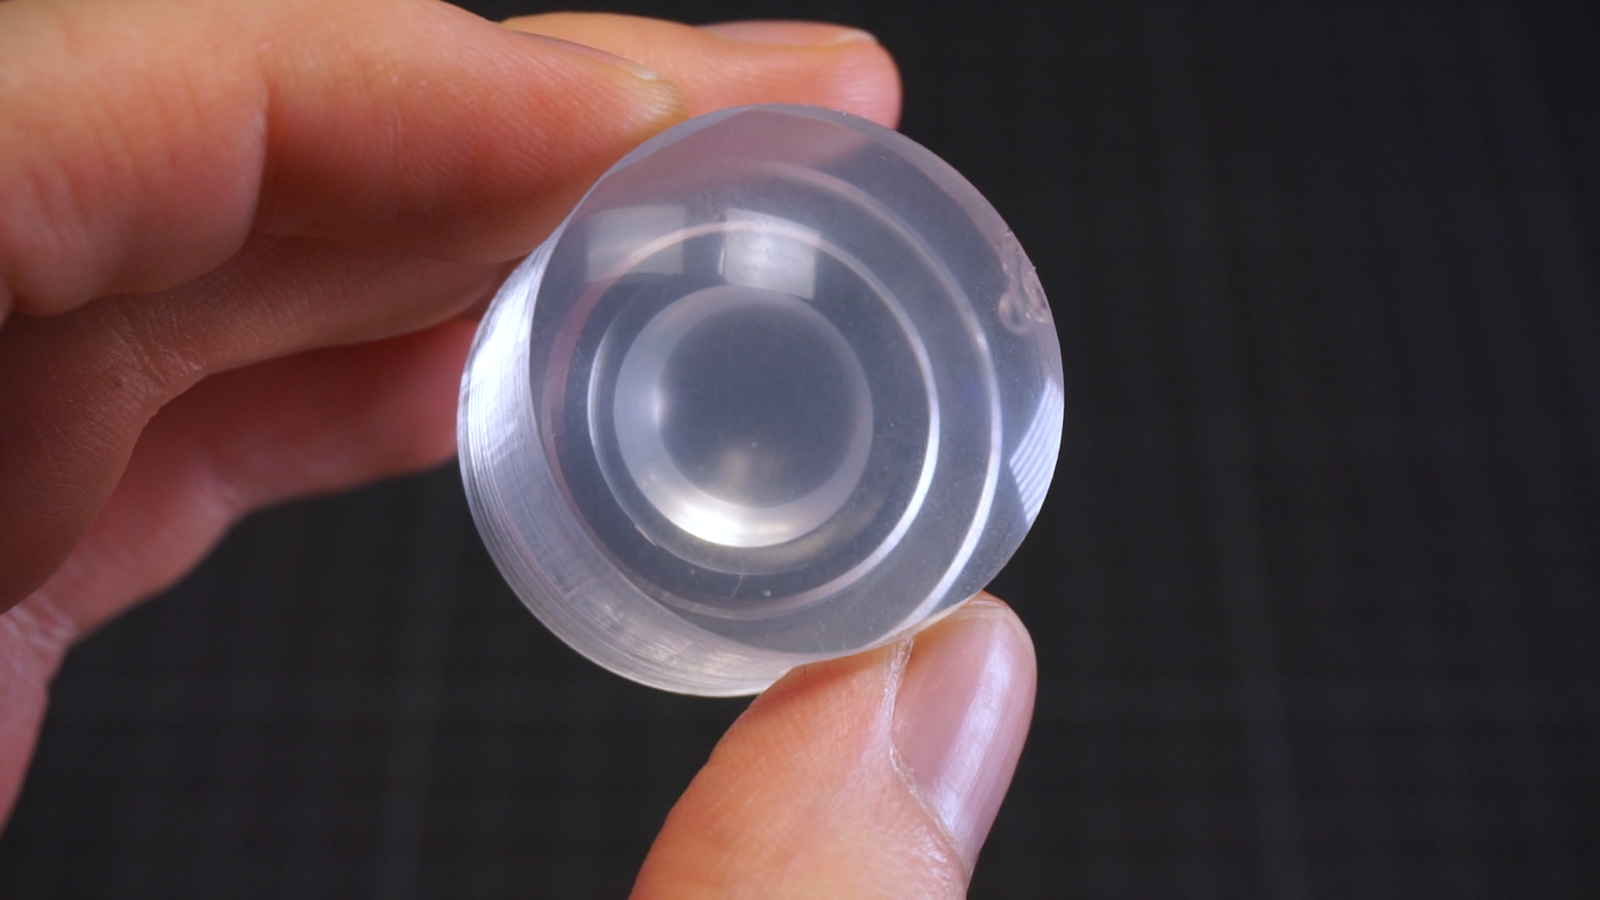
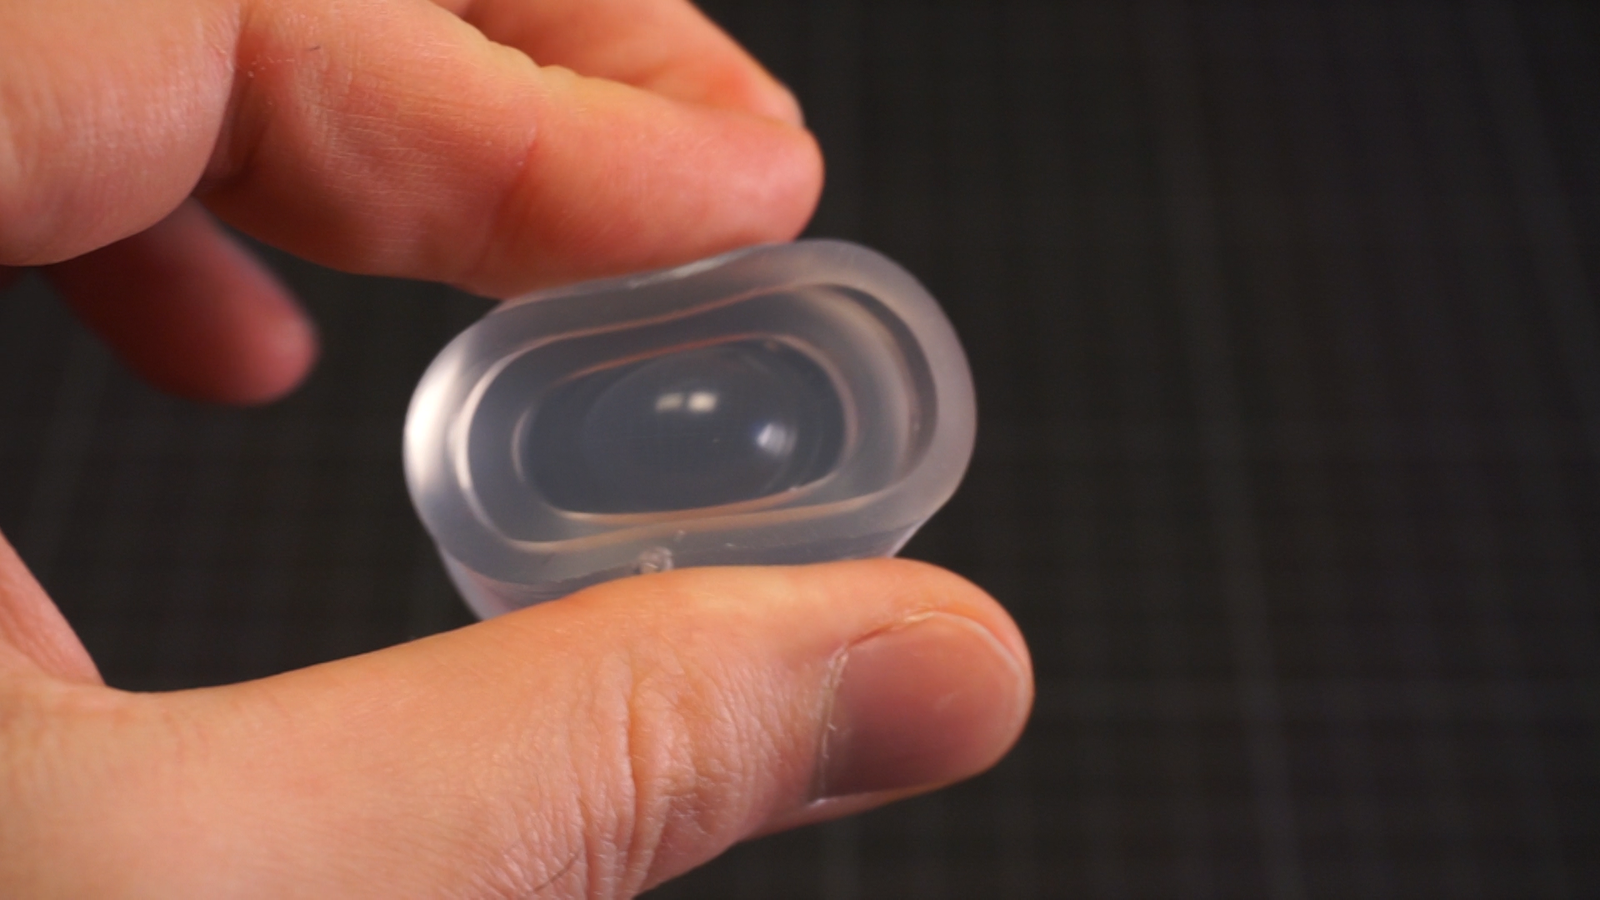
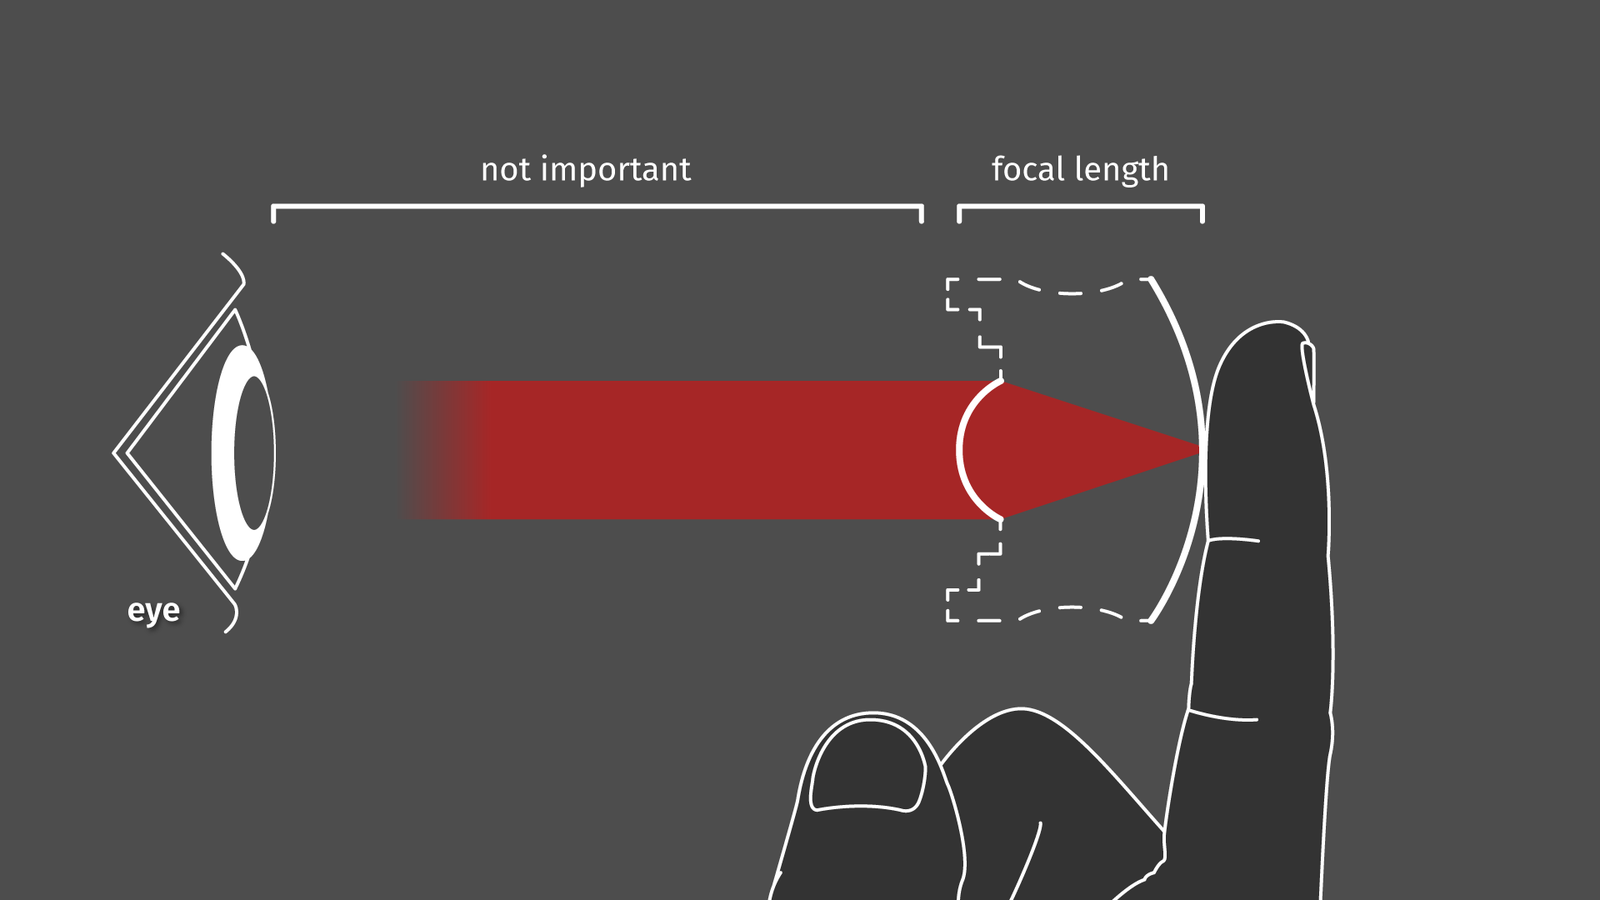
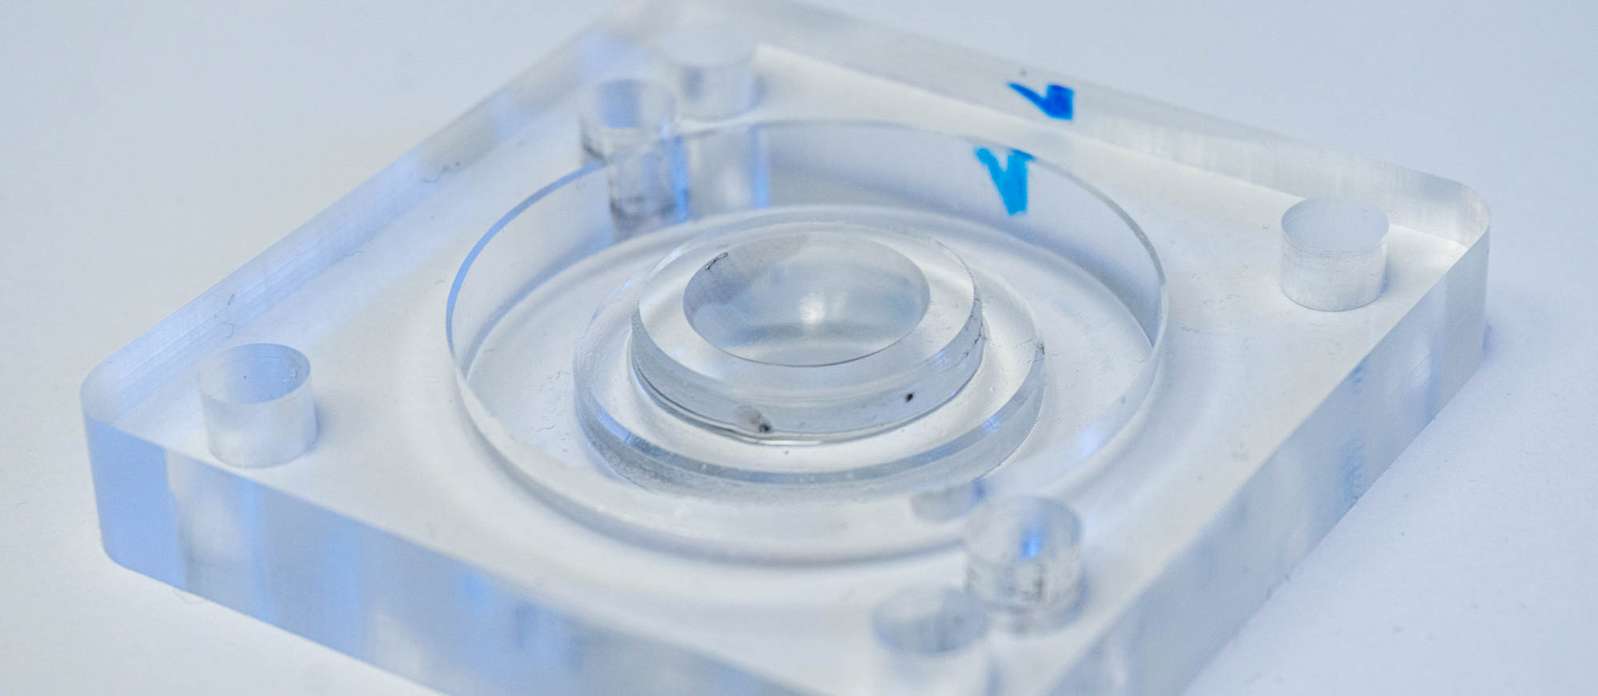

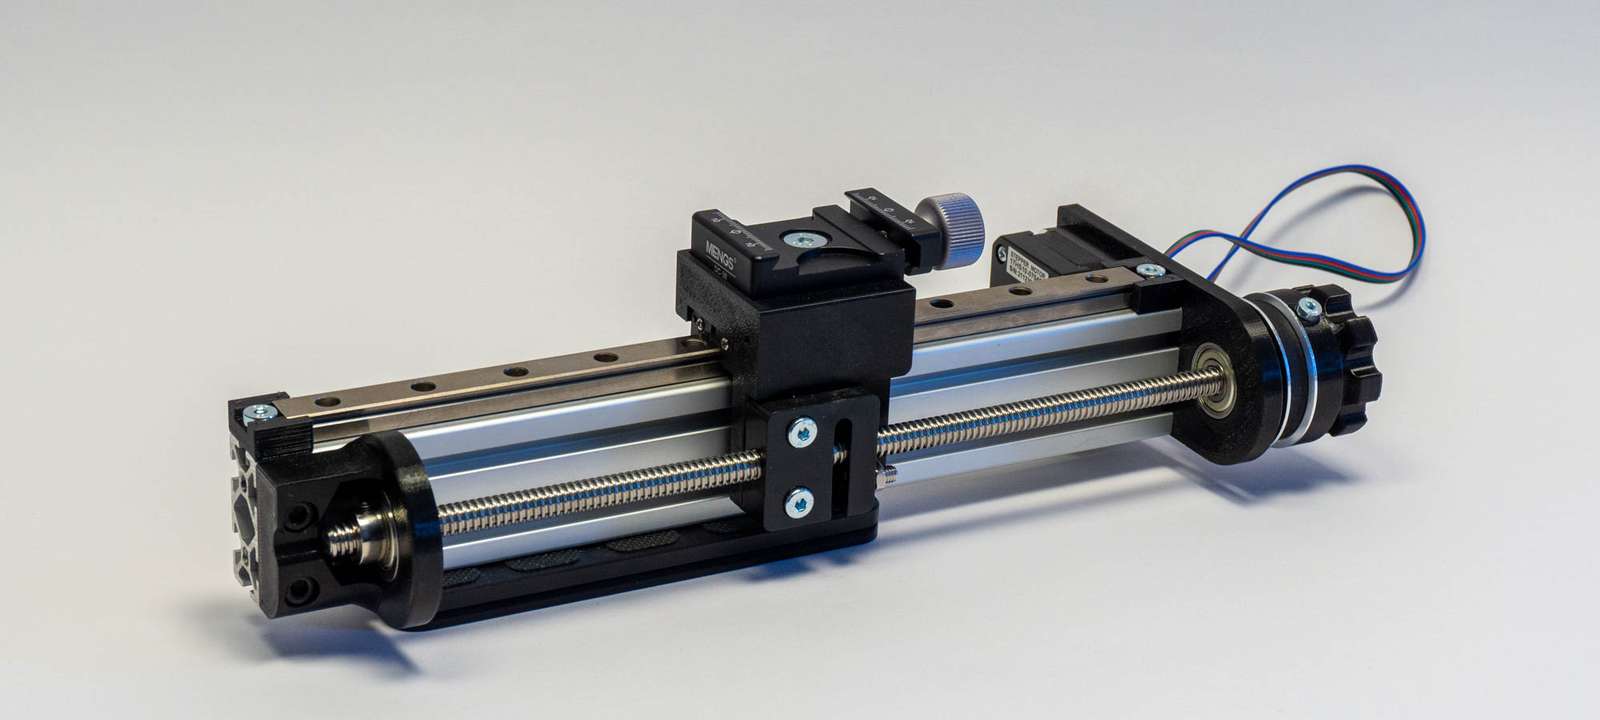
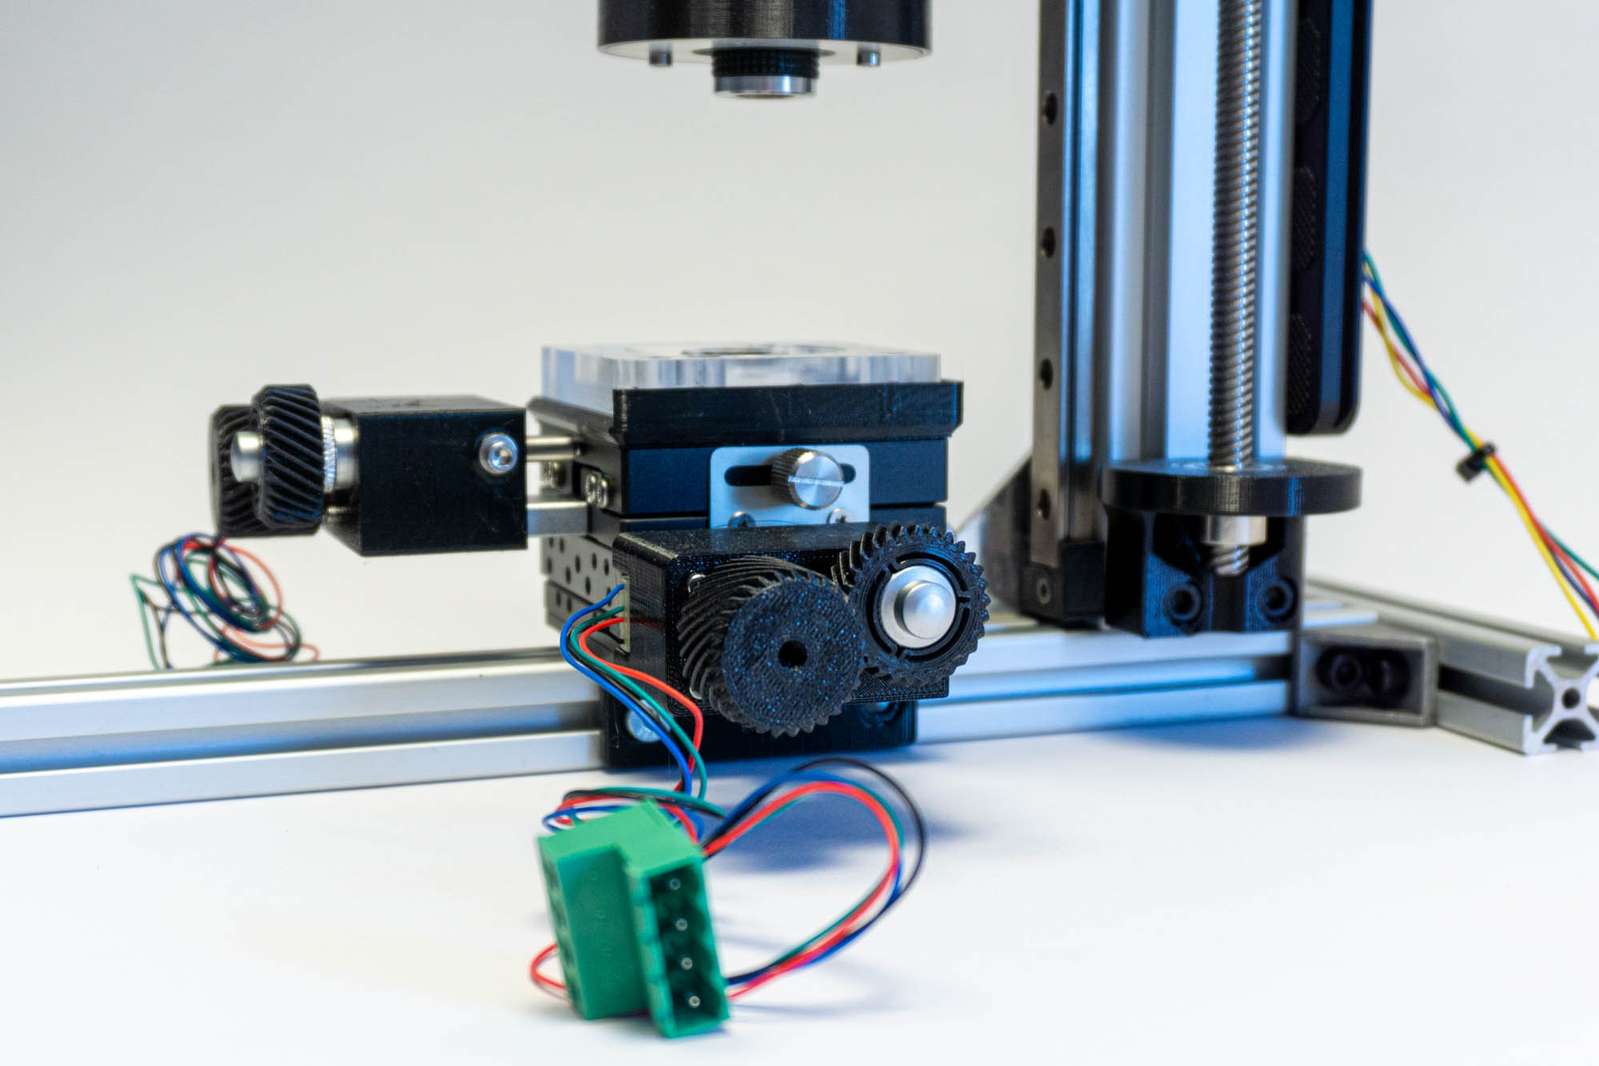
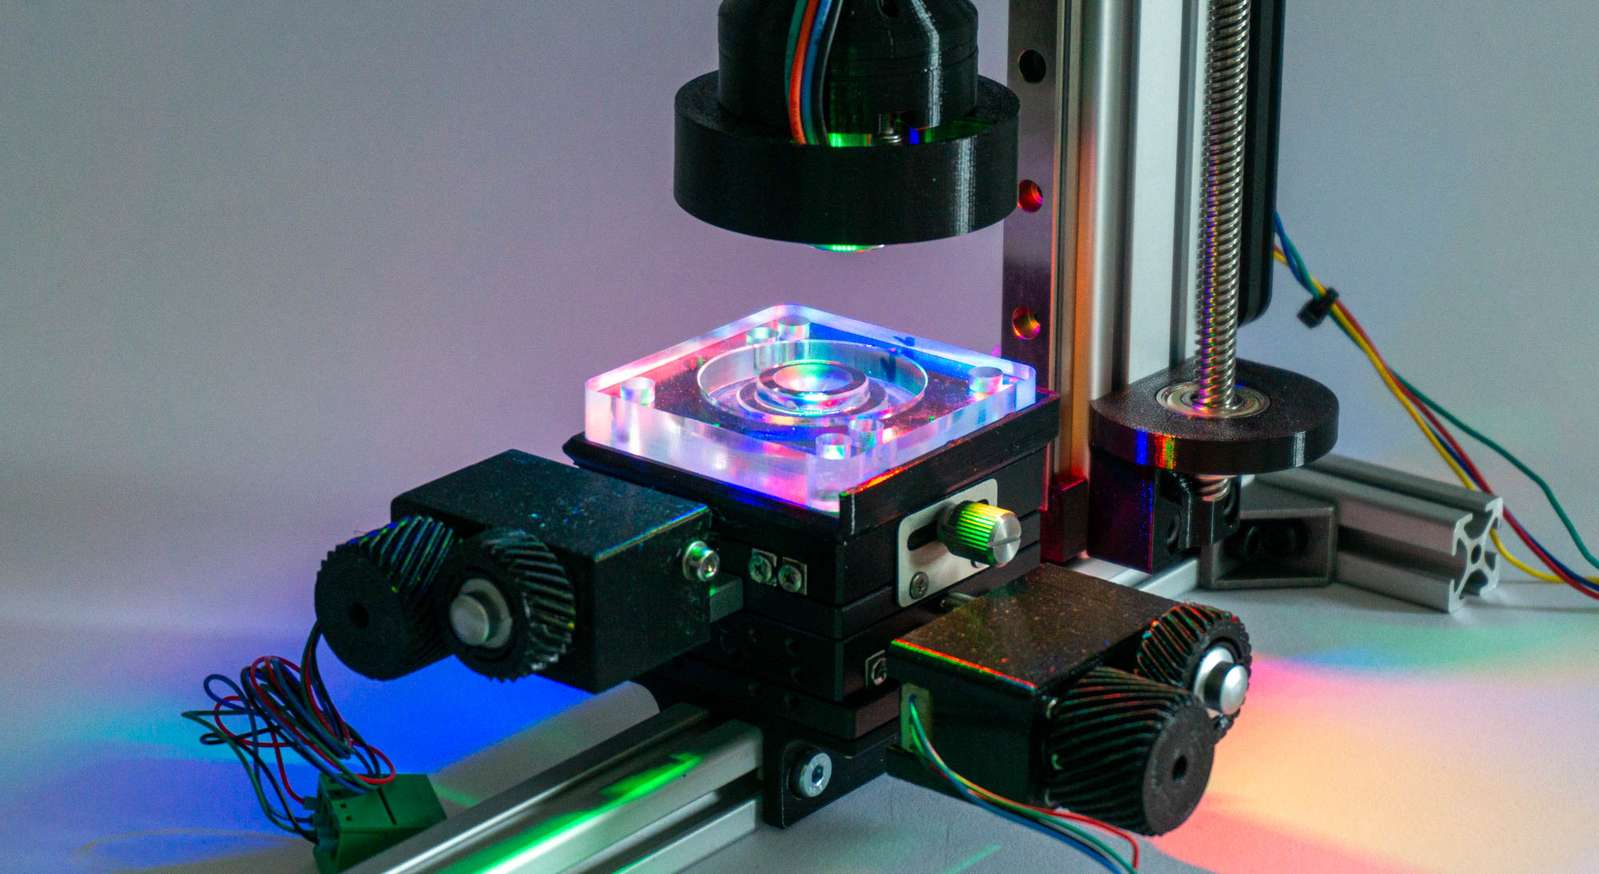
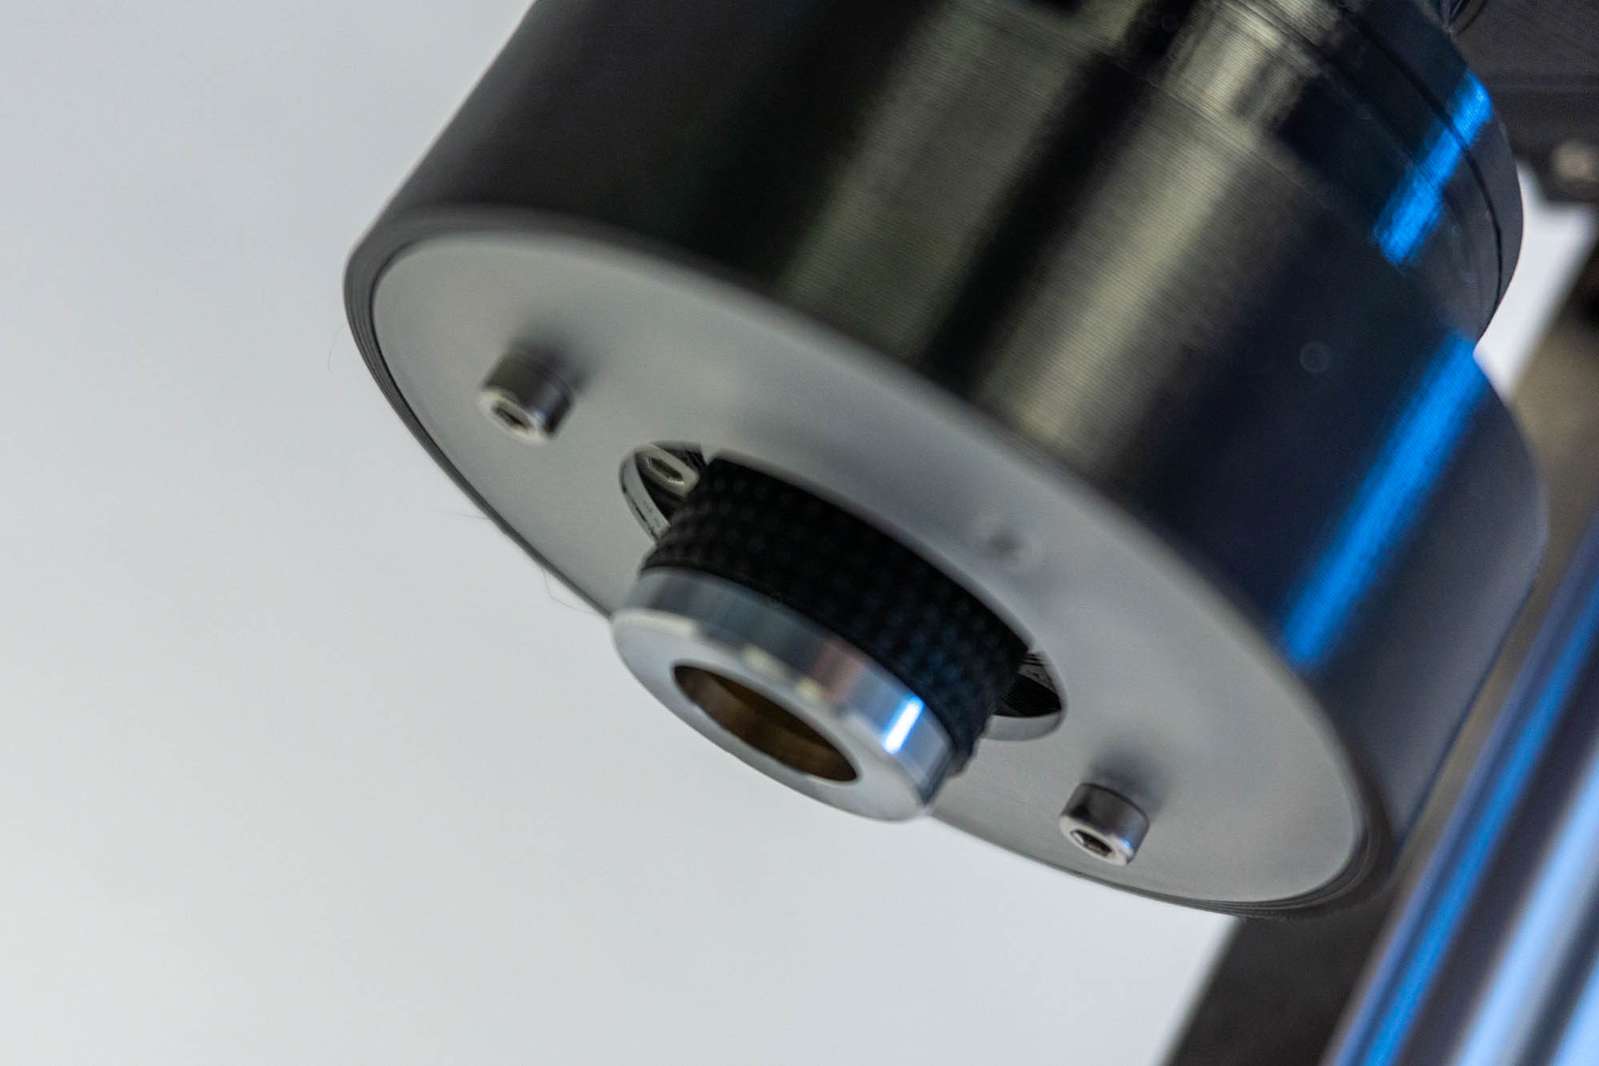
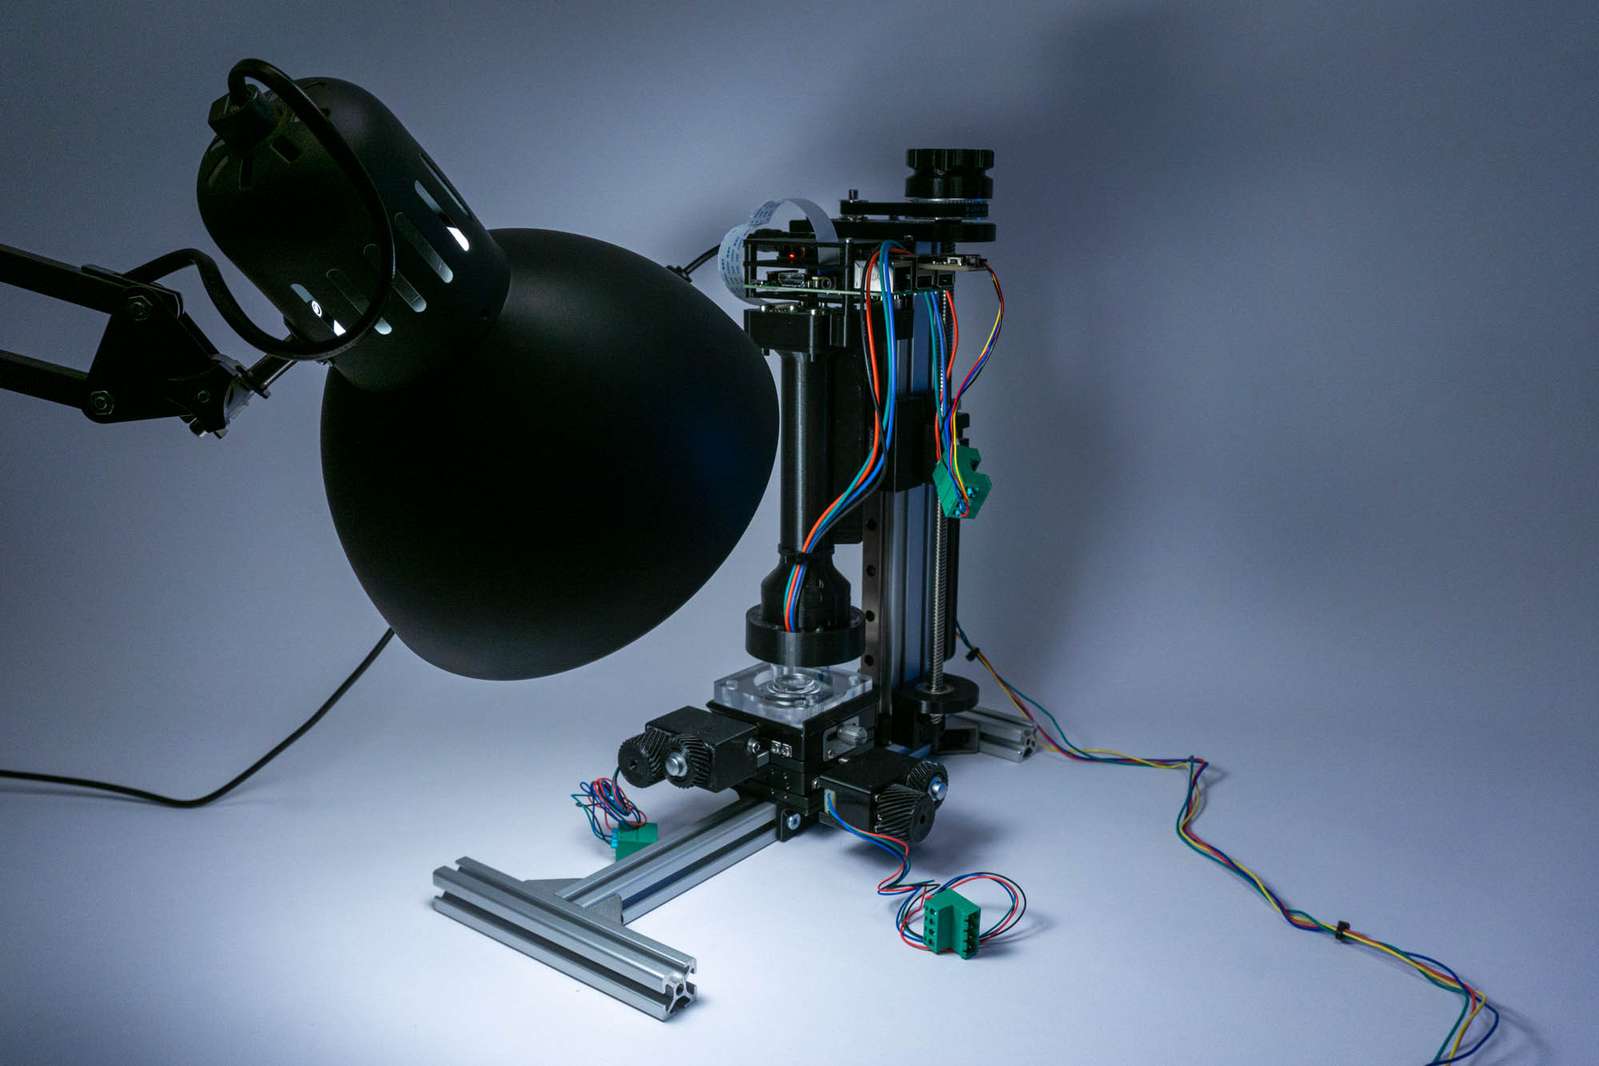
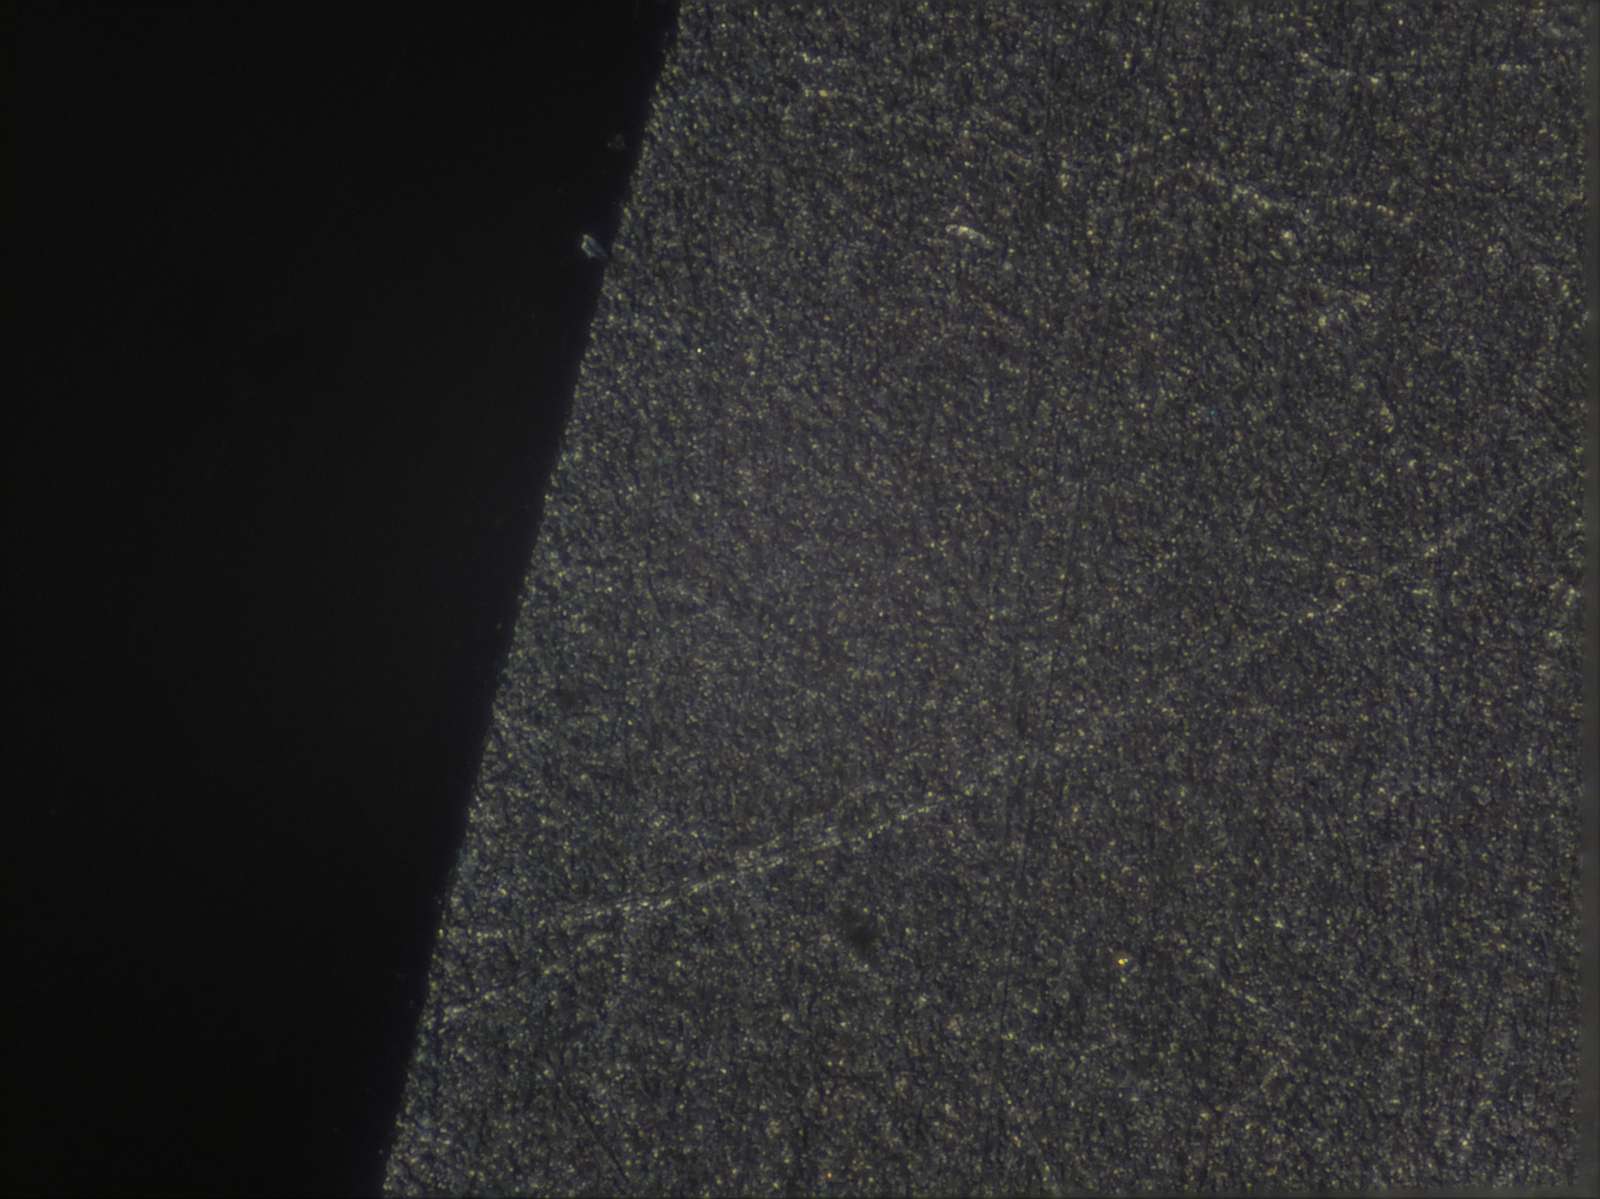
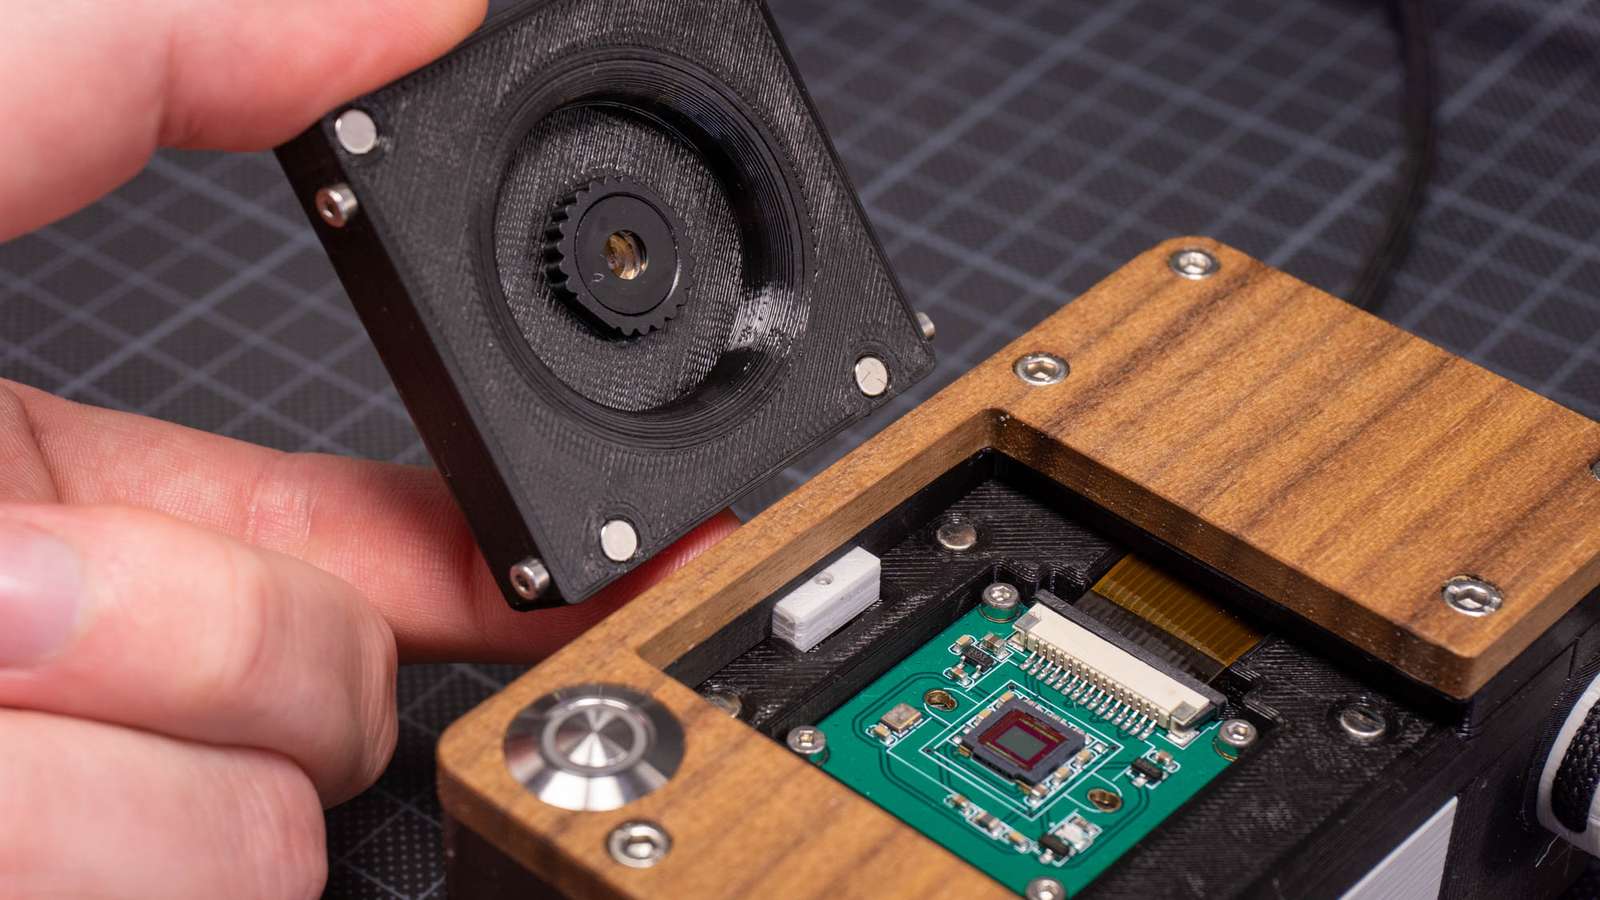
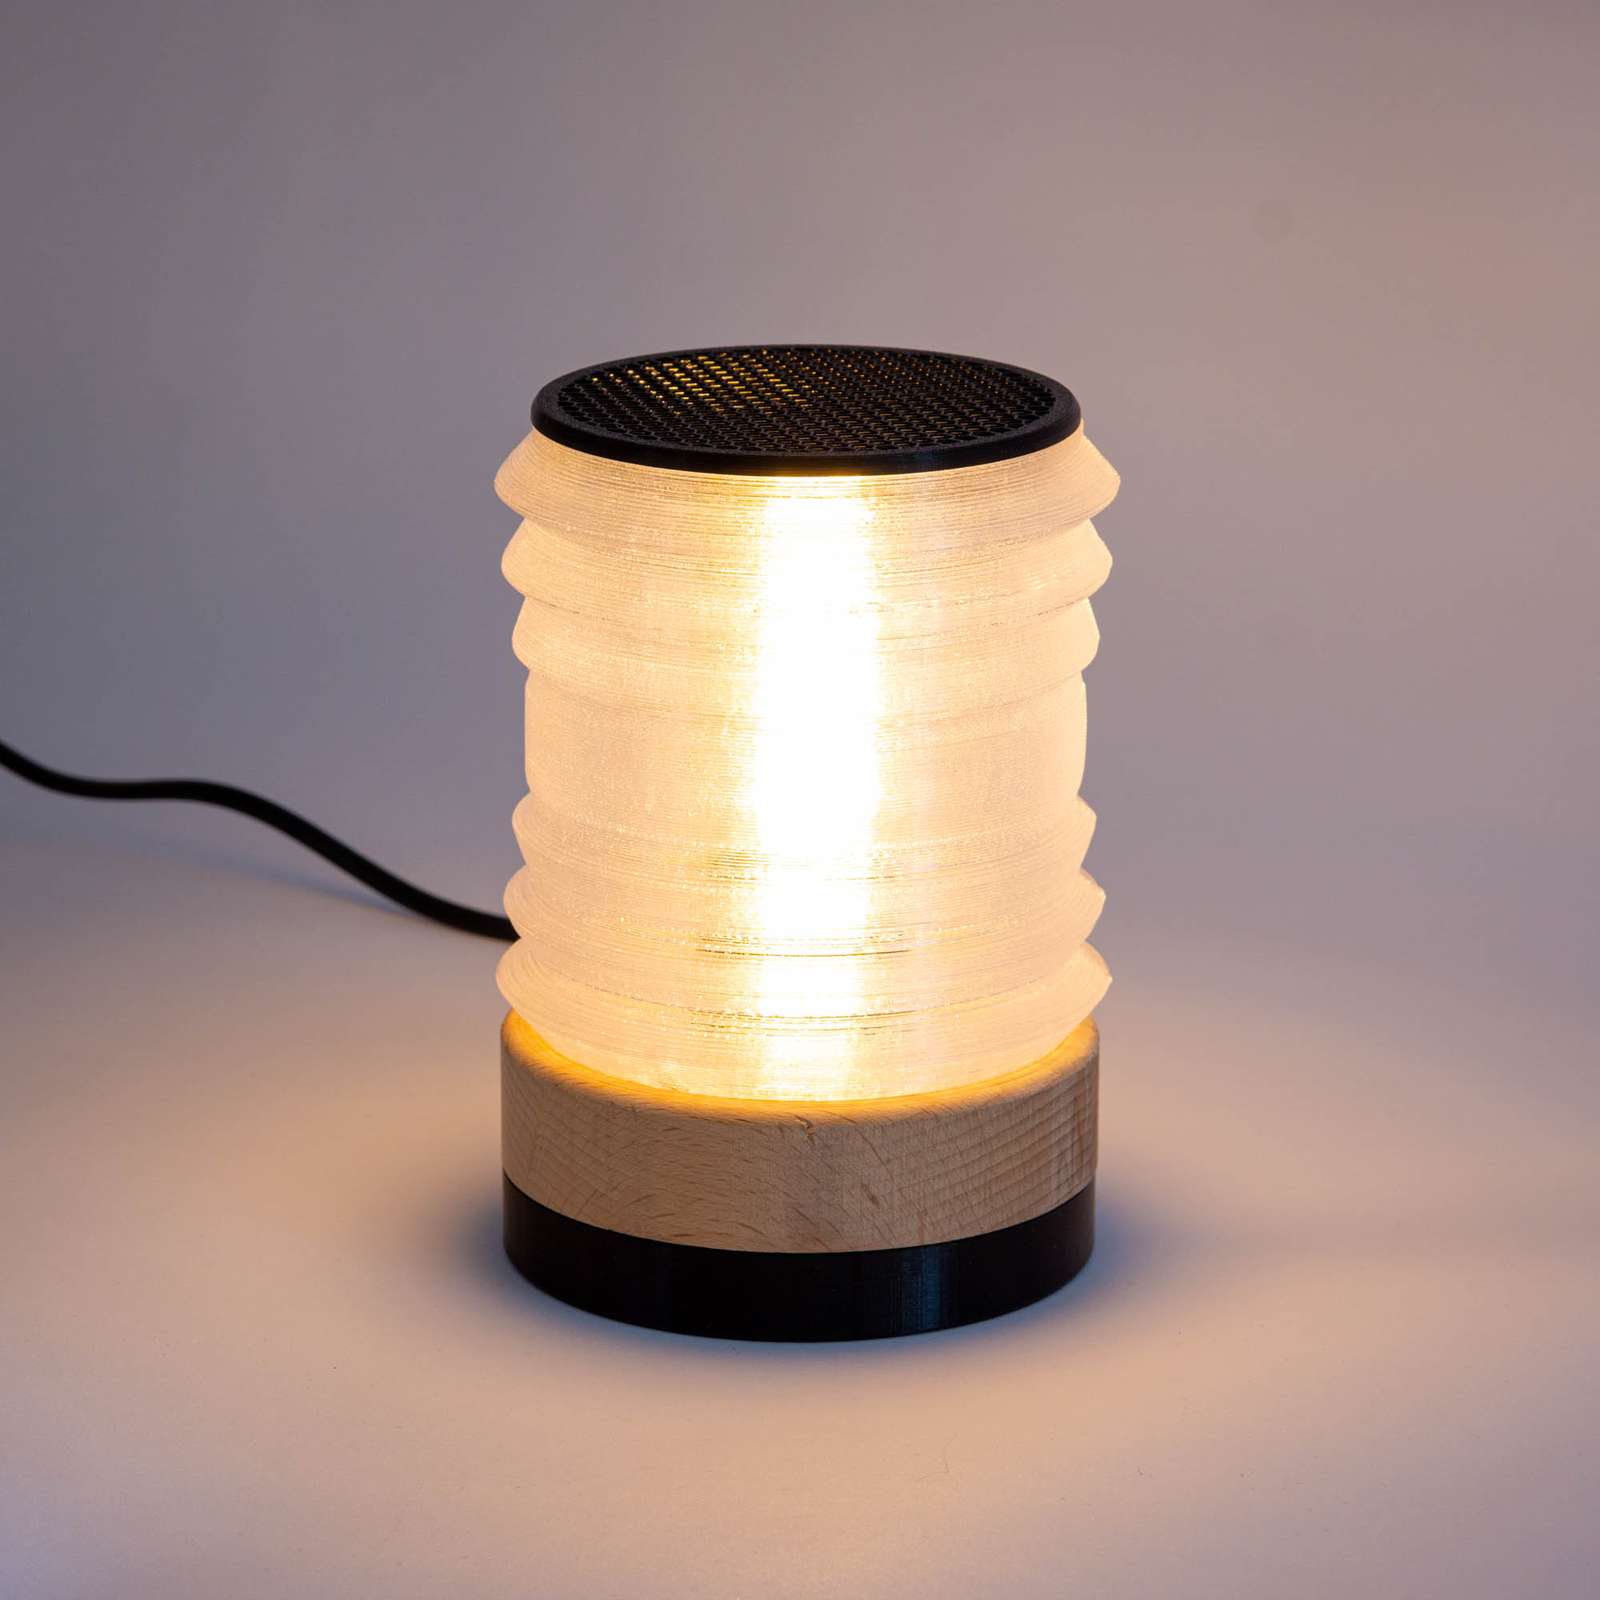
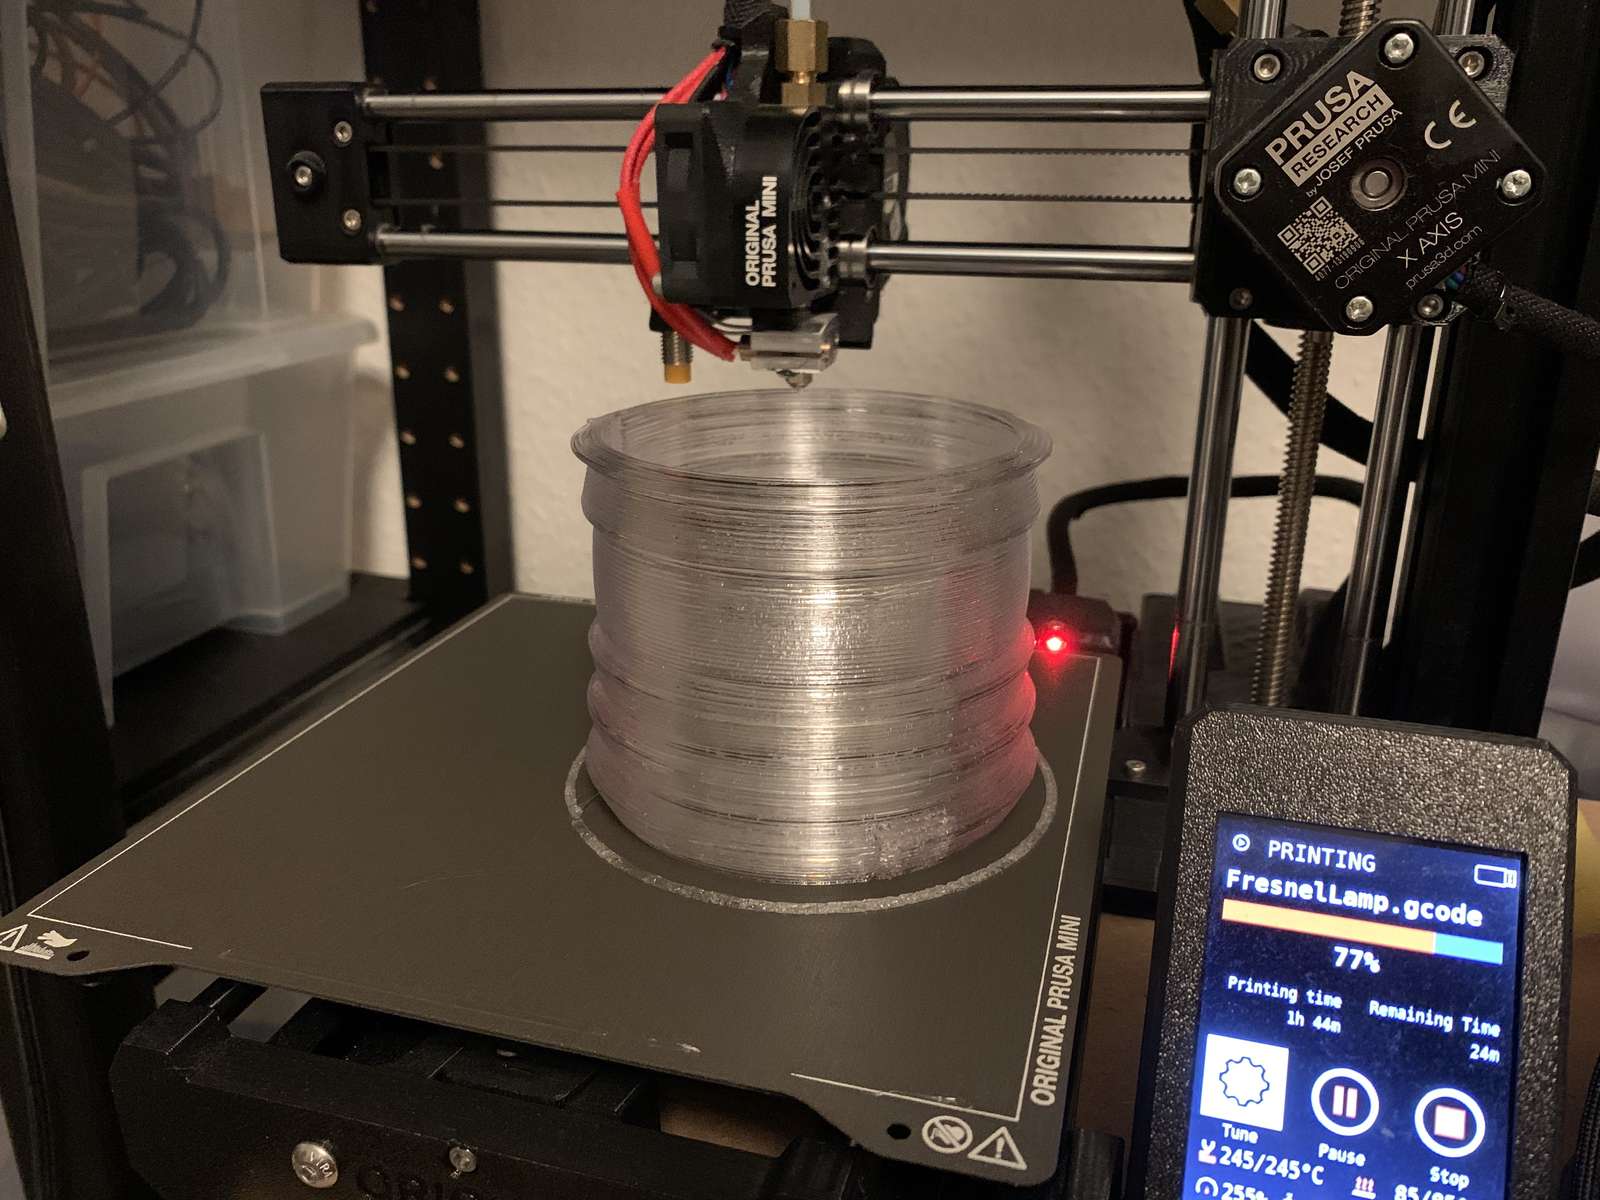
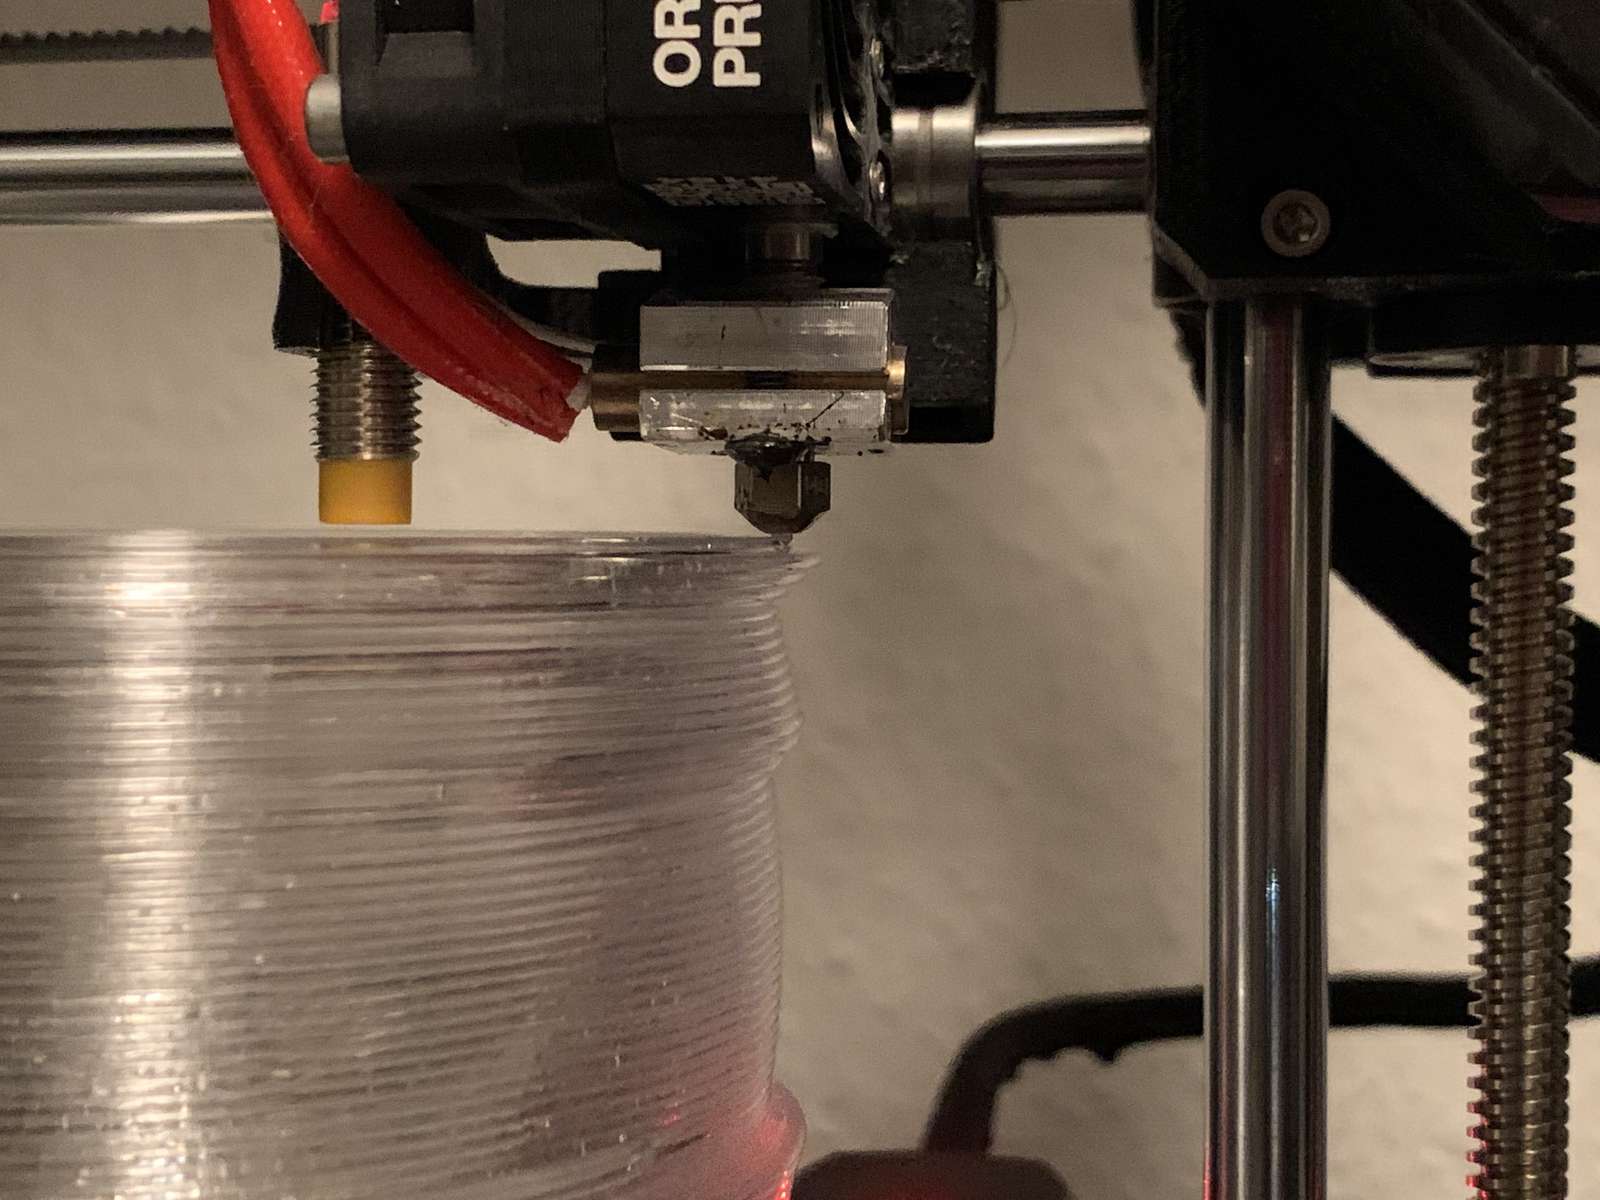
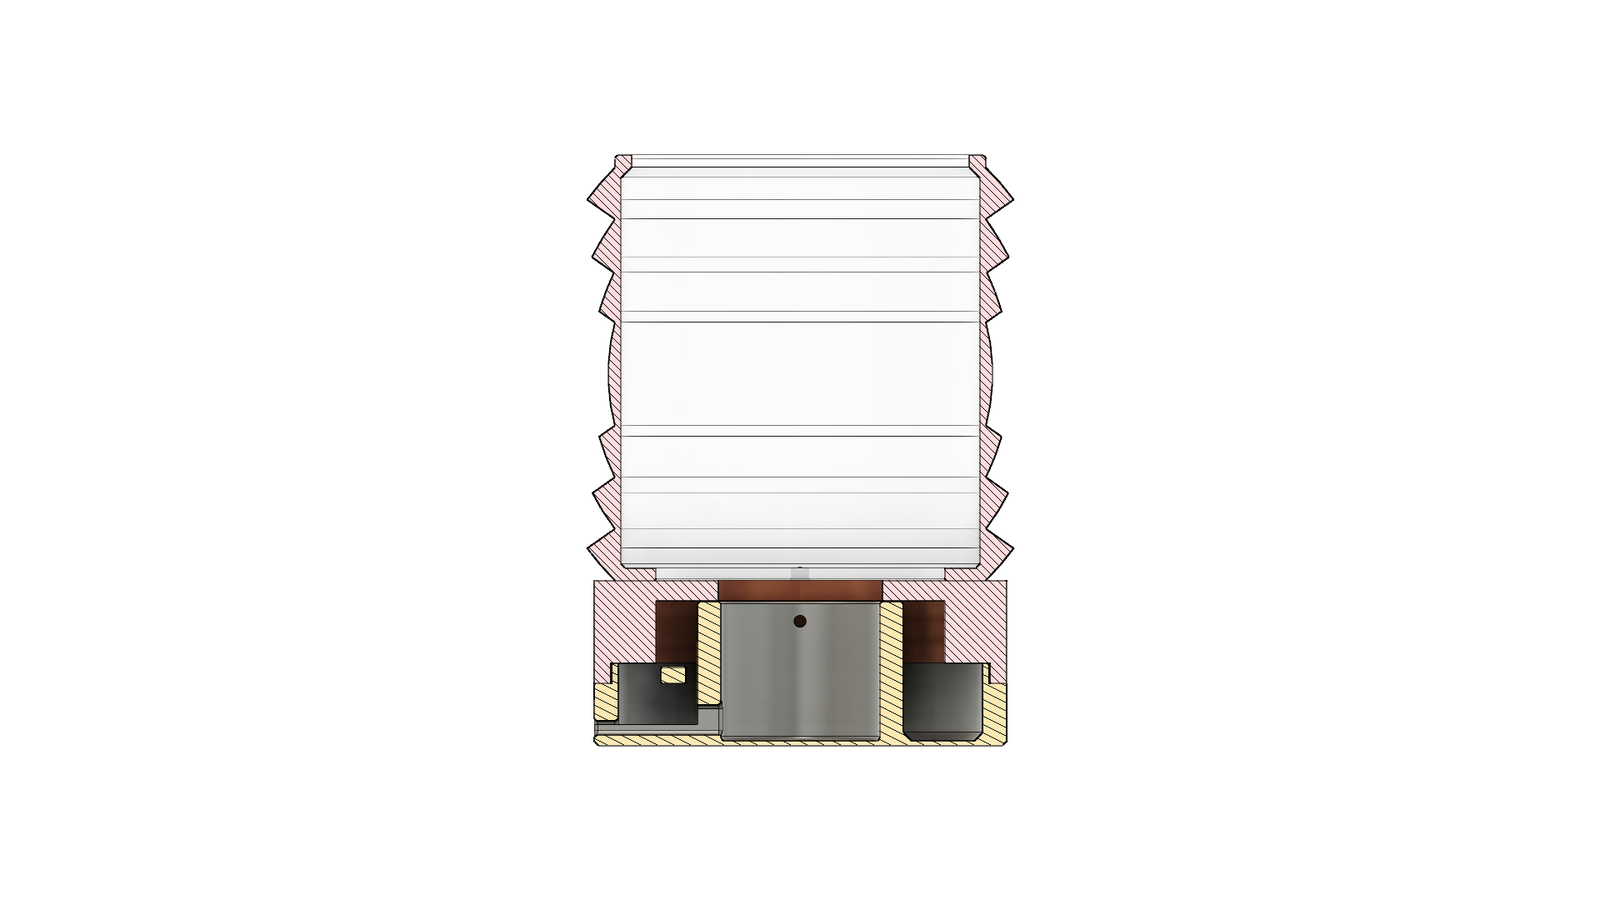
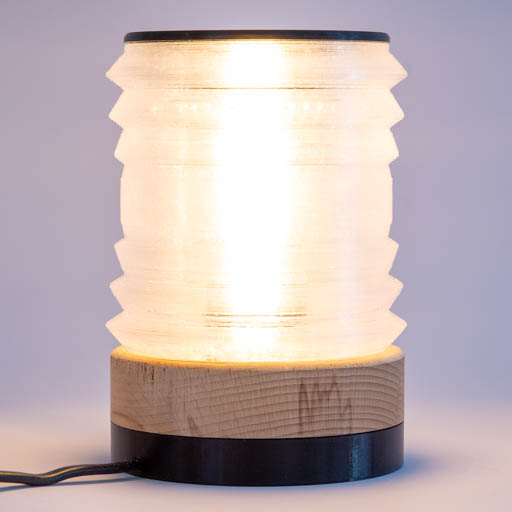
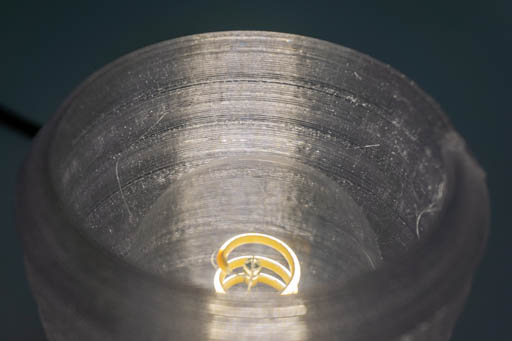
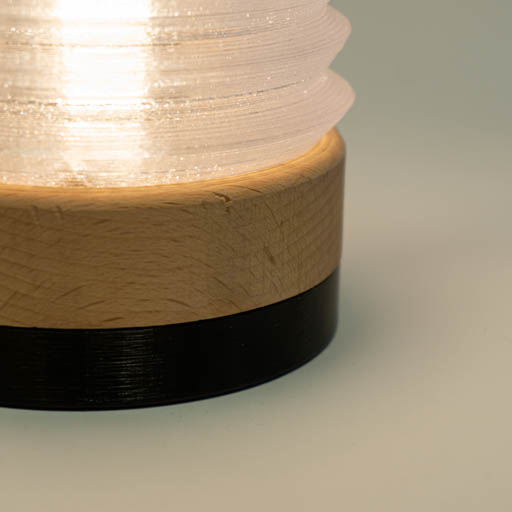
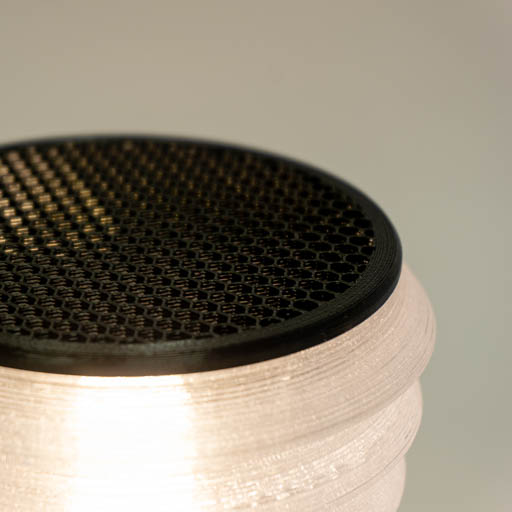
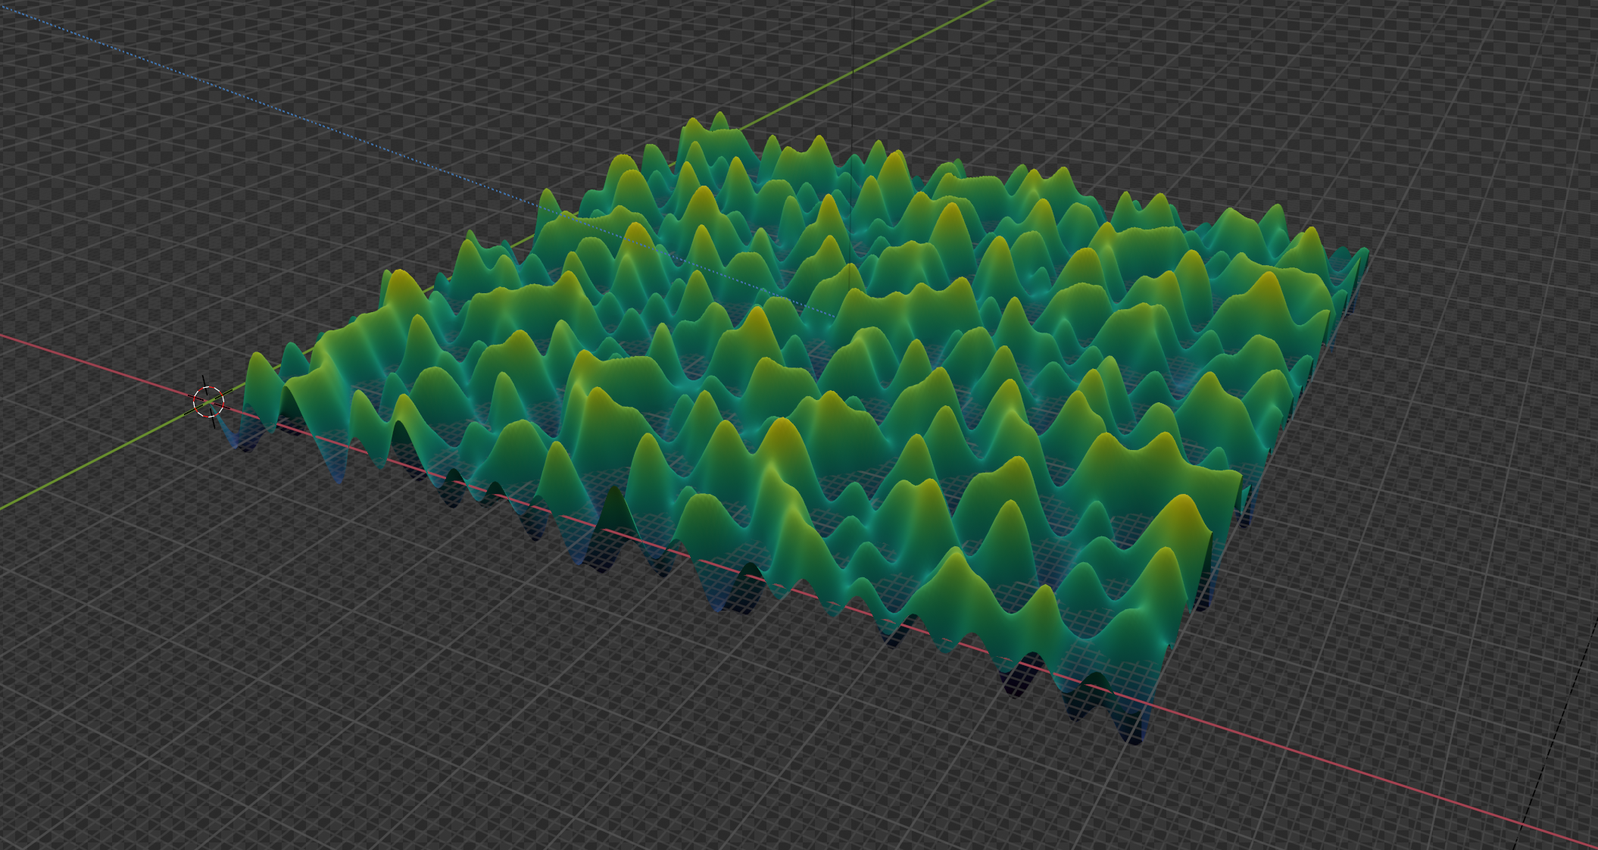
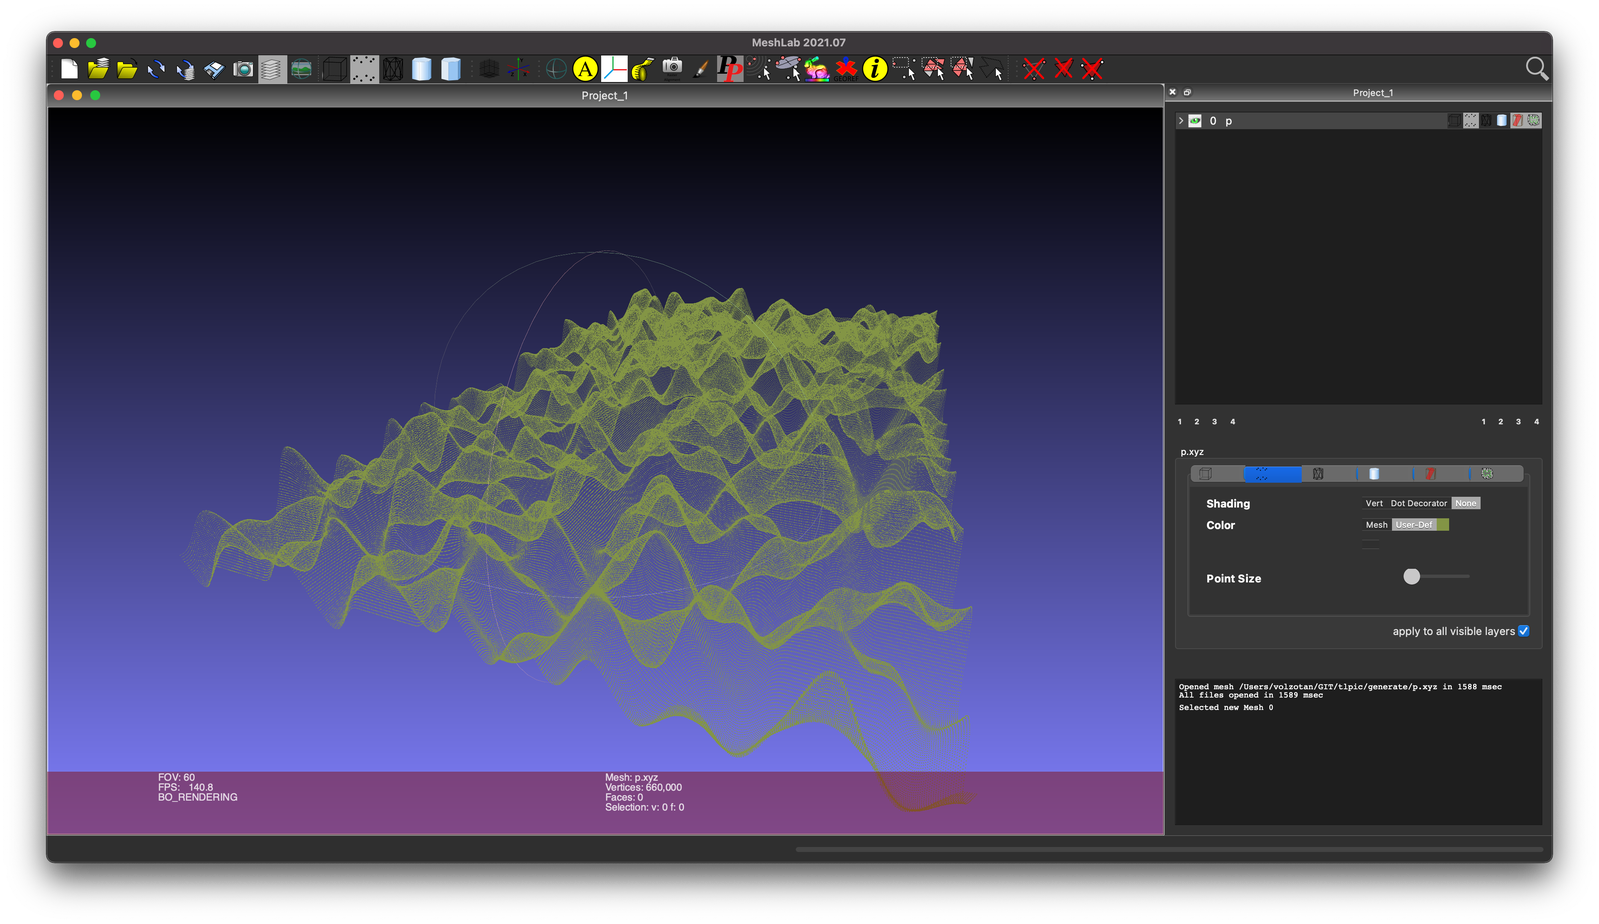
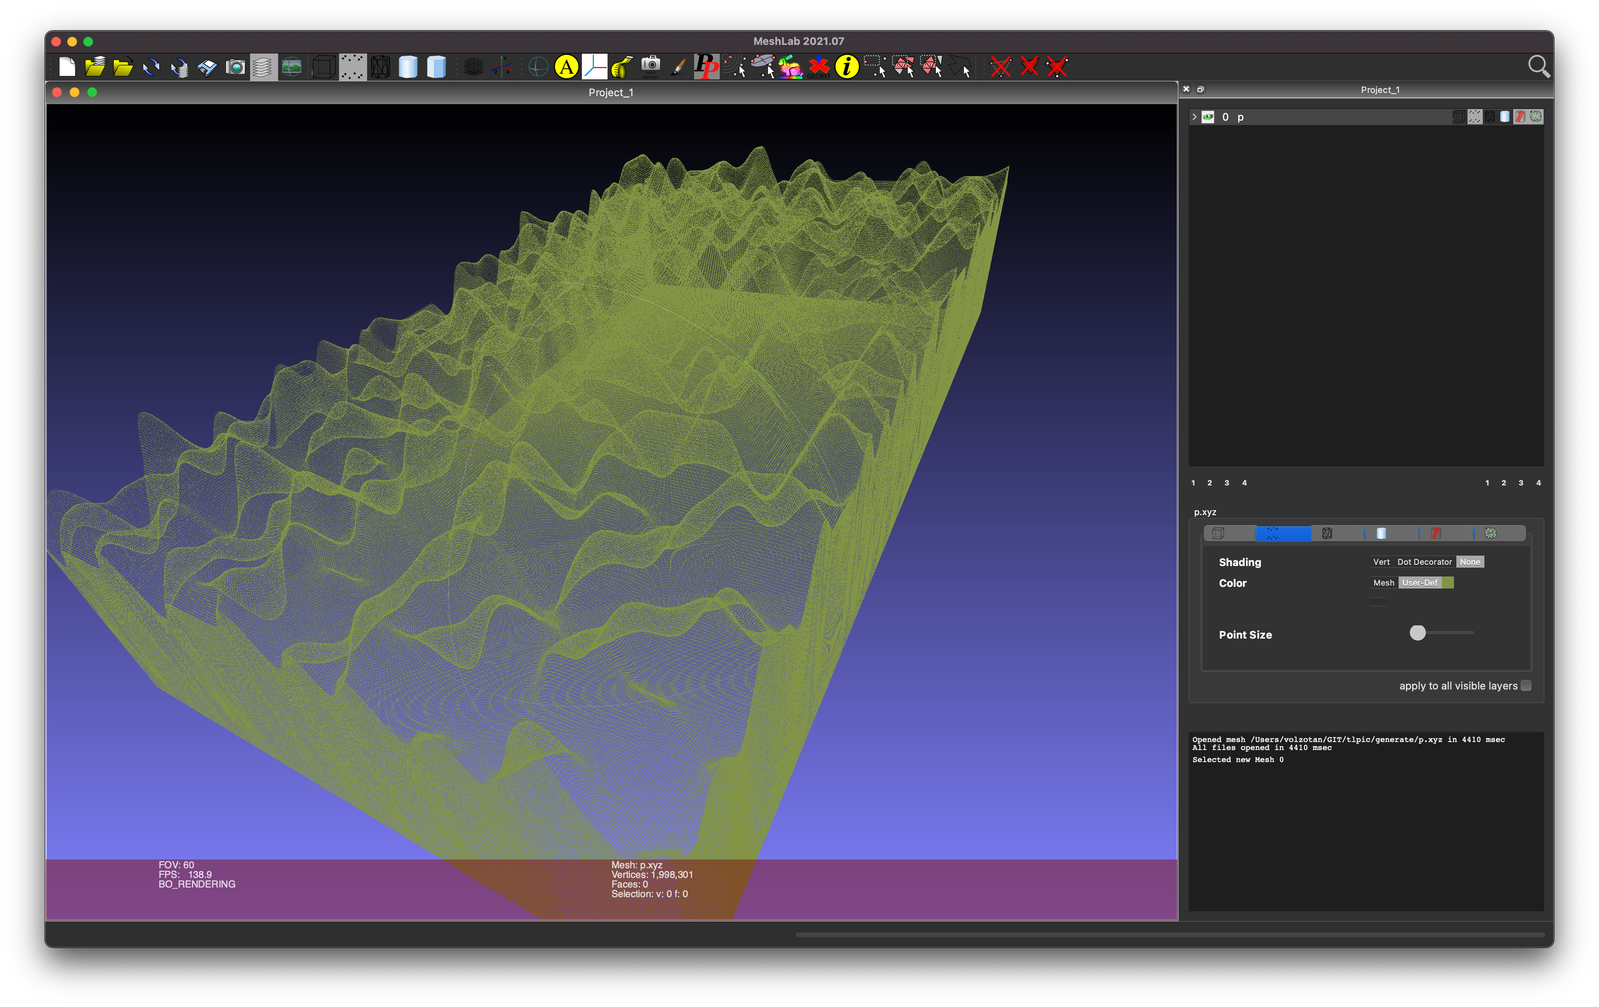
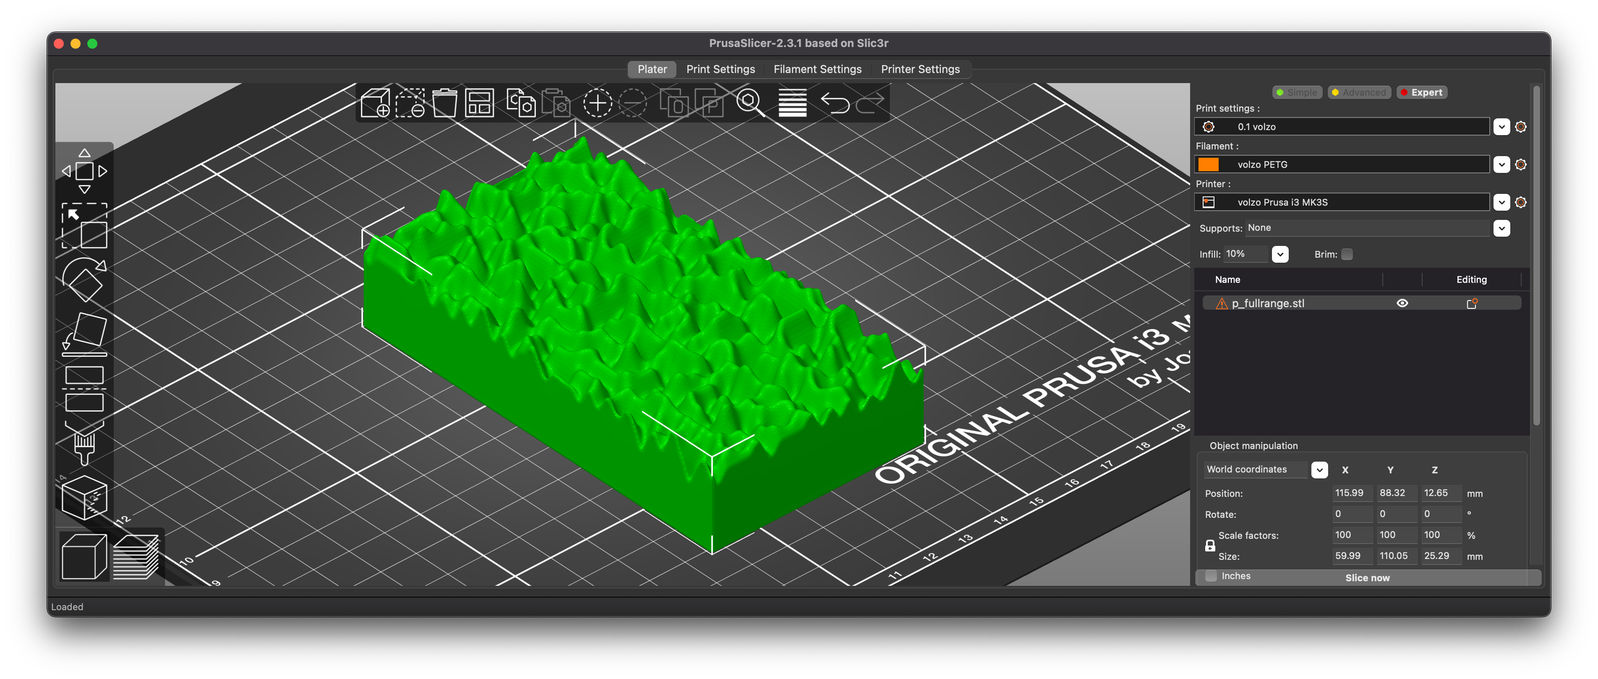
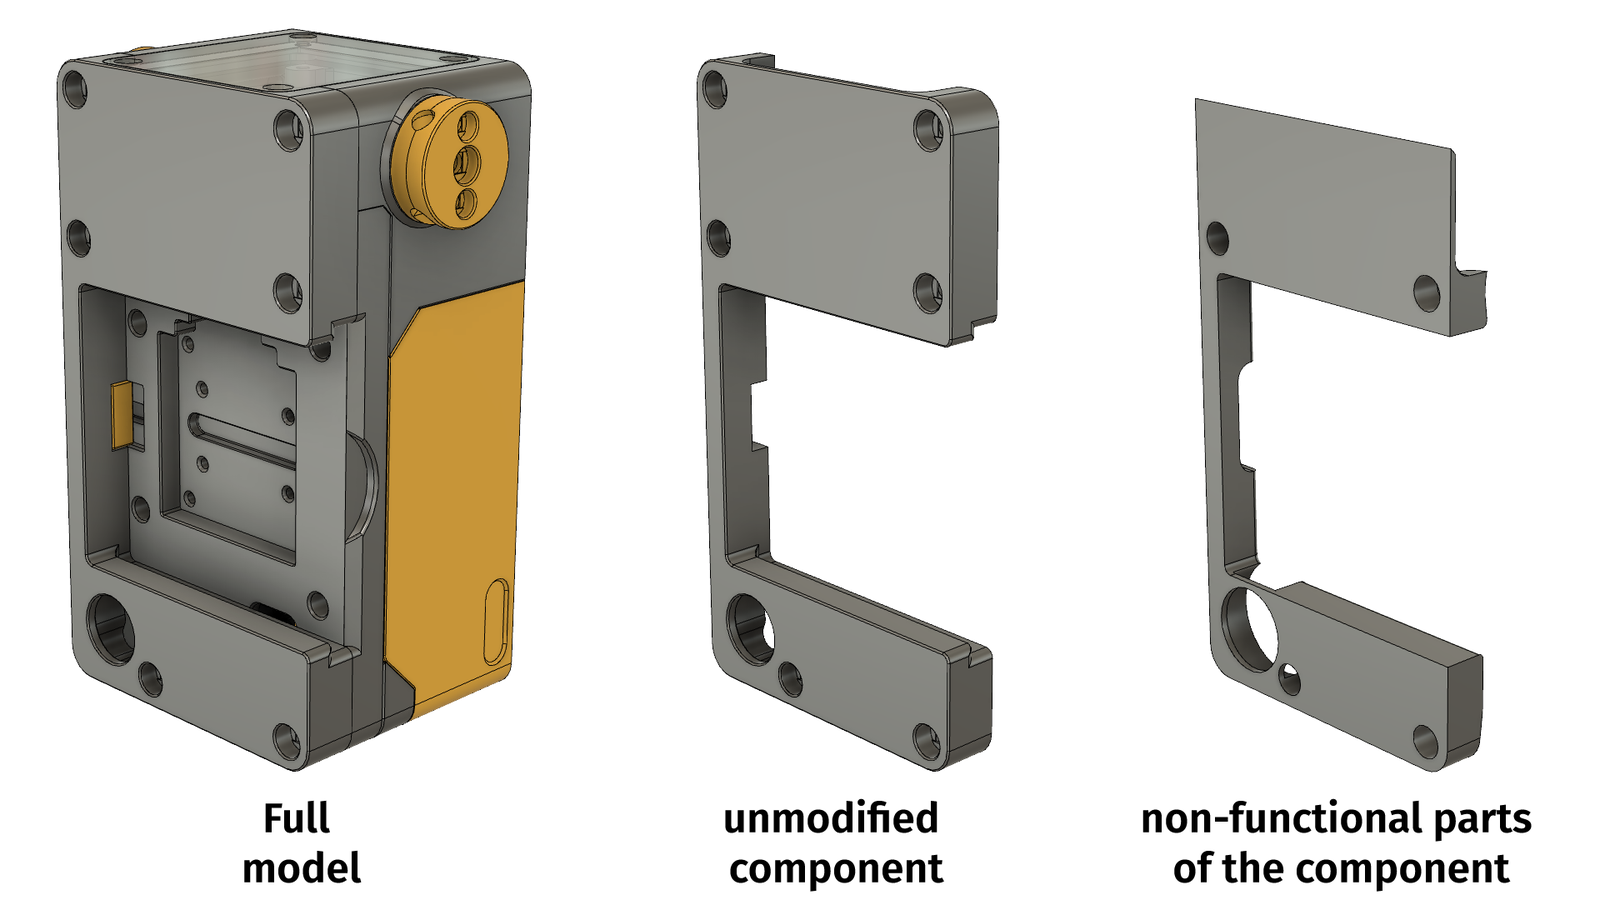
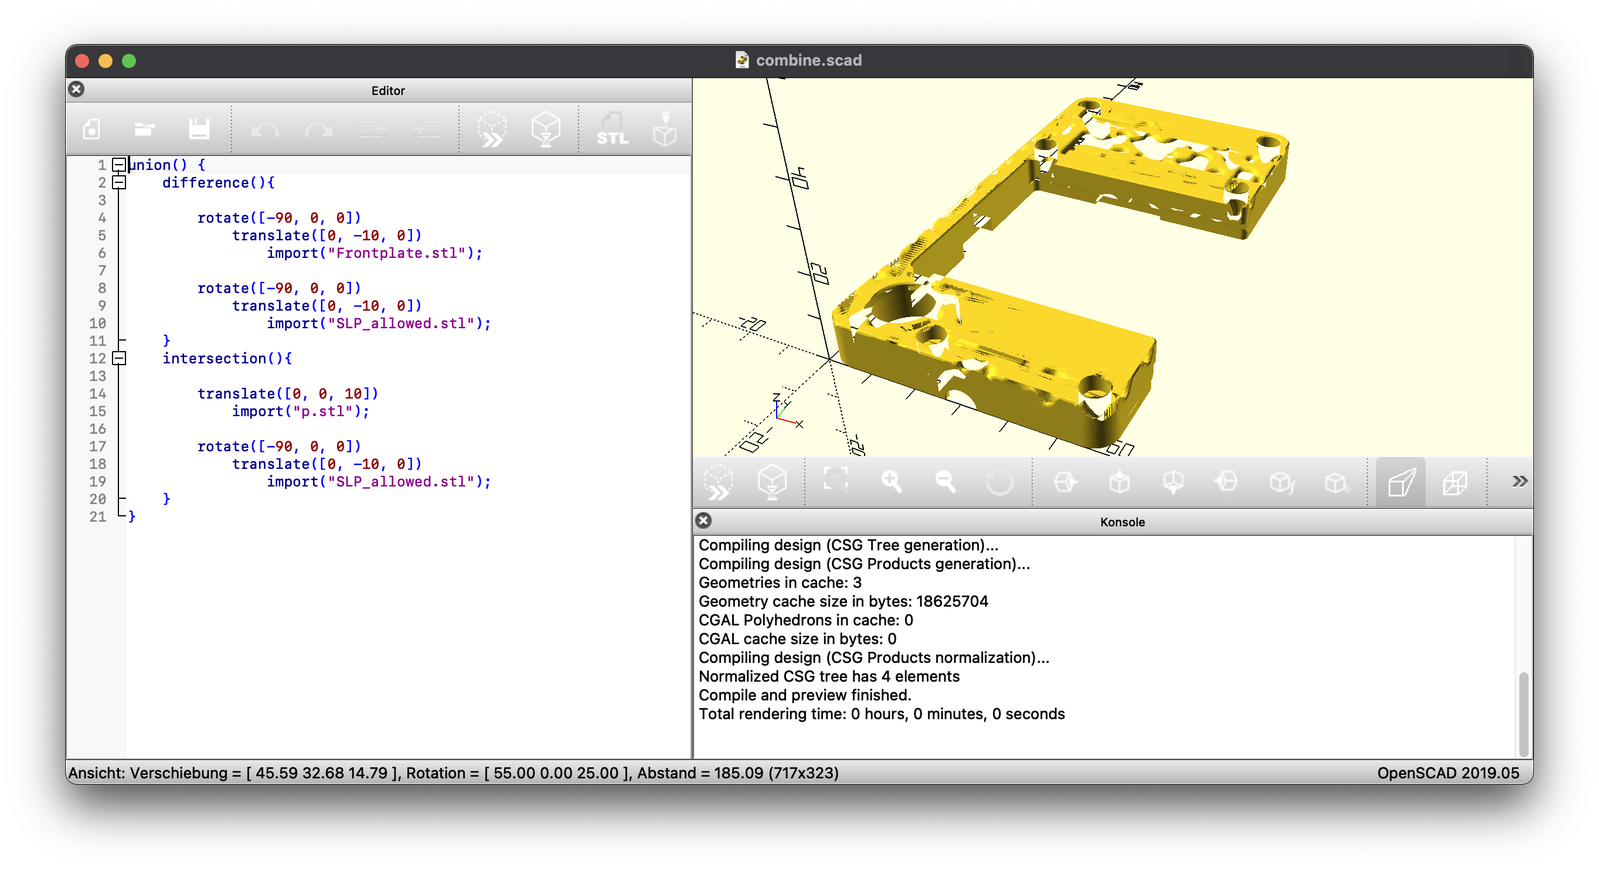

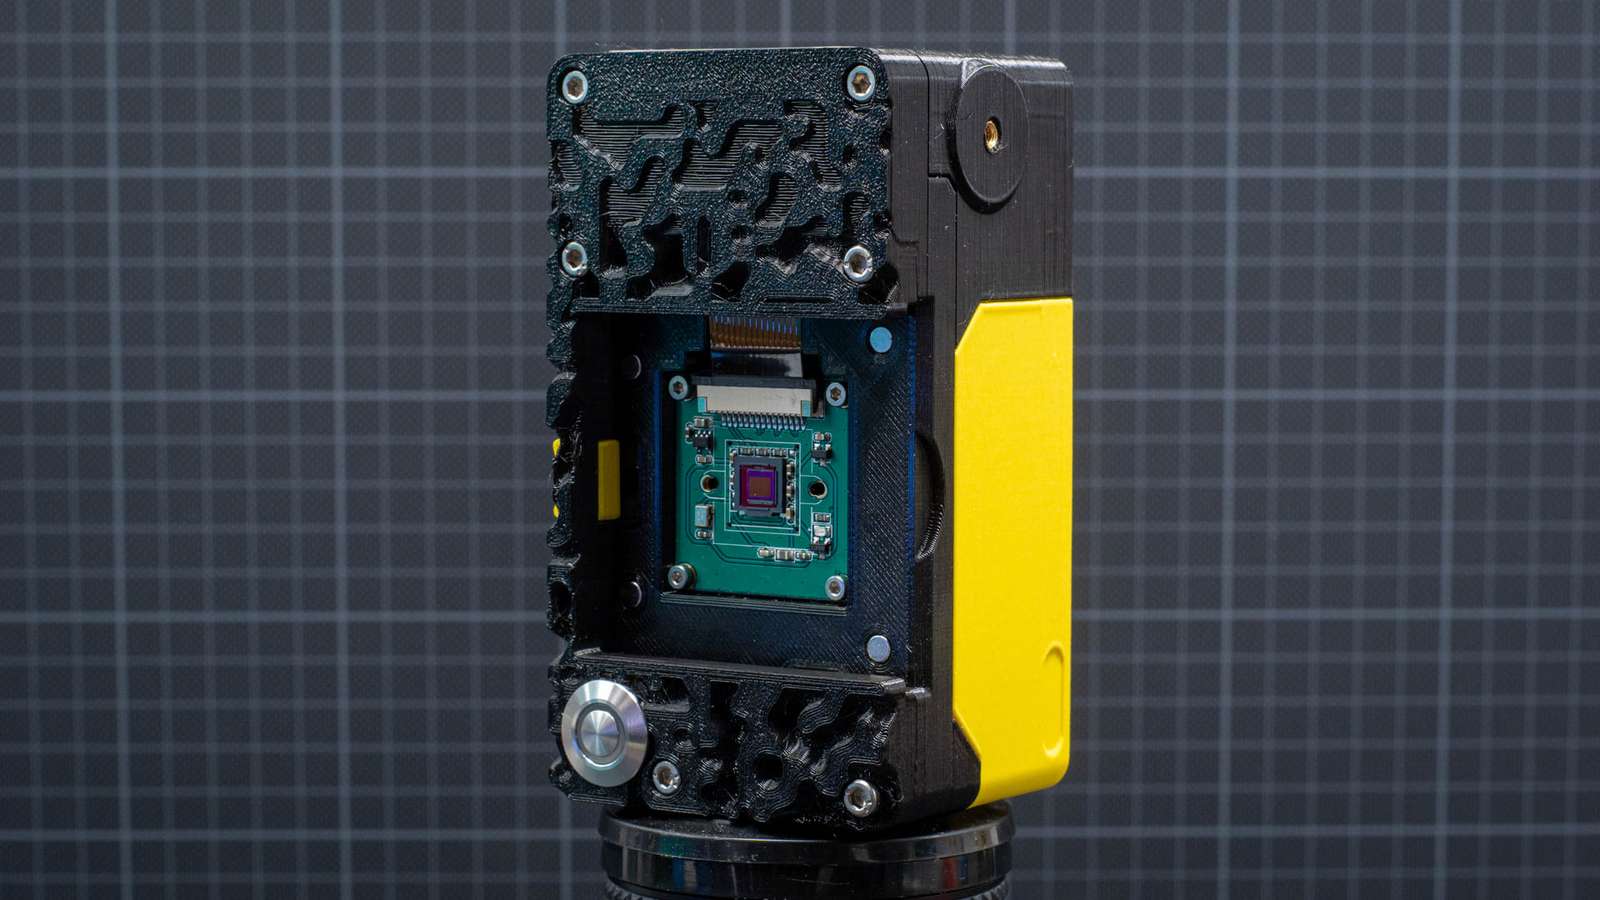
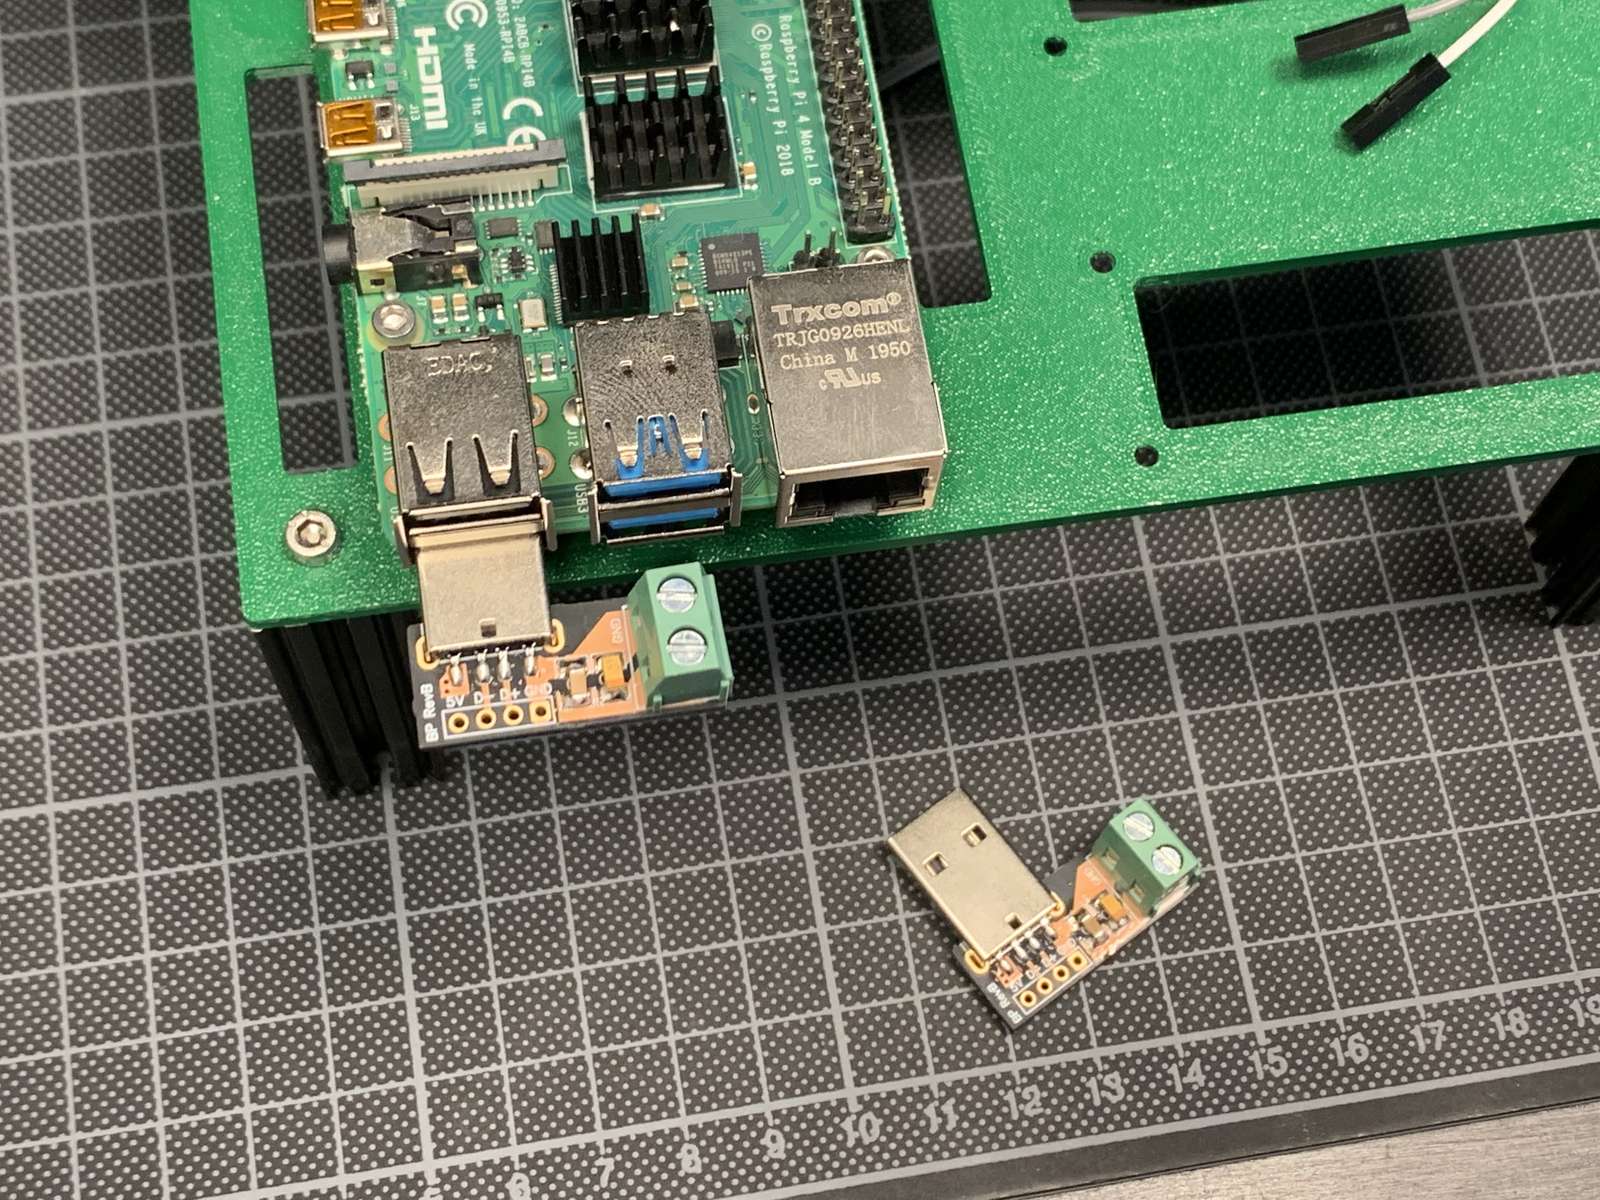
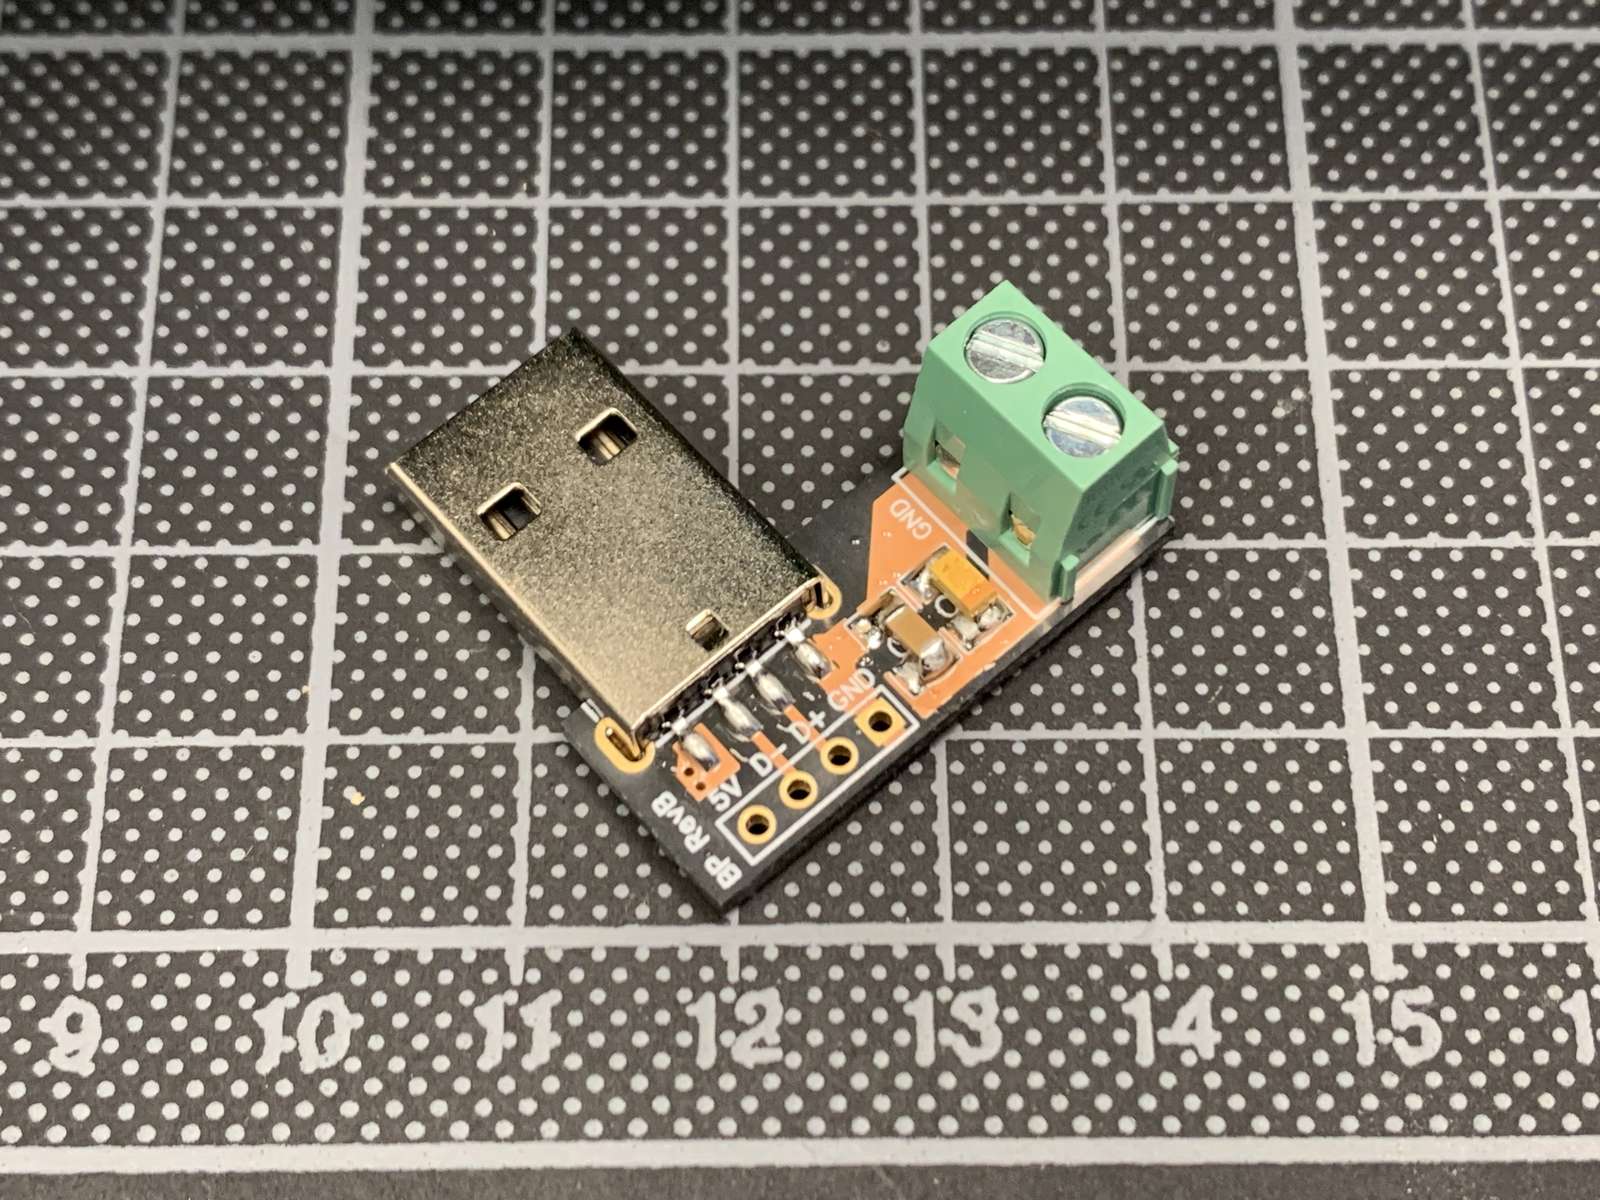
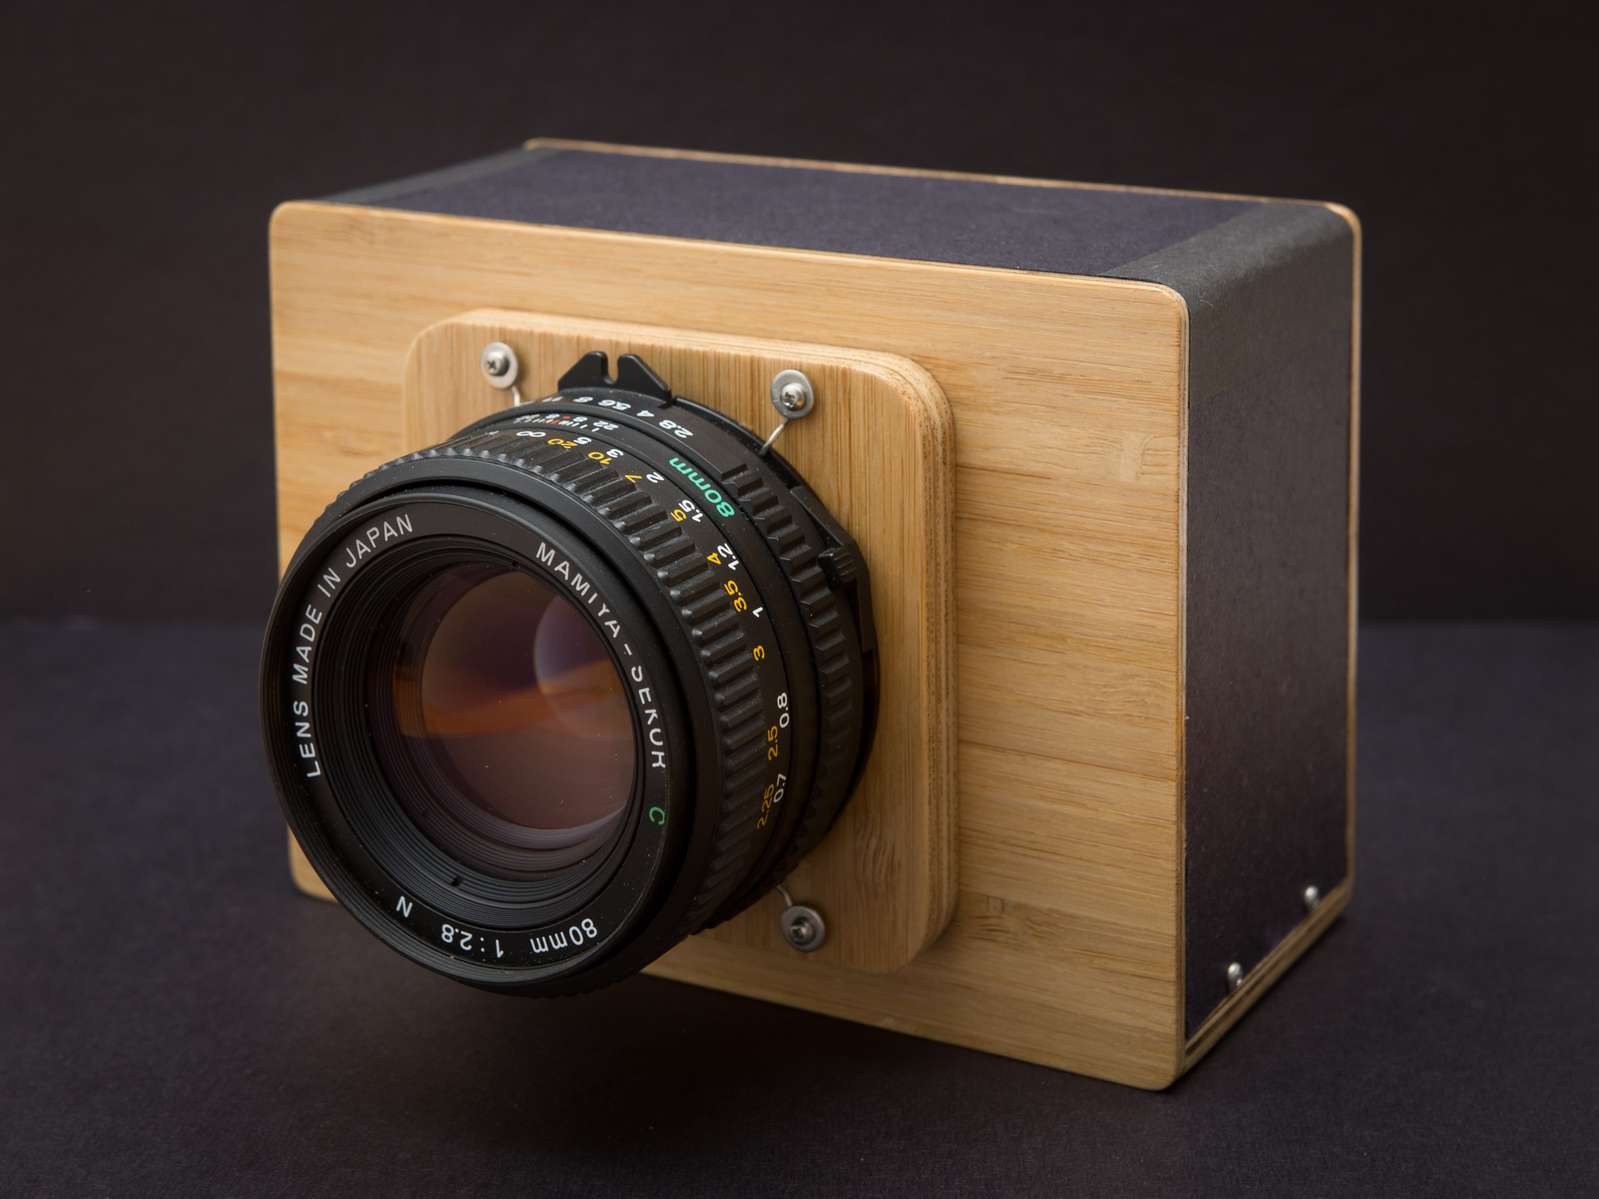
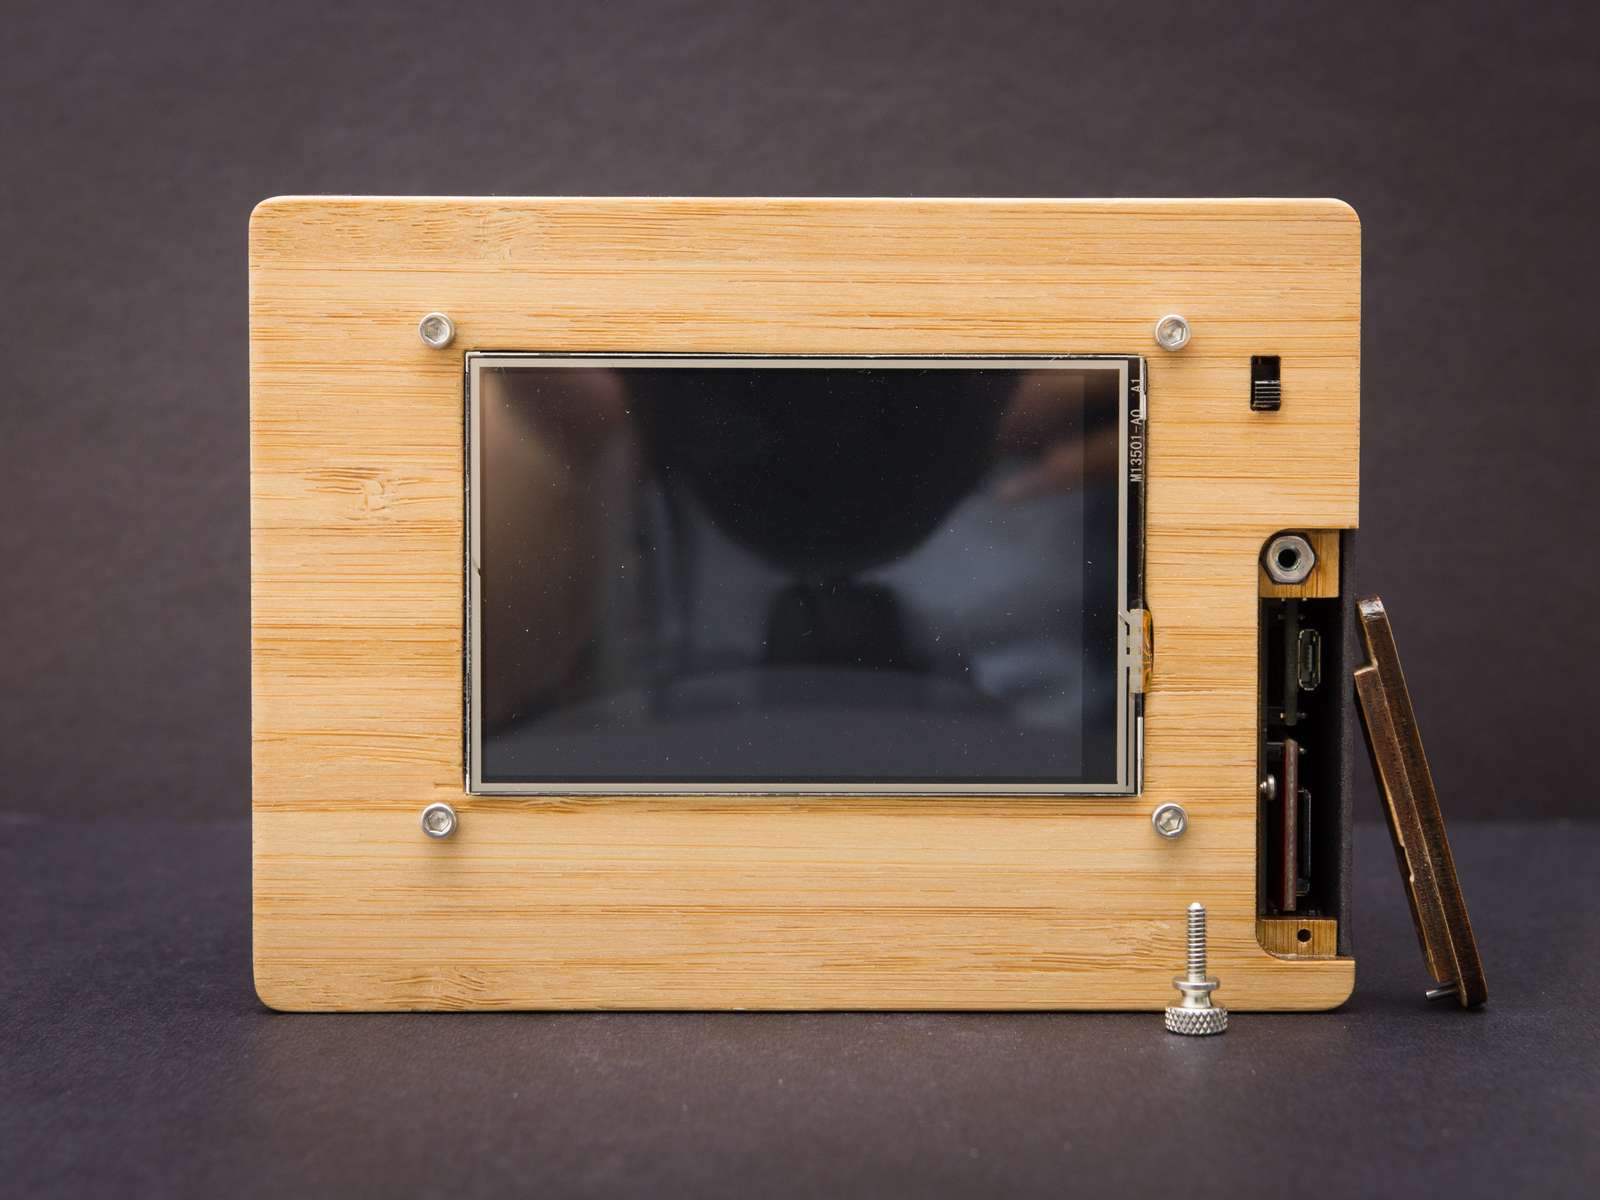

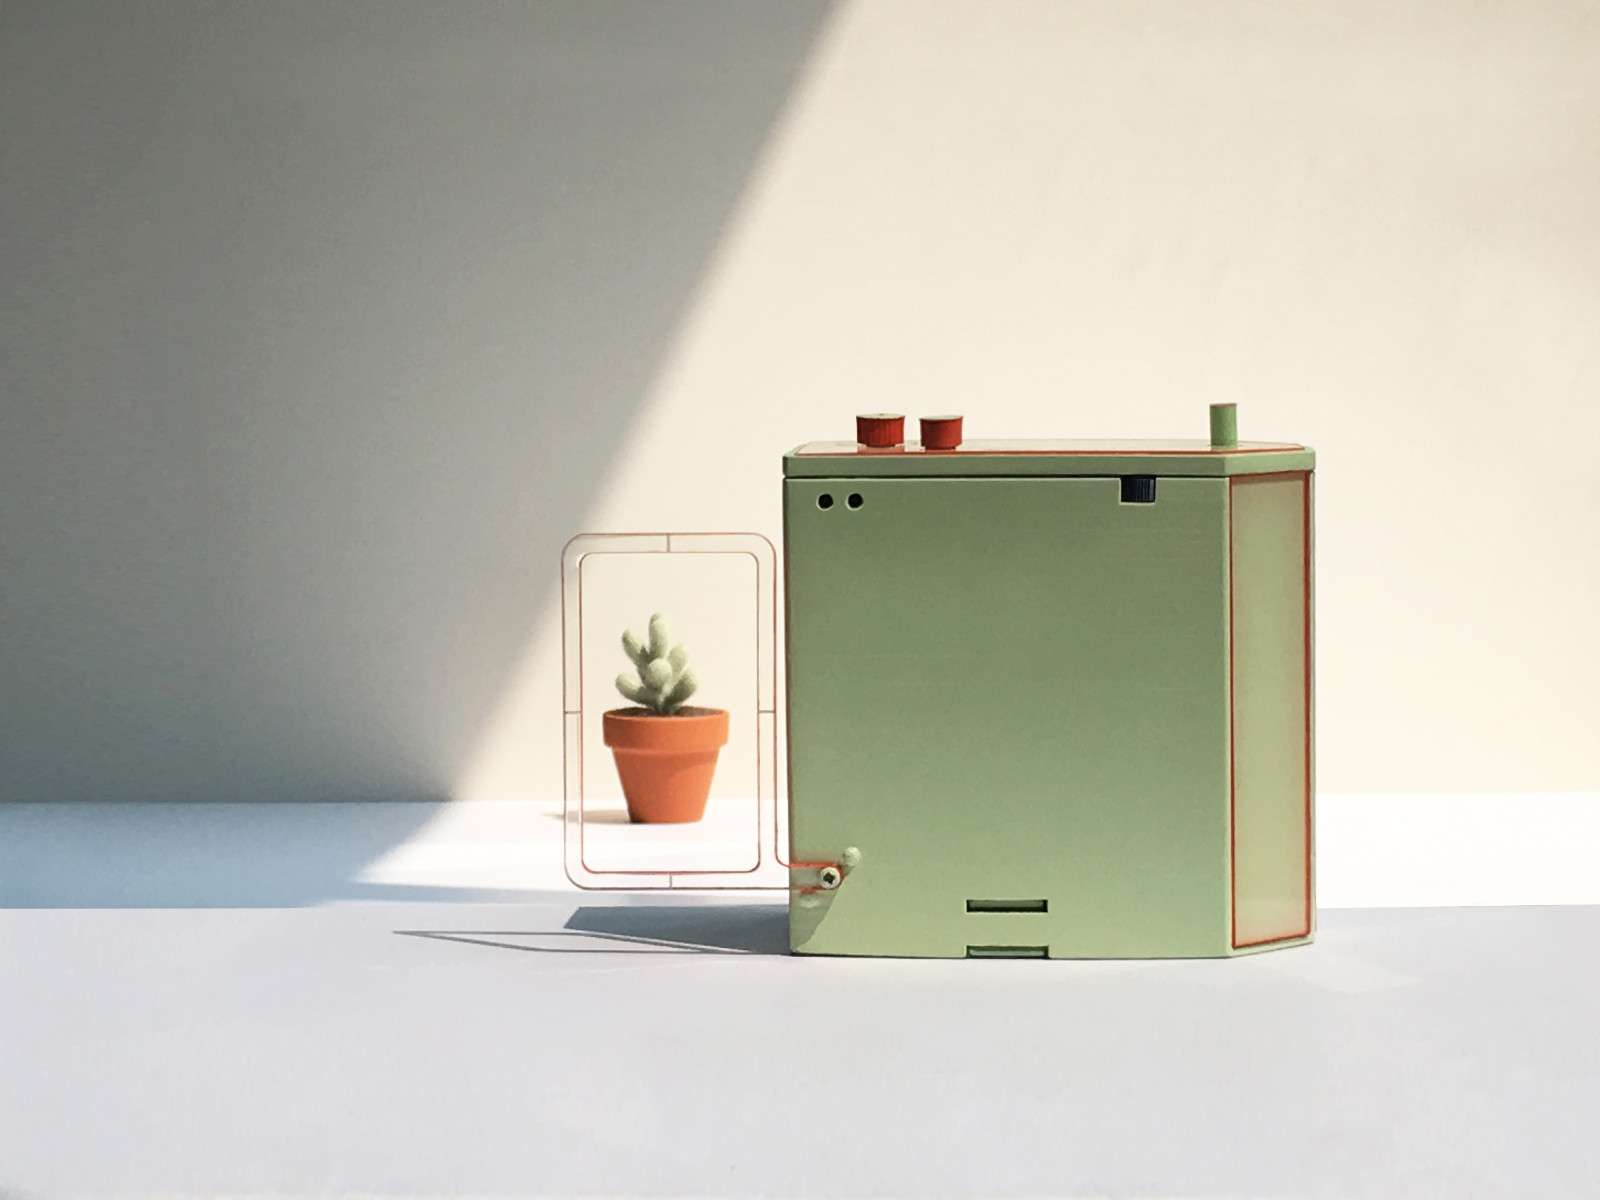
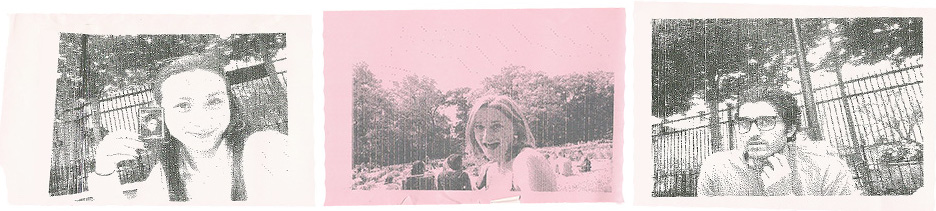
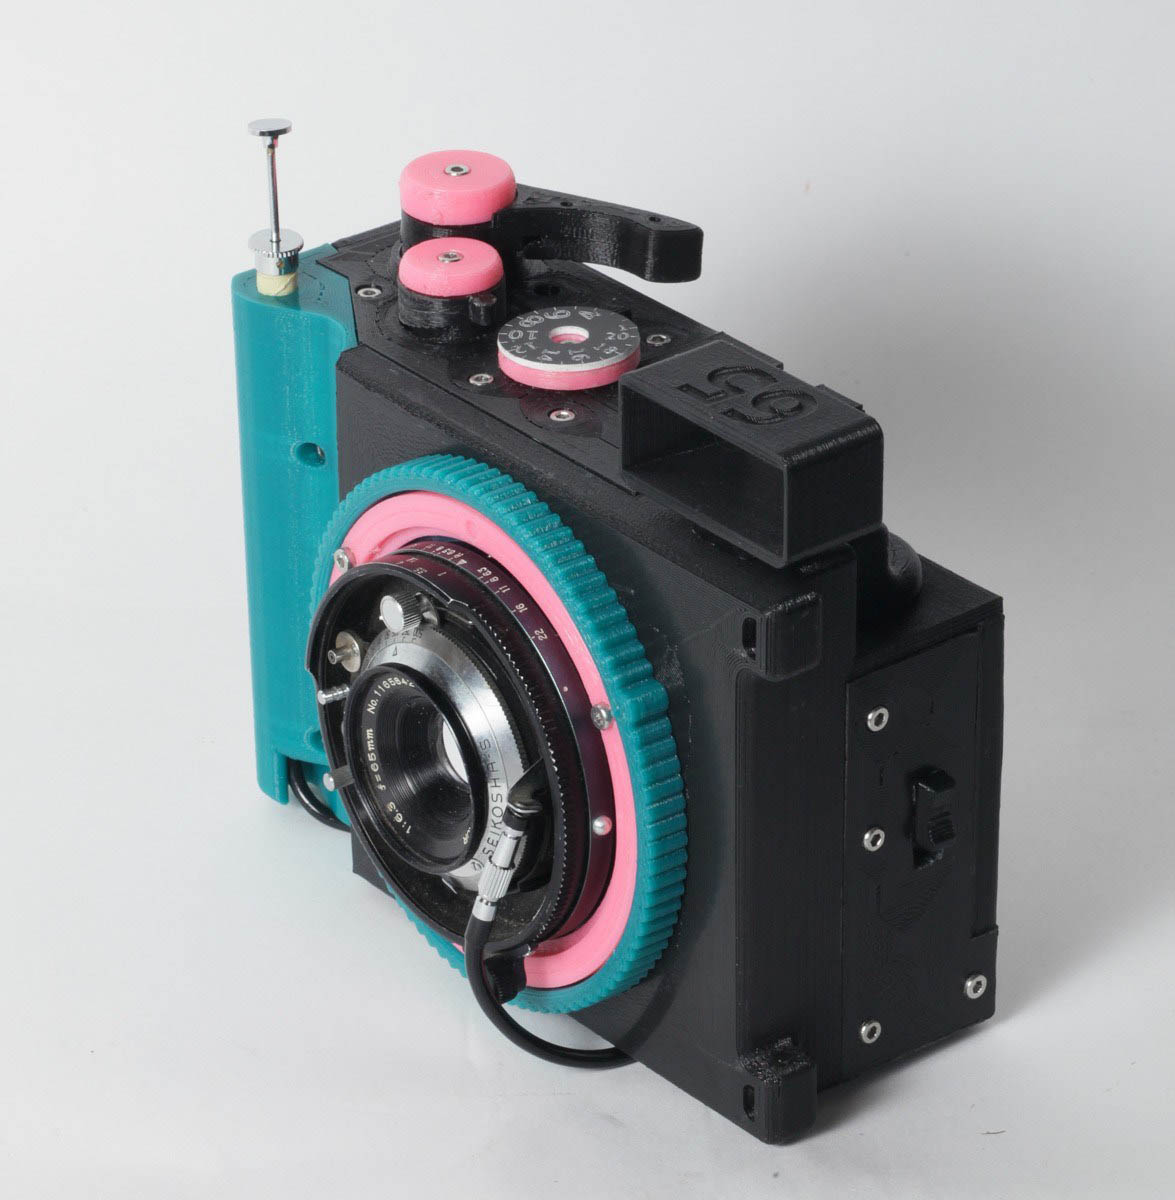
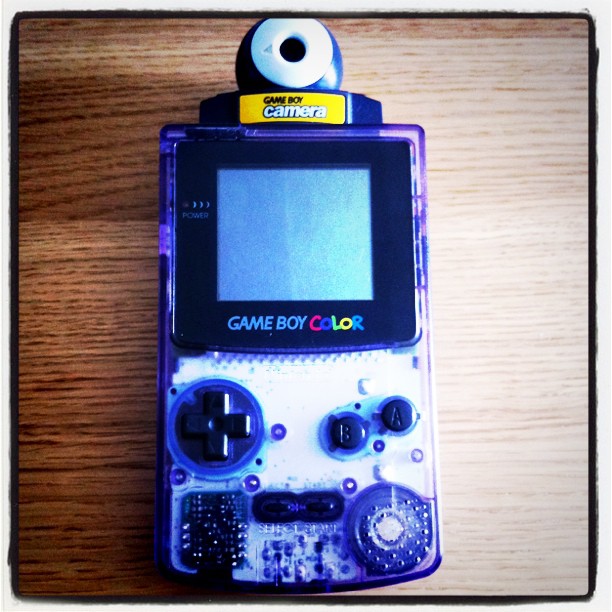 CC BY NC -
  CC BY NC ND -
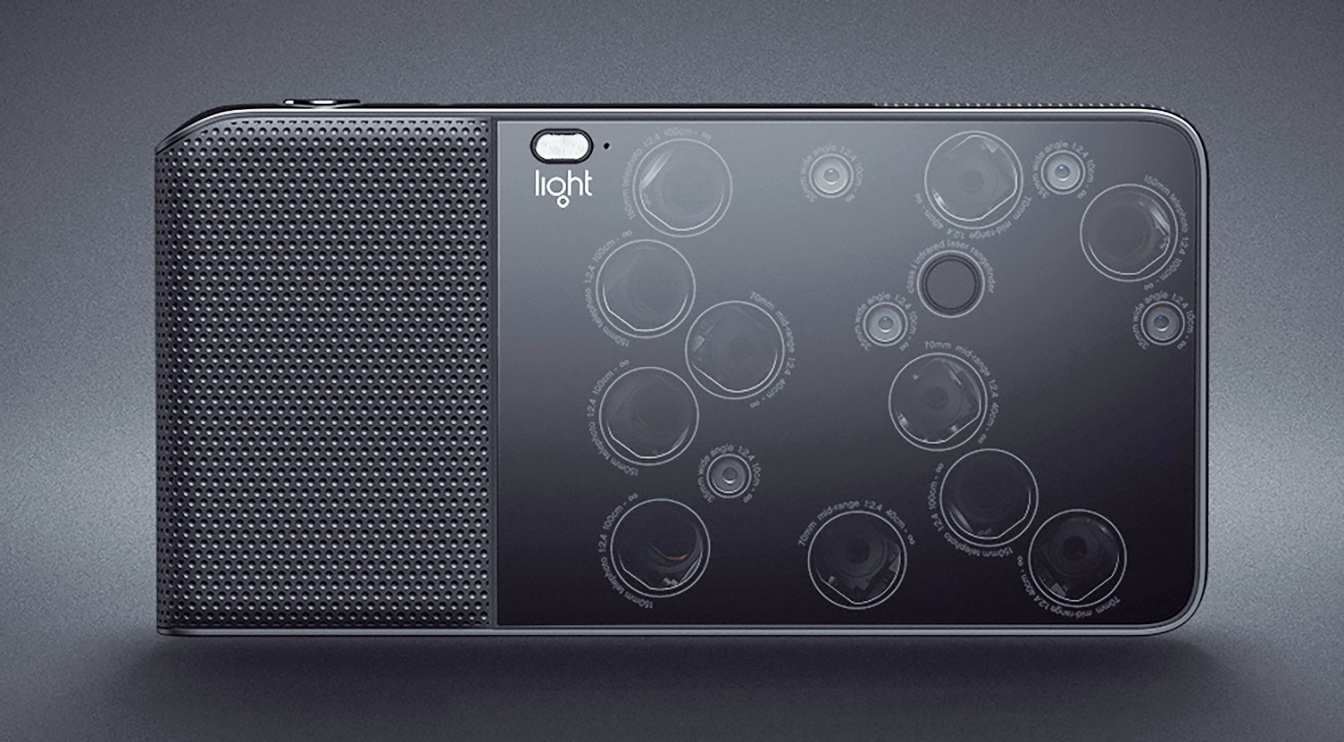
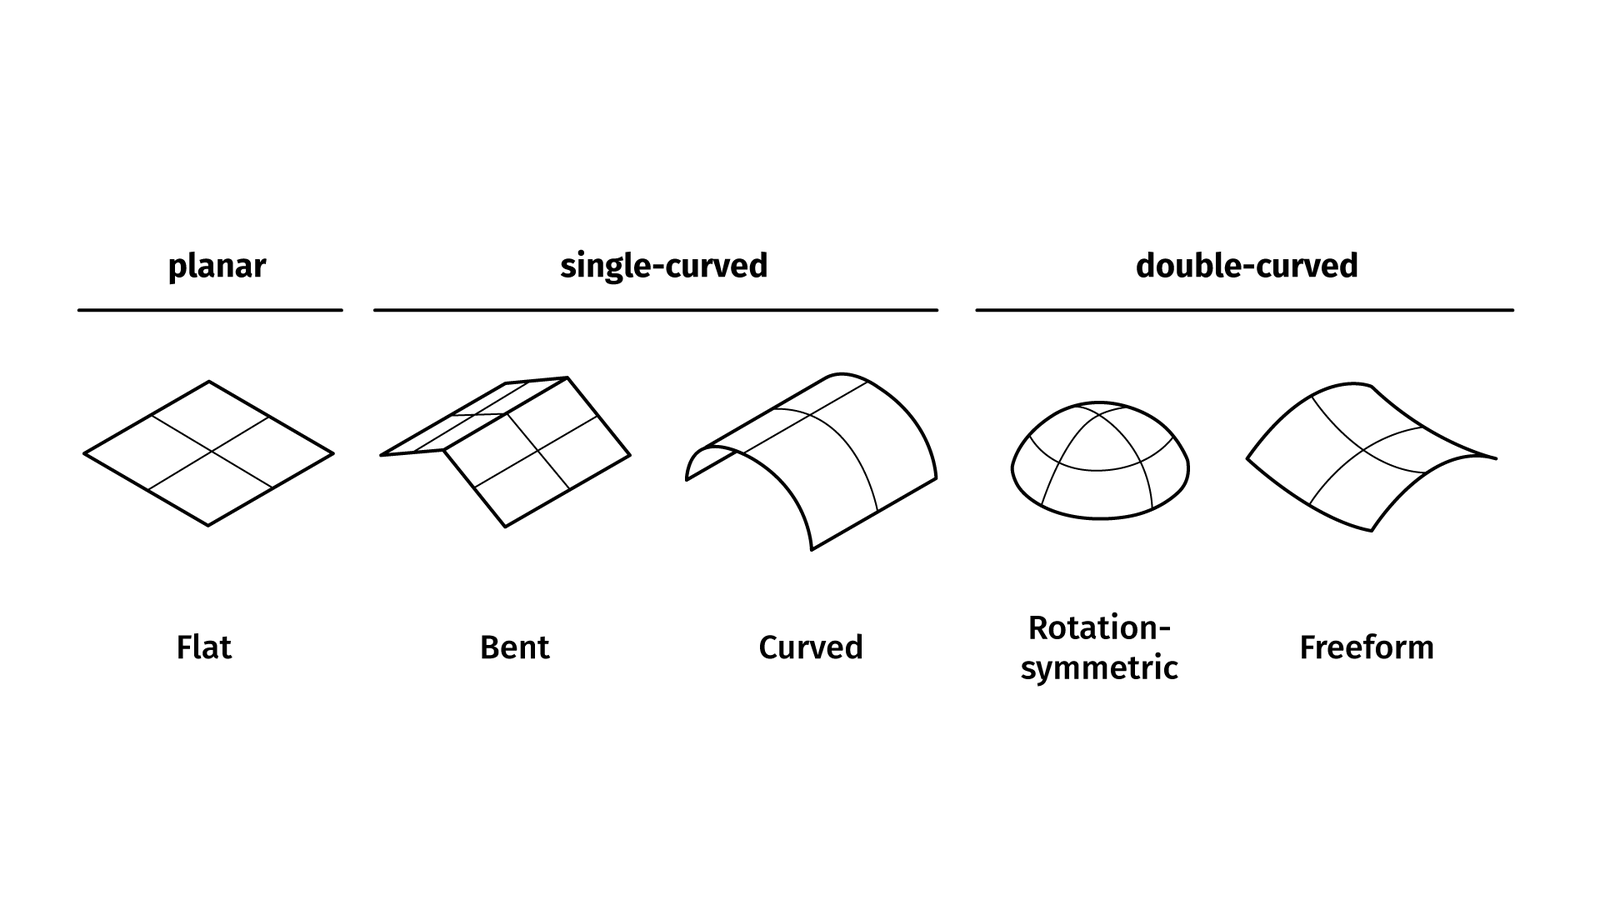
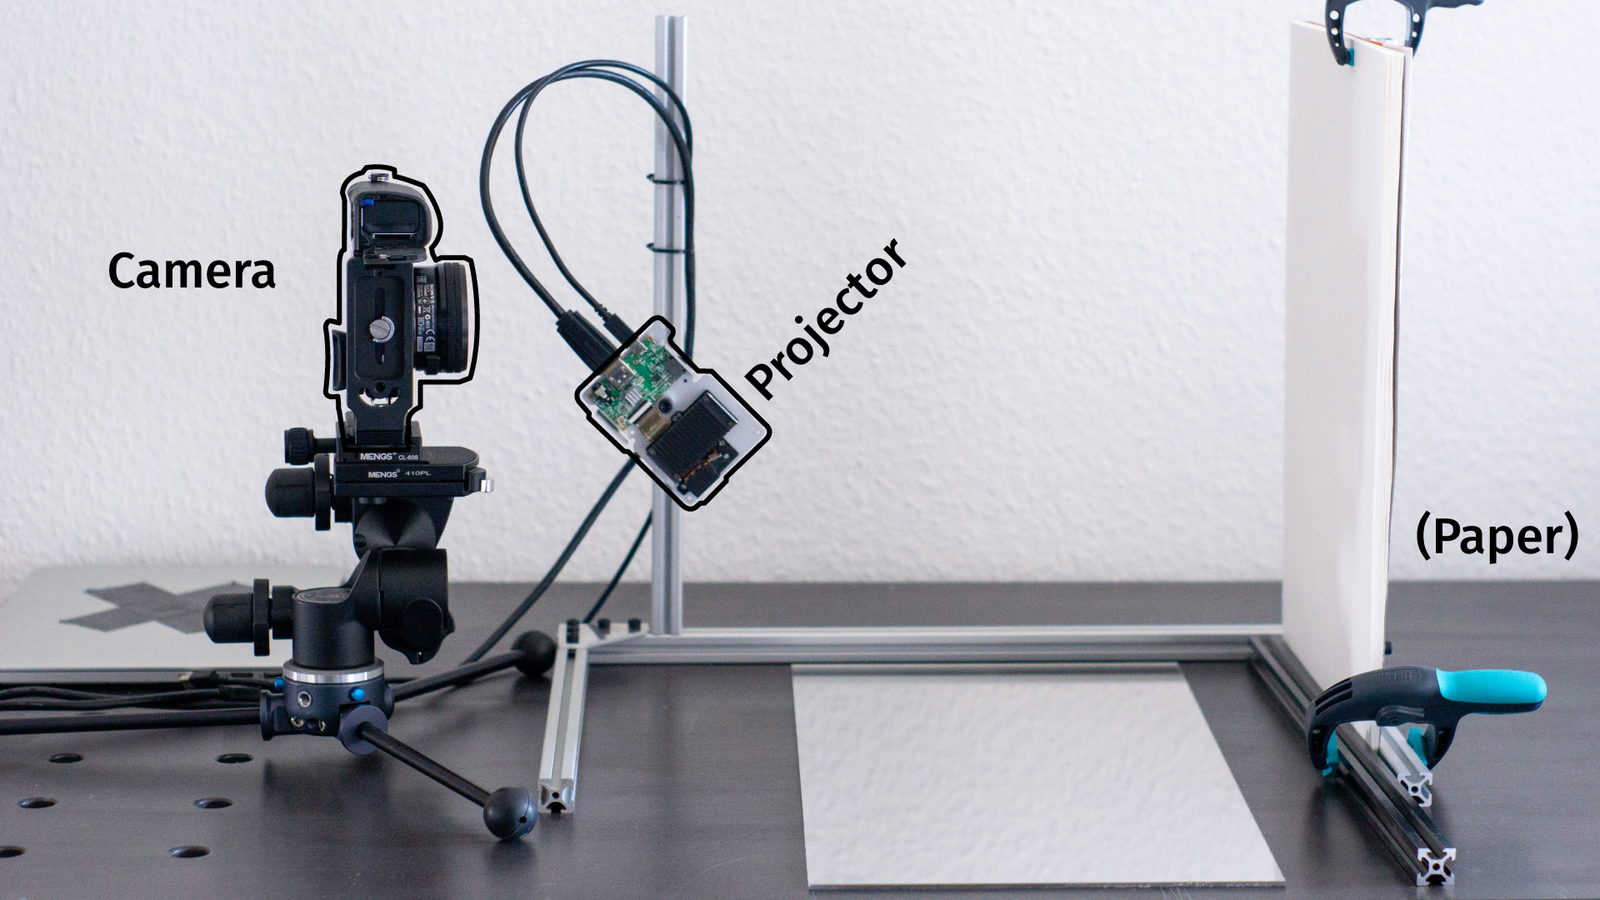
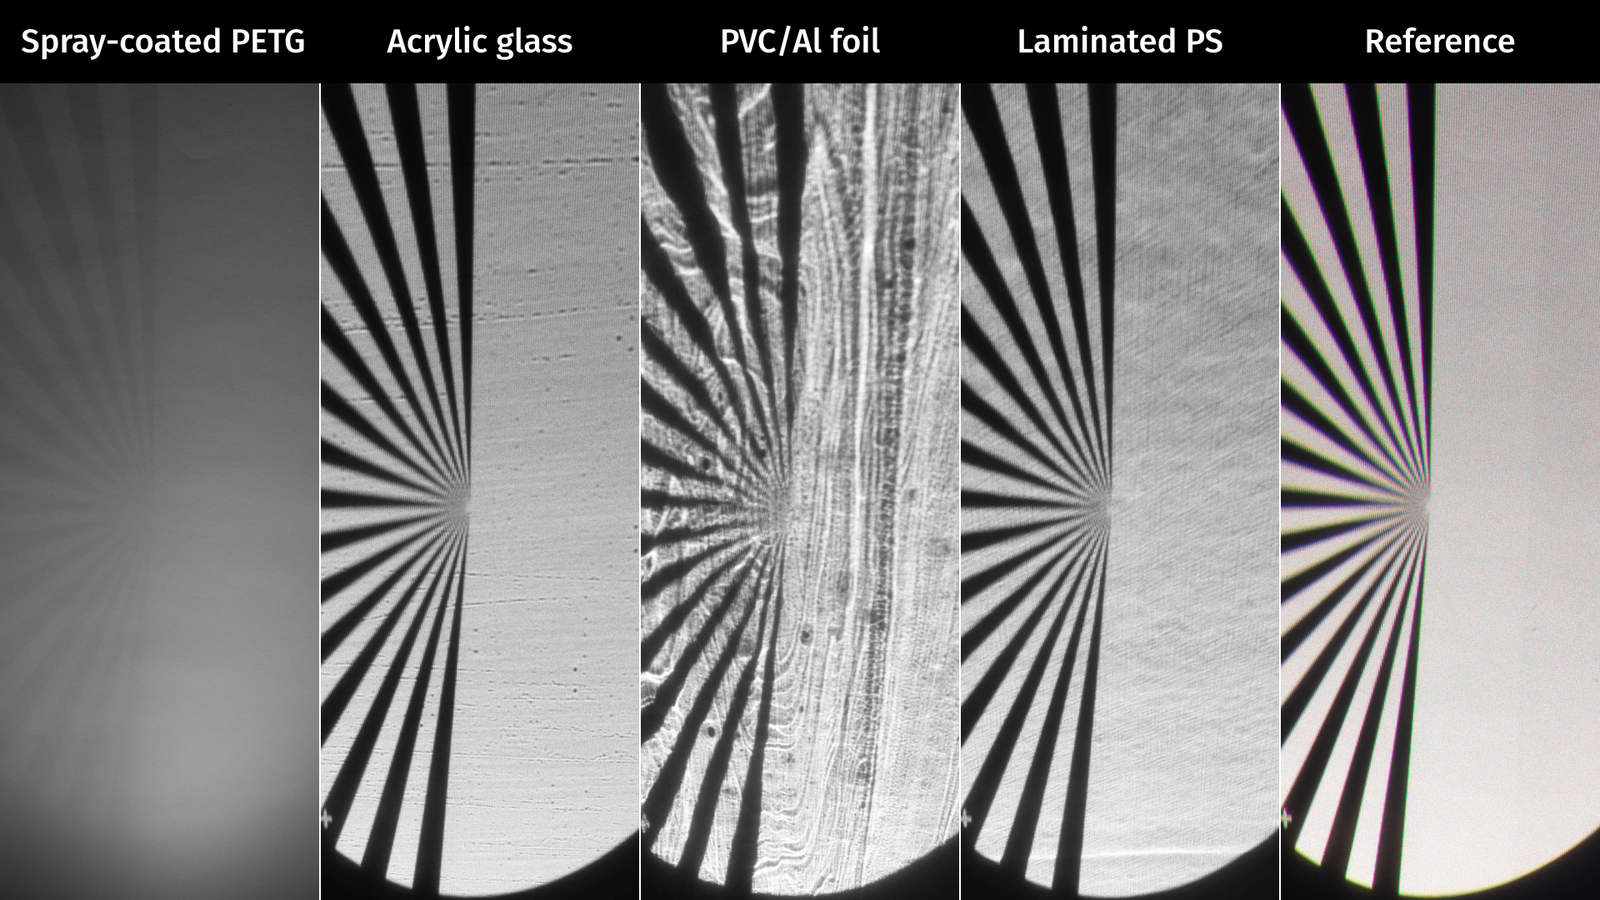
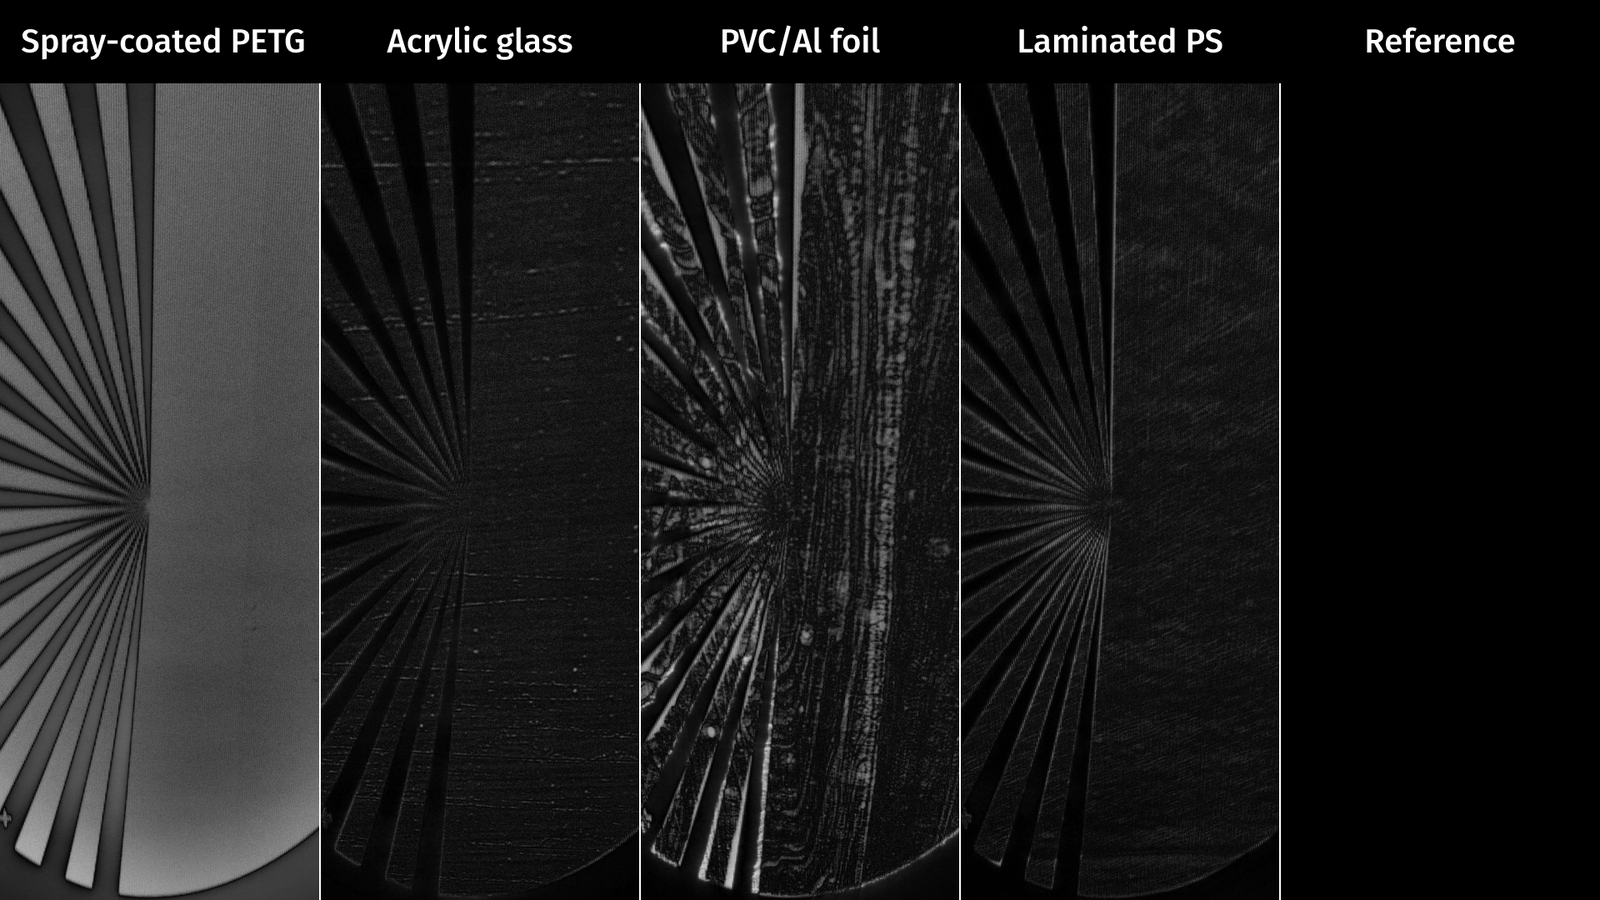
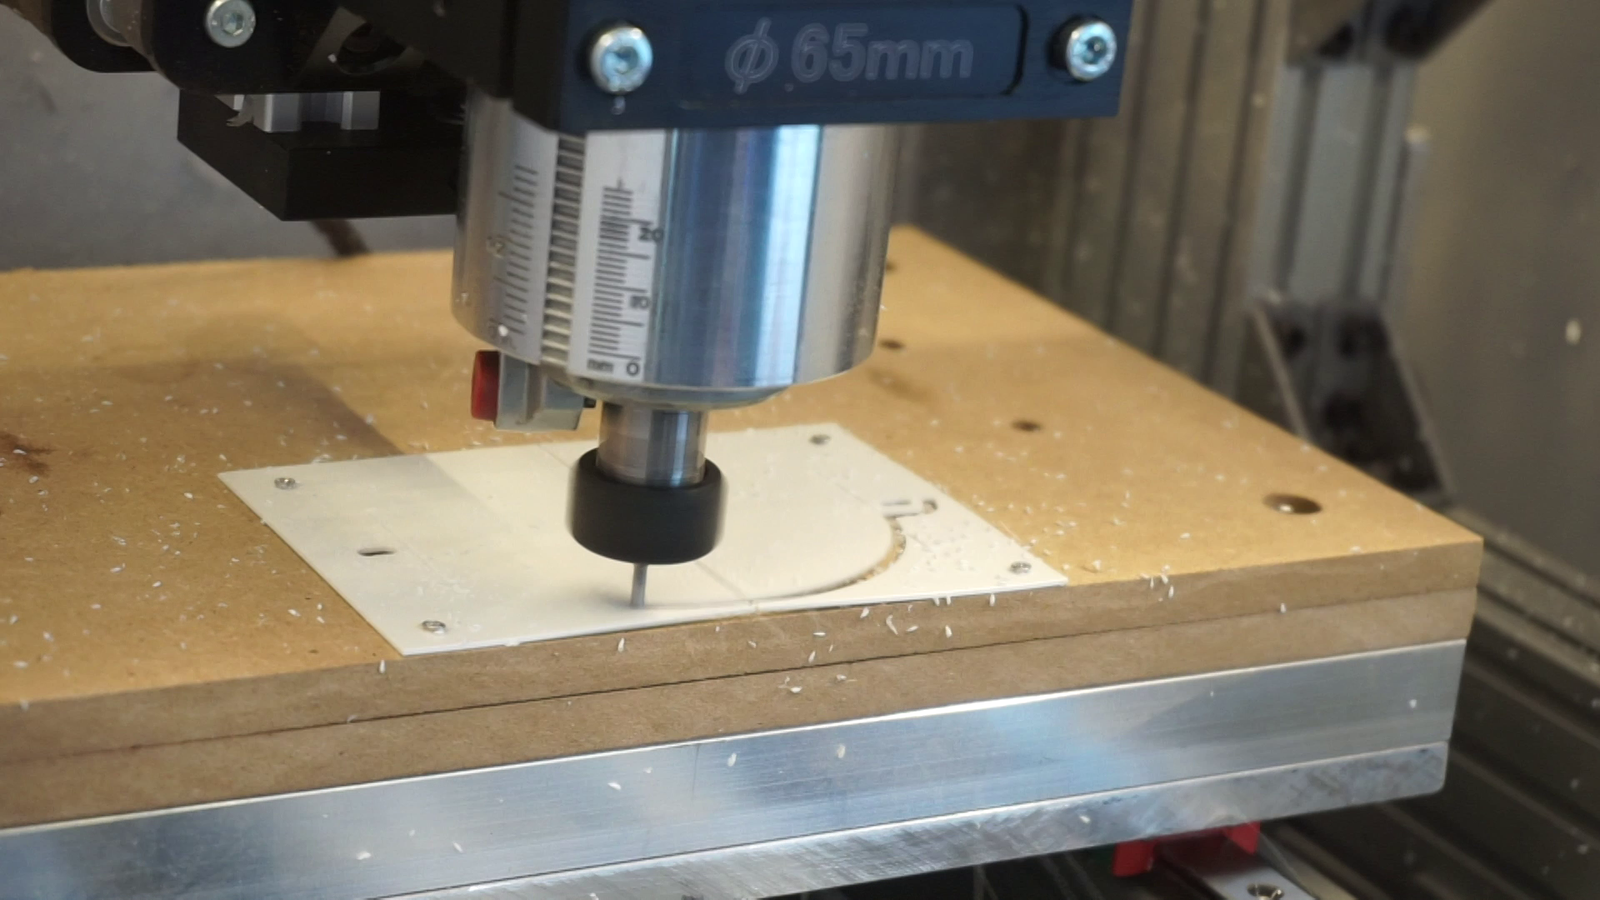
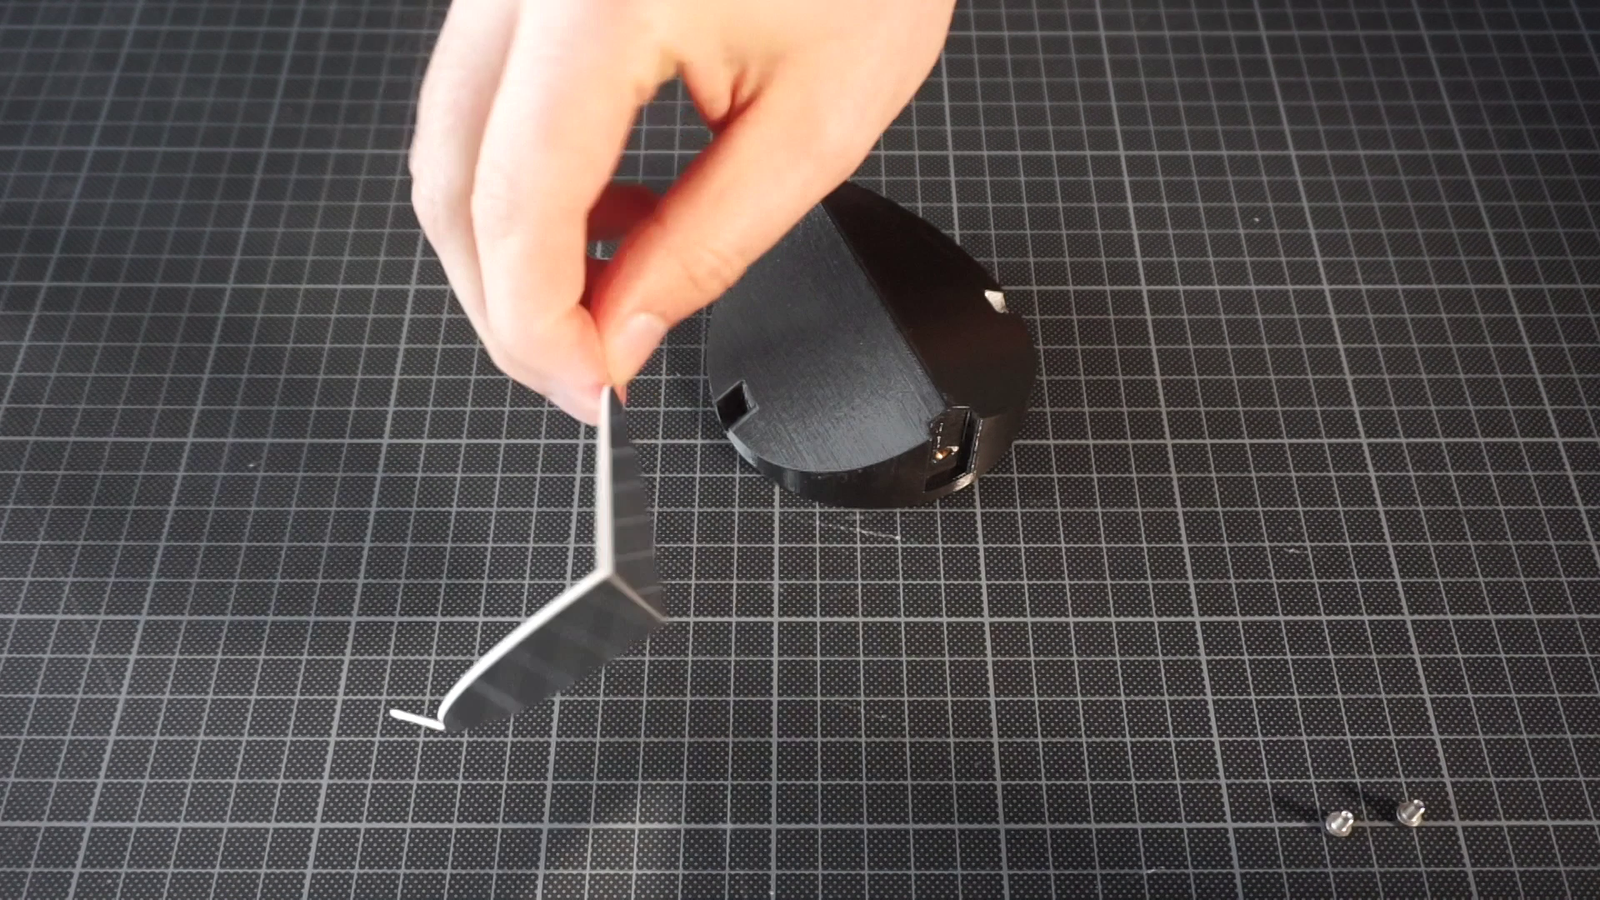
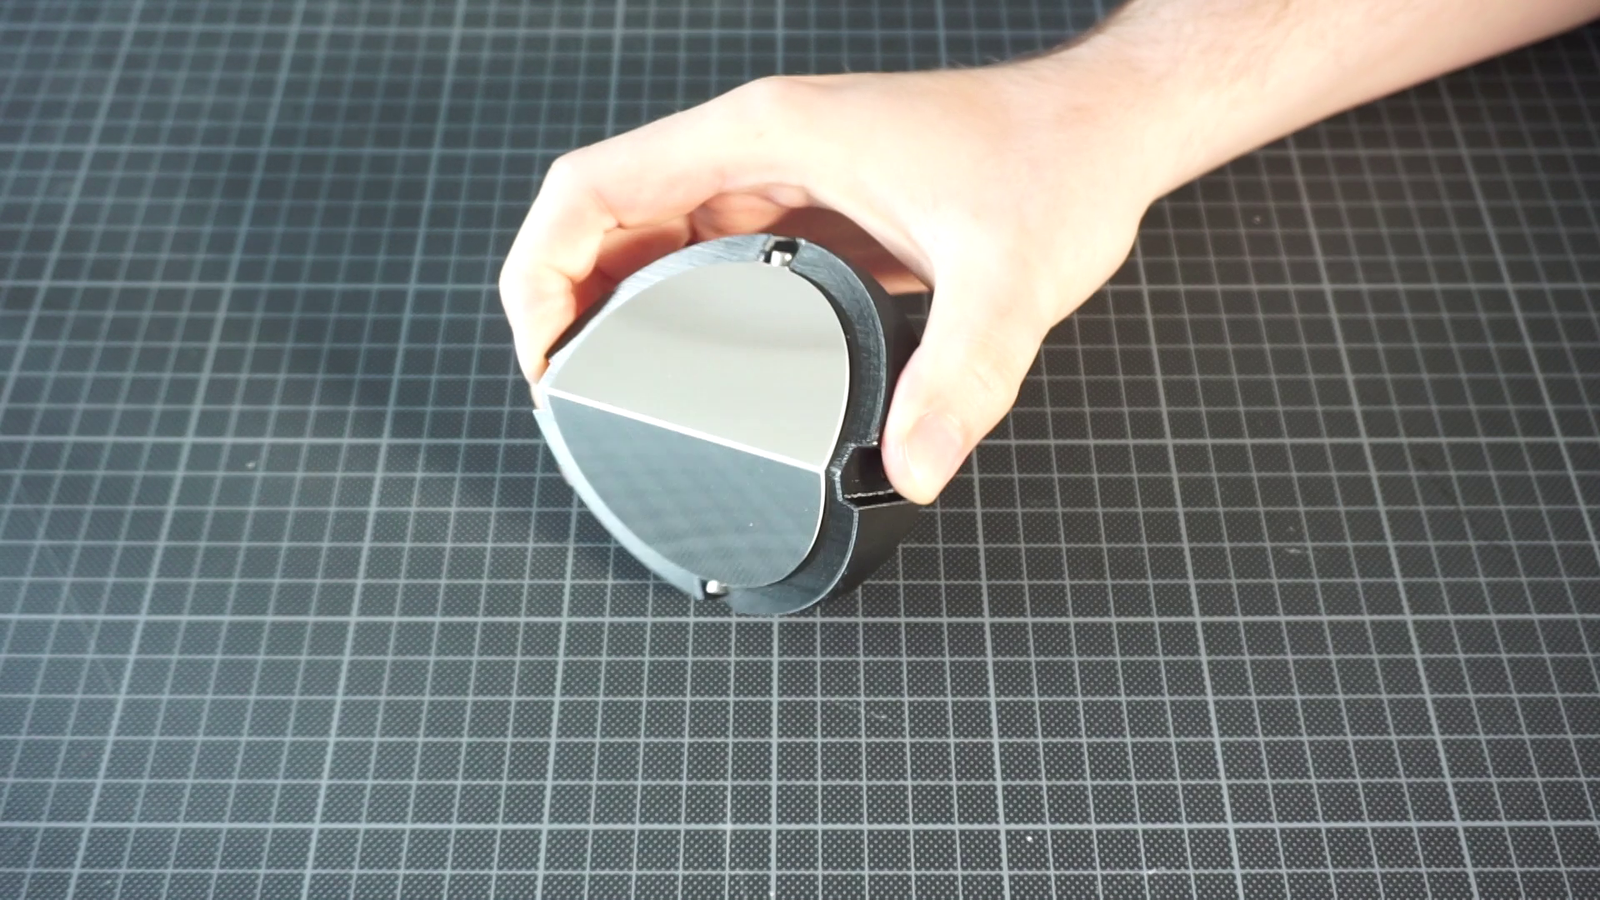
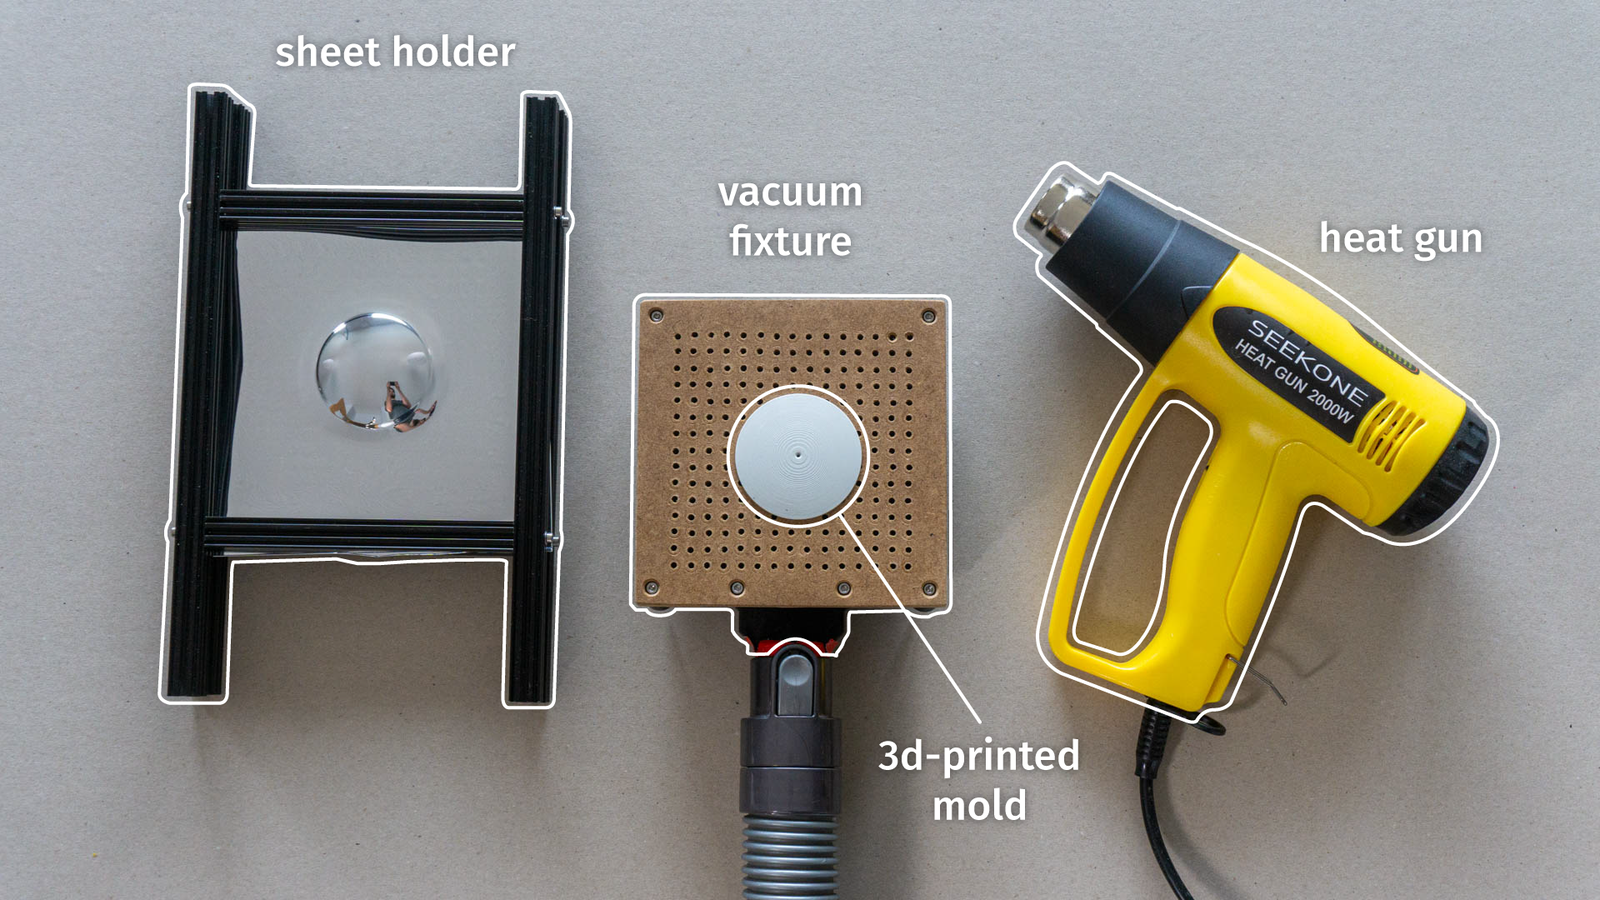
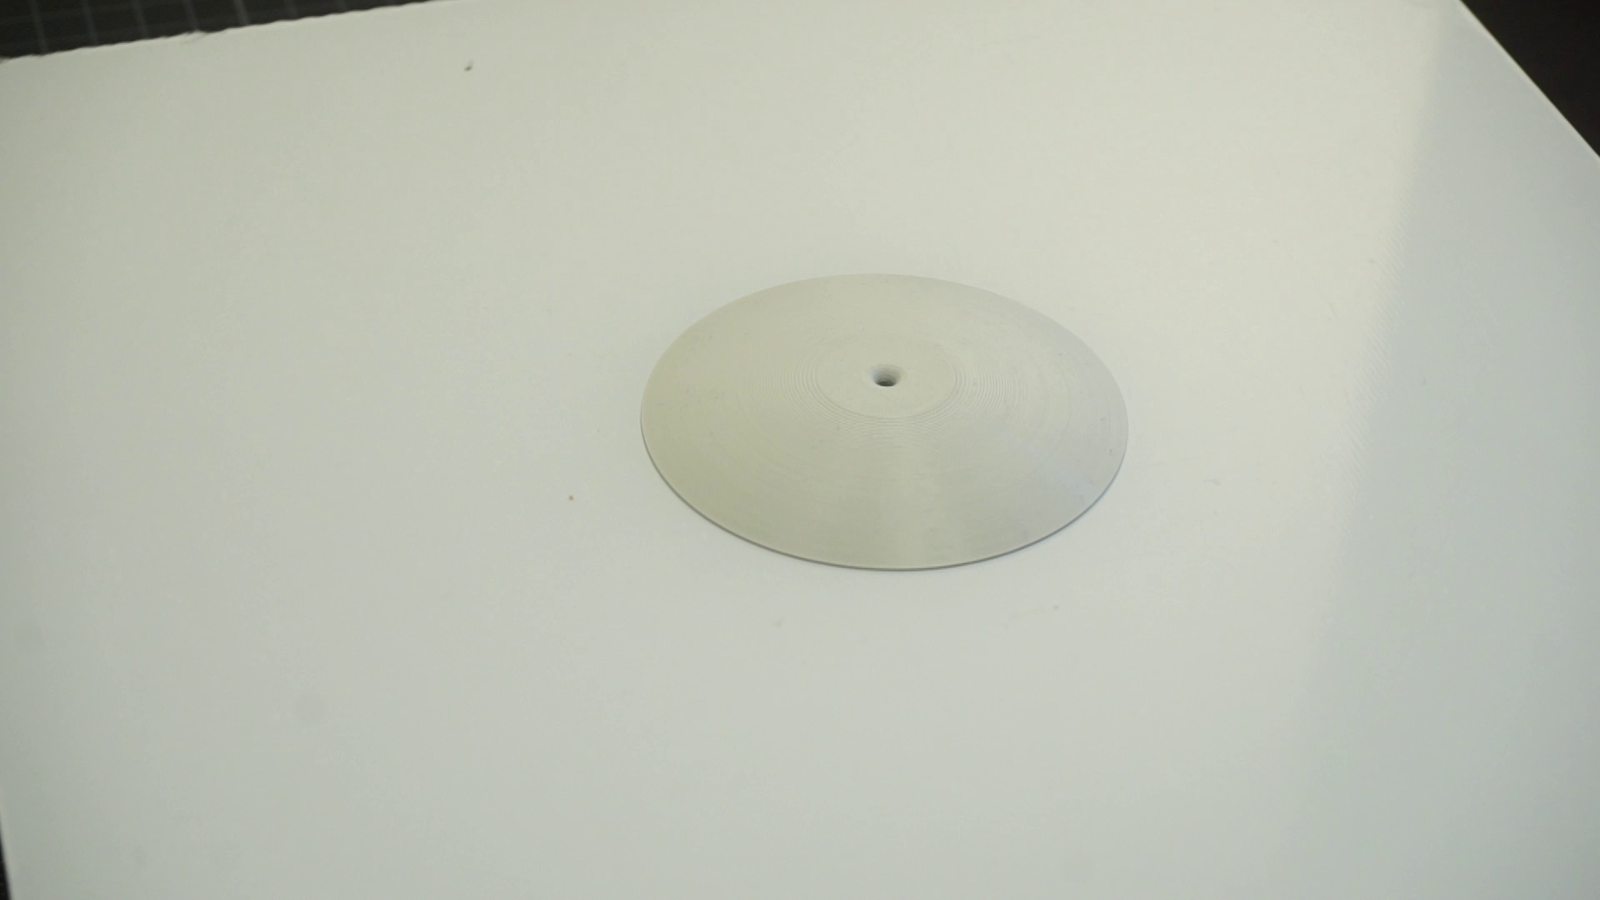
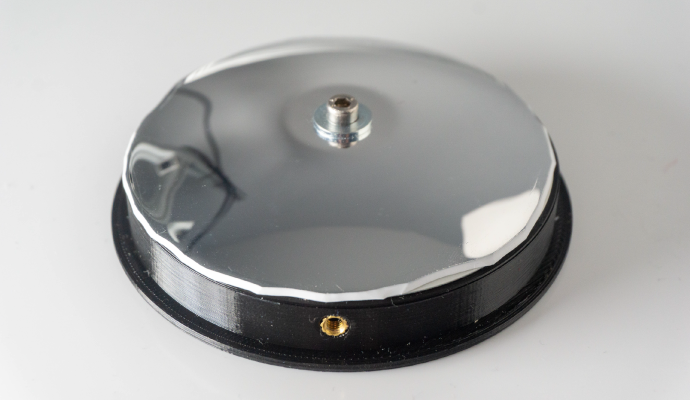
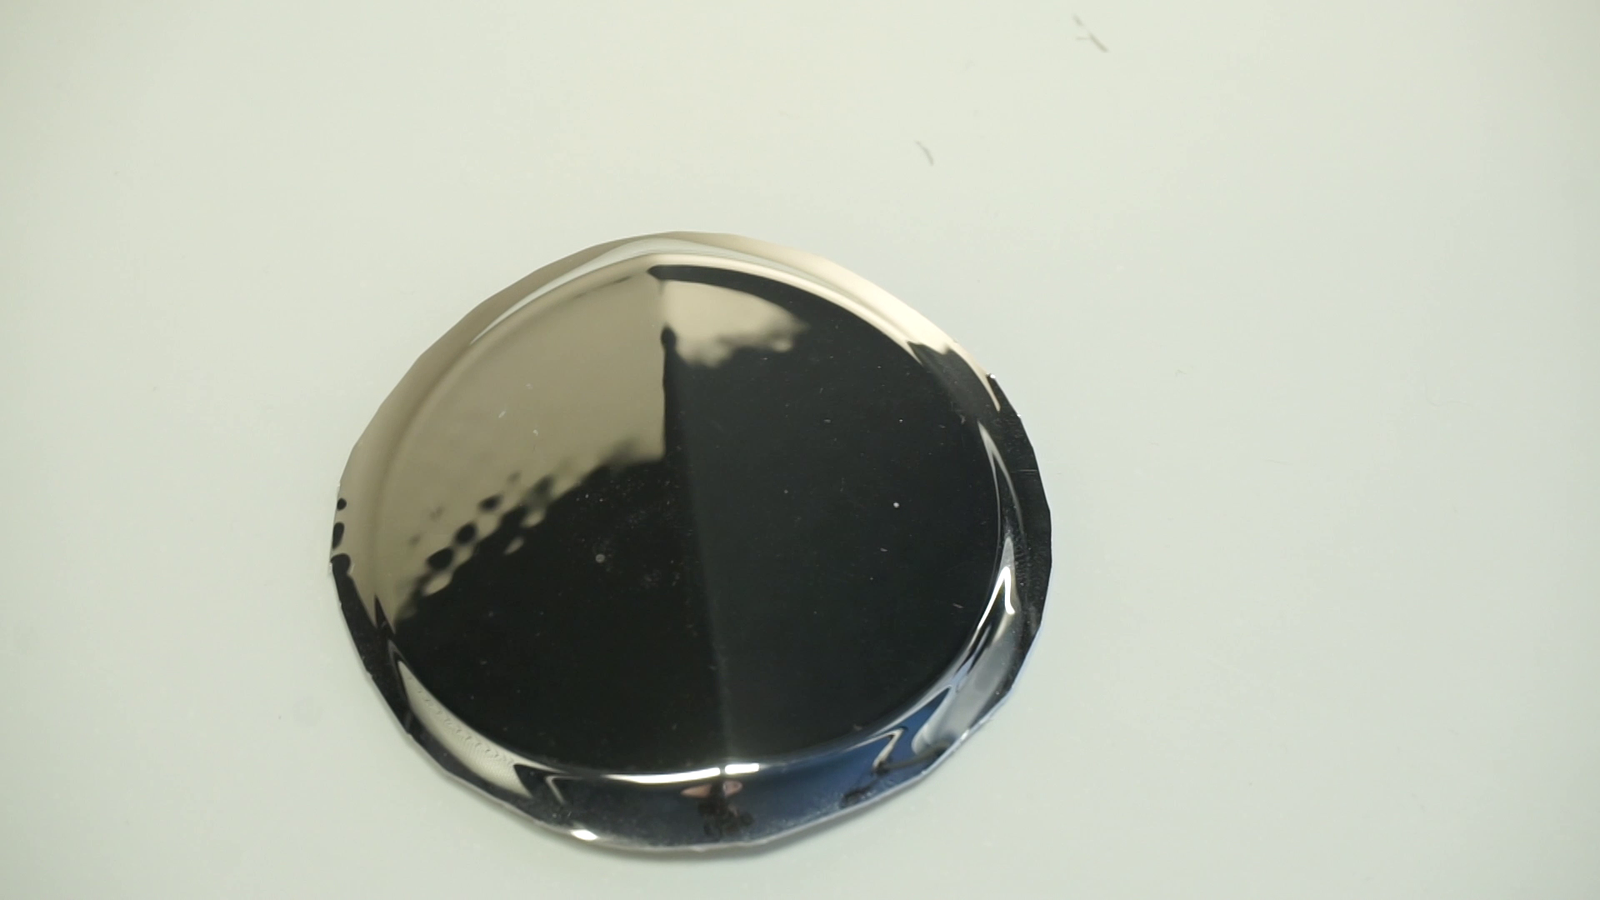
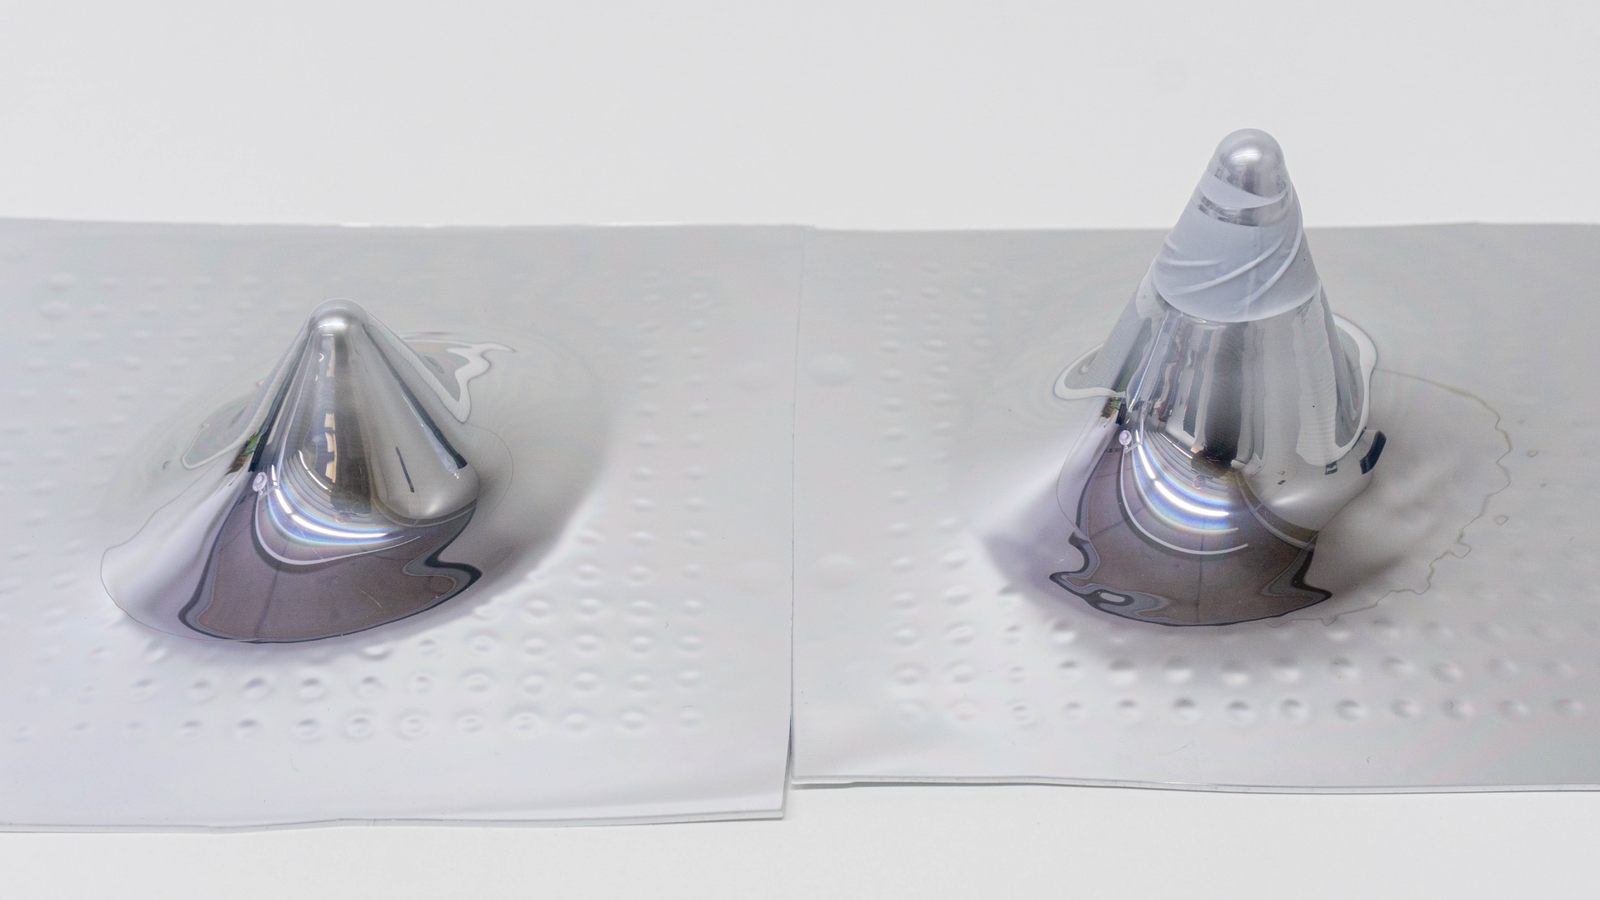
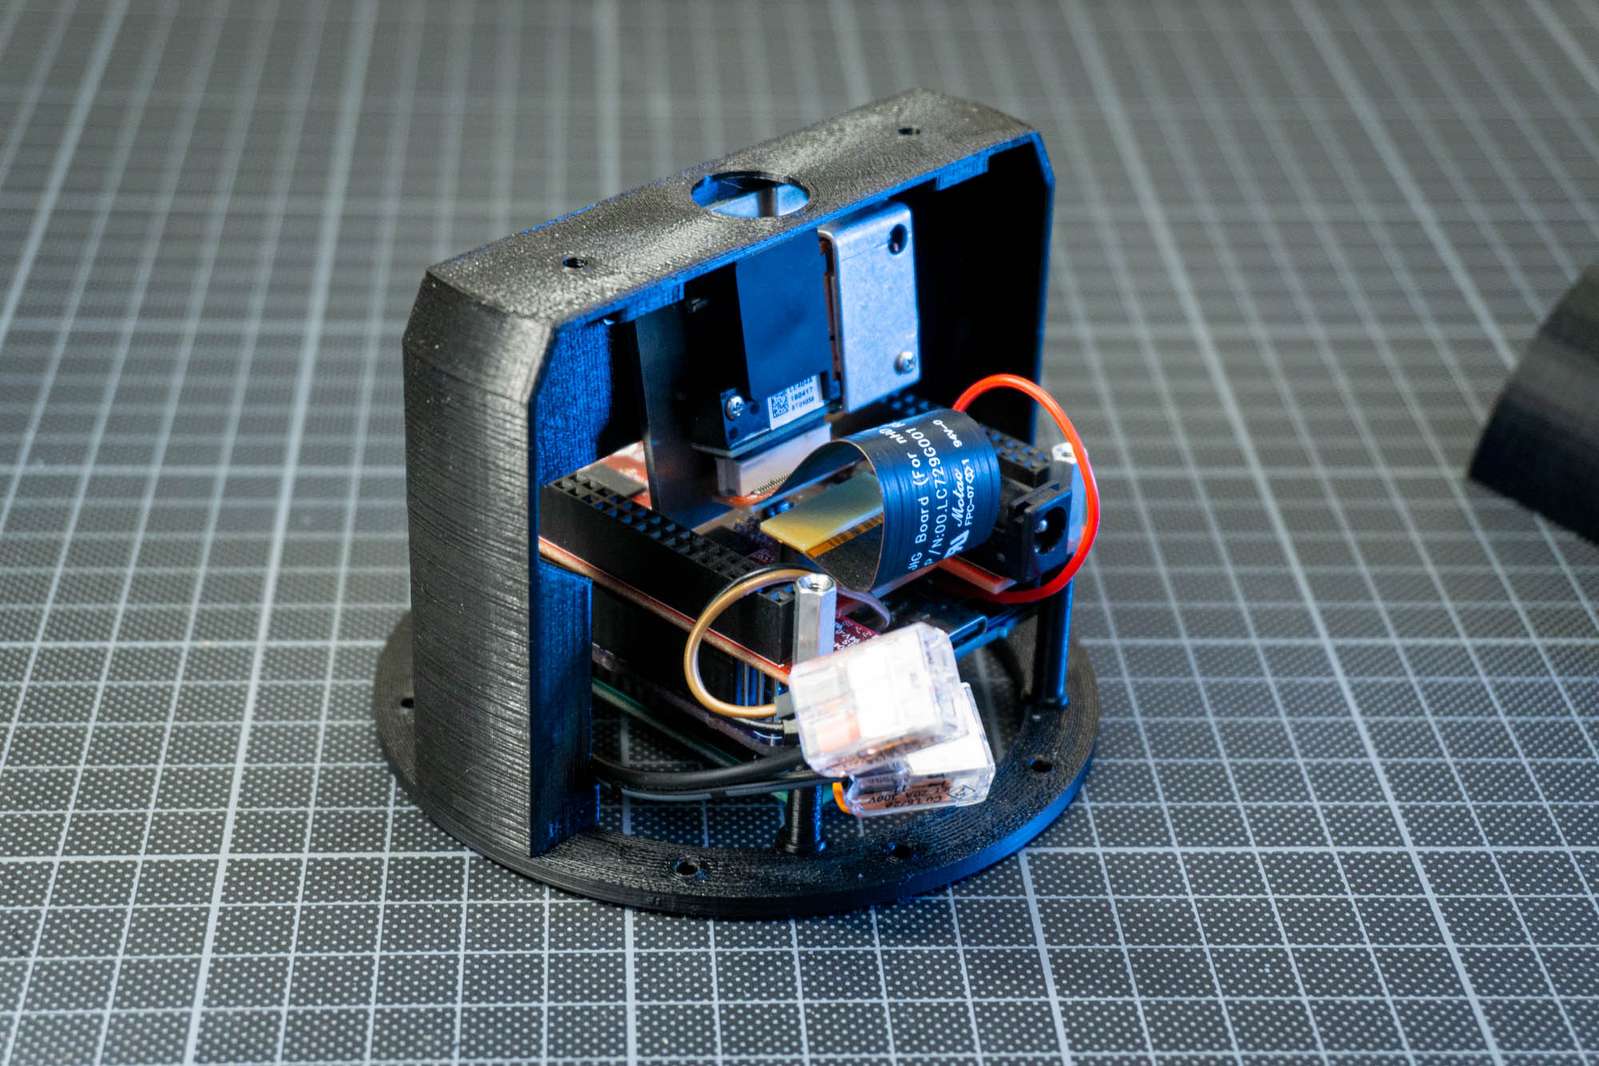
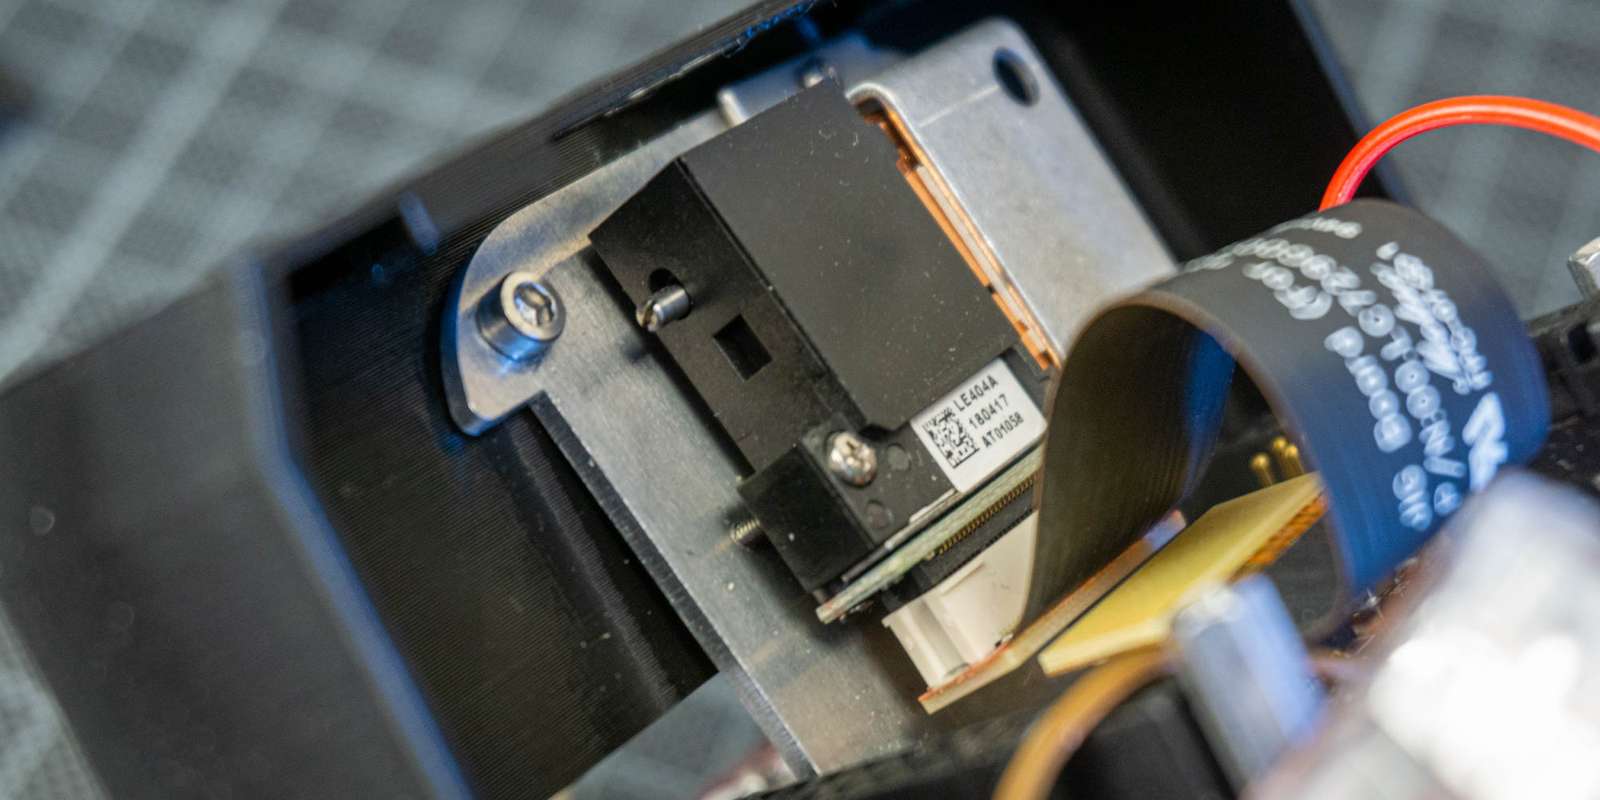


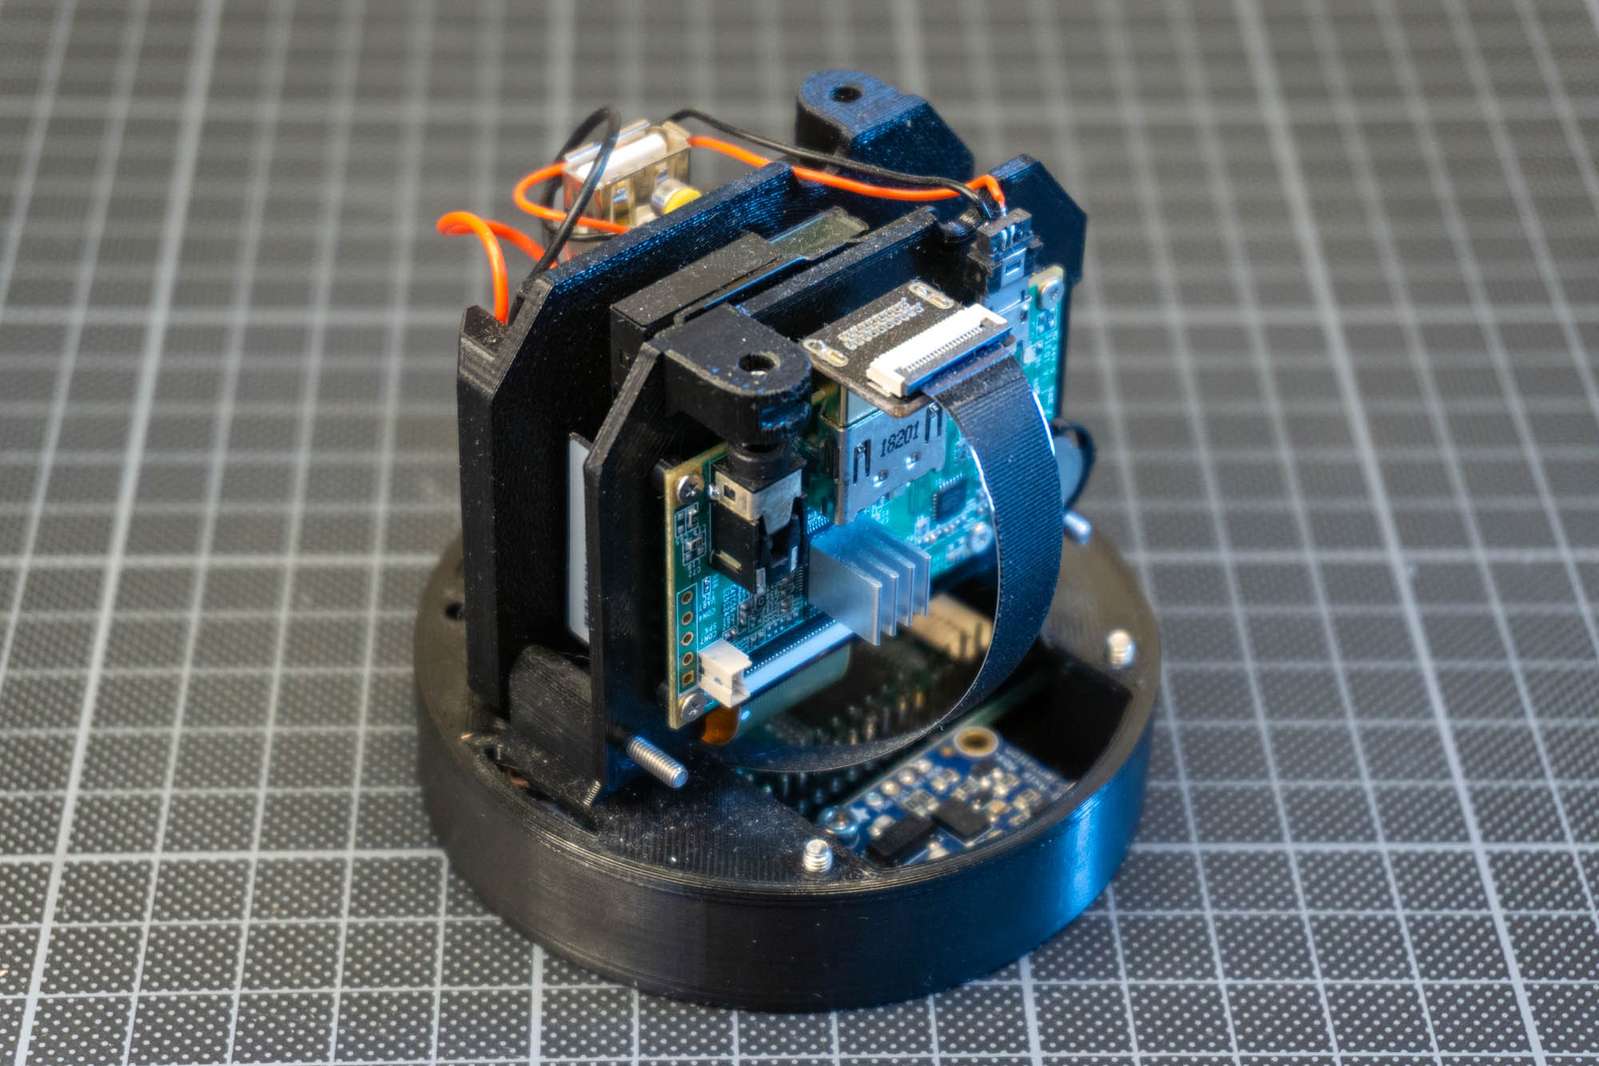
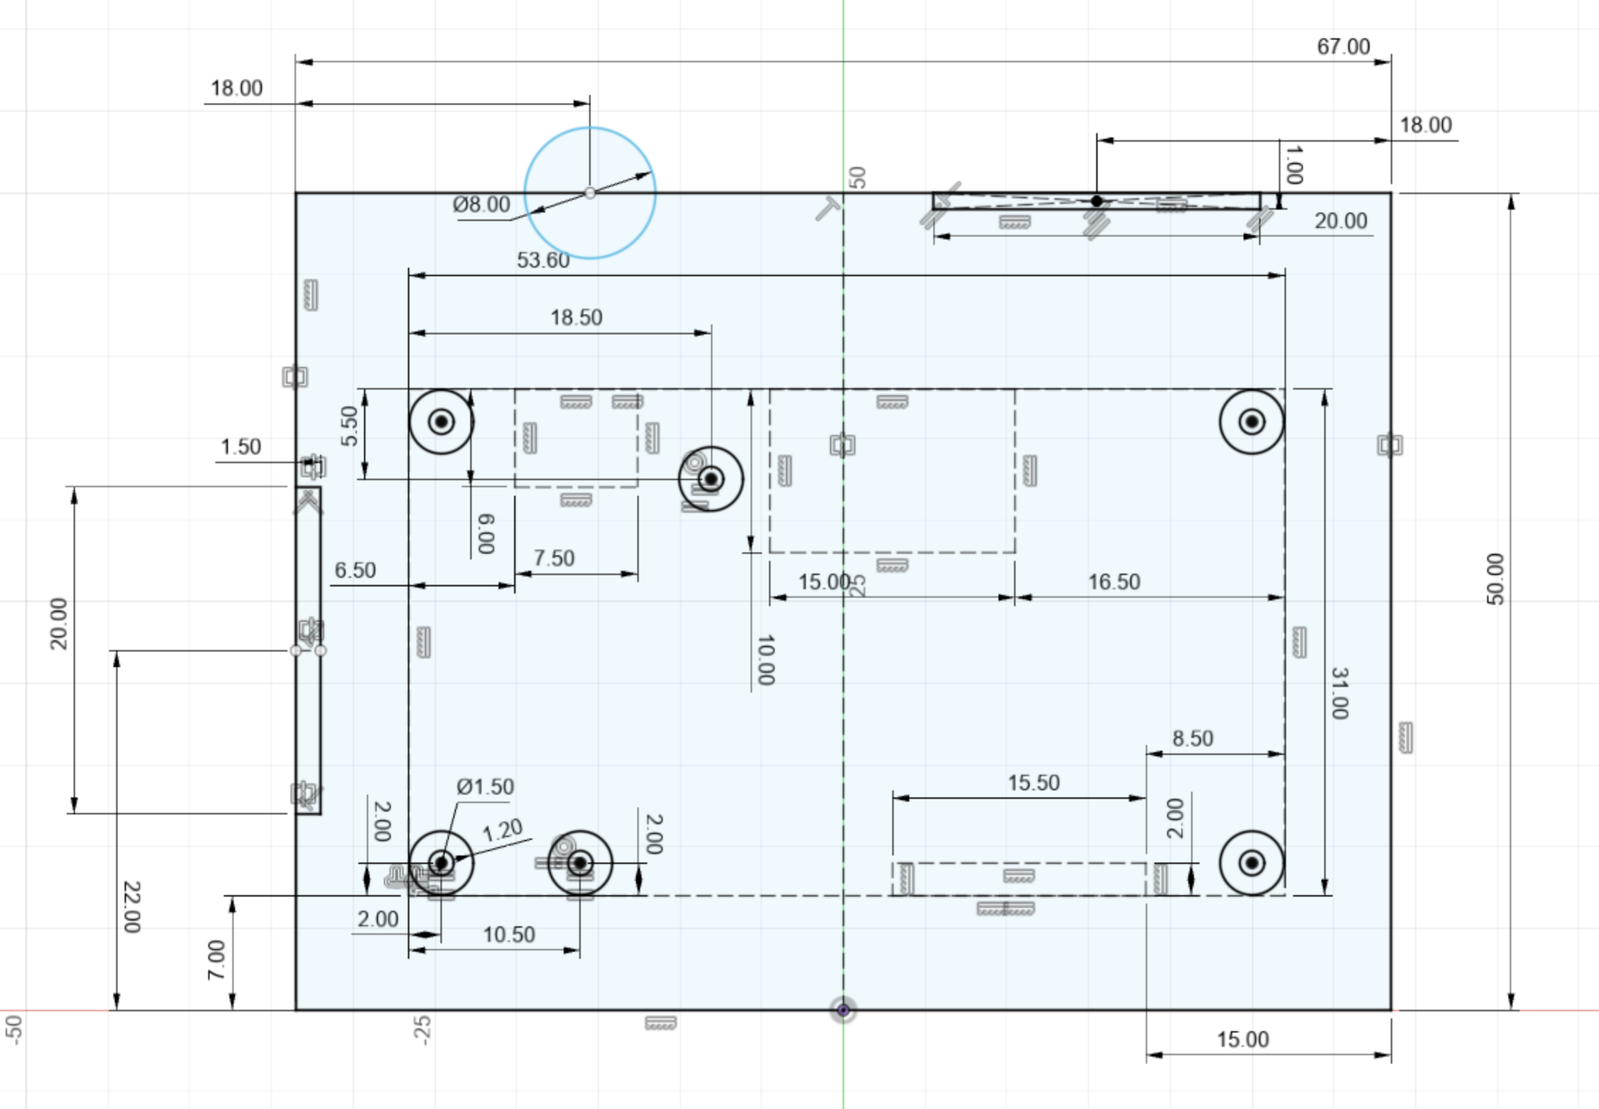


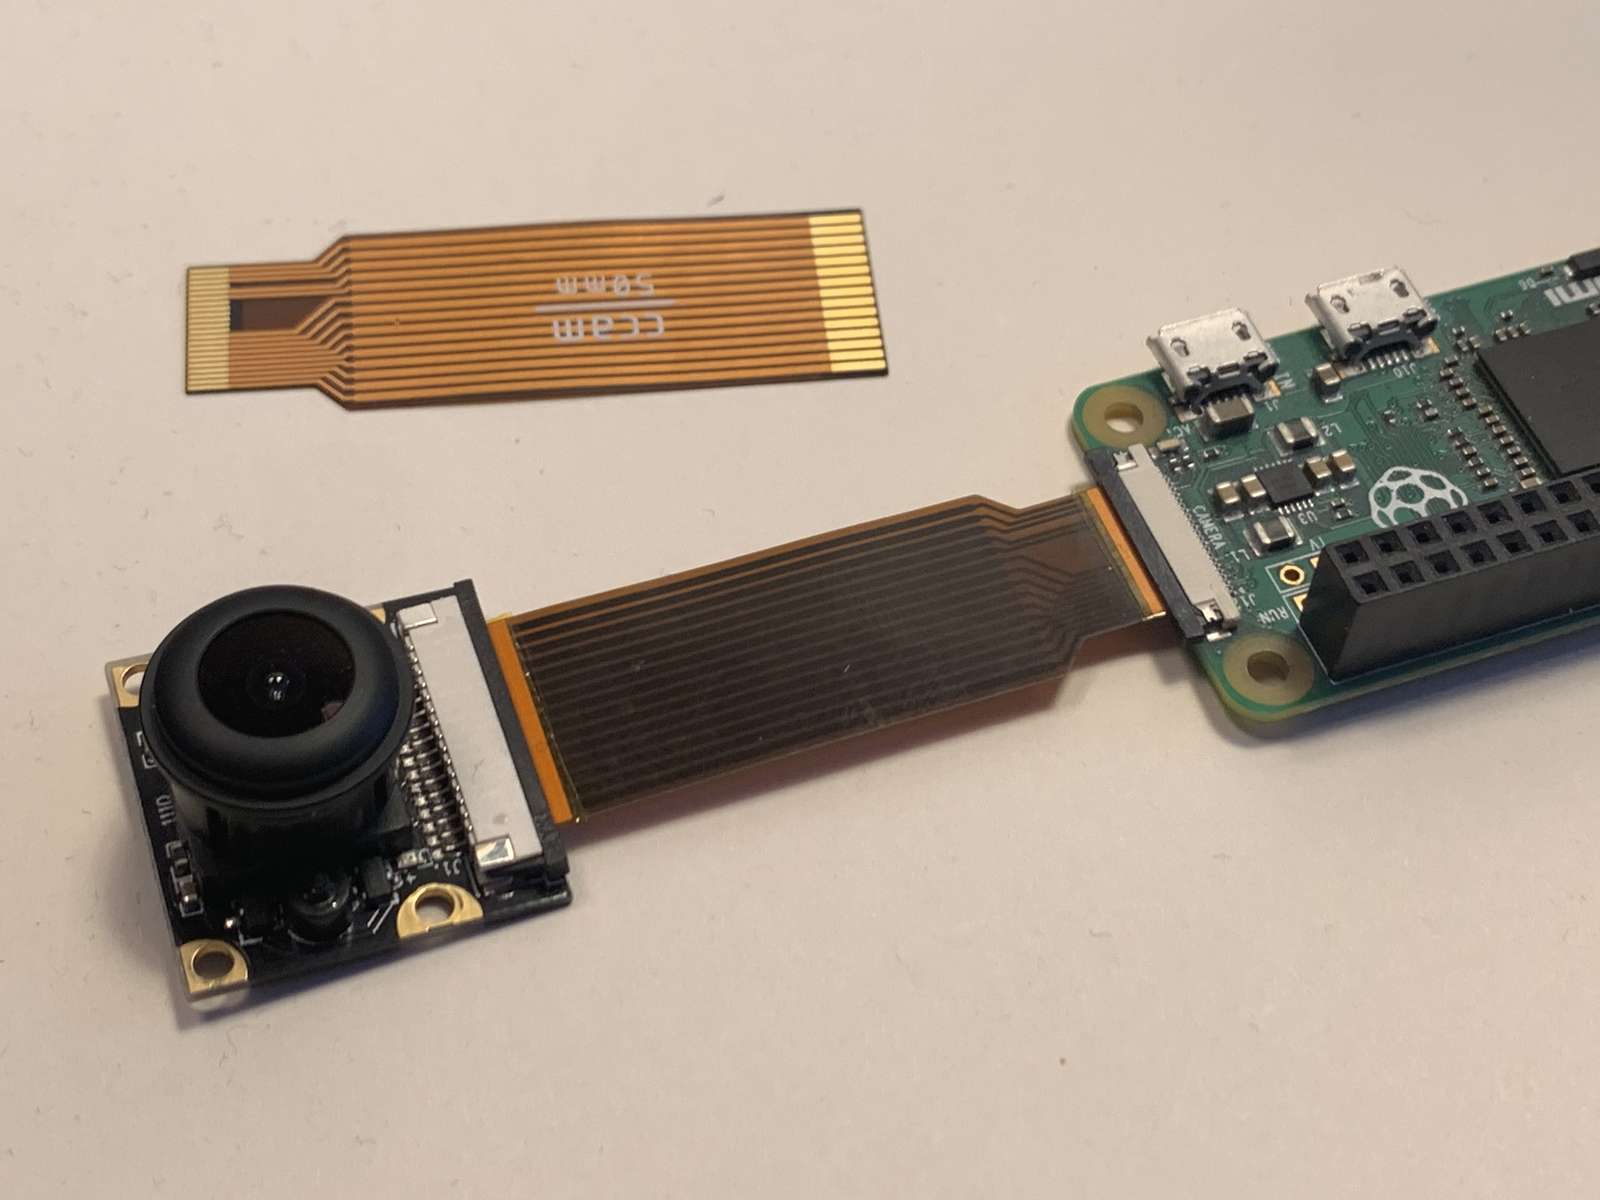
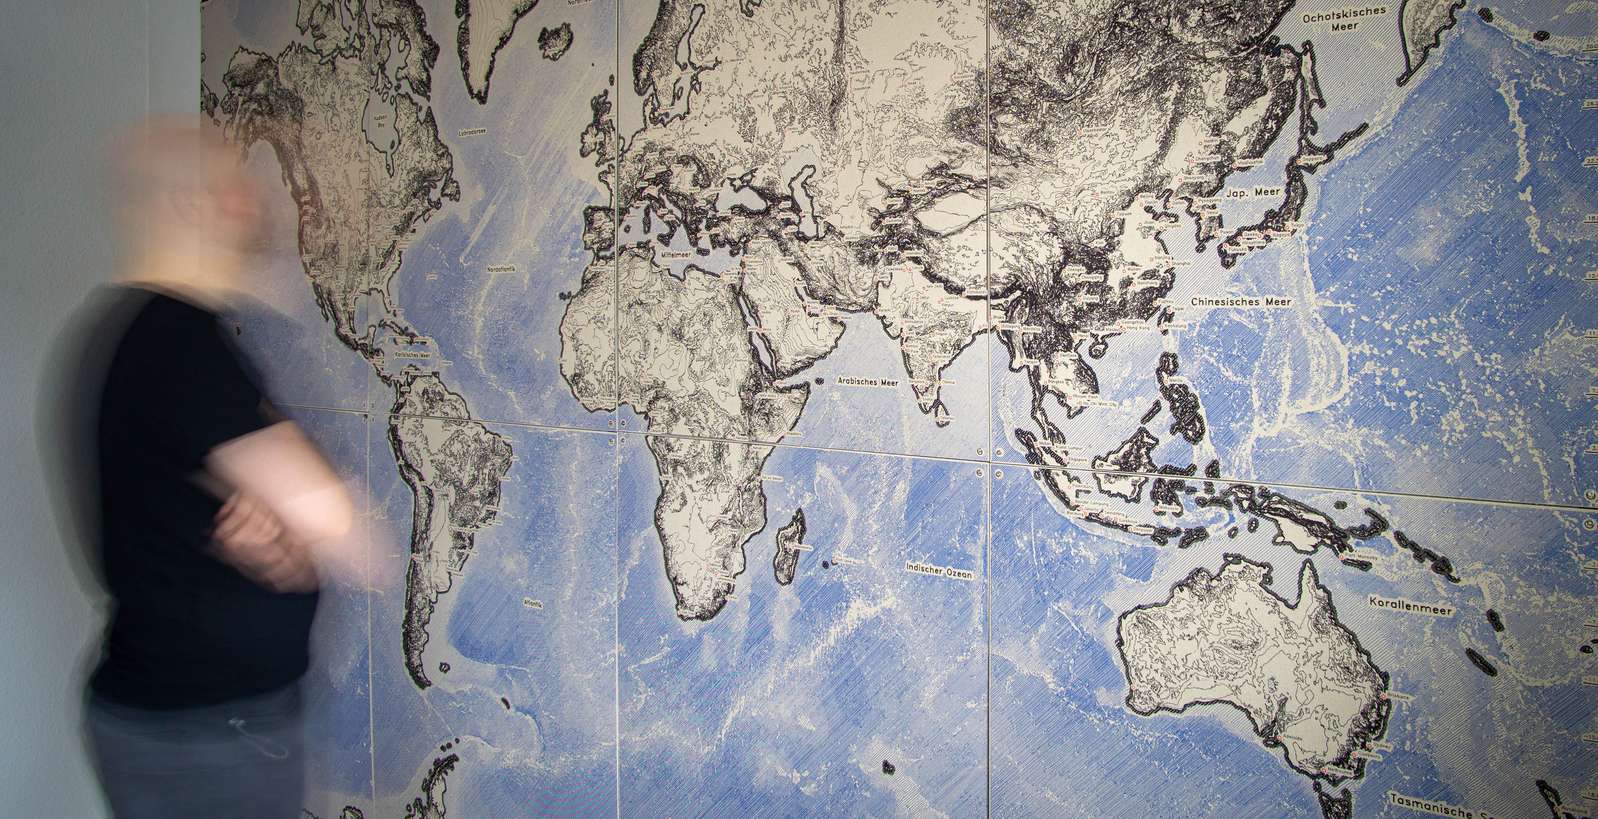
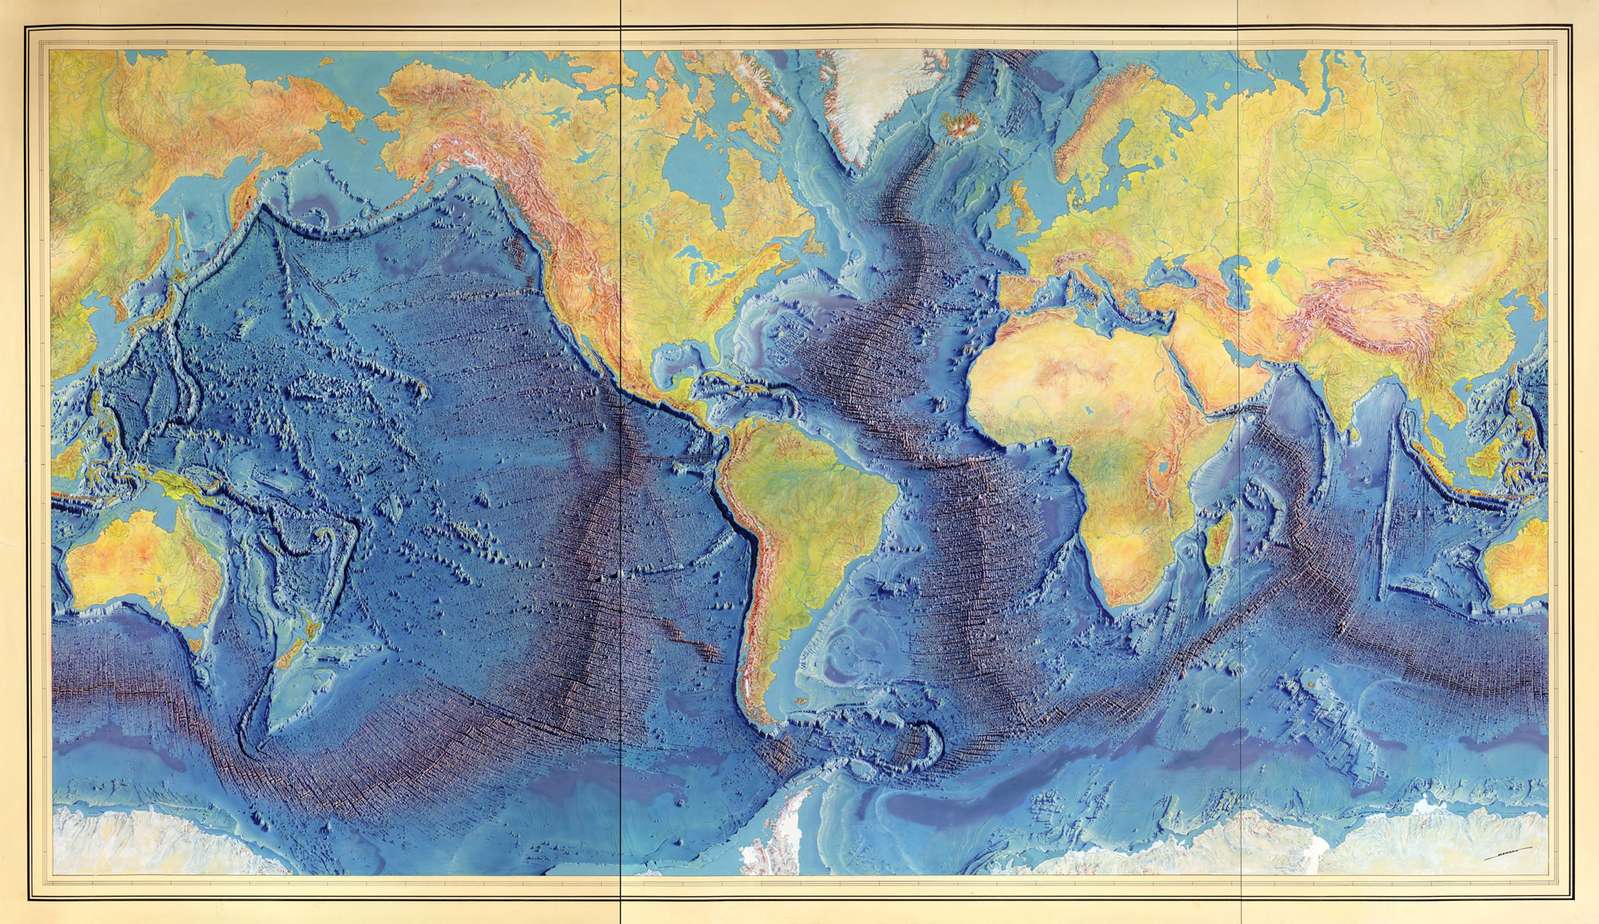

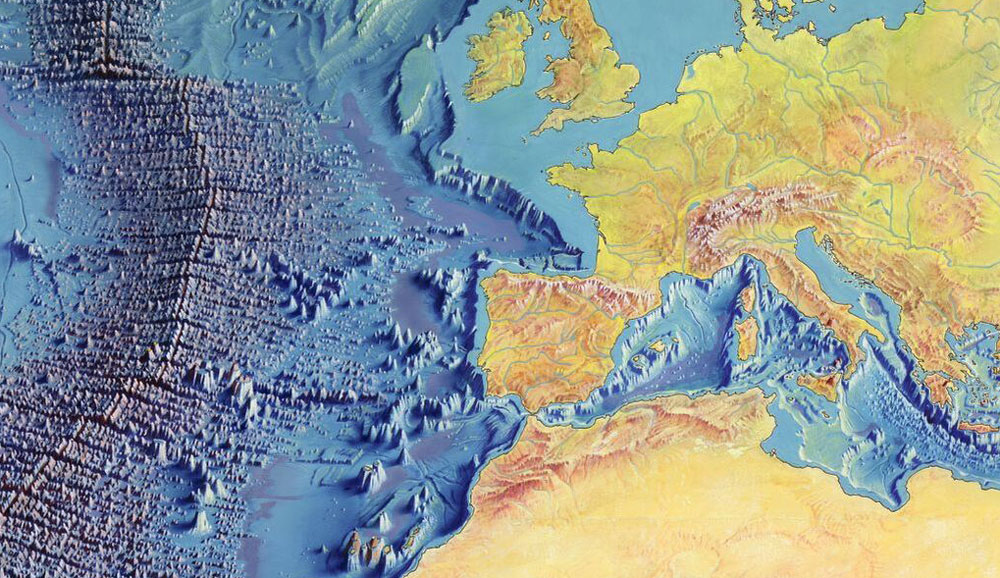
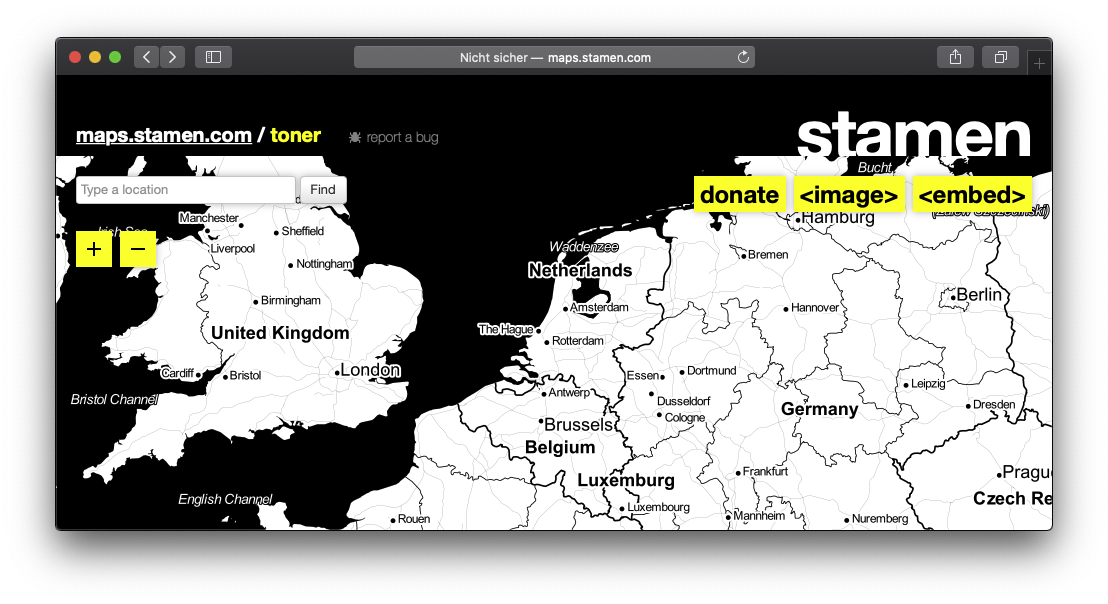
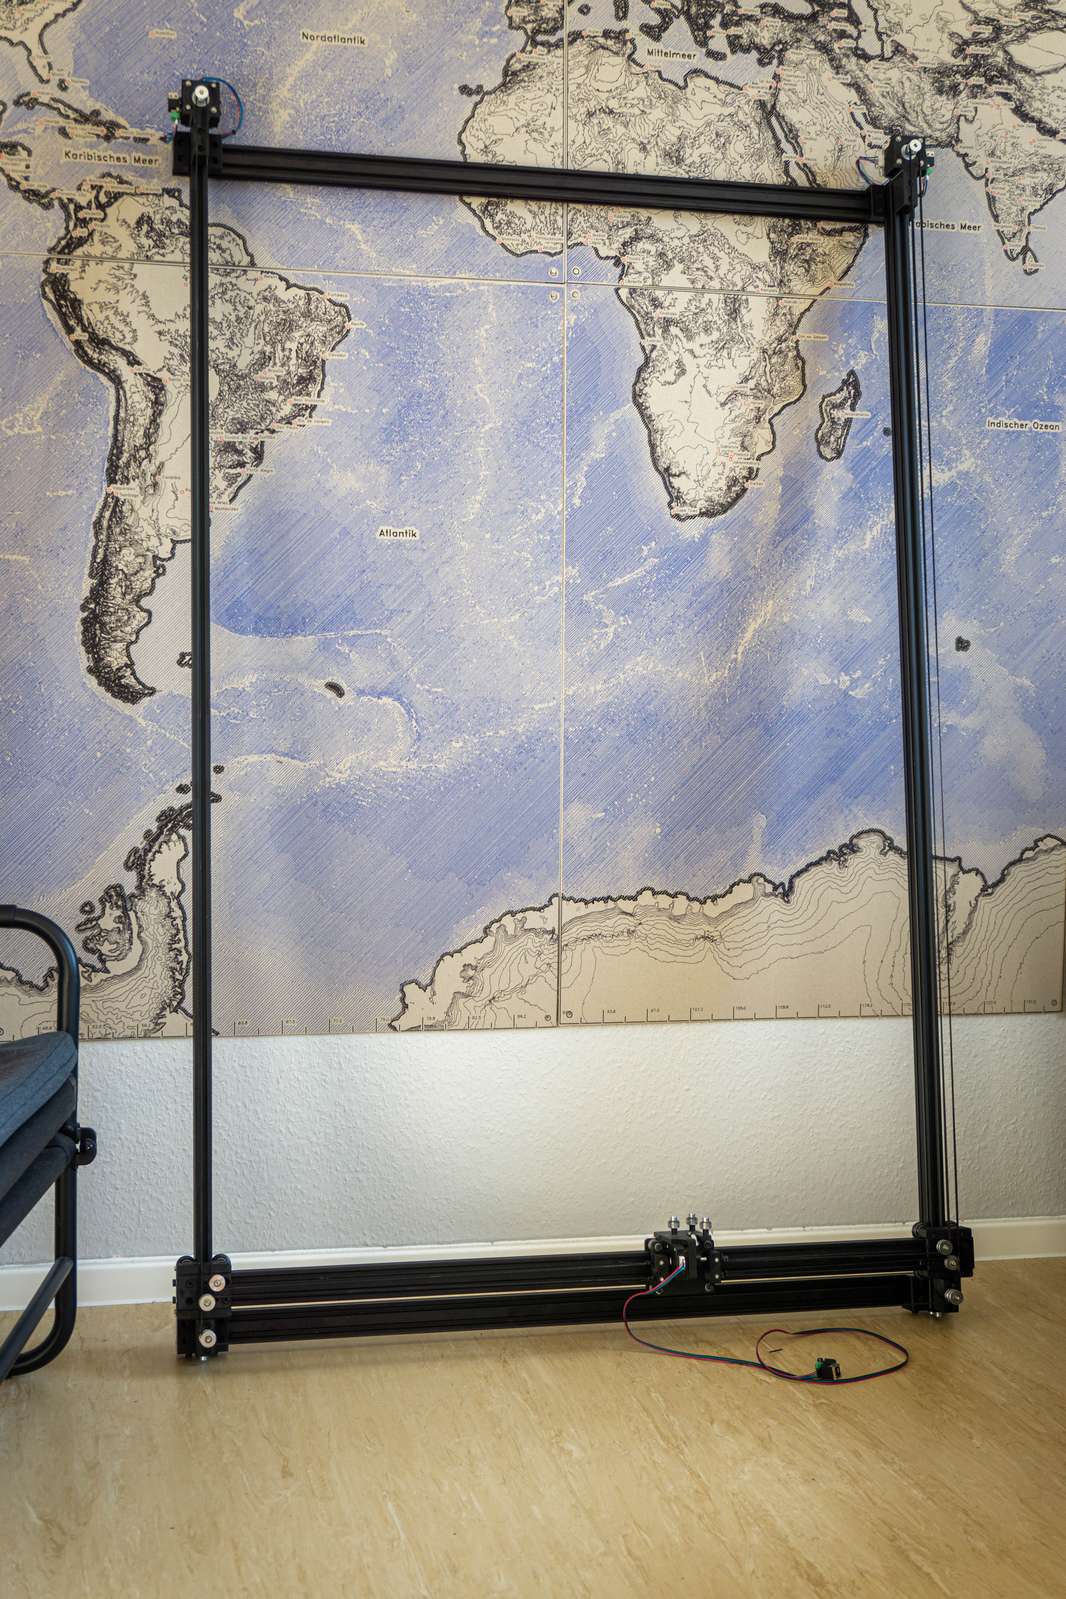
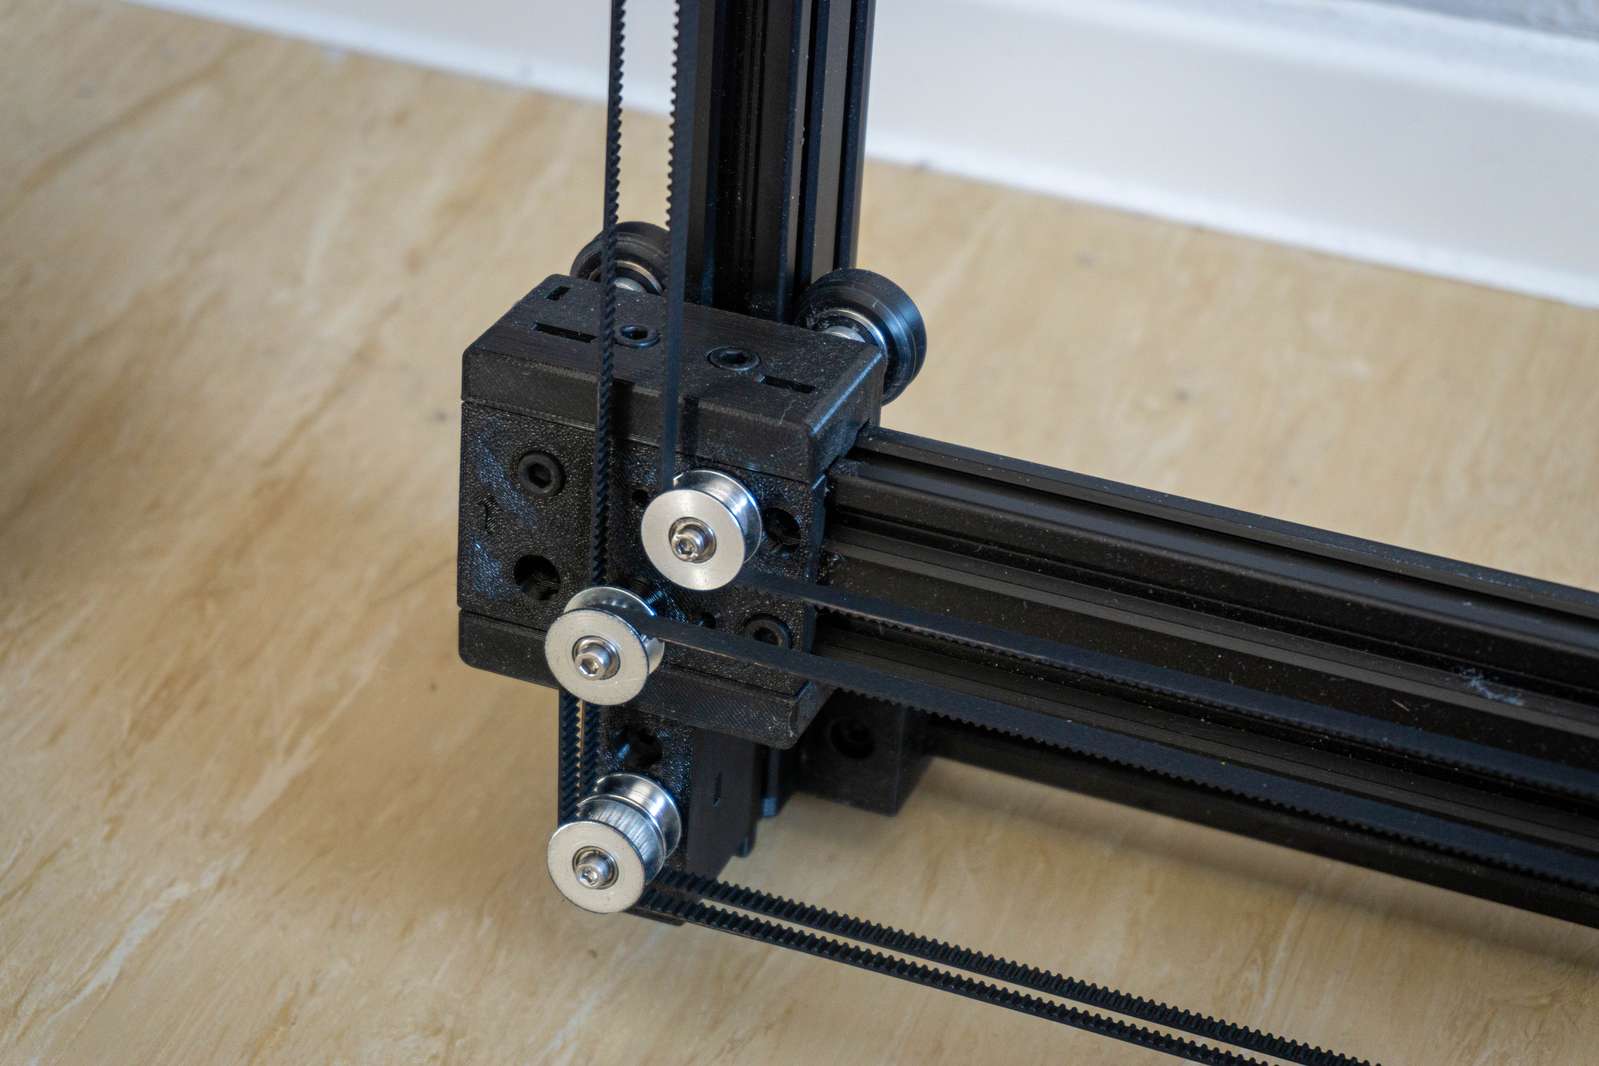
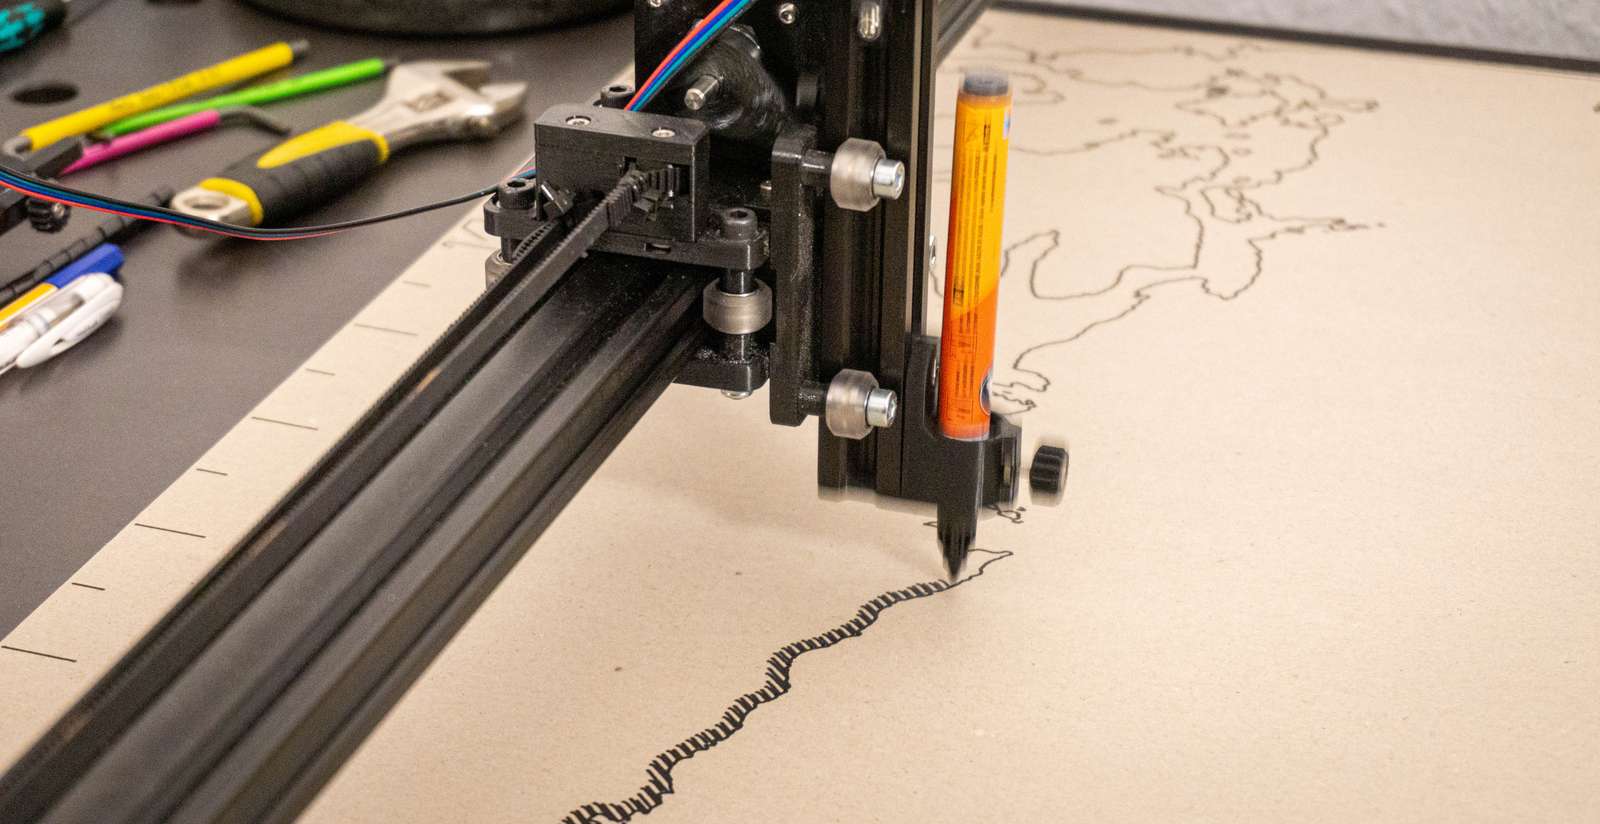

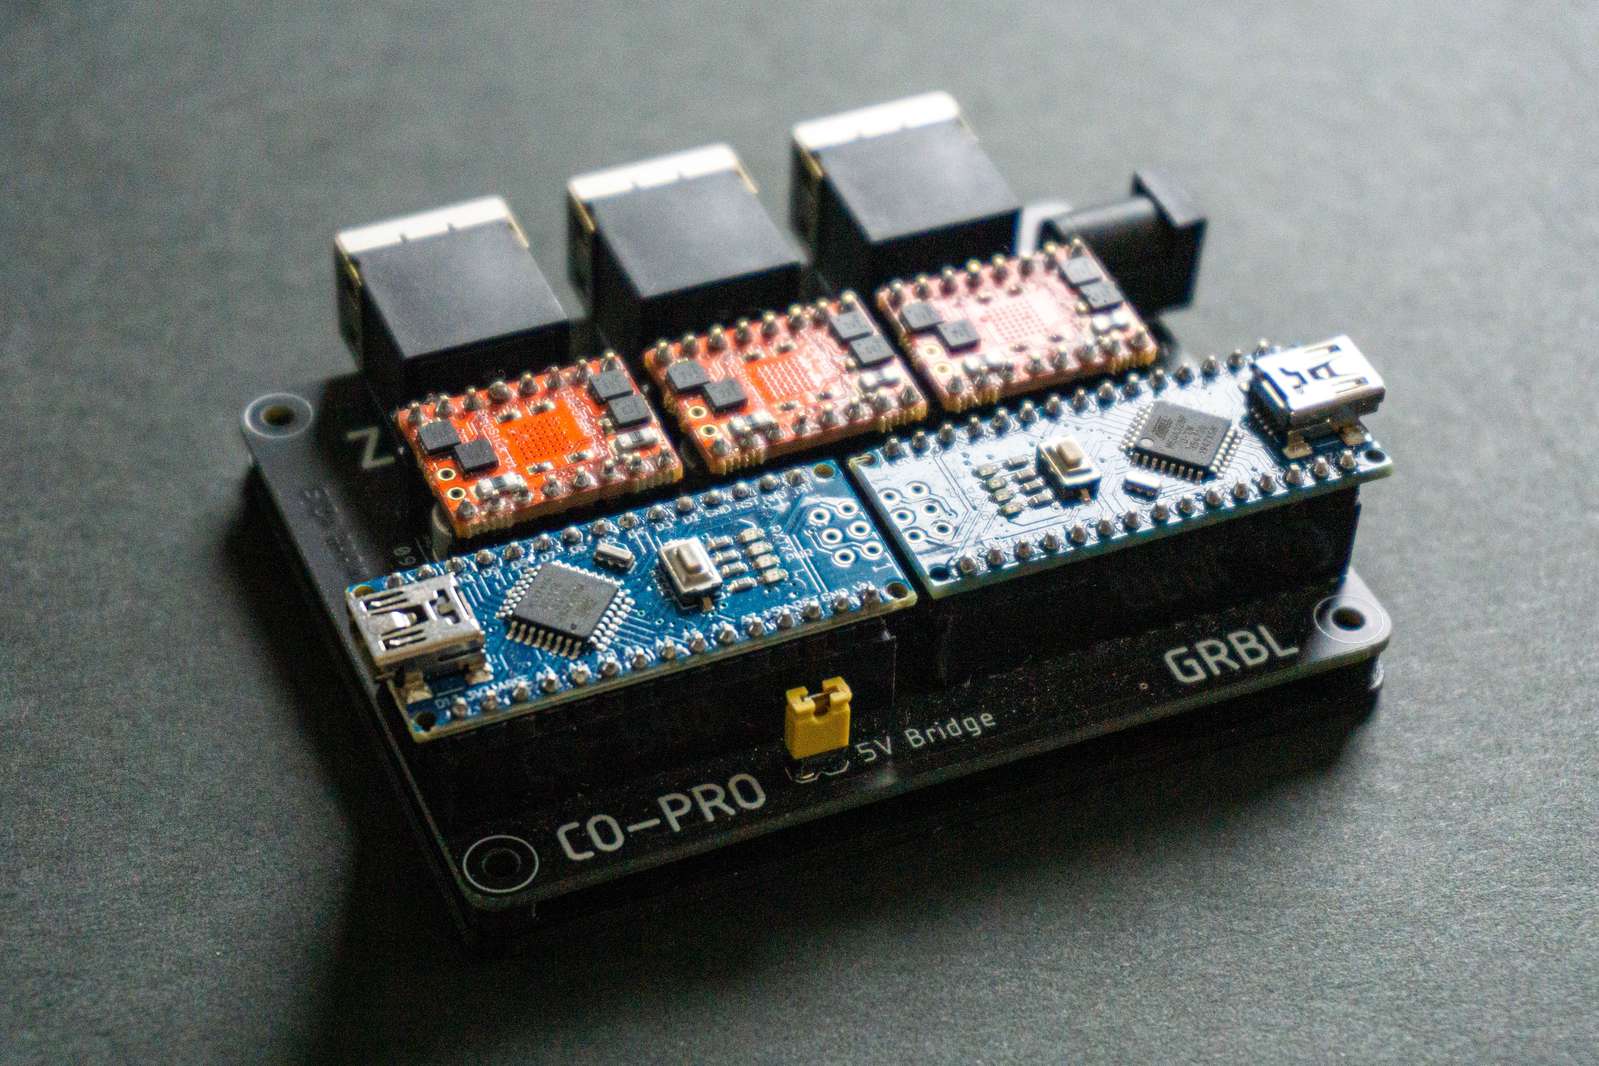
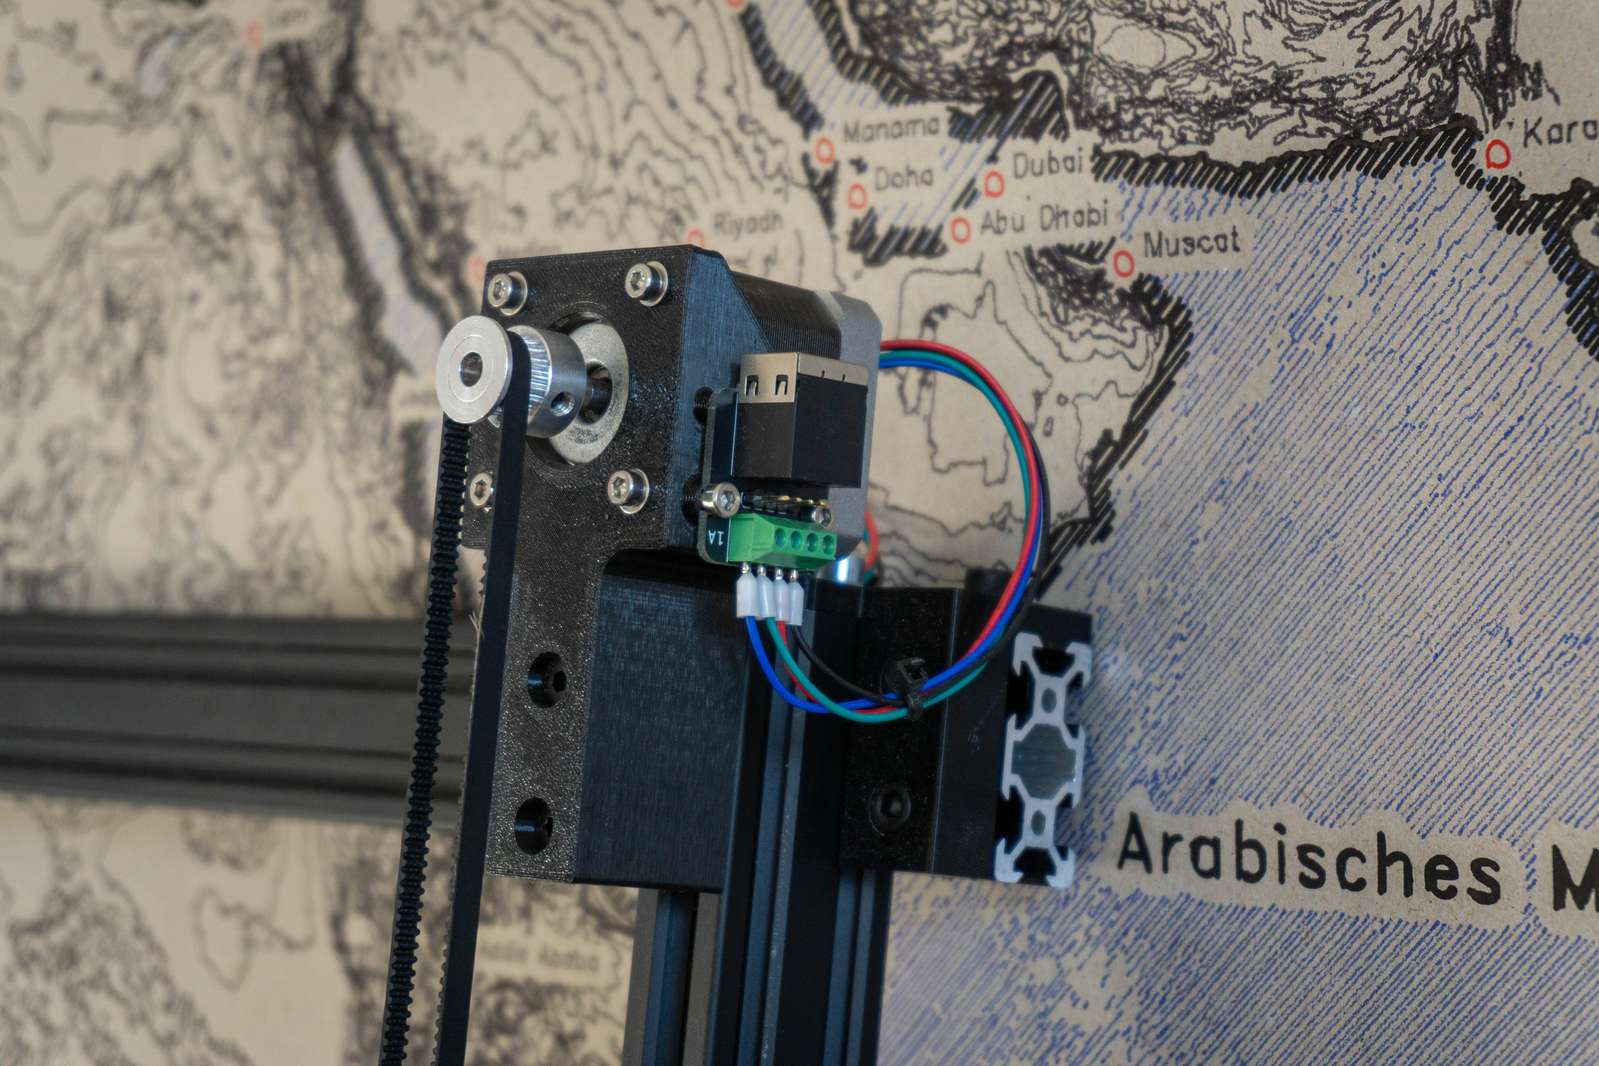
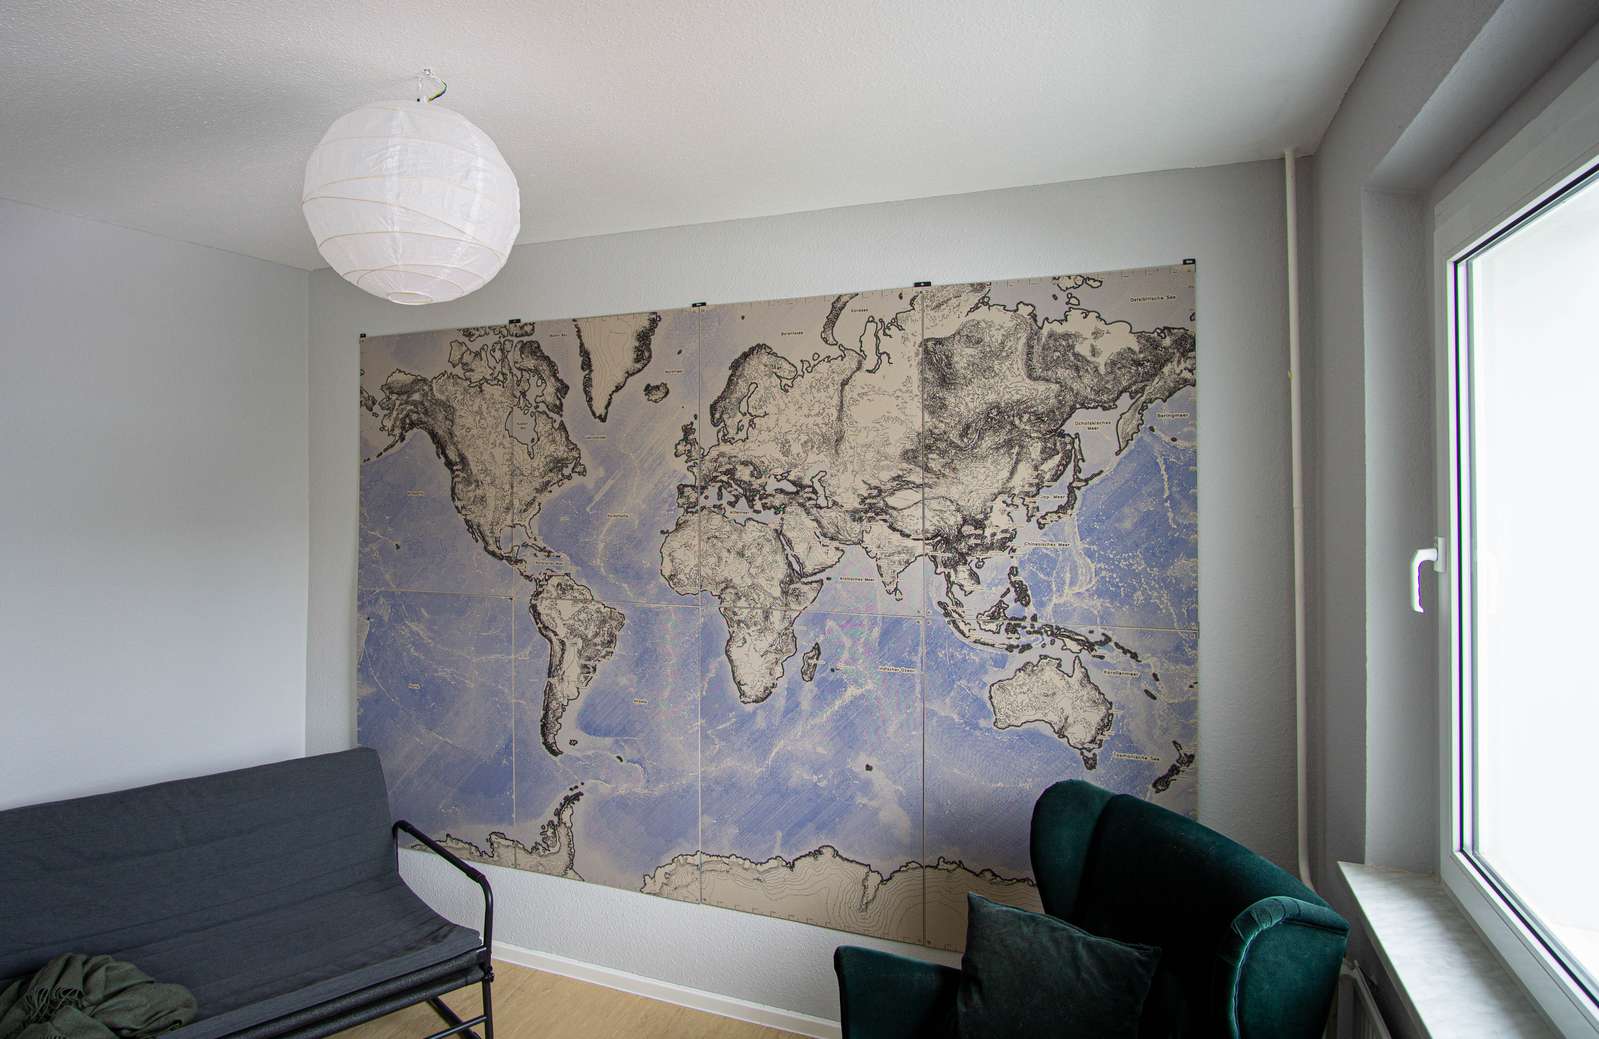
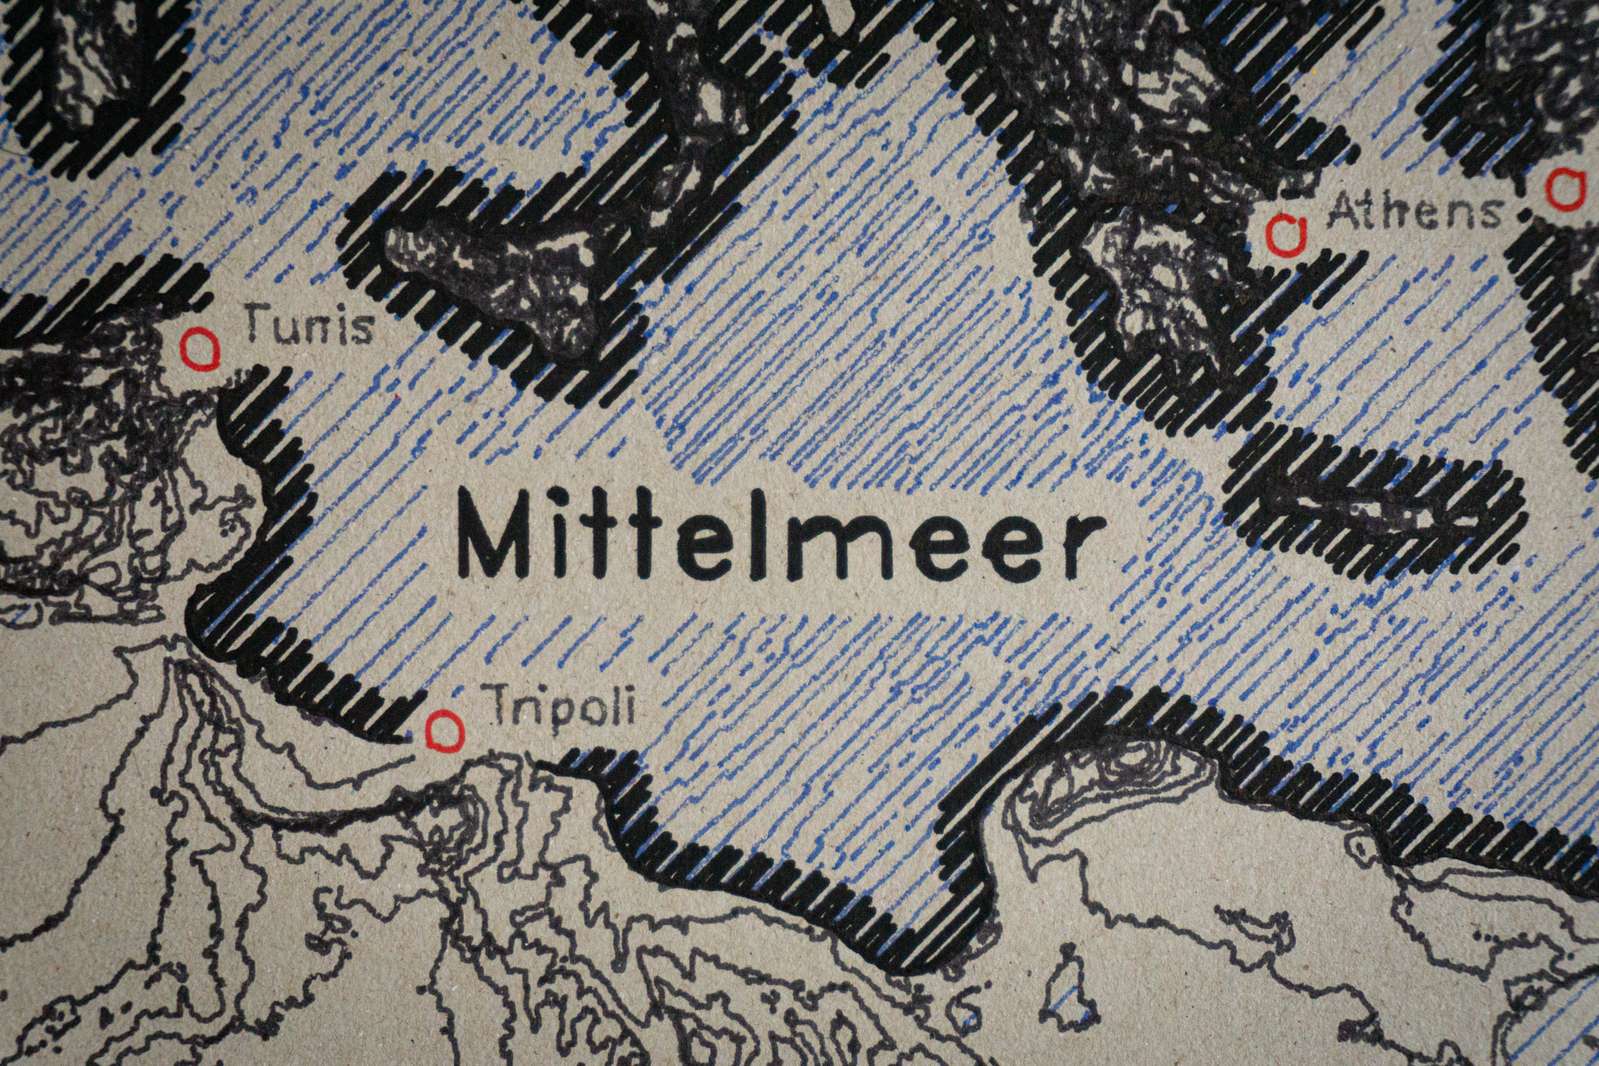

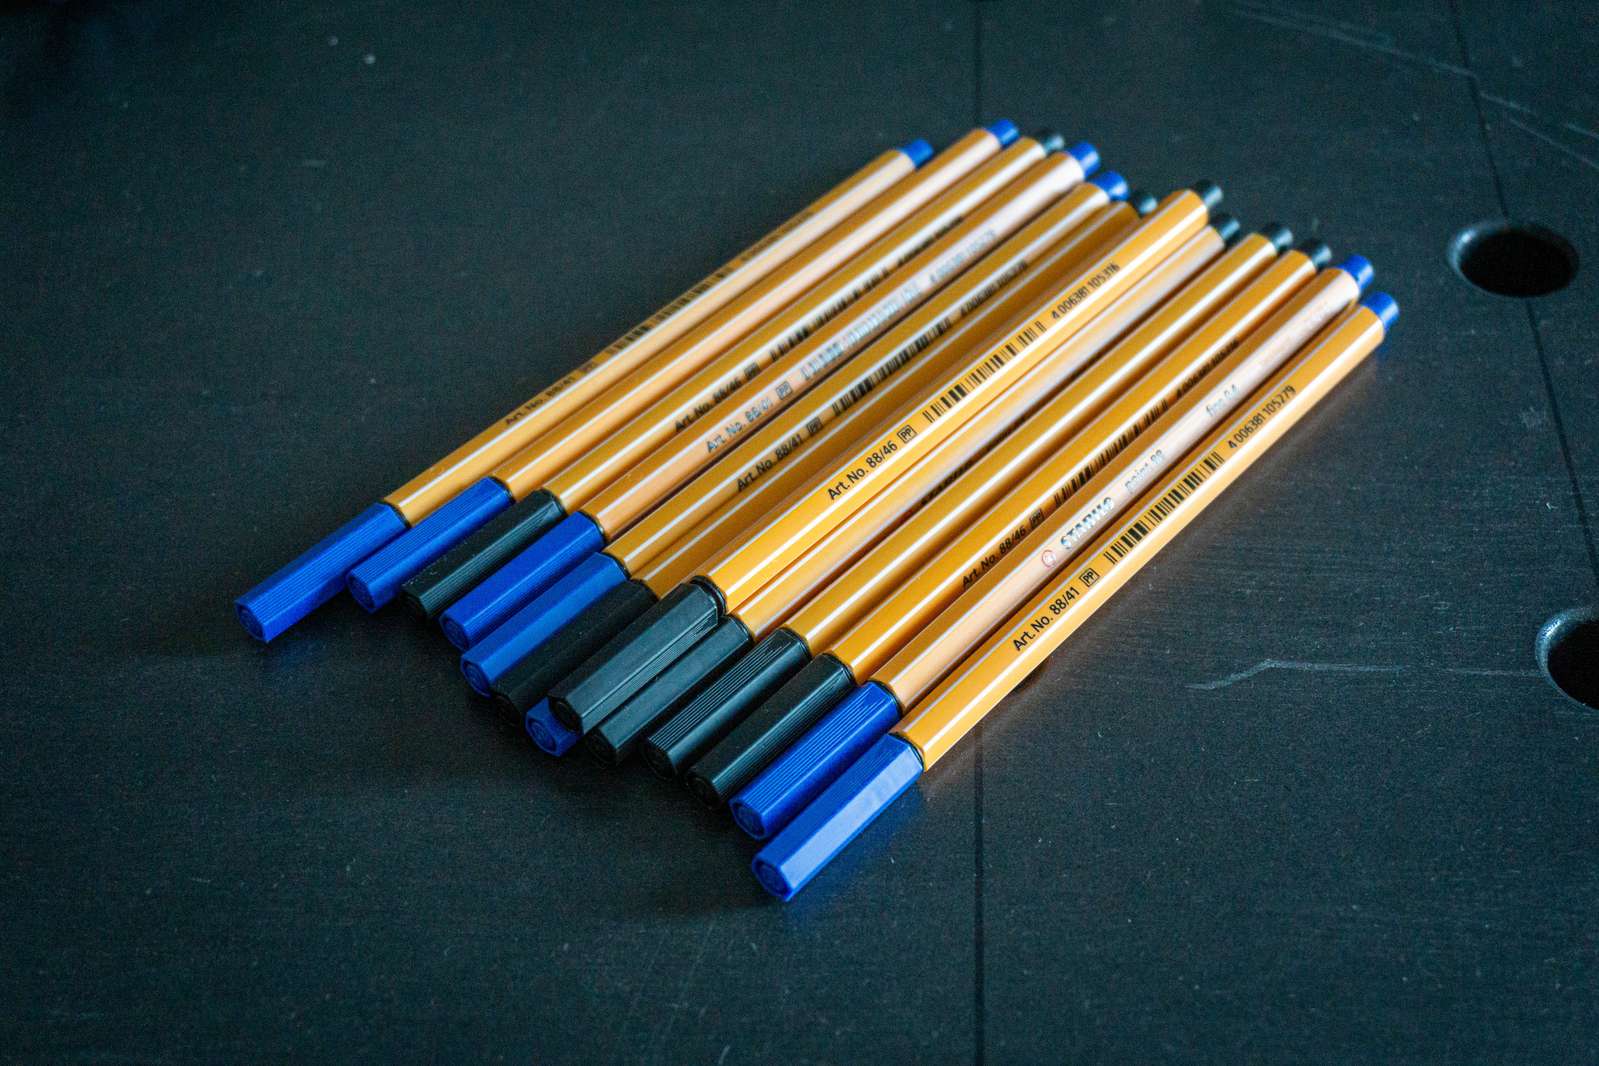
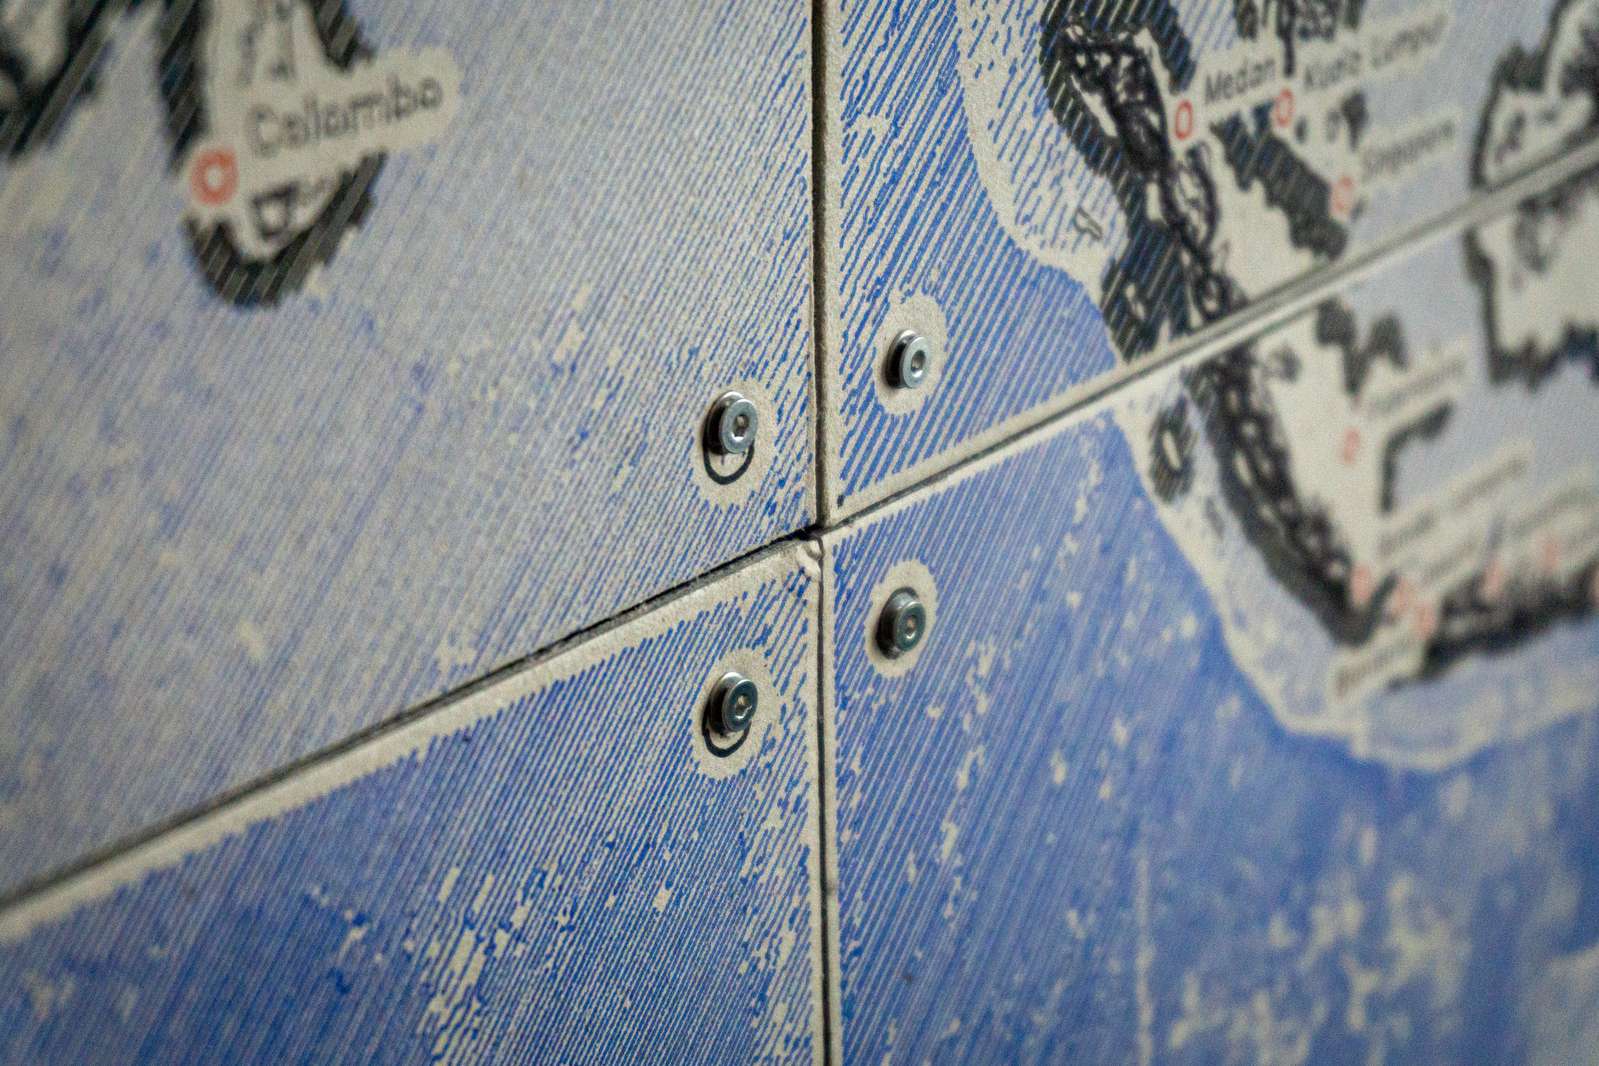
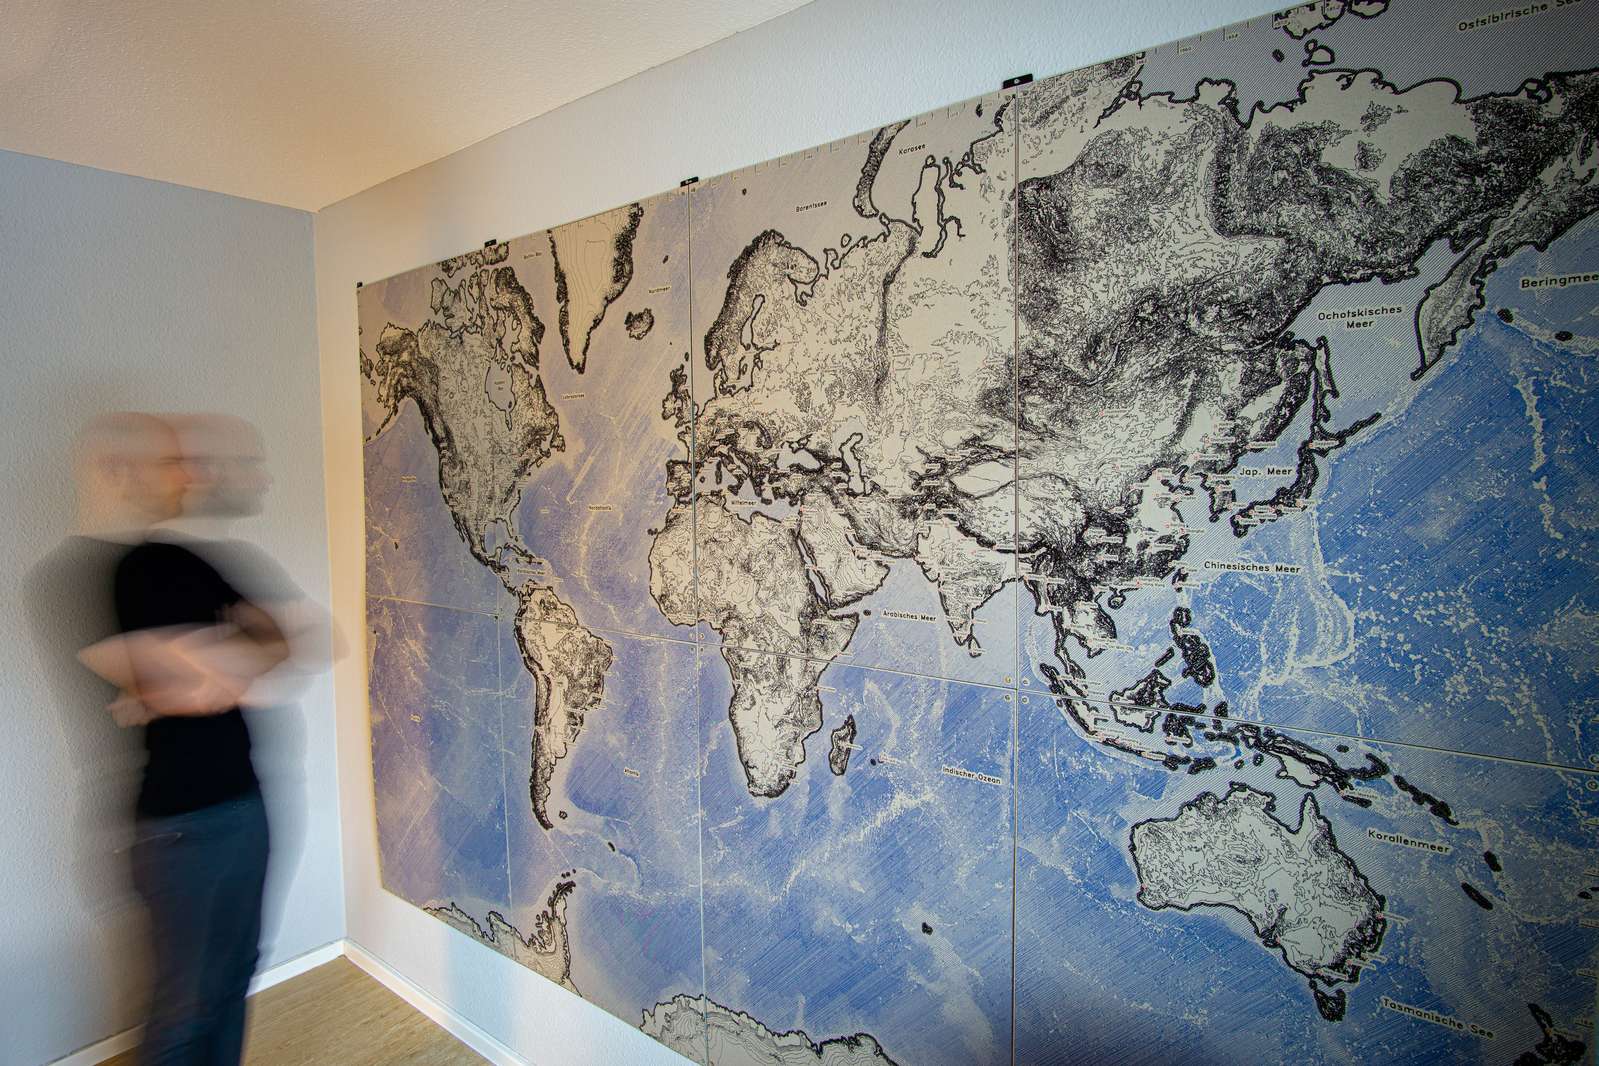
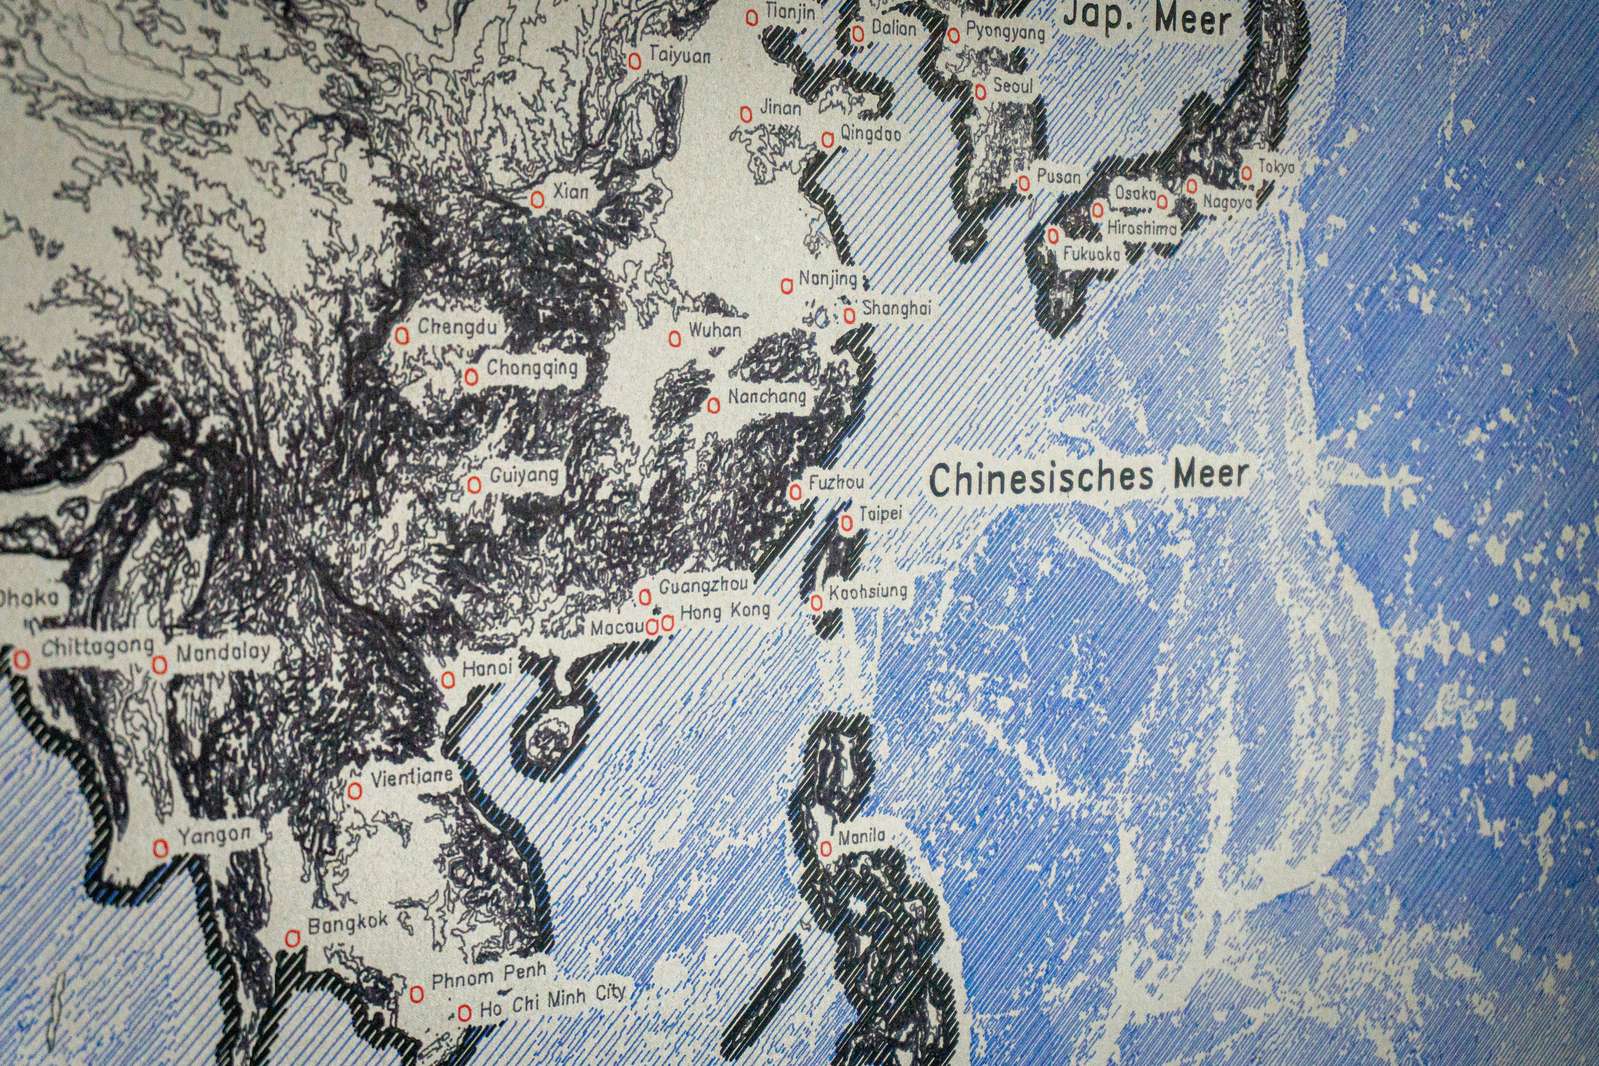
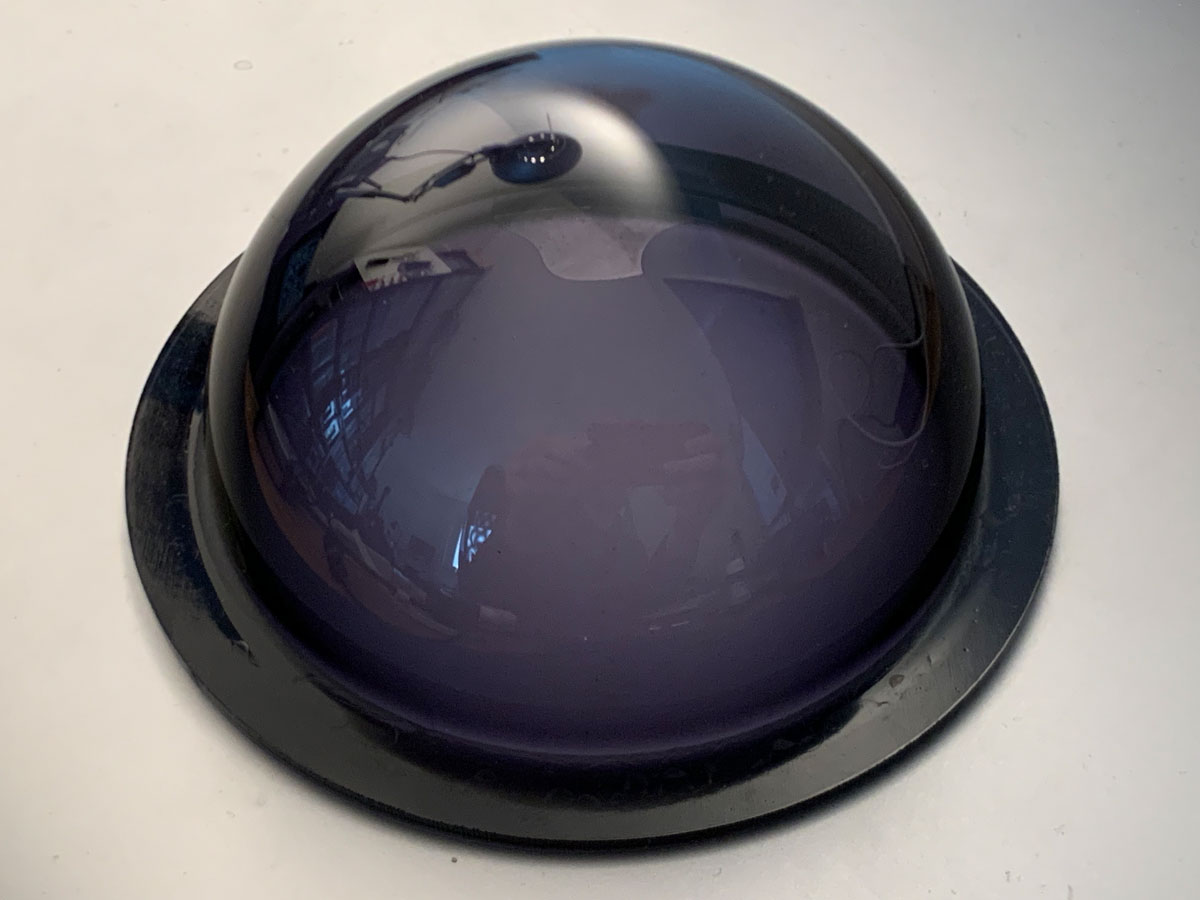
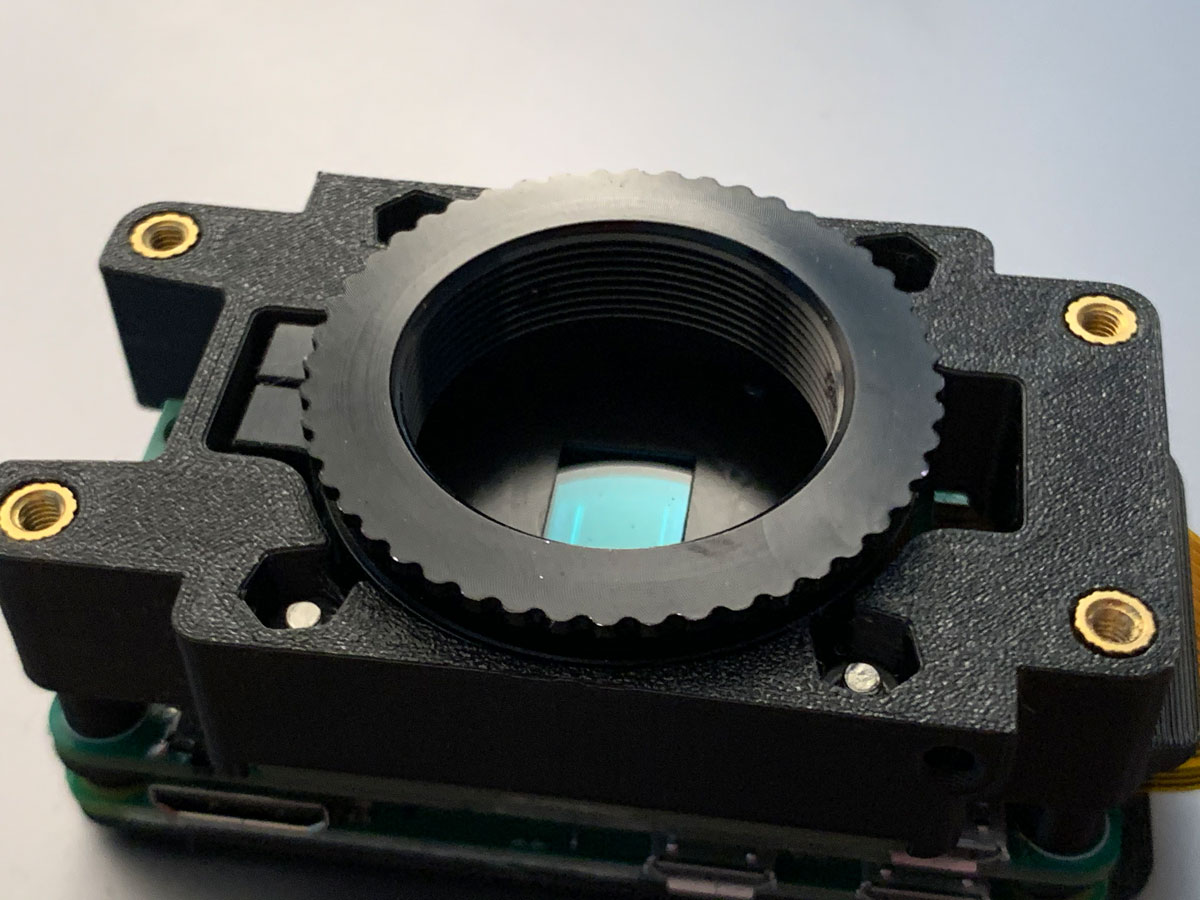
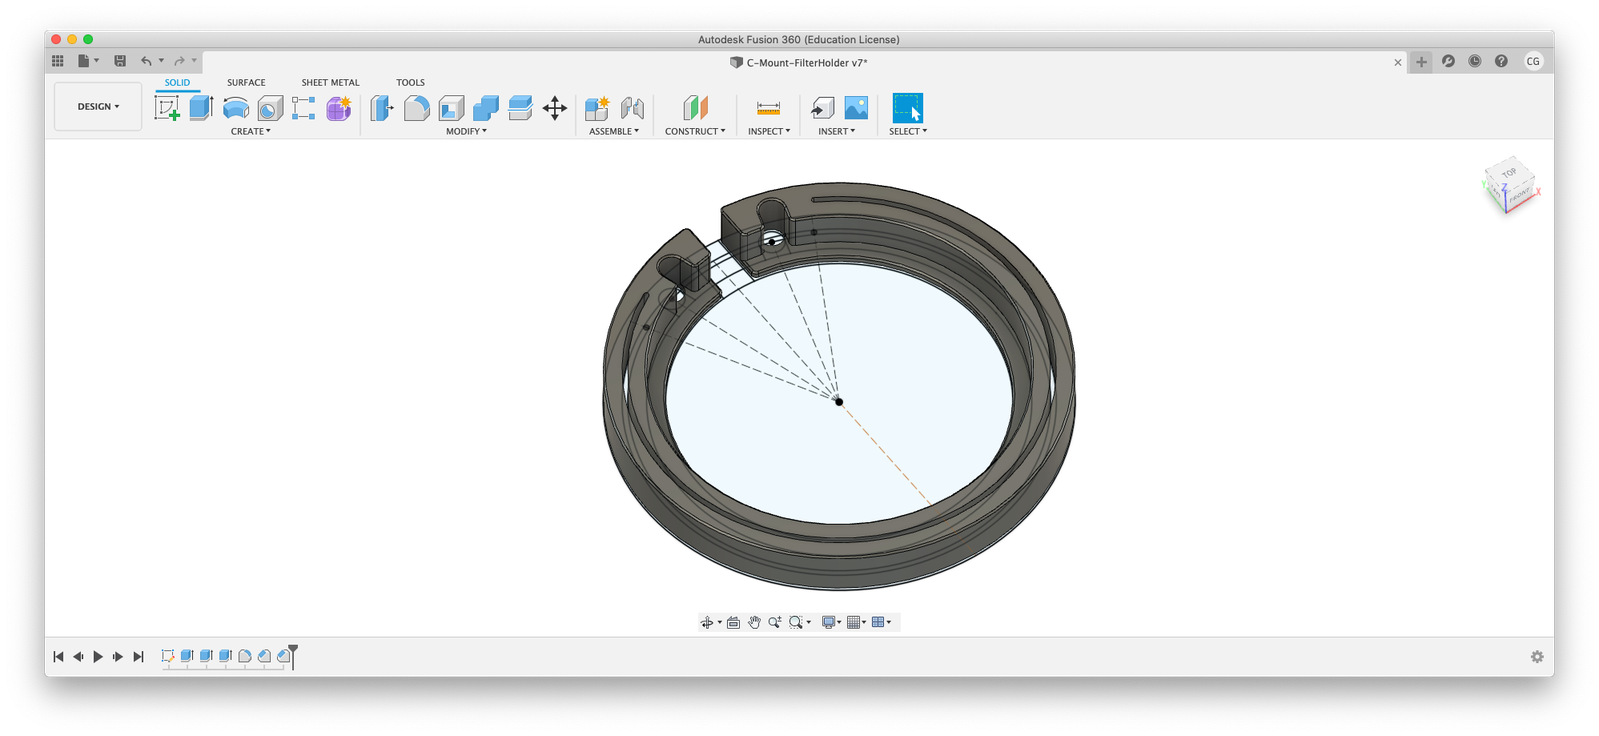
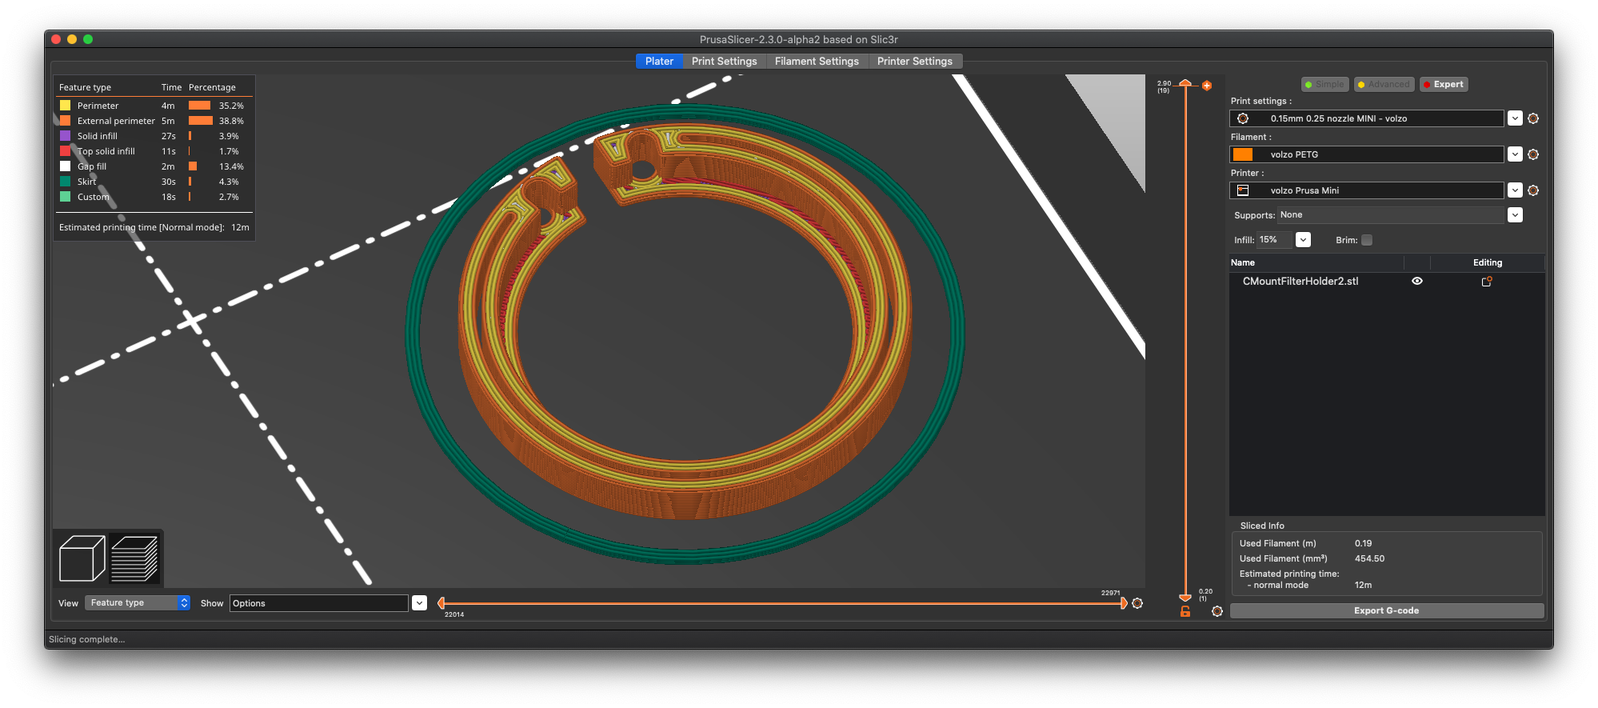
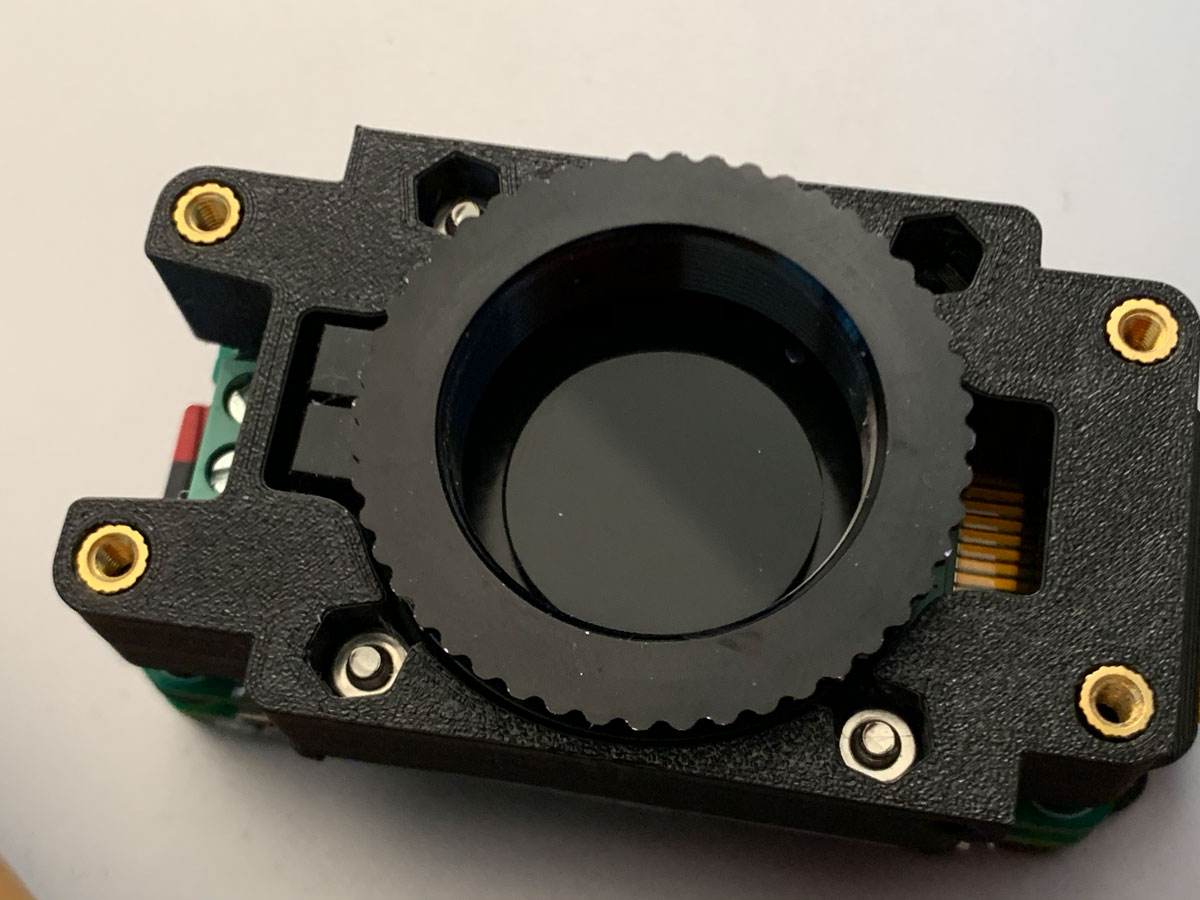
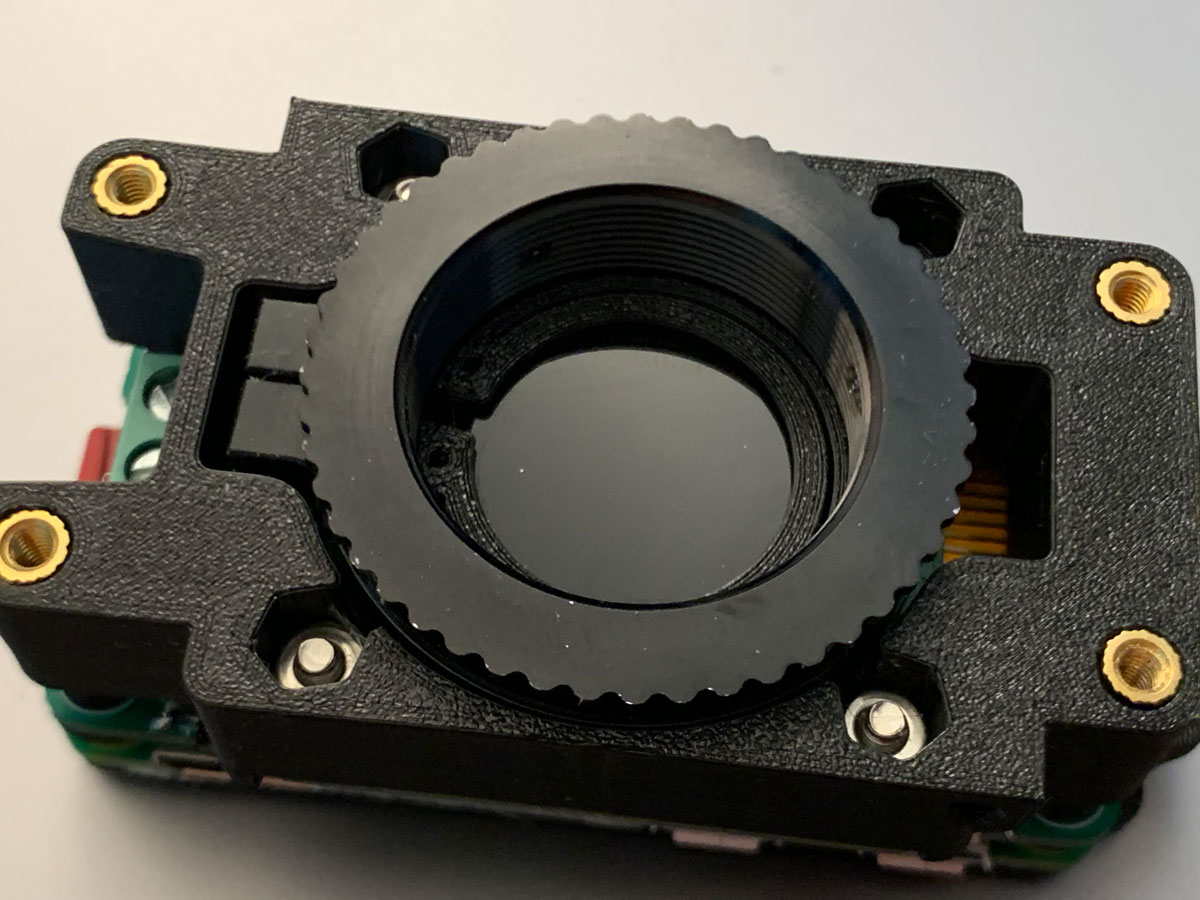
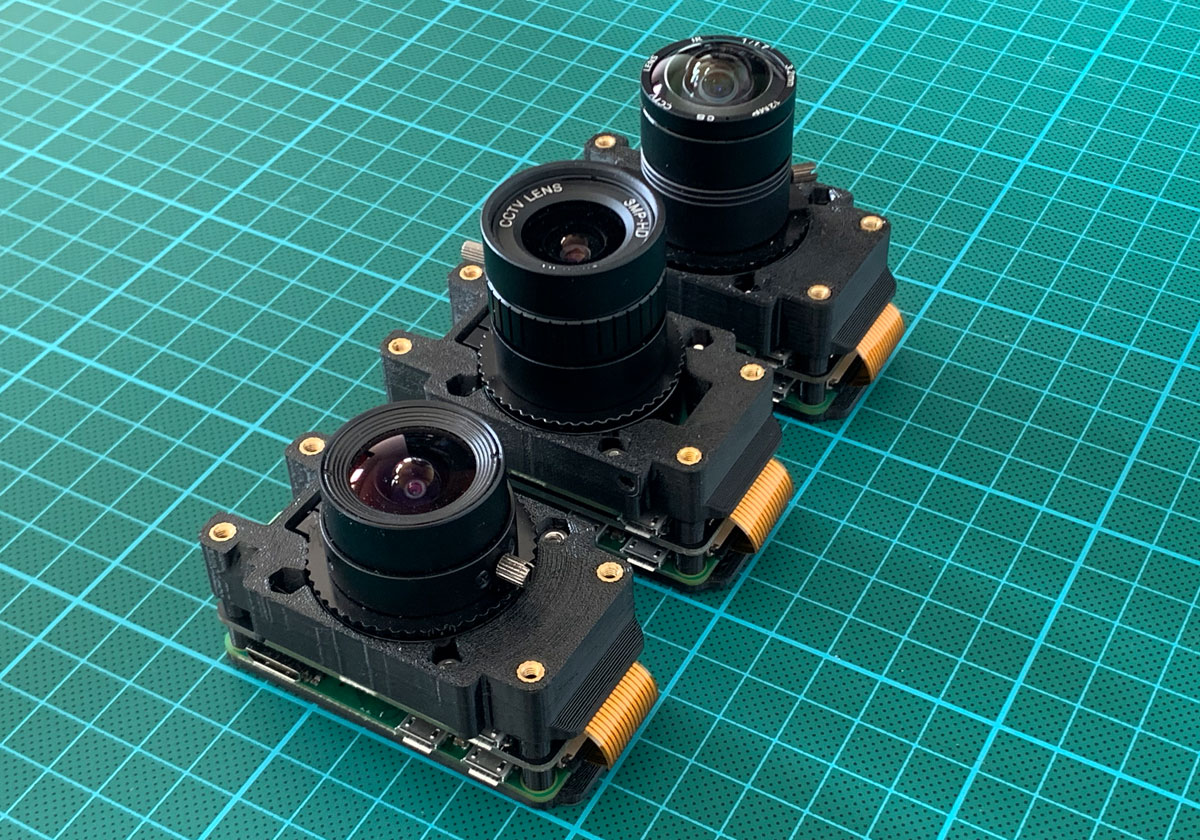
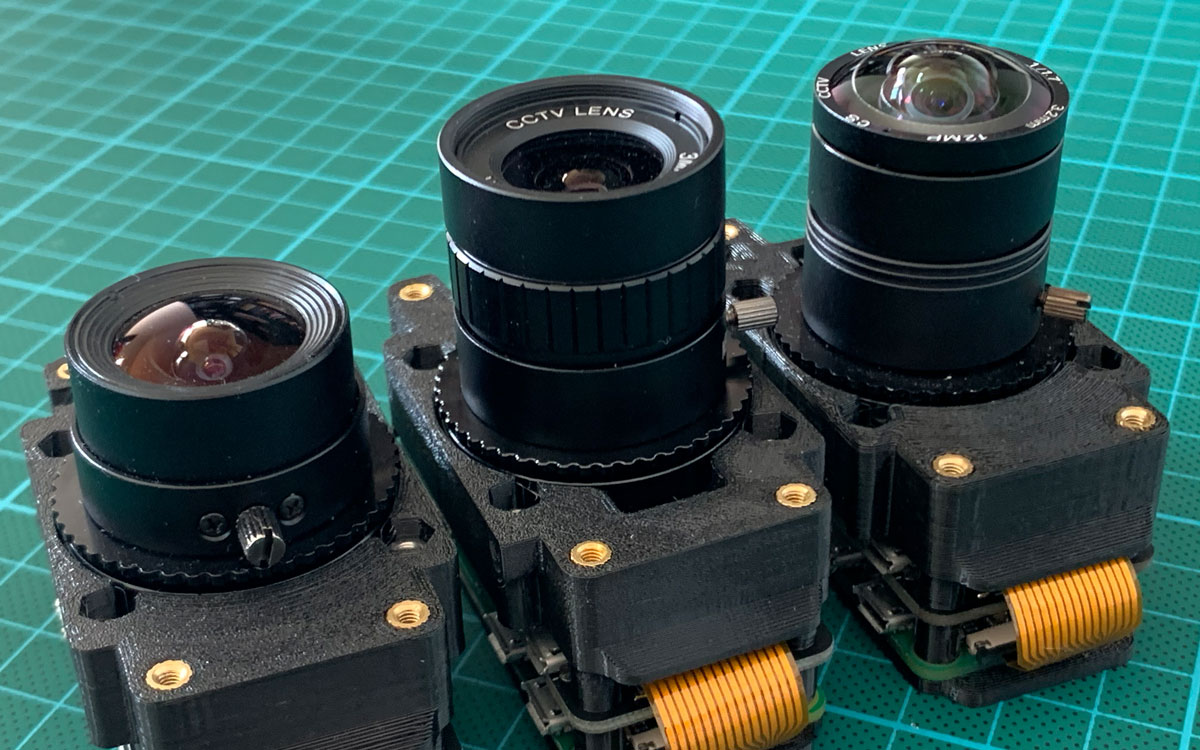
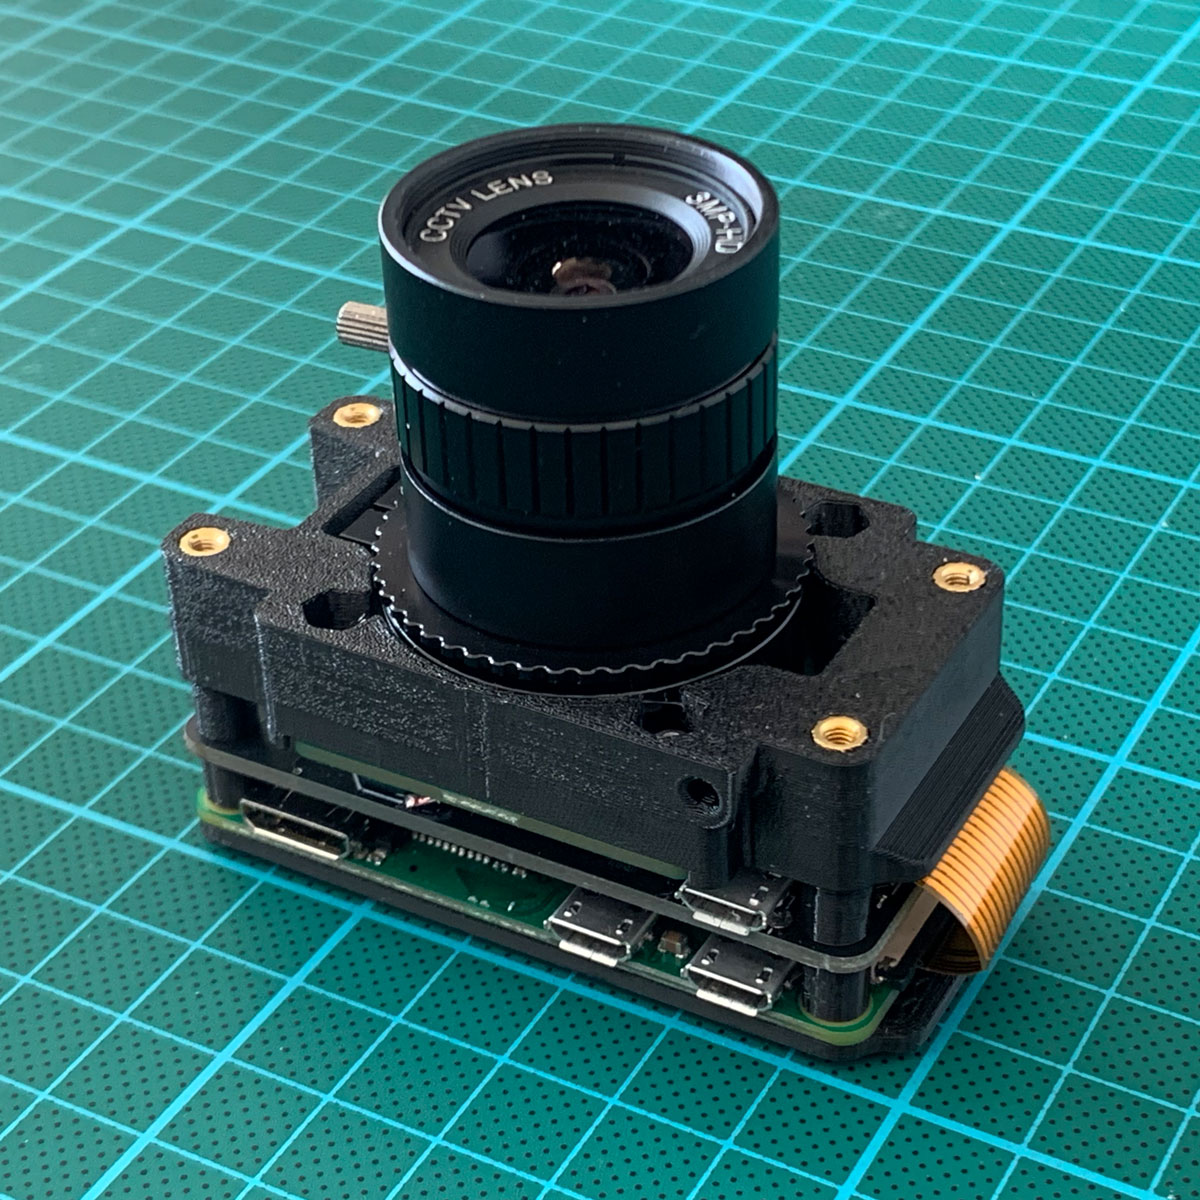
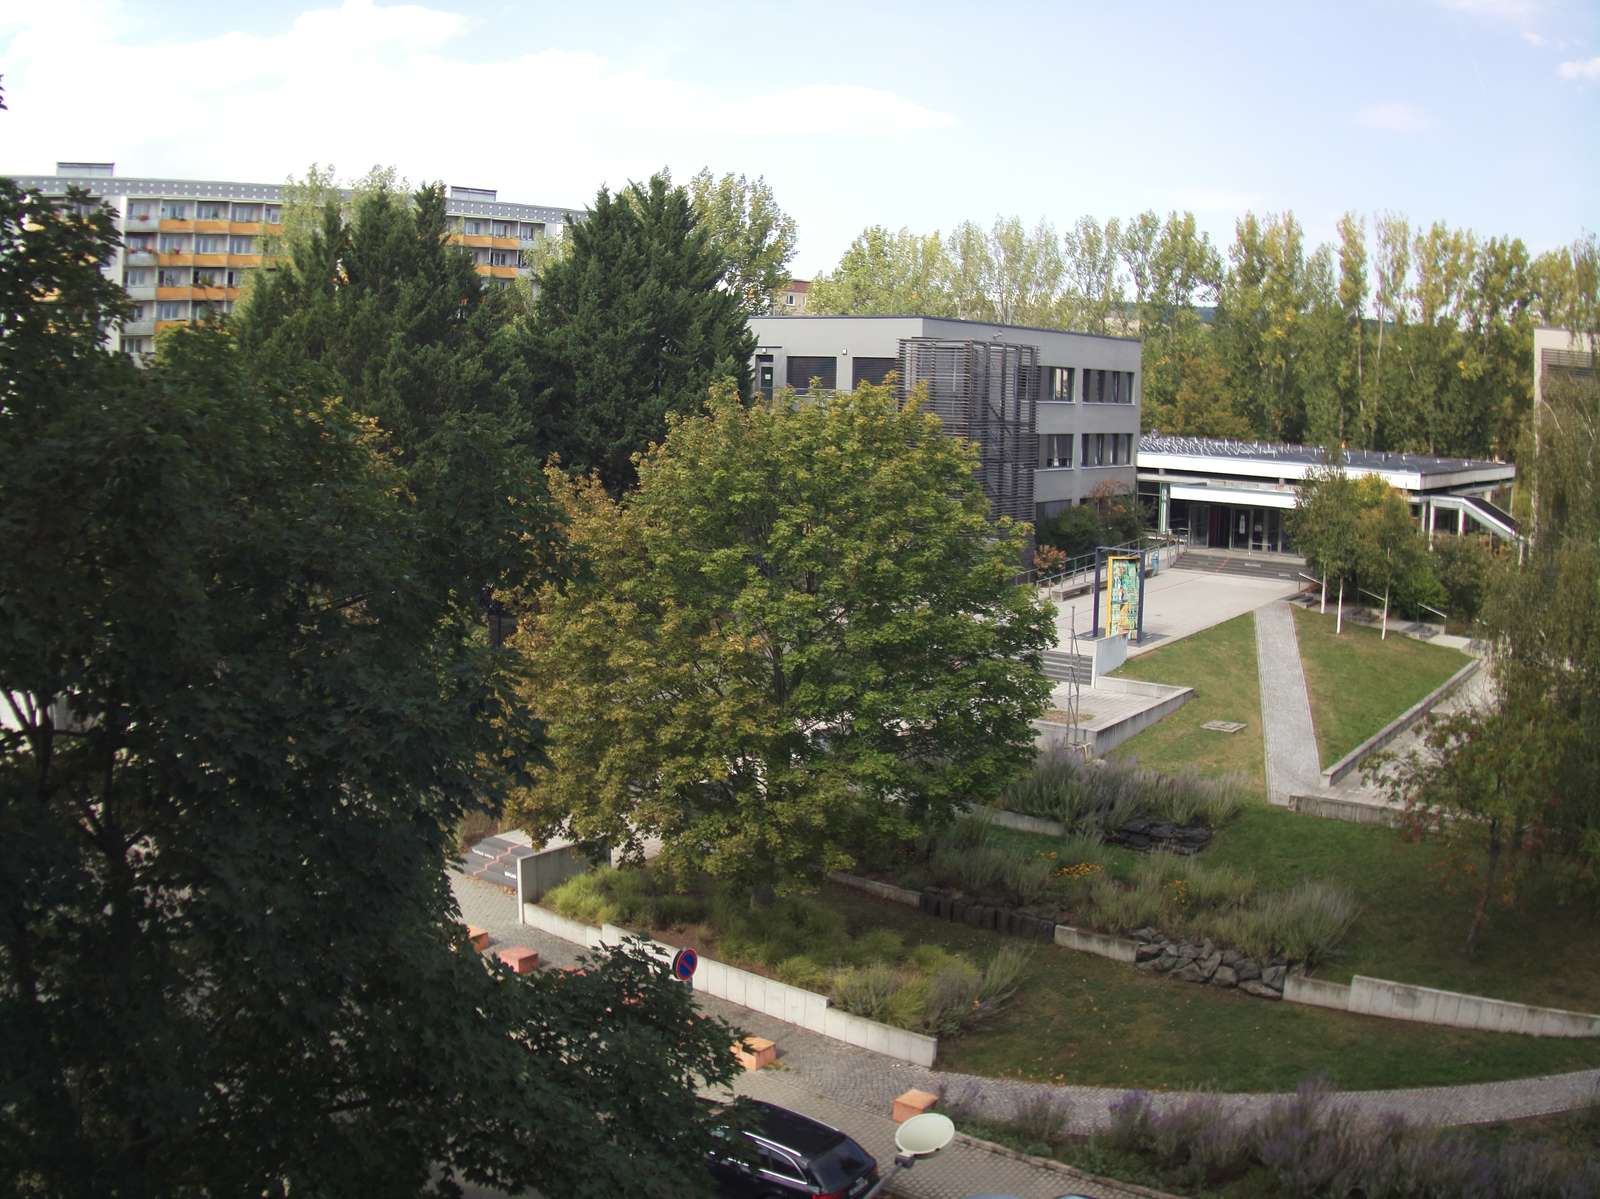
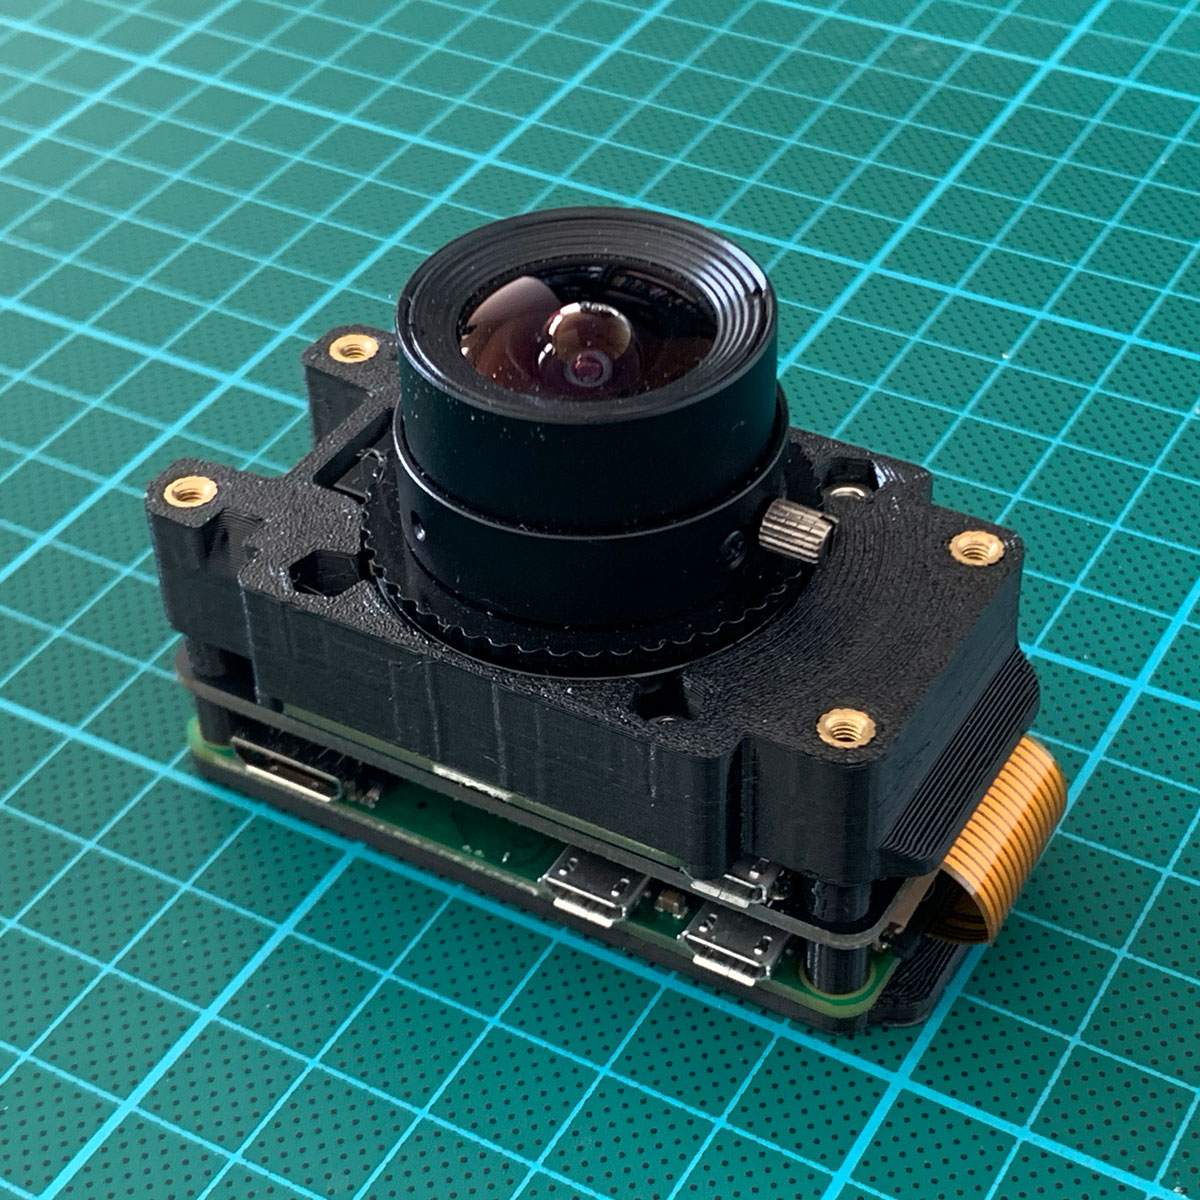
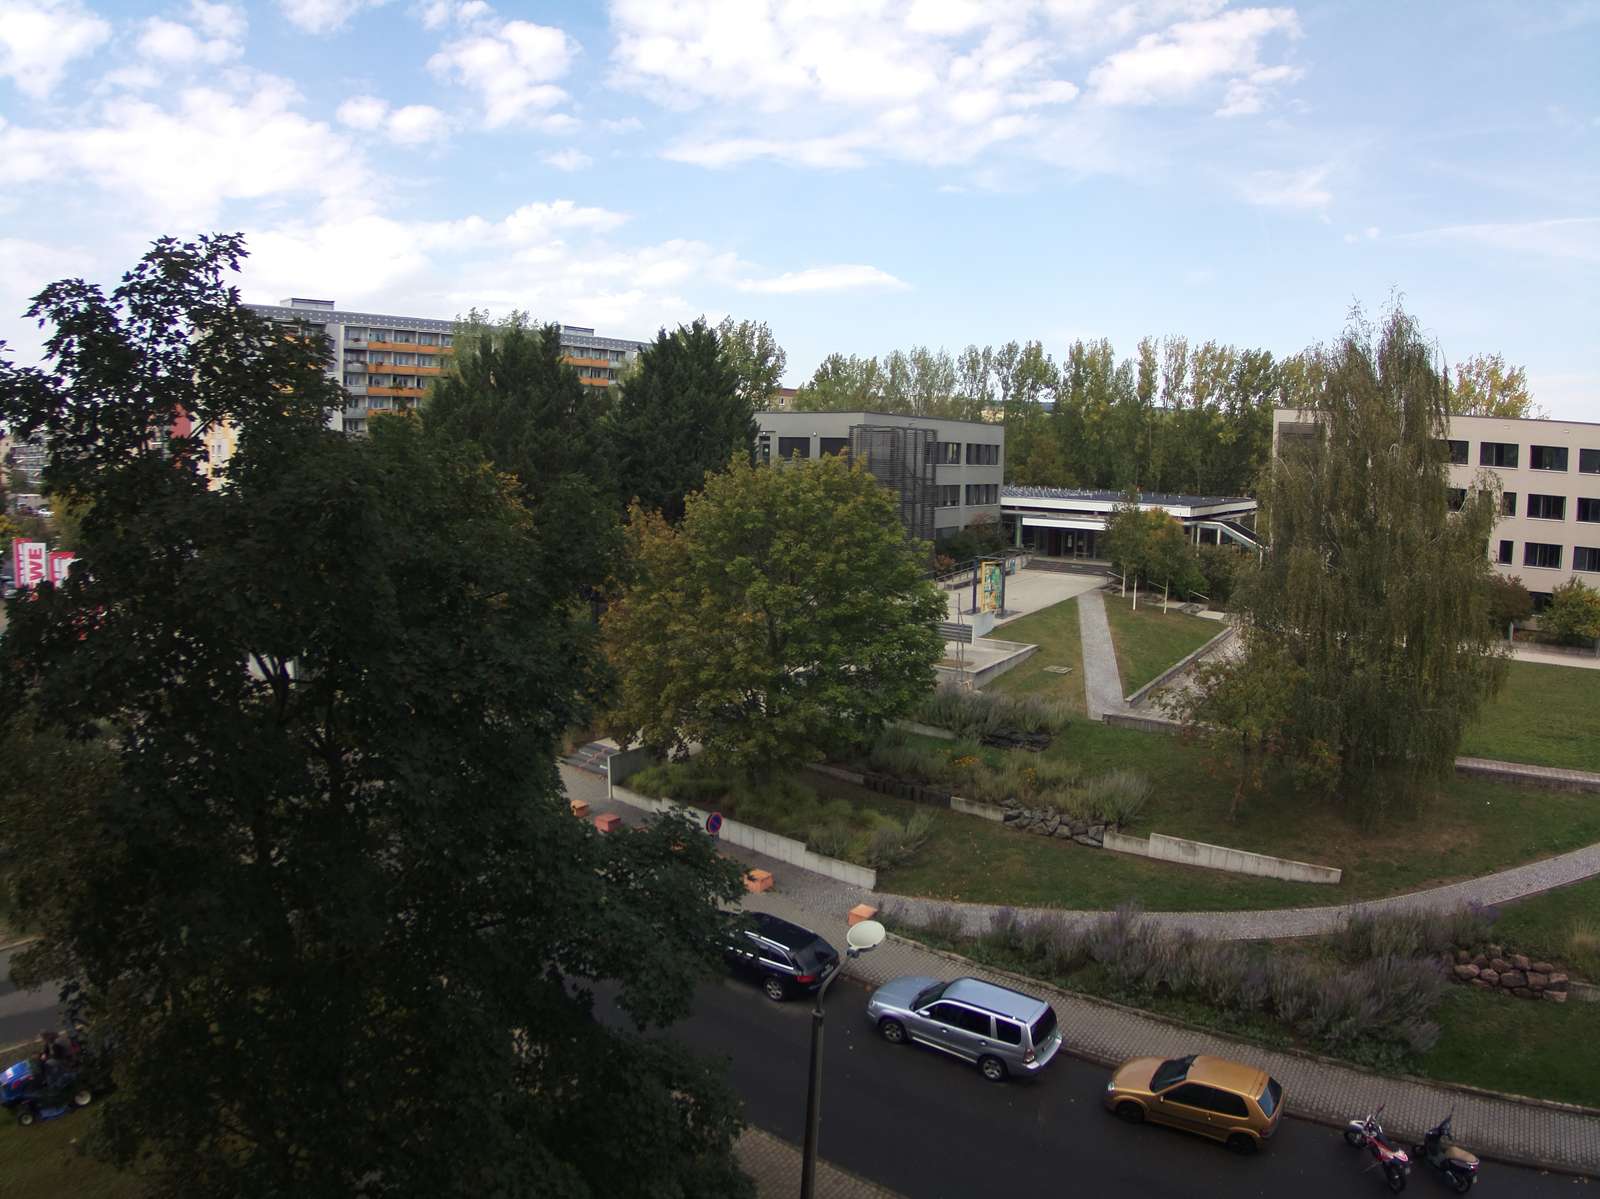
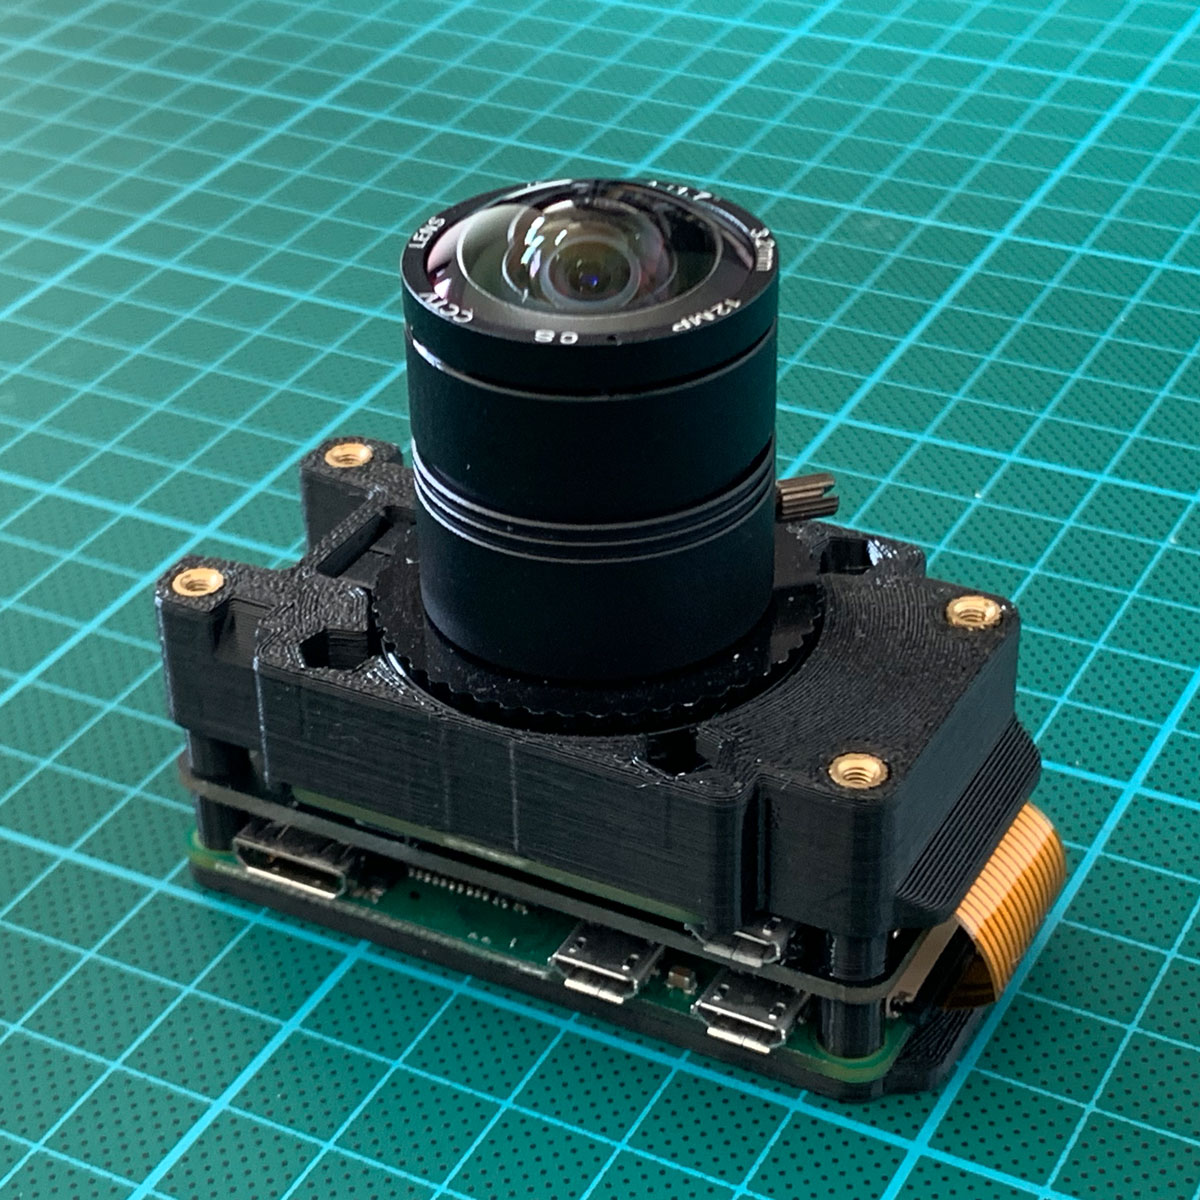
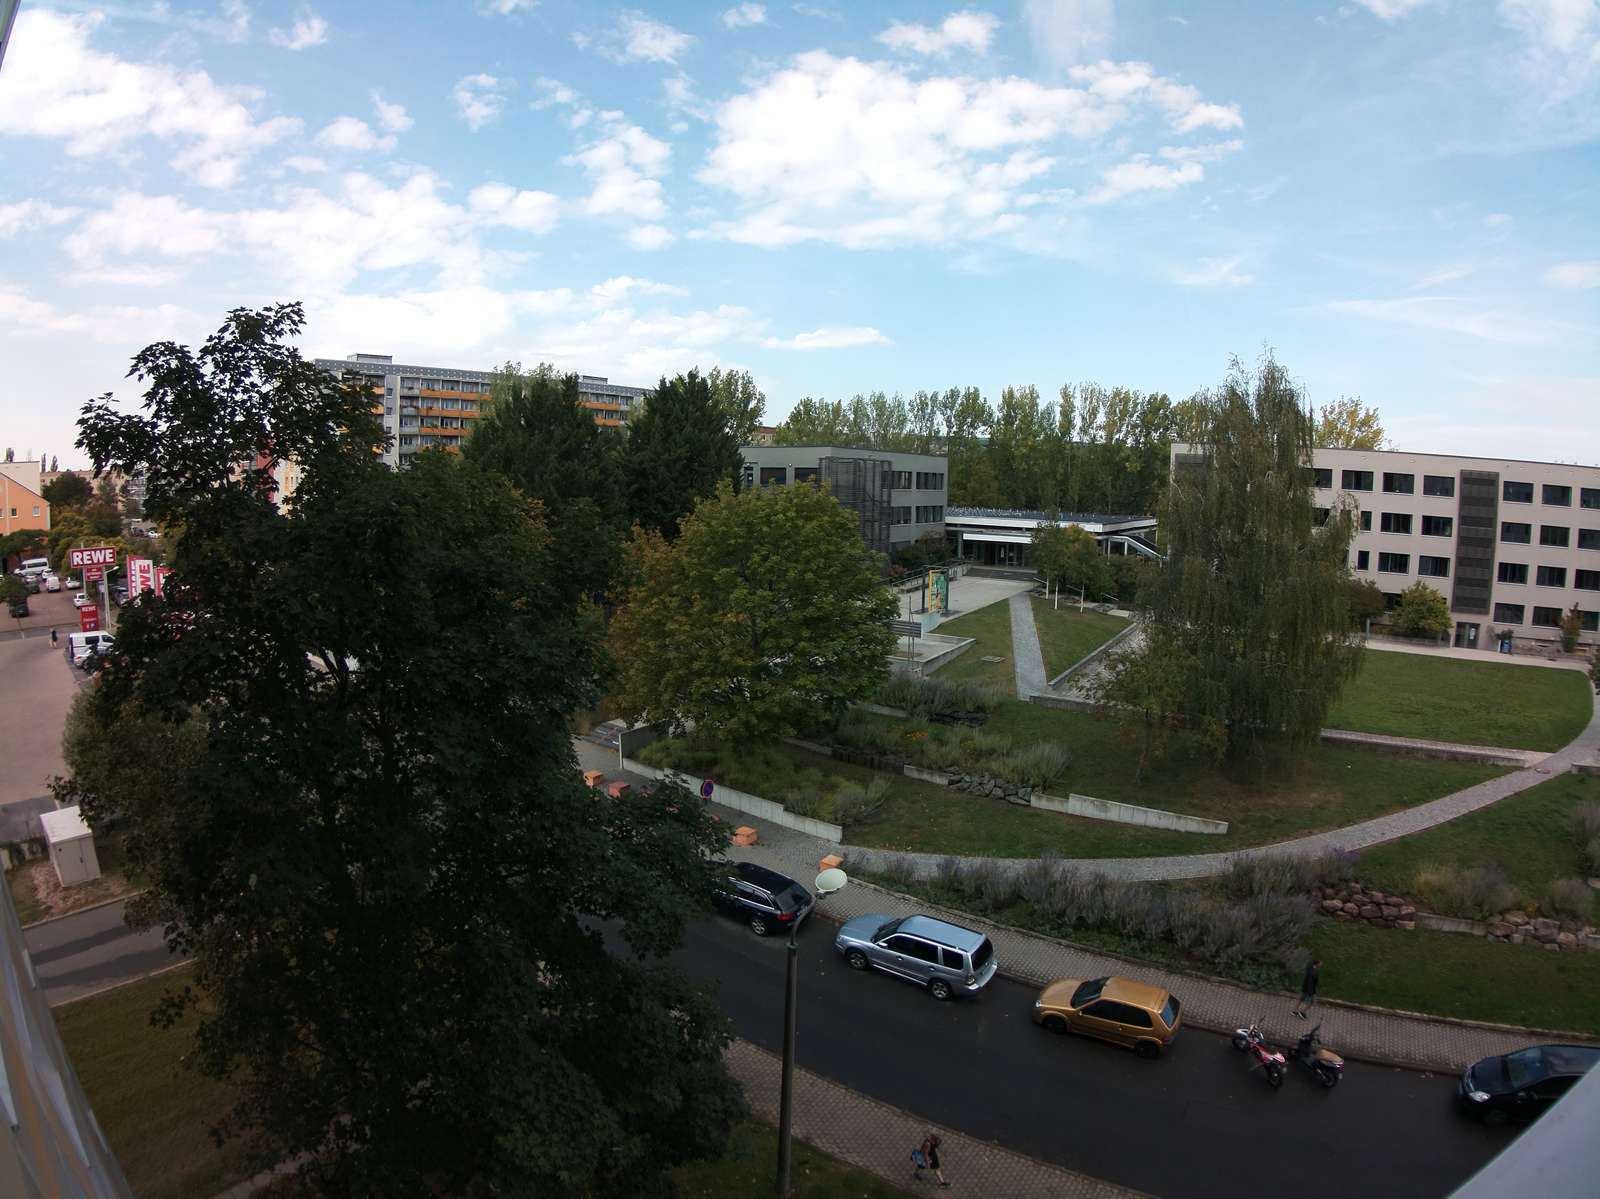
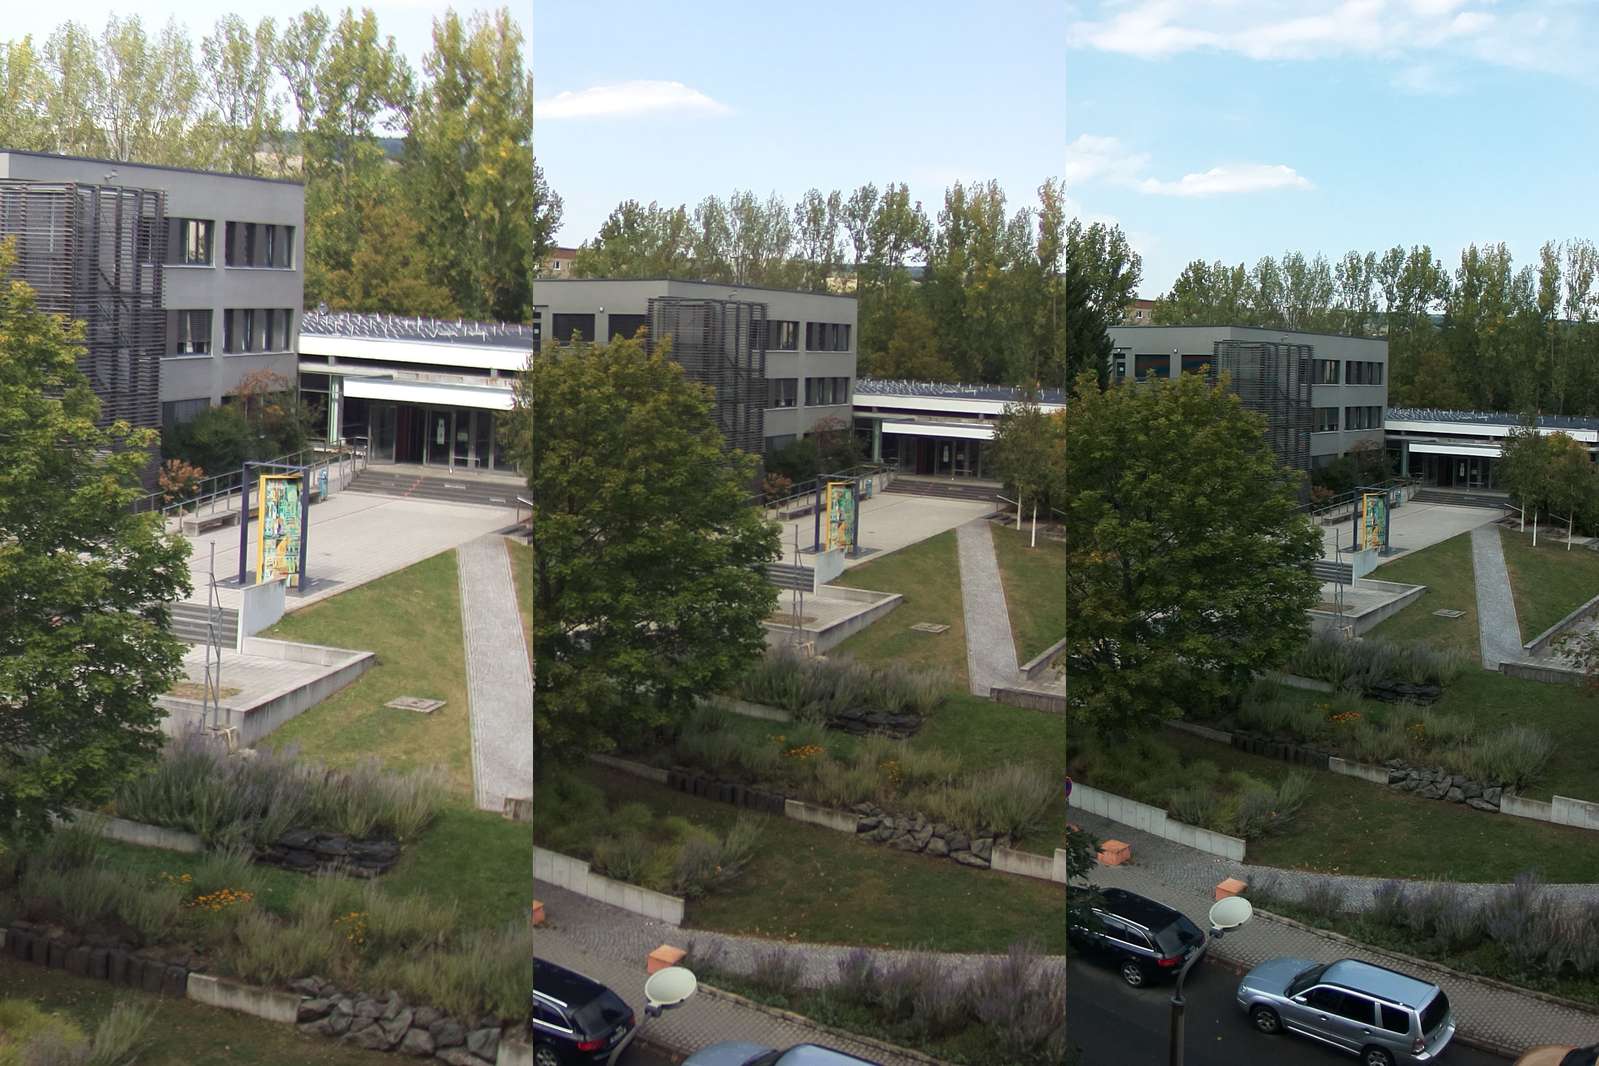 (100% crop, Official Wide Angle | Arecont 4mm | No-name 3.2mm)
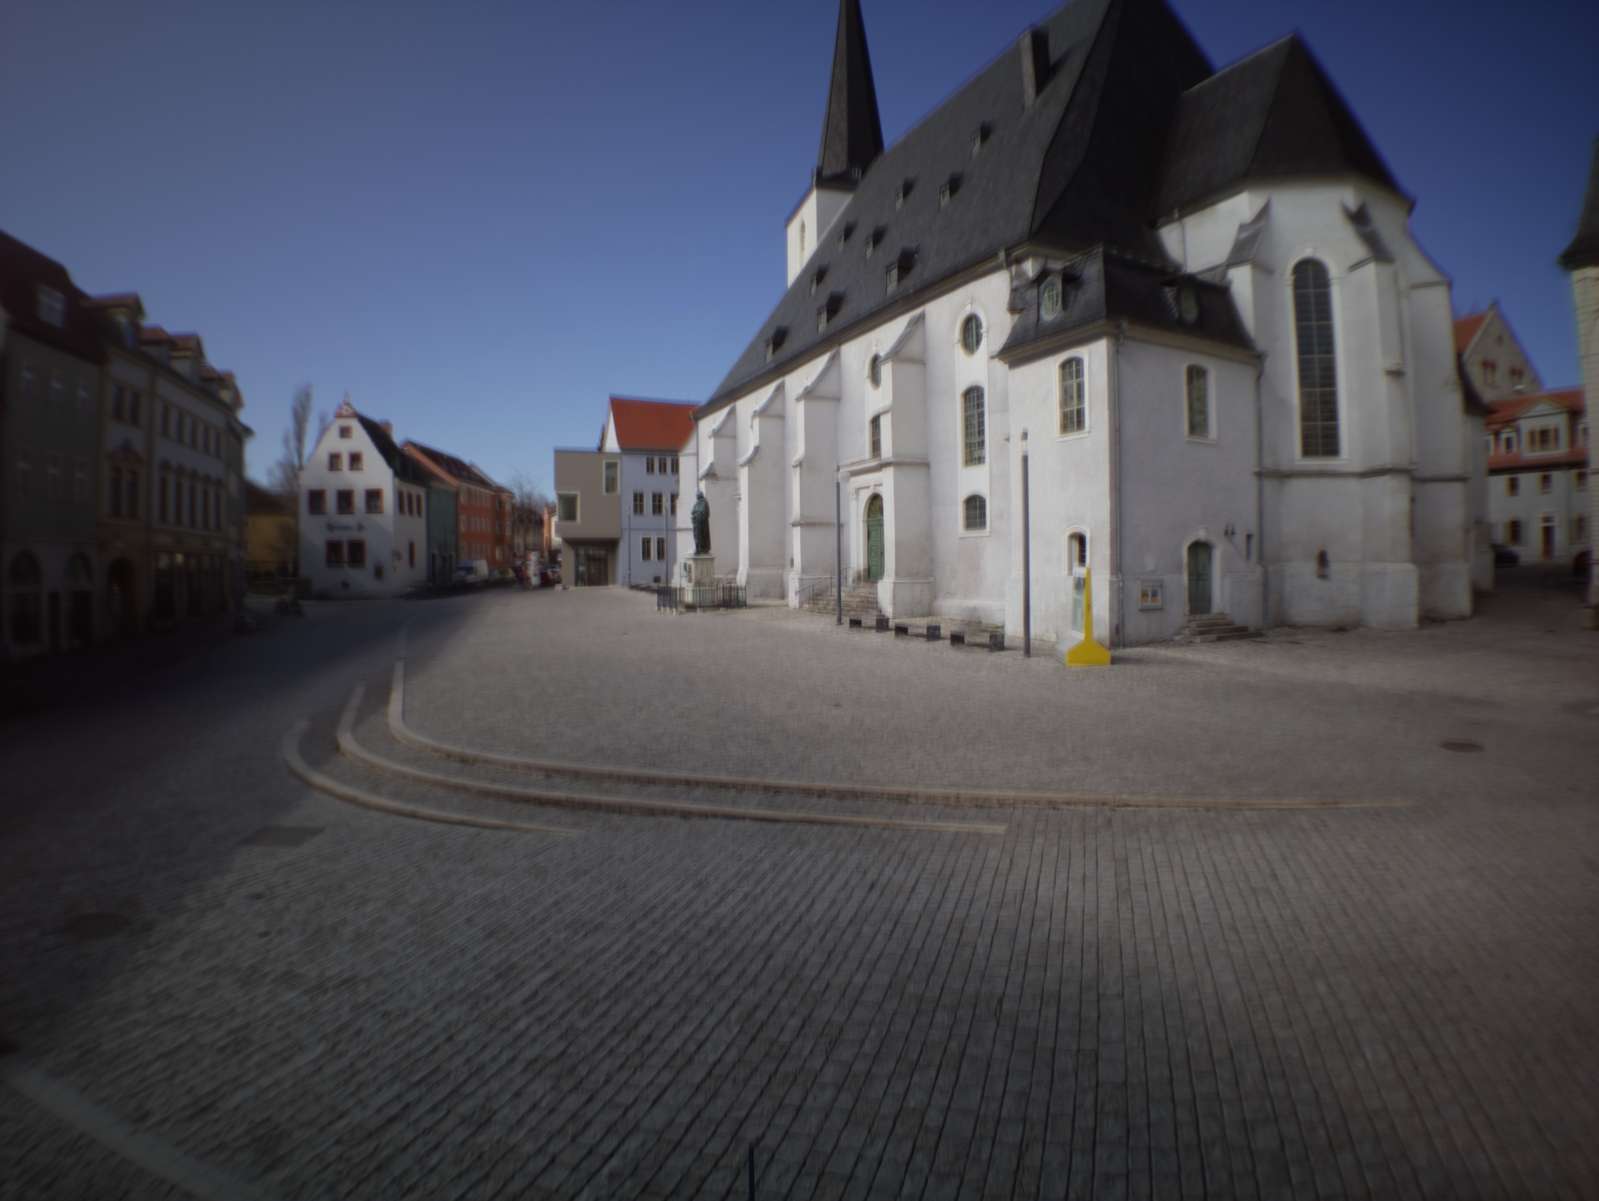
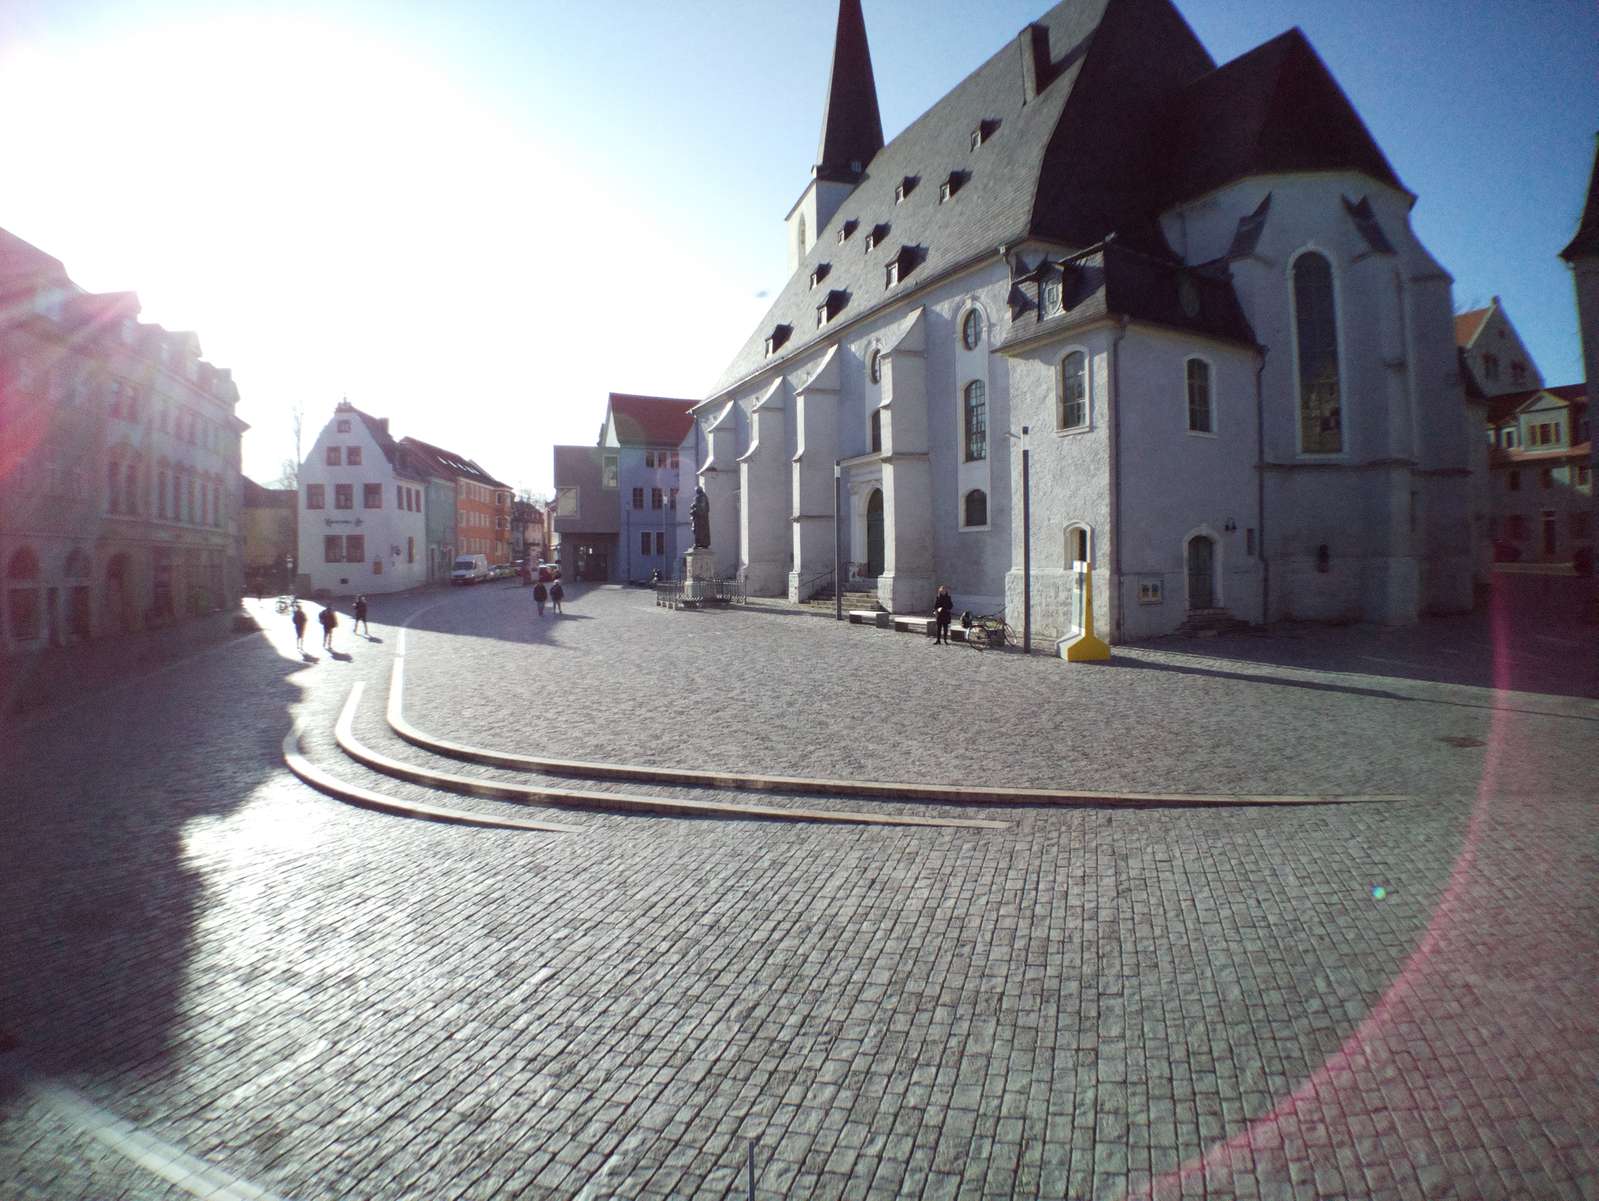
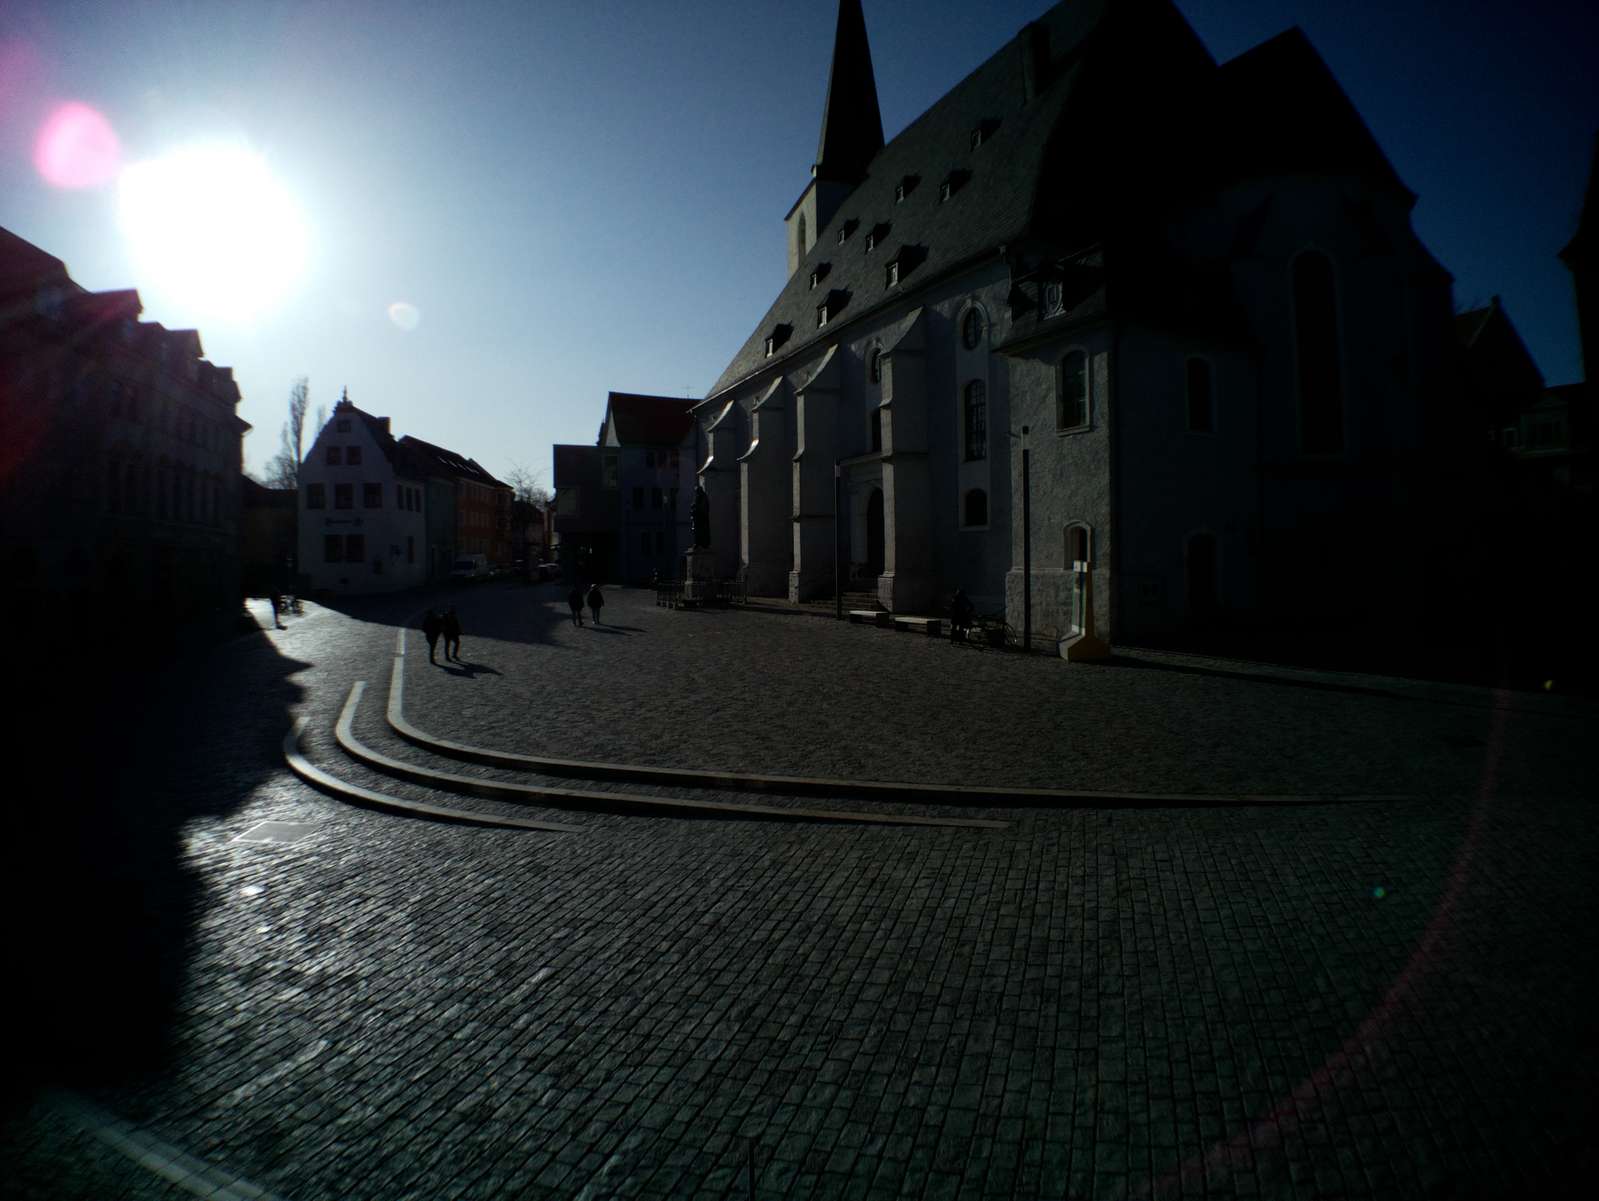
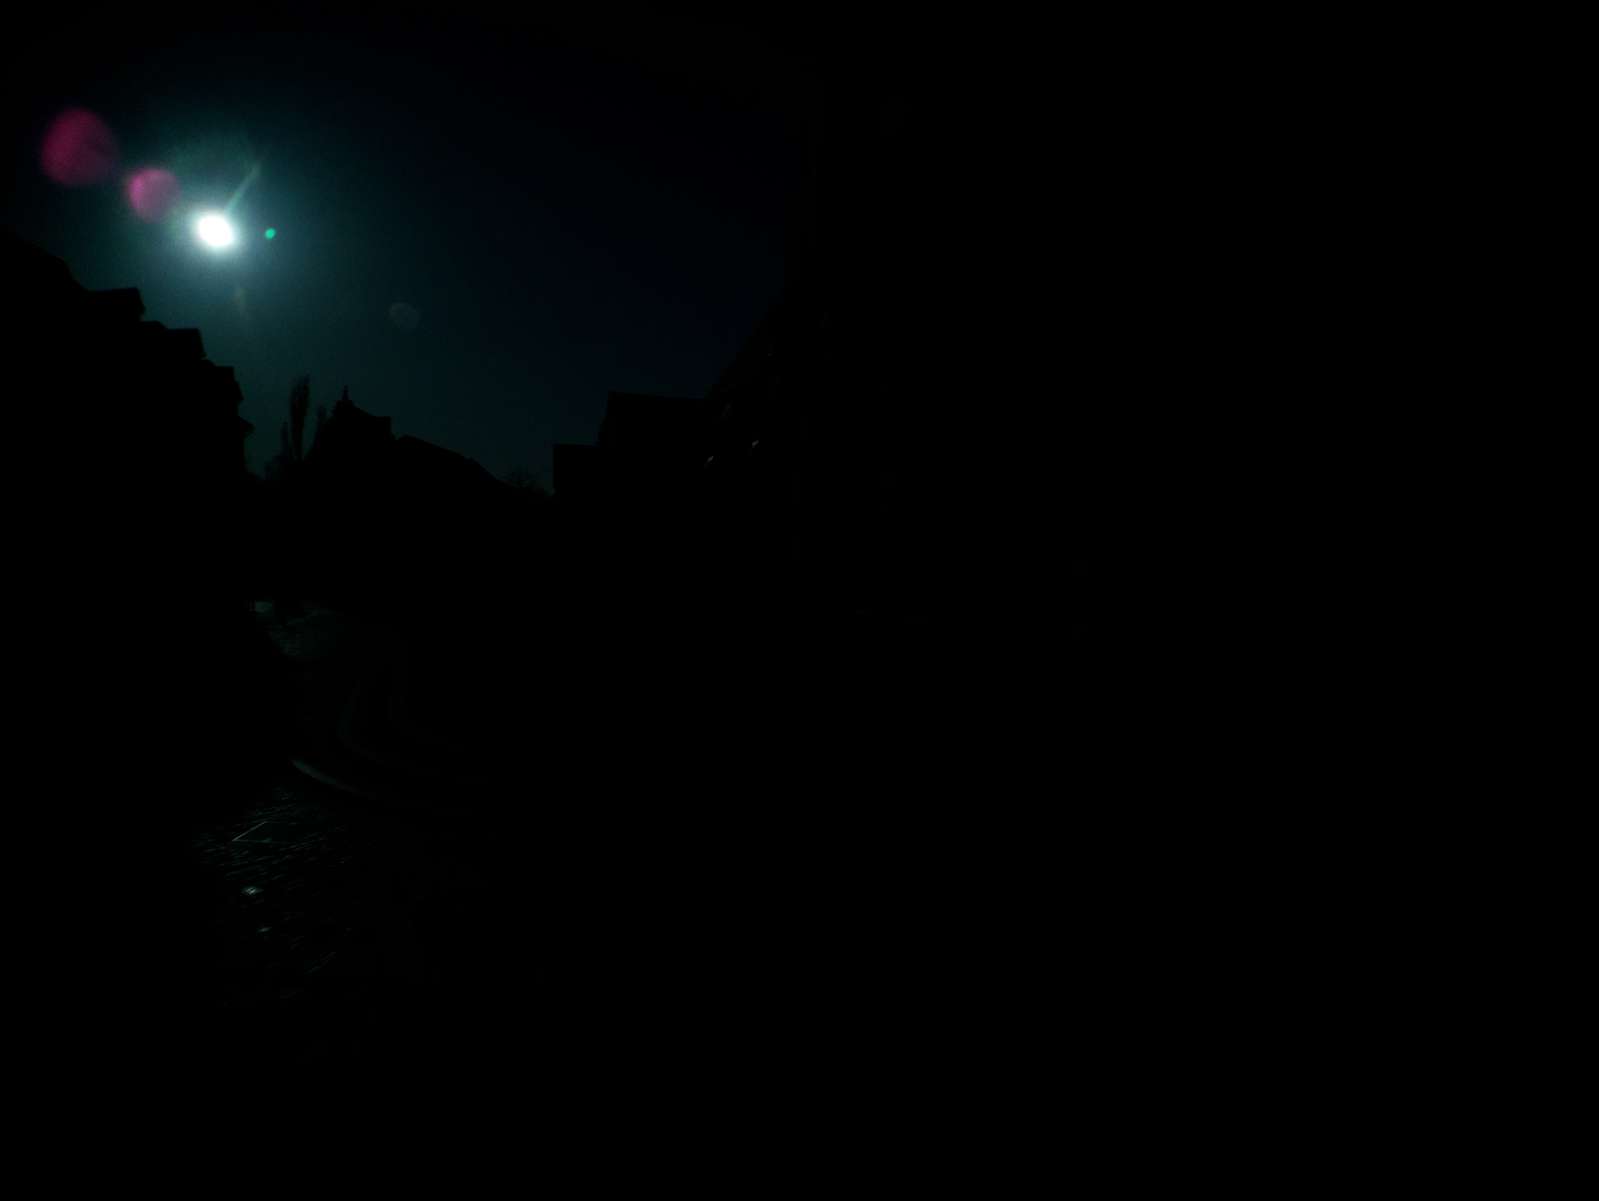

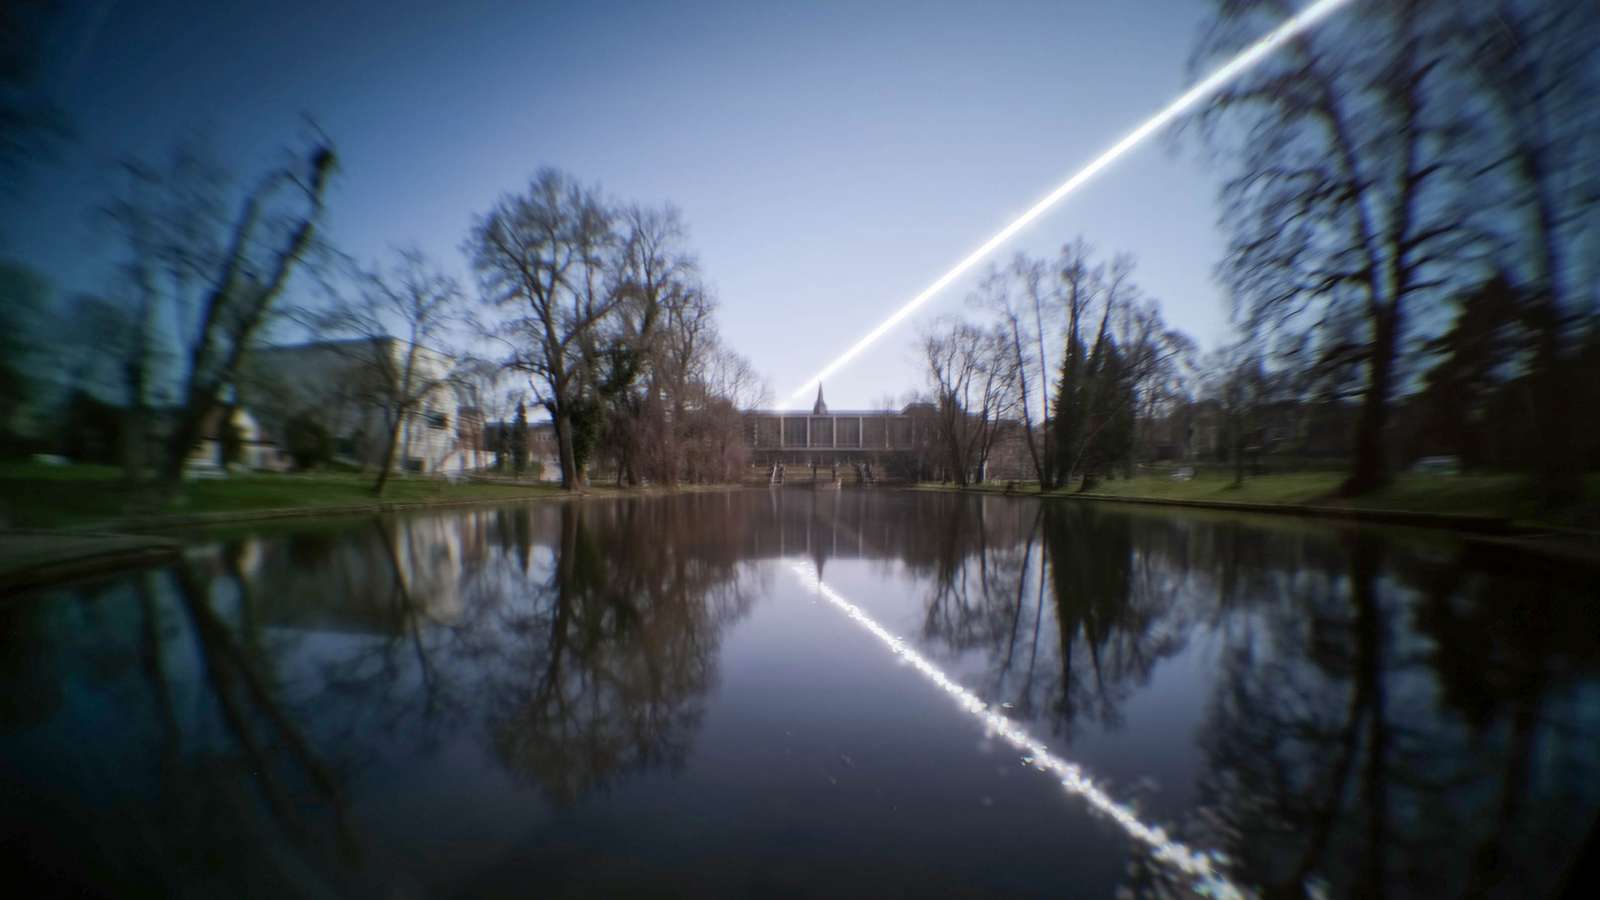
 (gaps are caused by a partially clouded sky which blocked the sun)
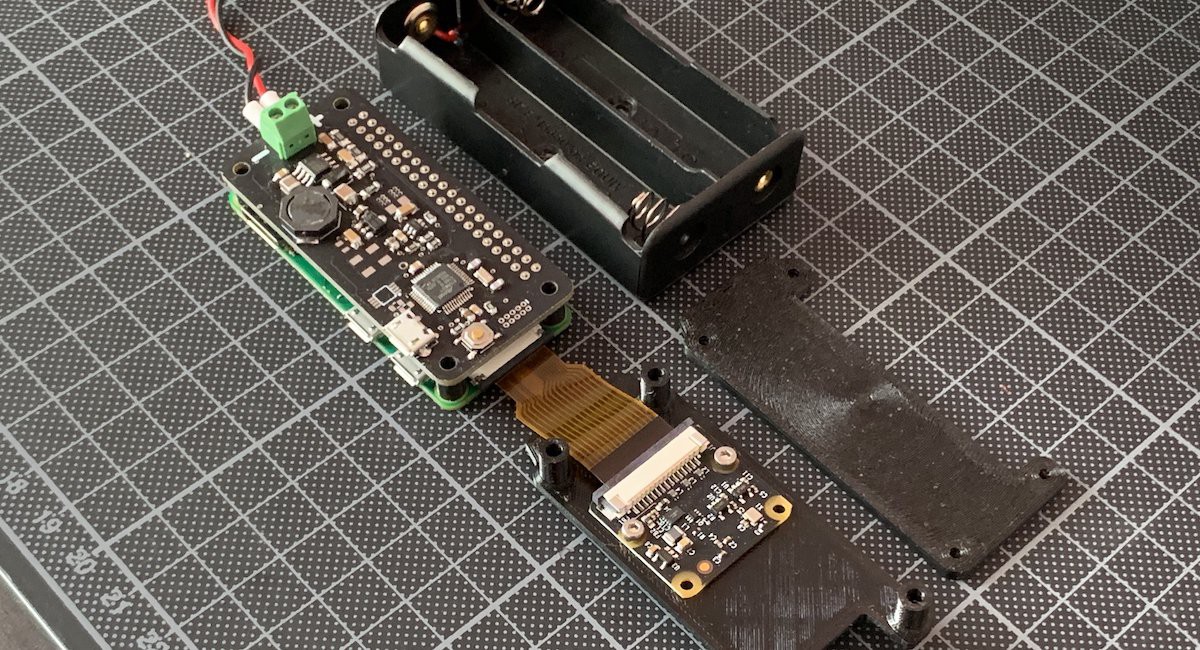
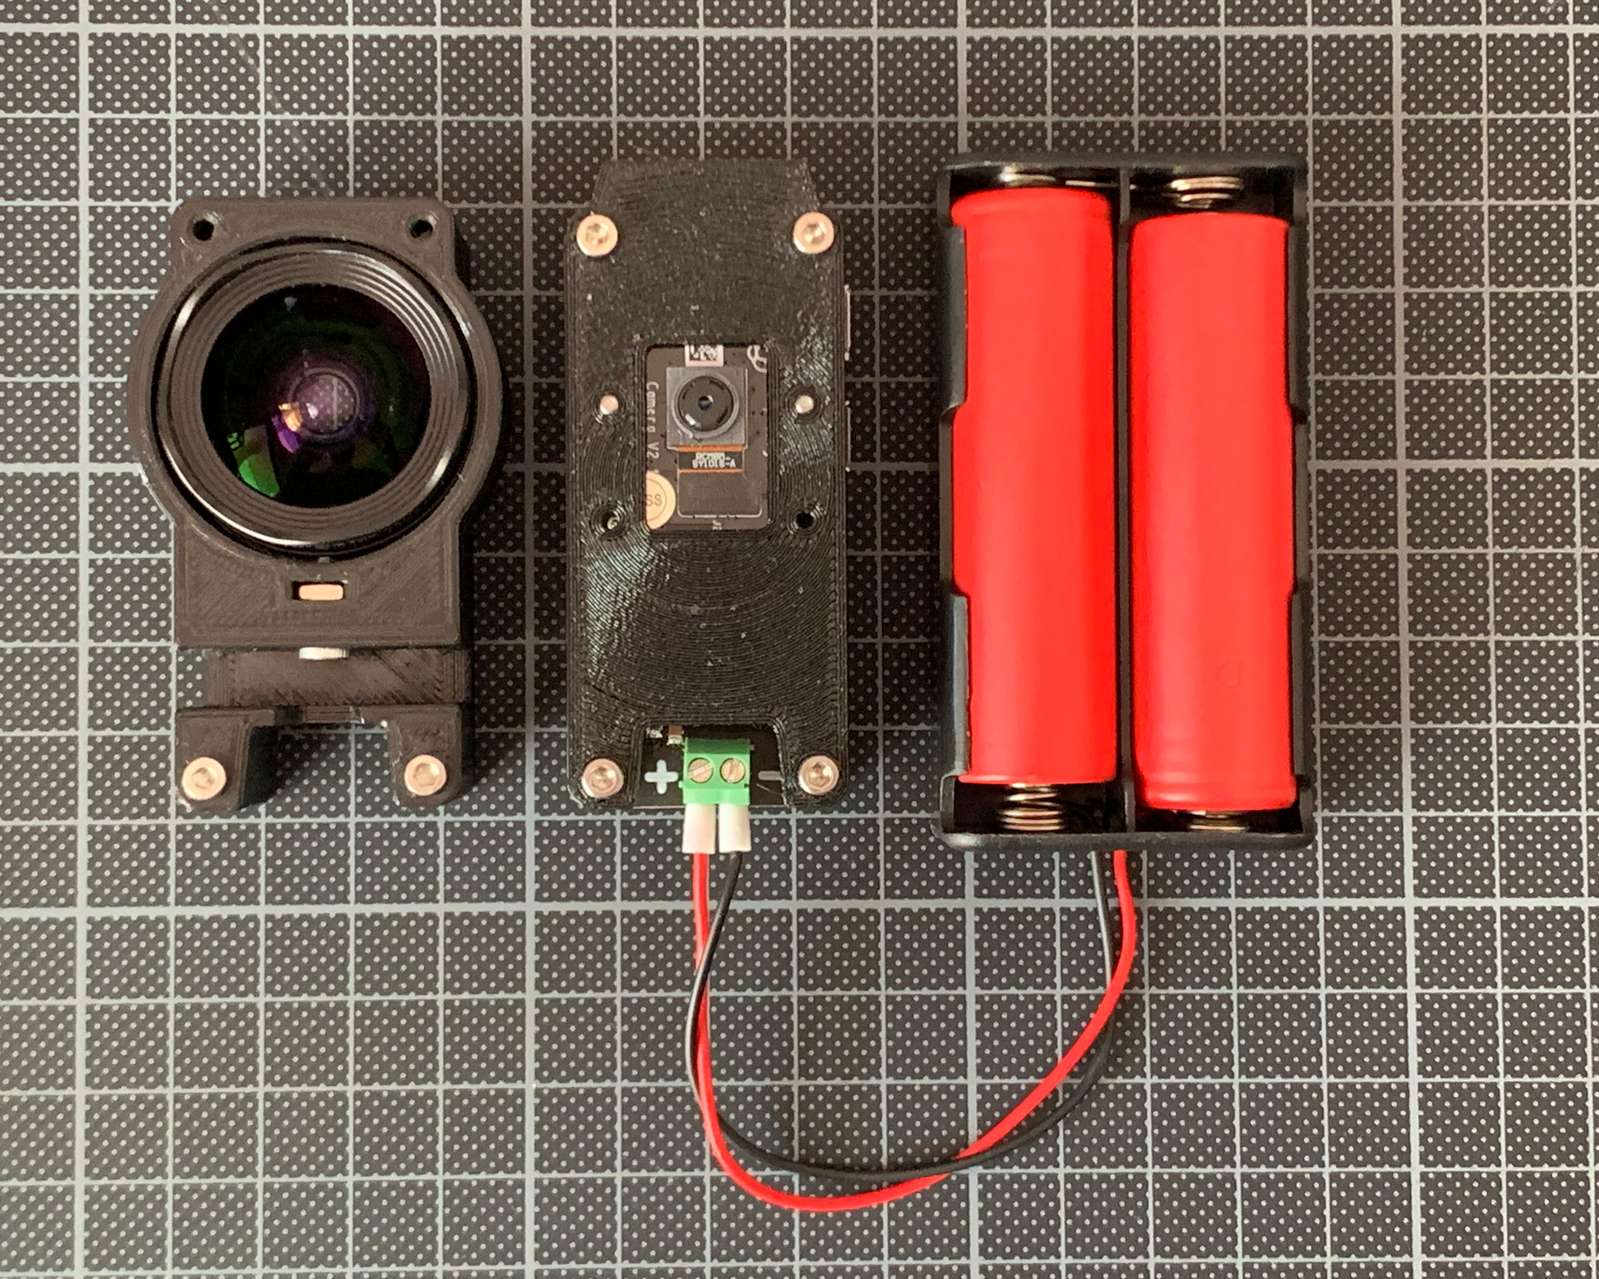
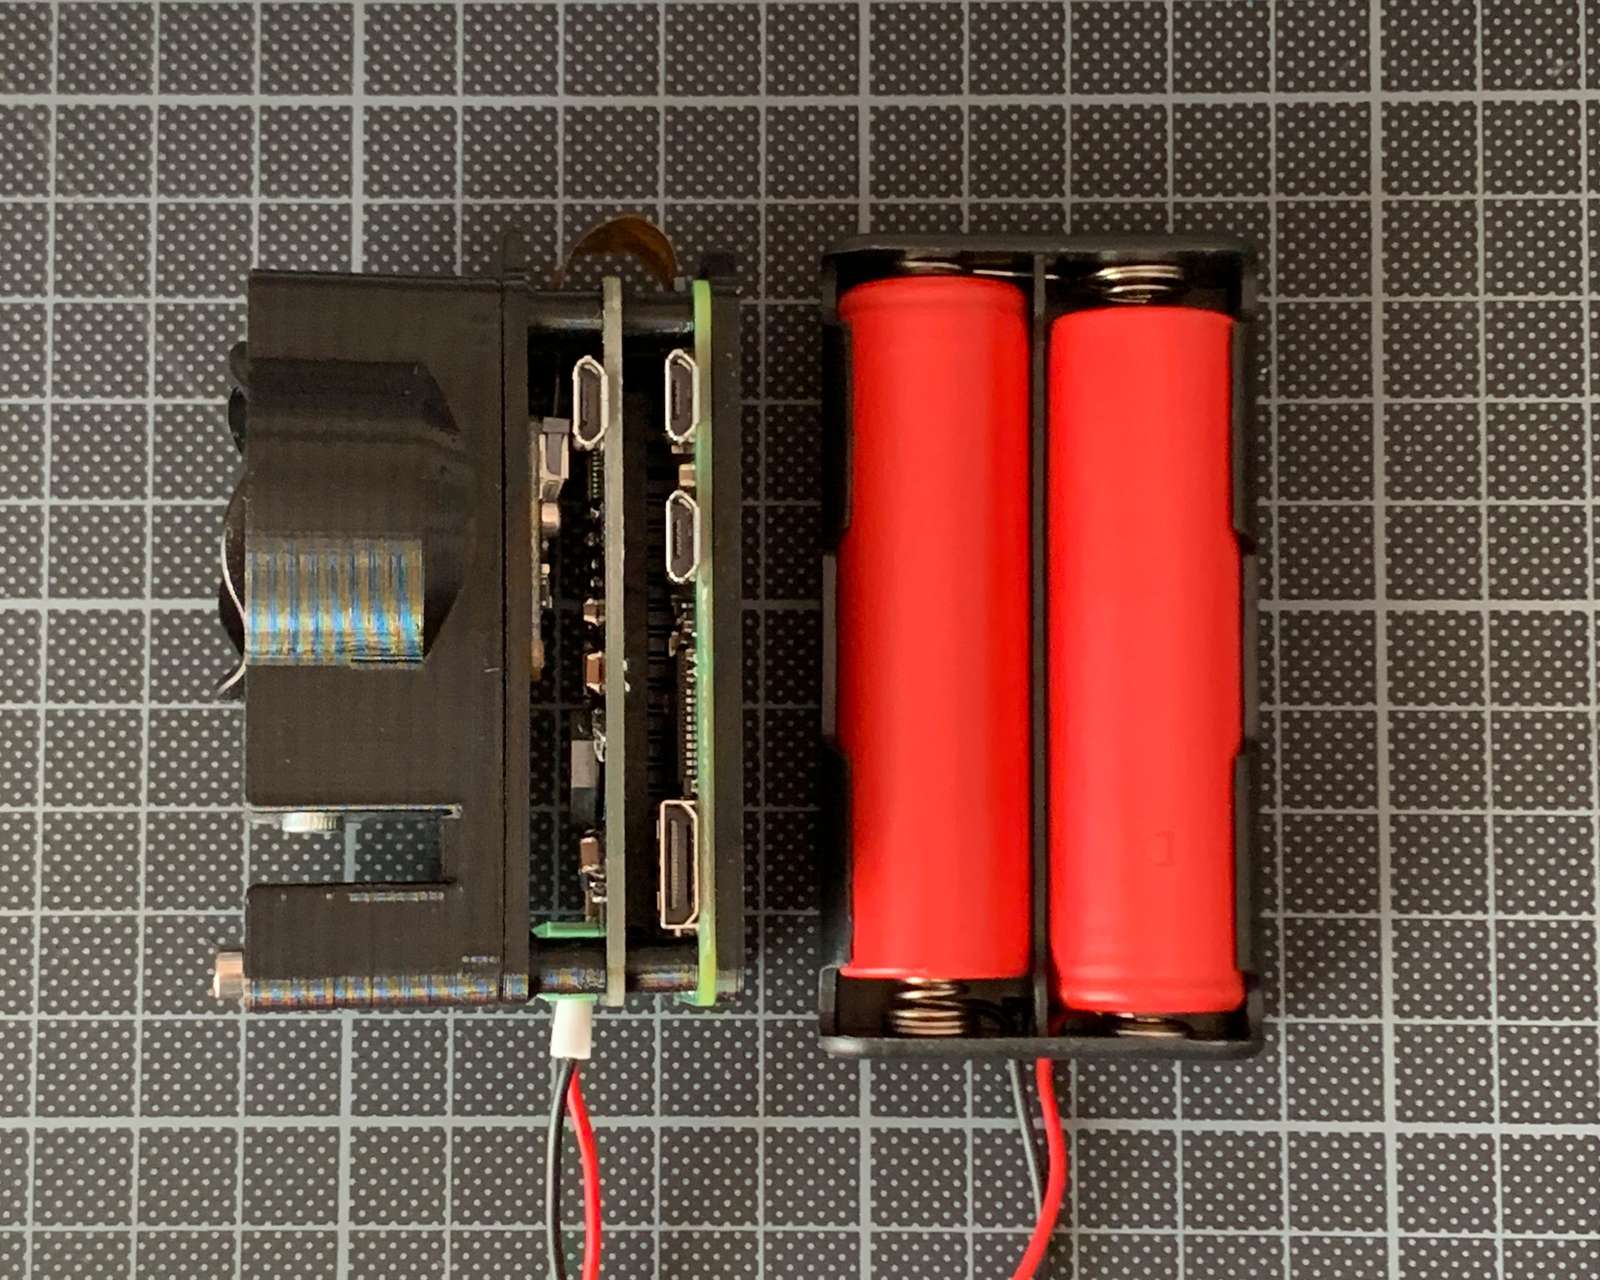
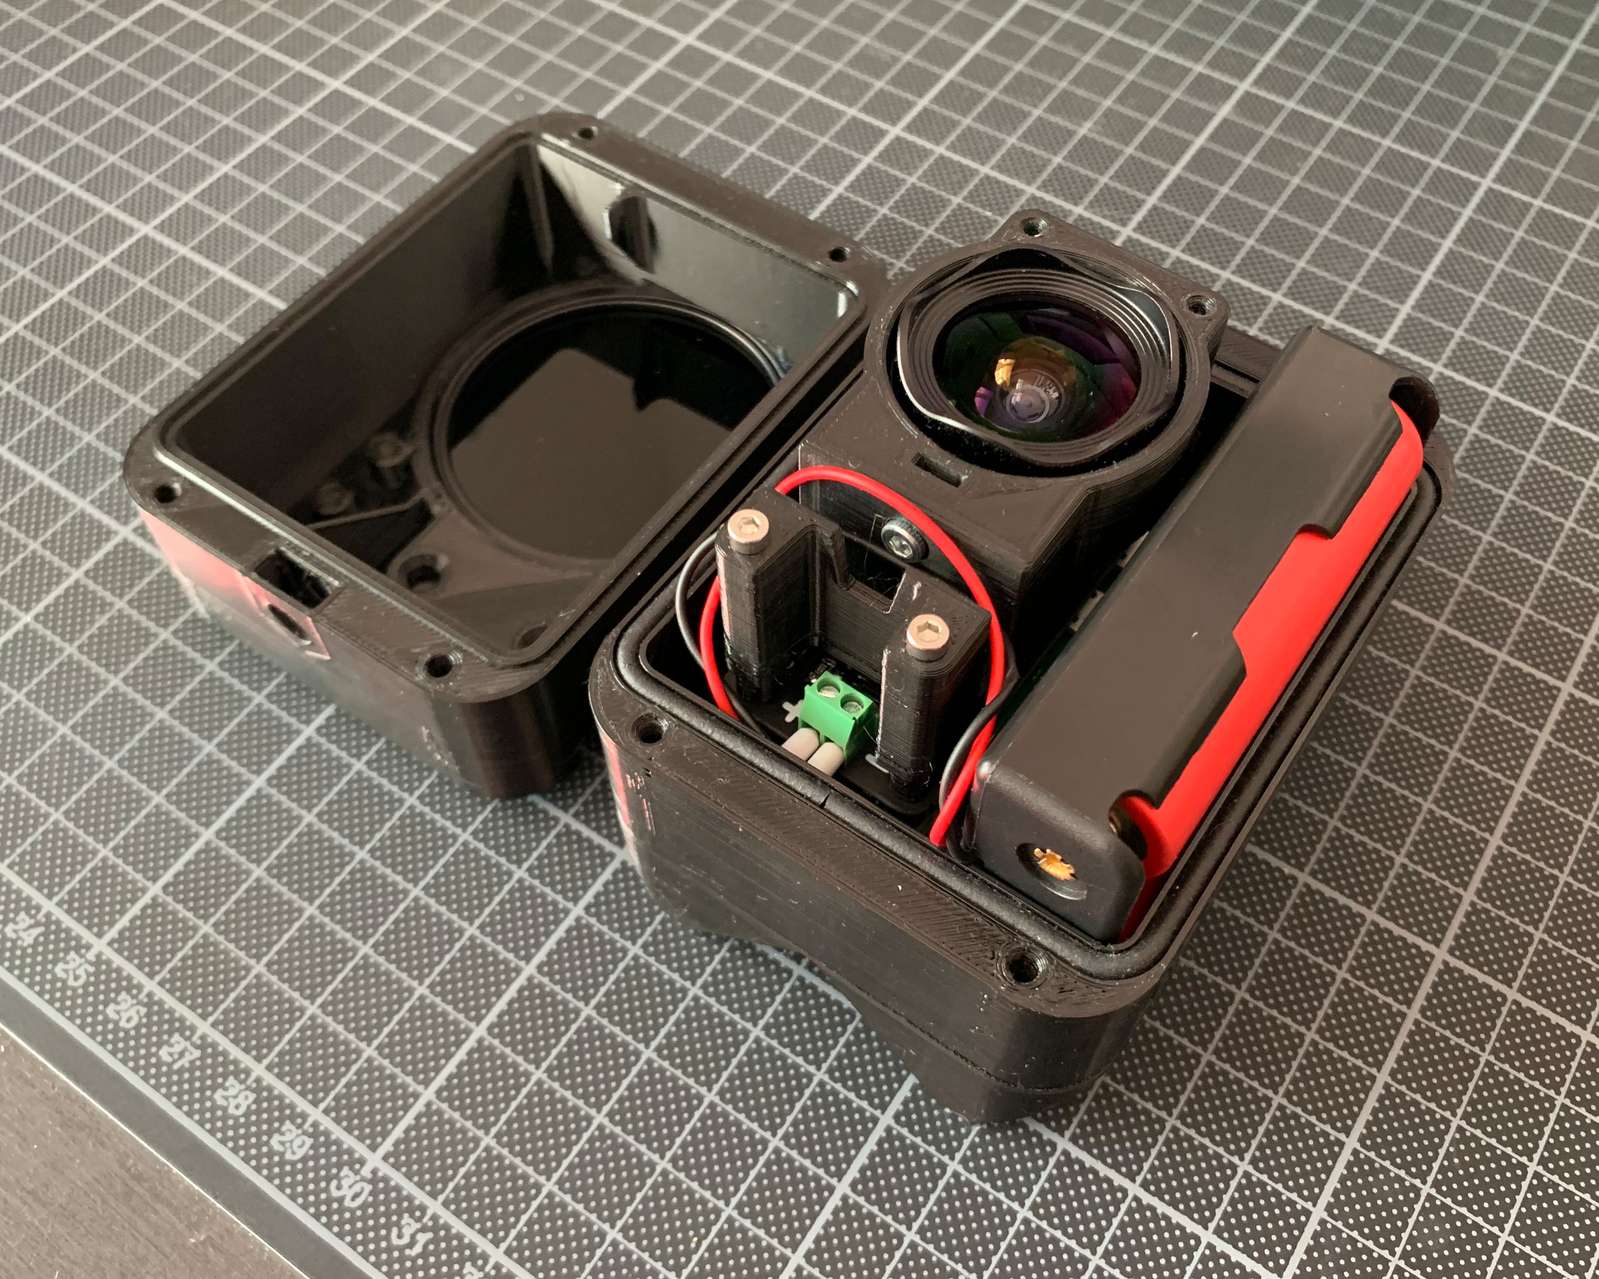

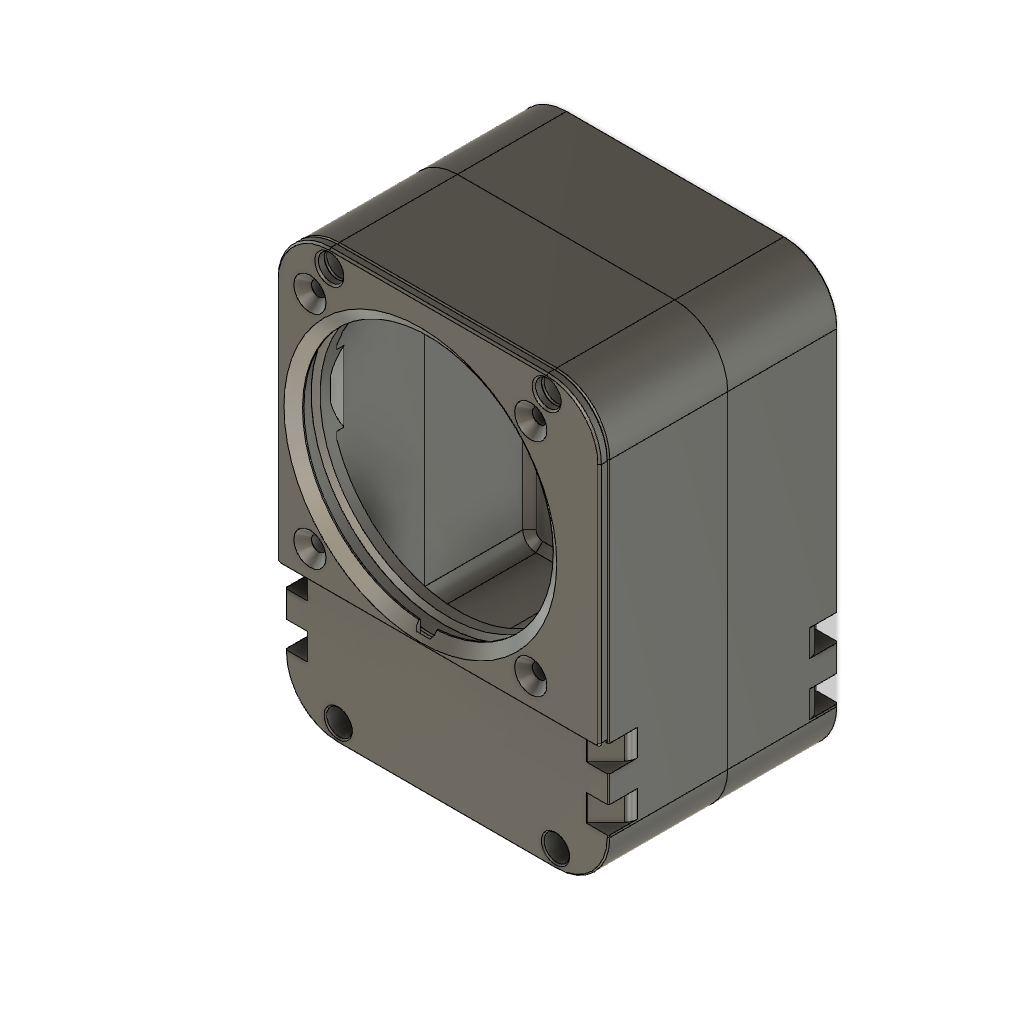
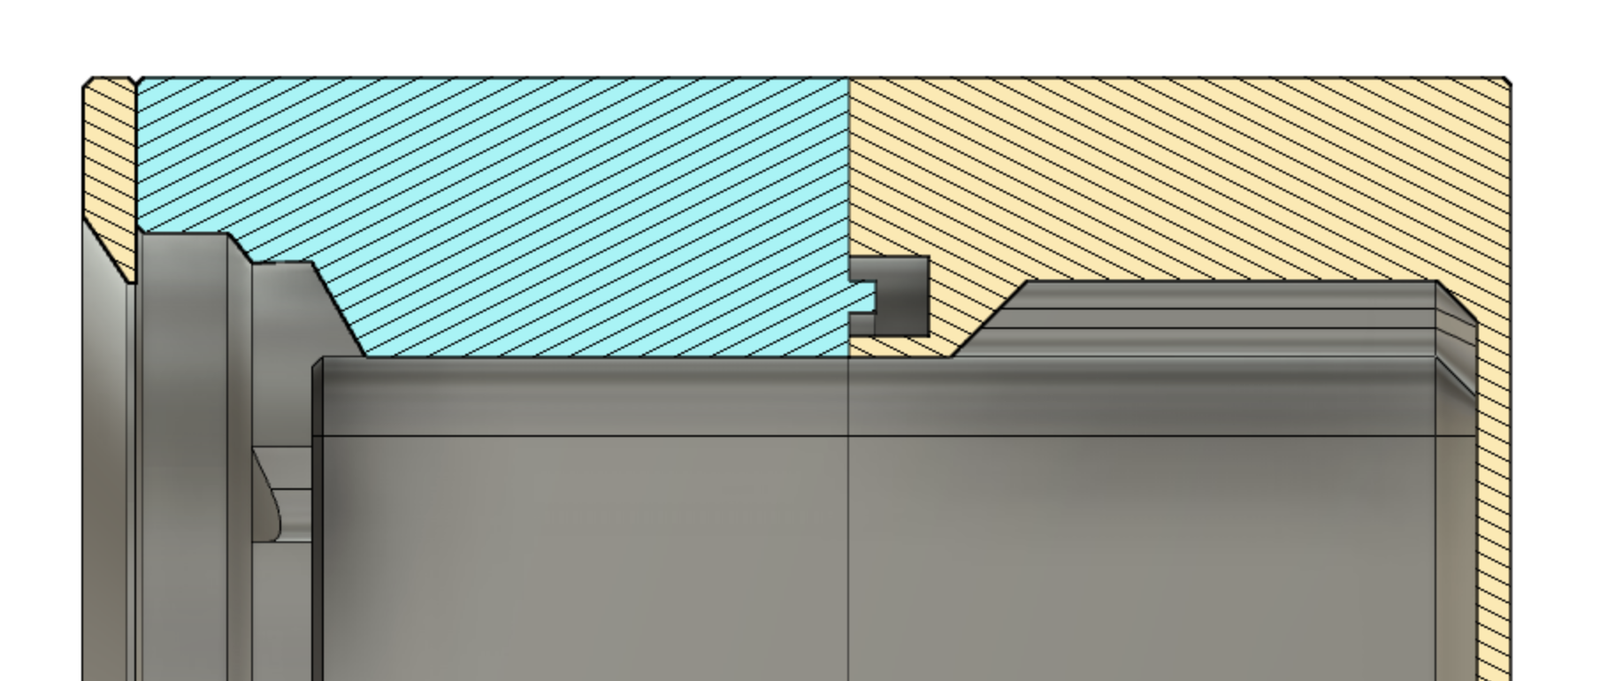
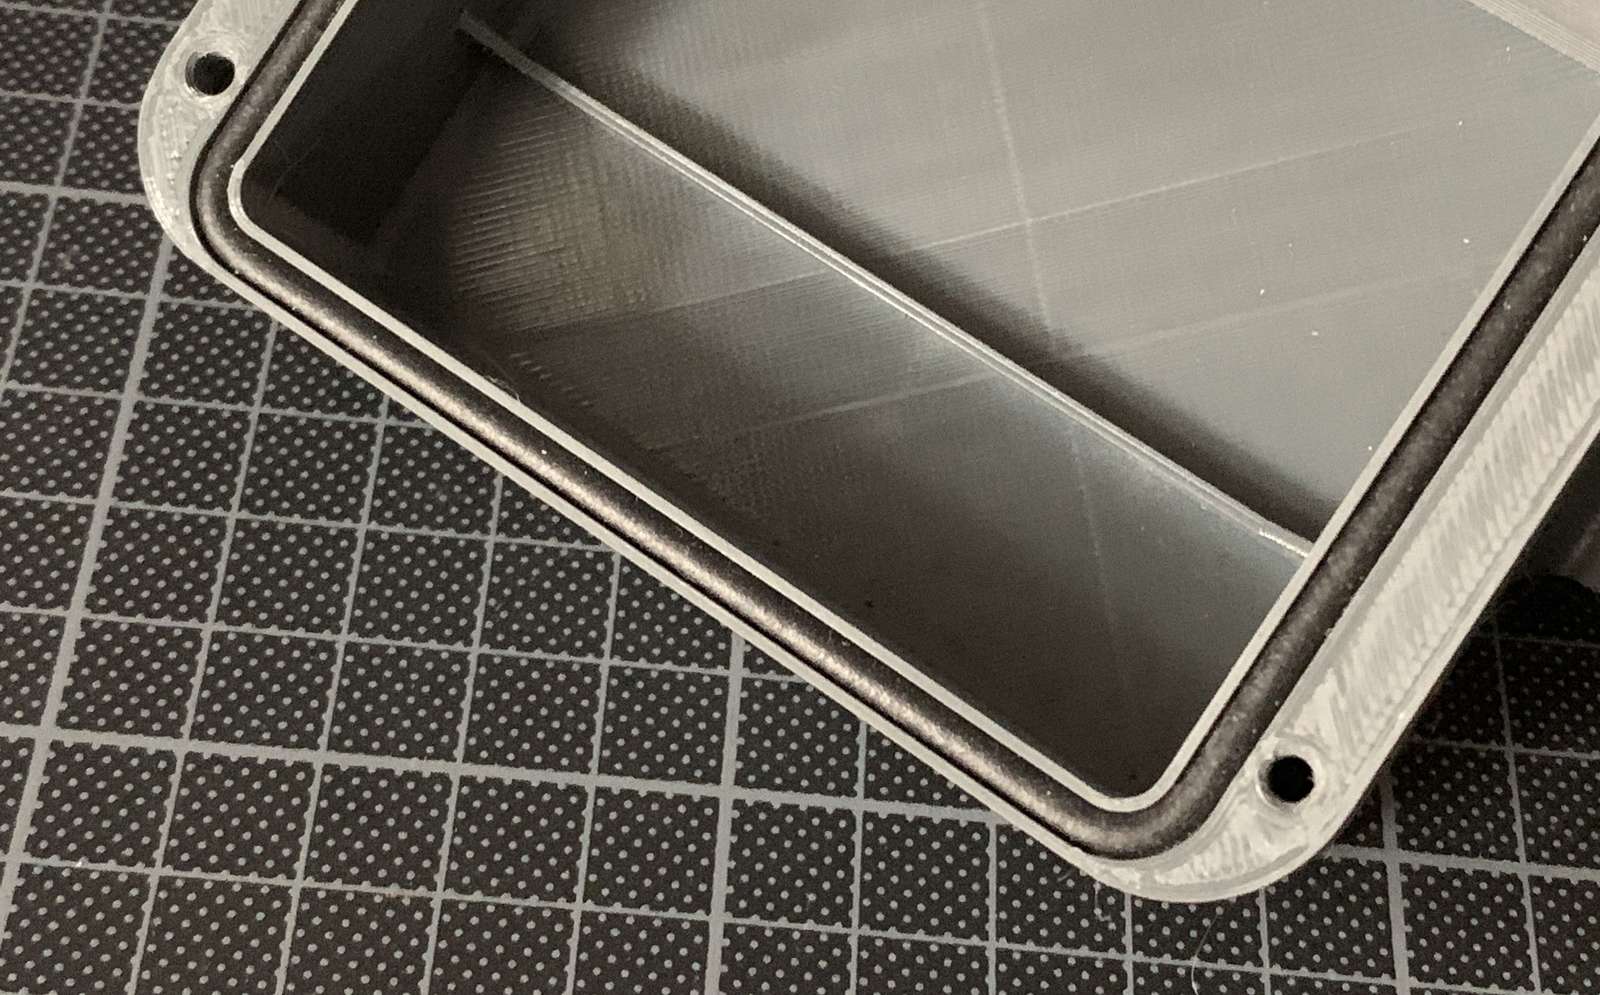
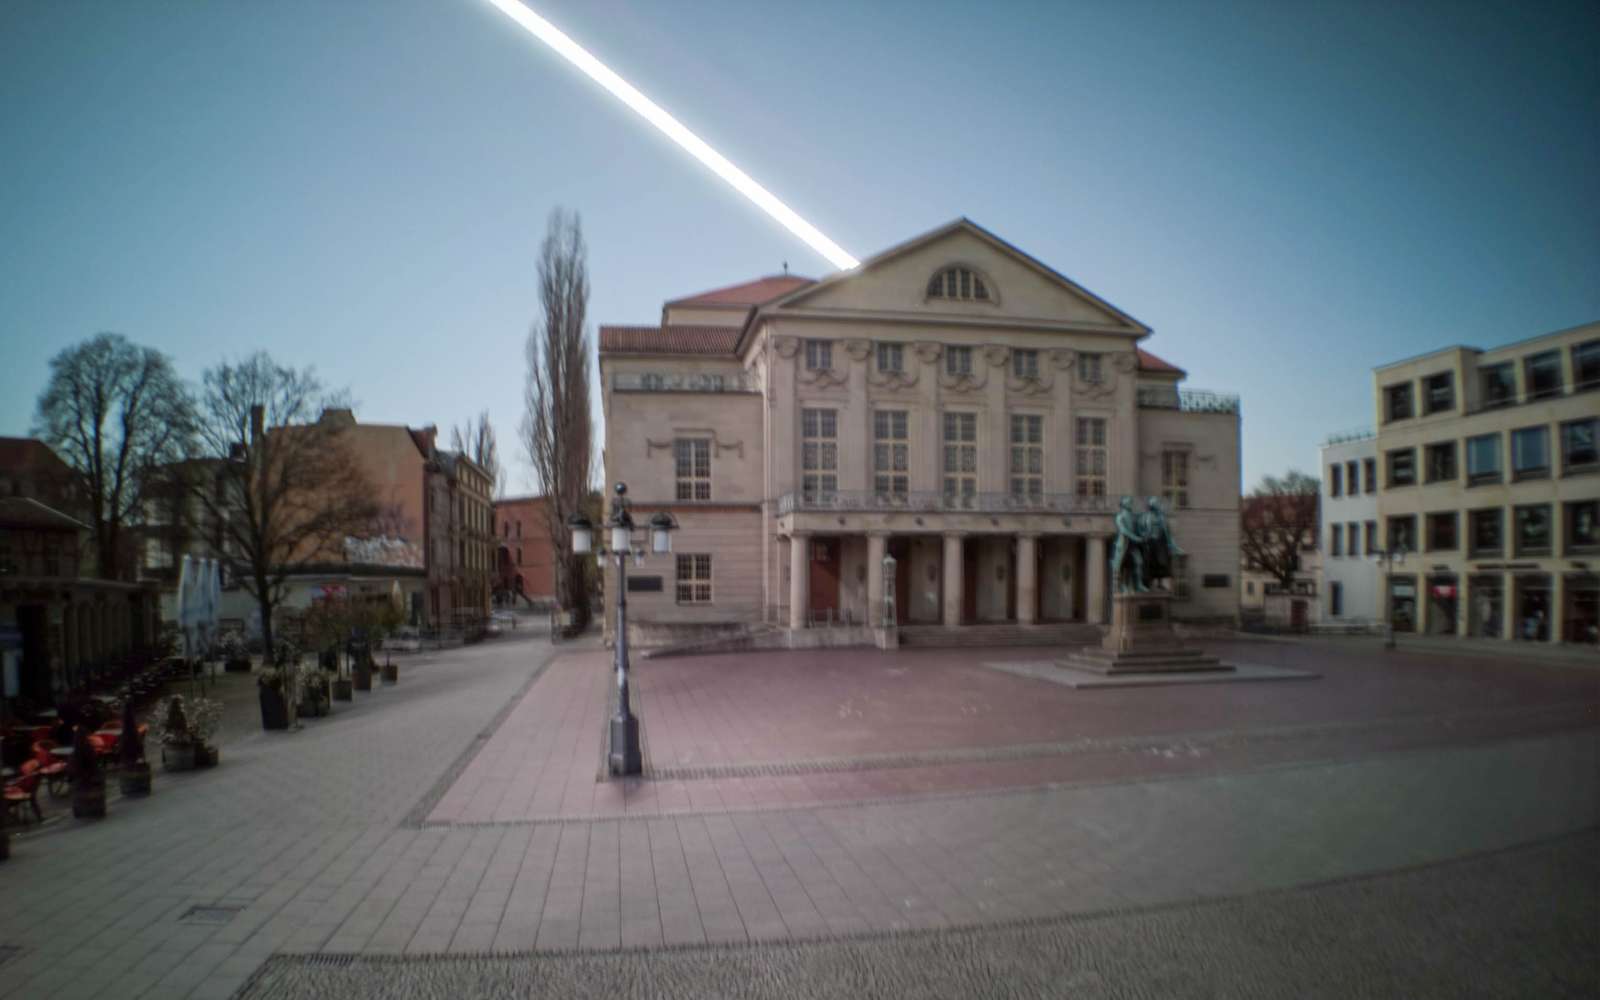

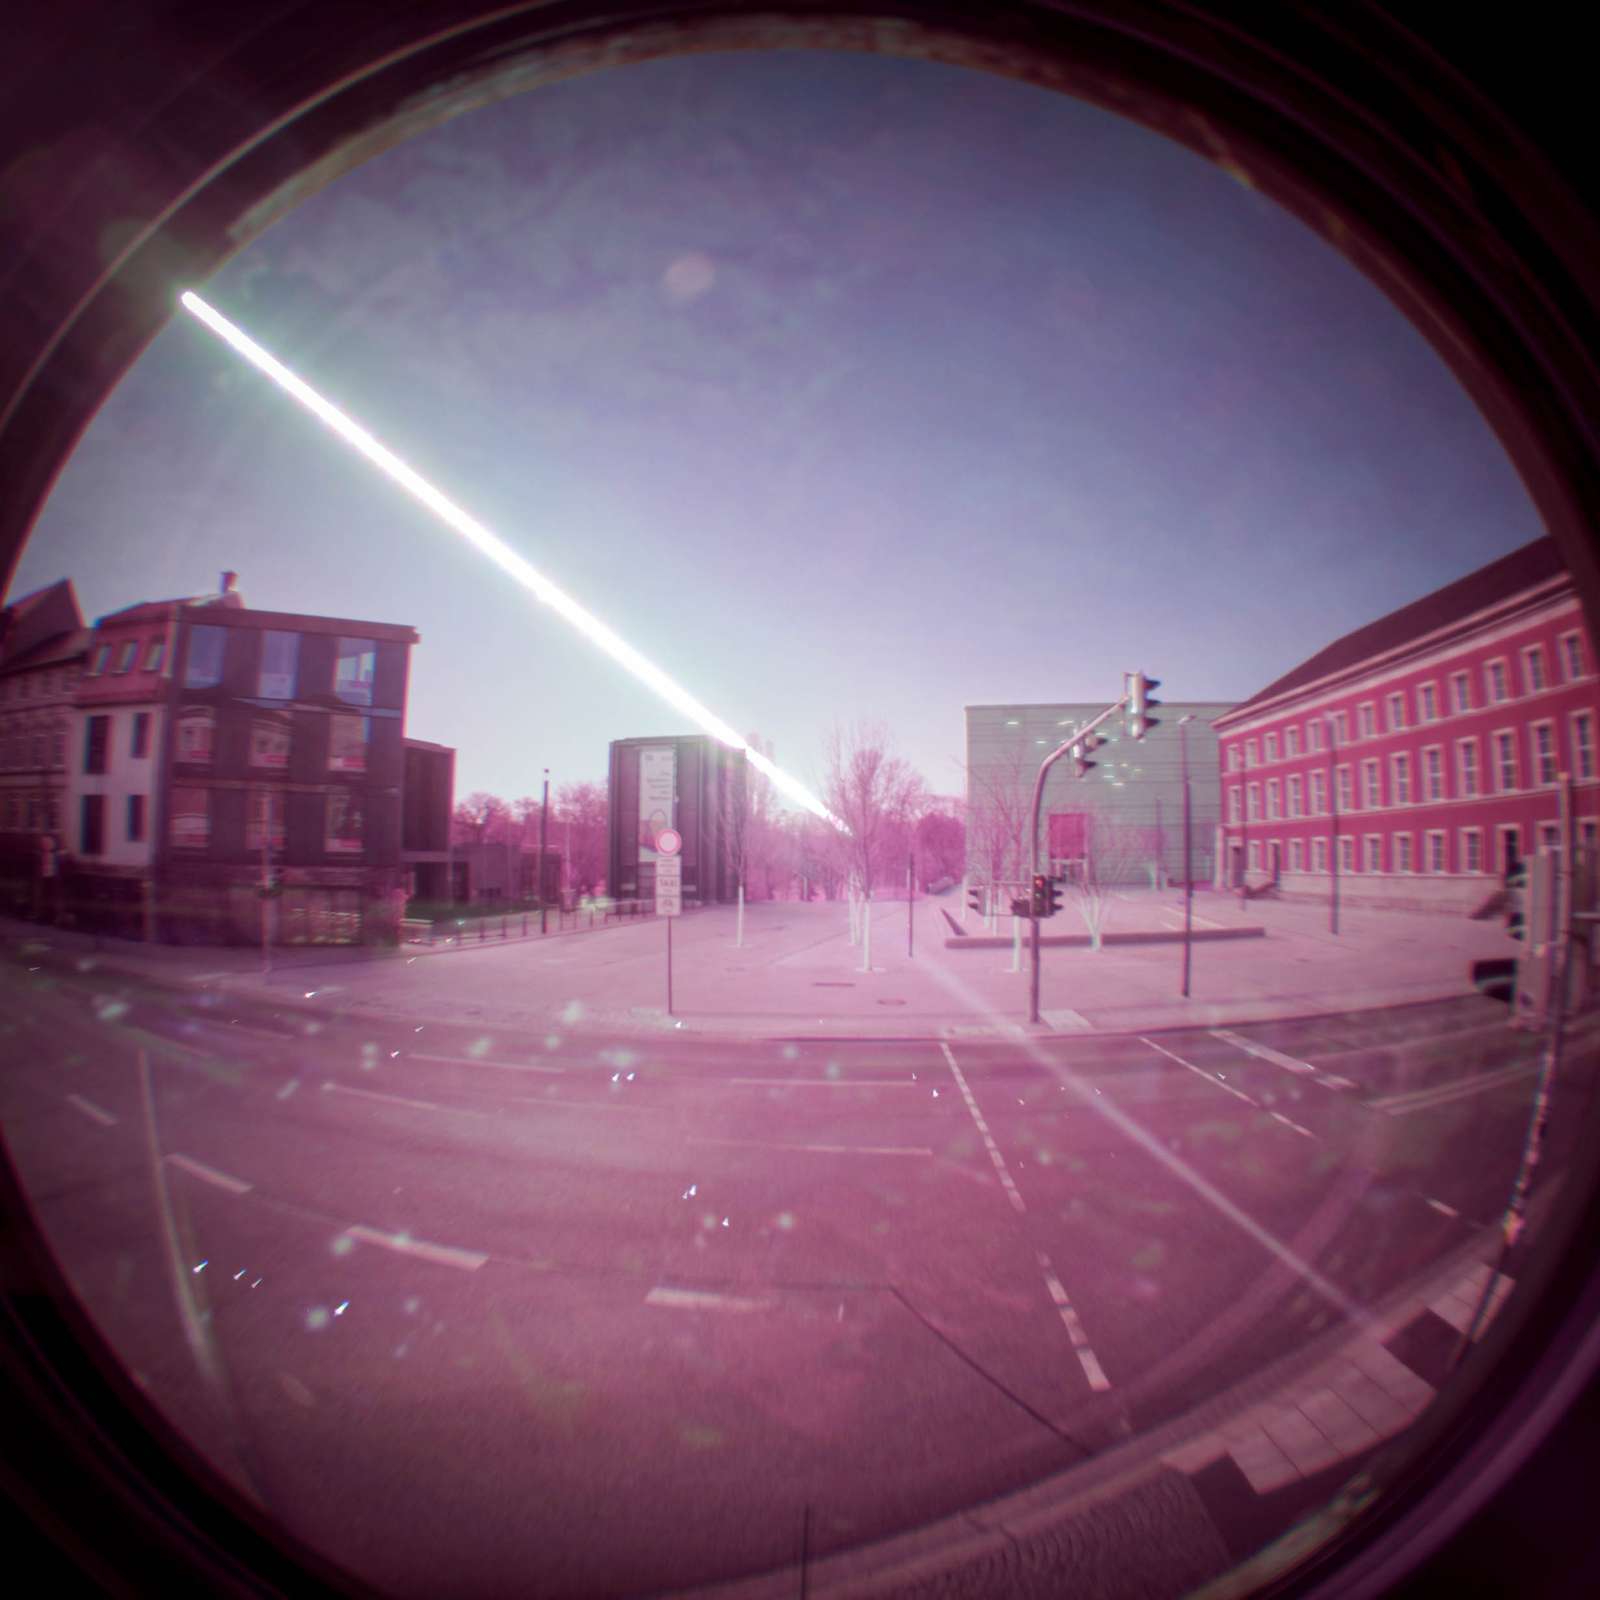
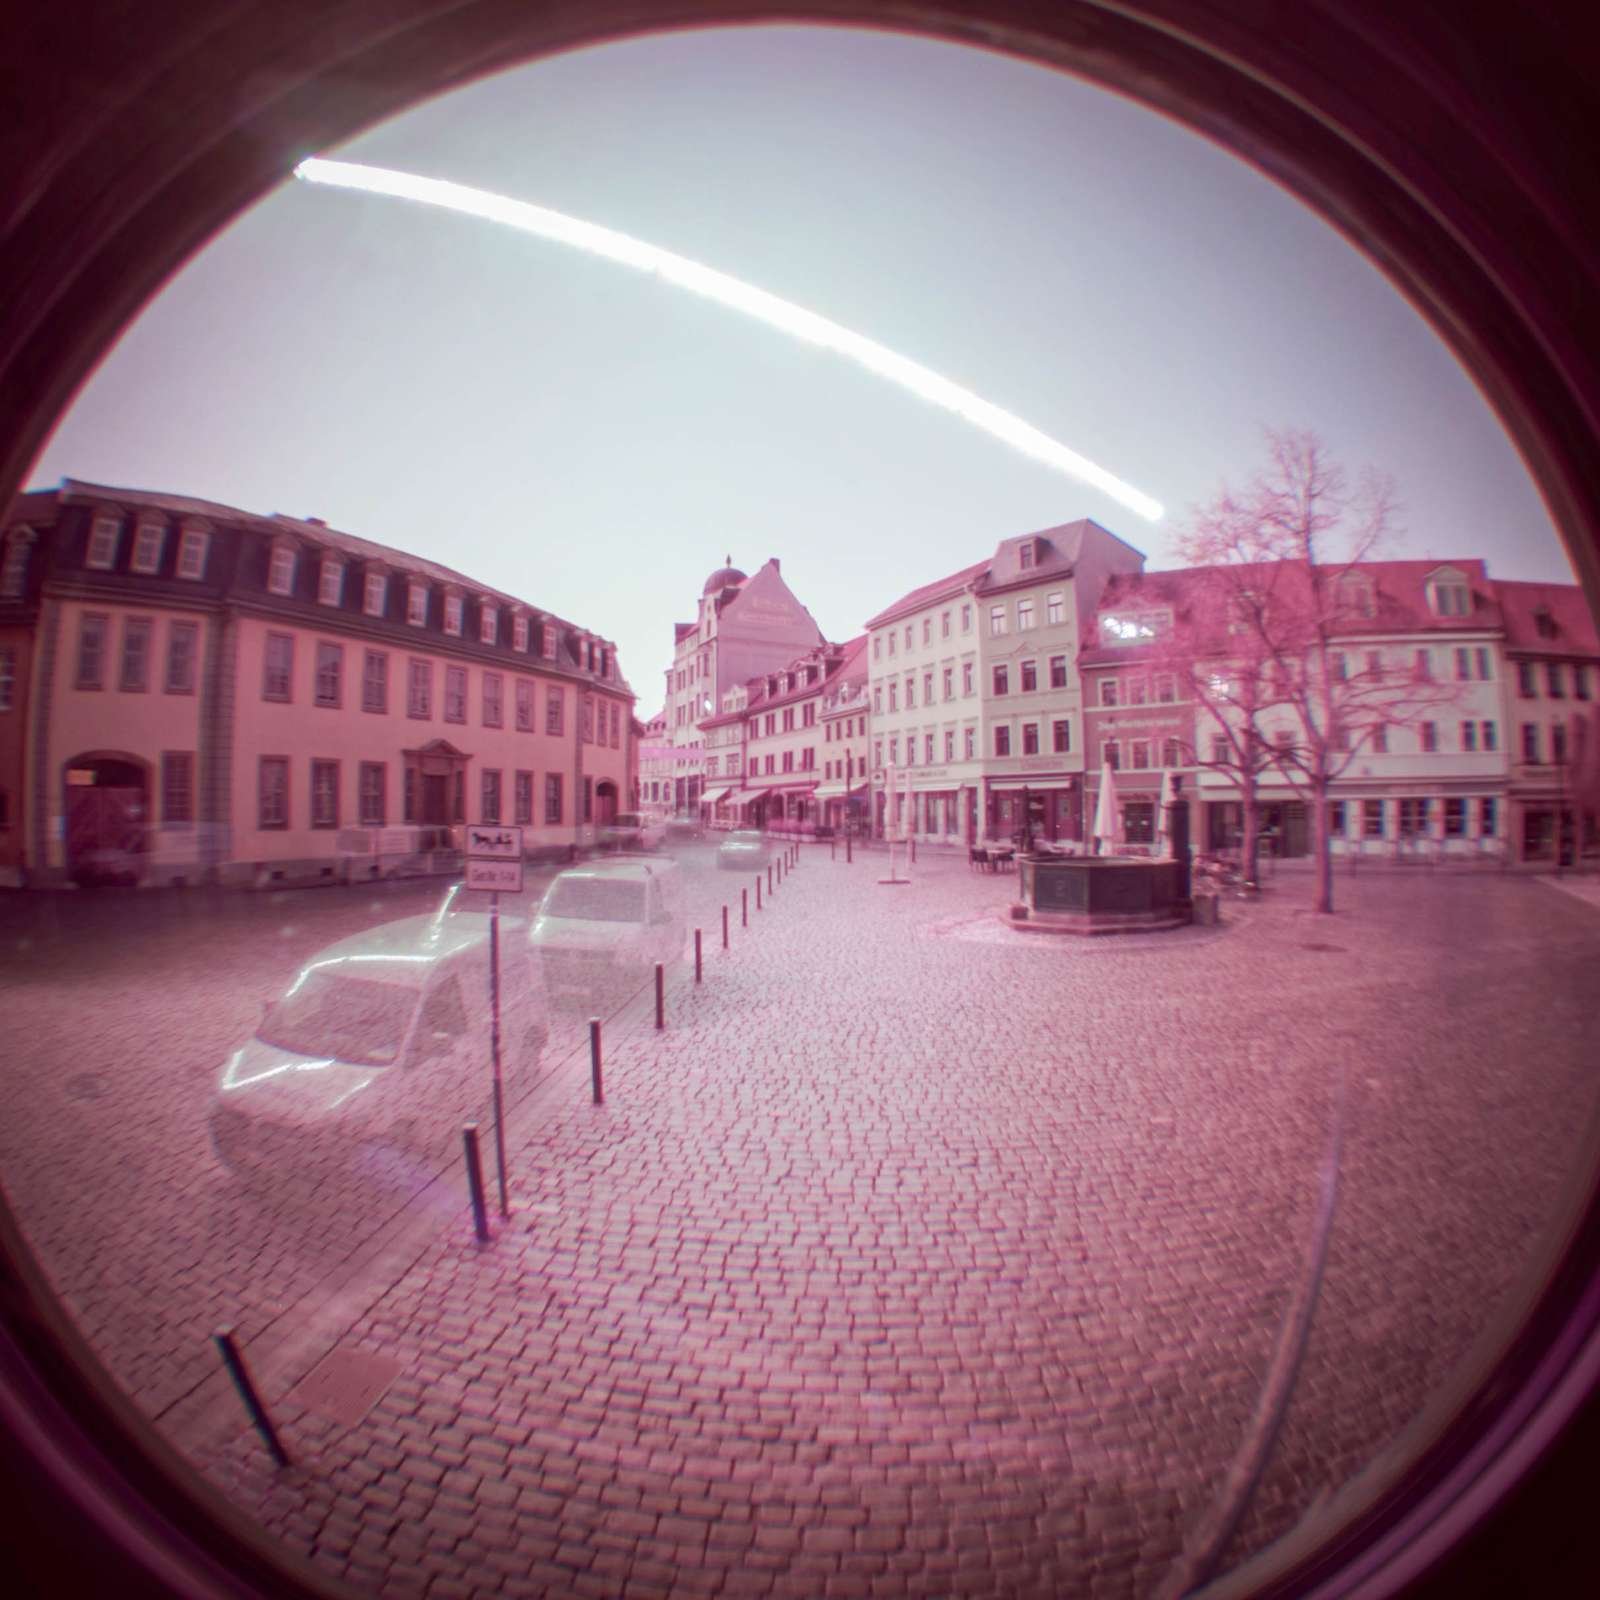
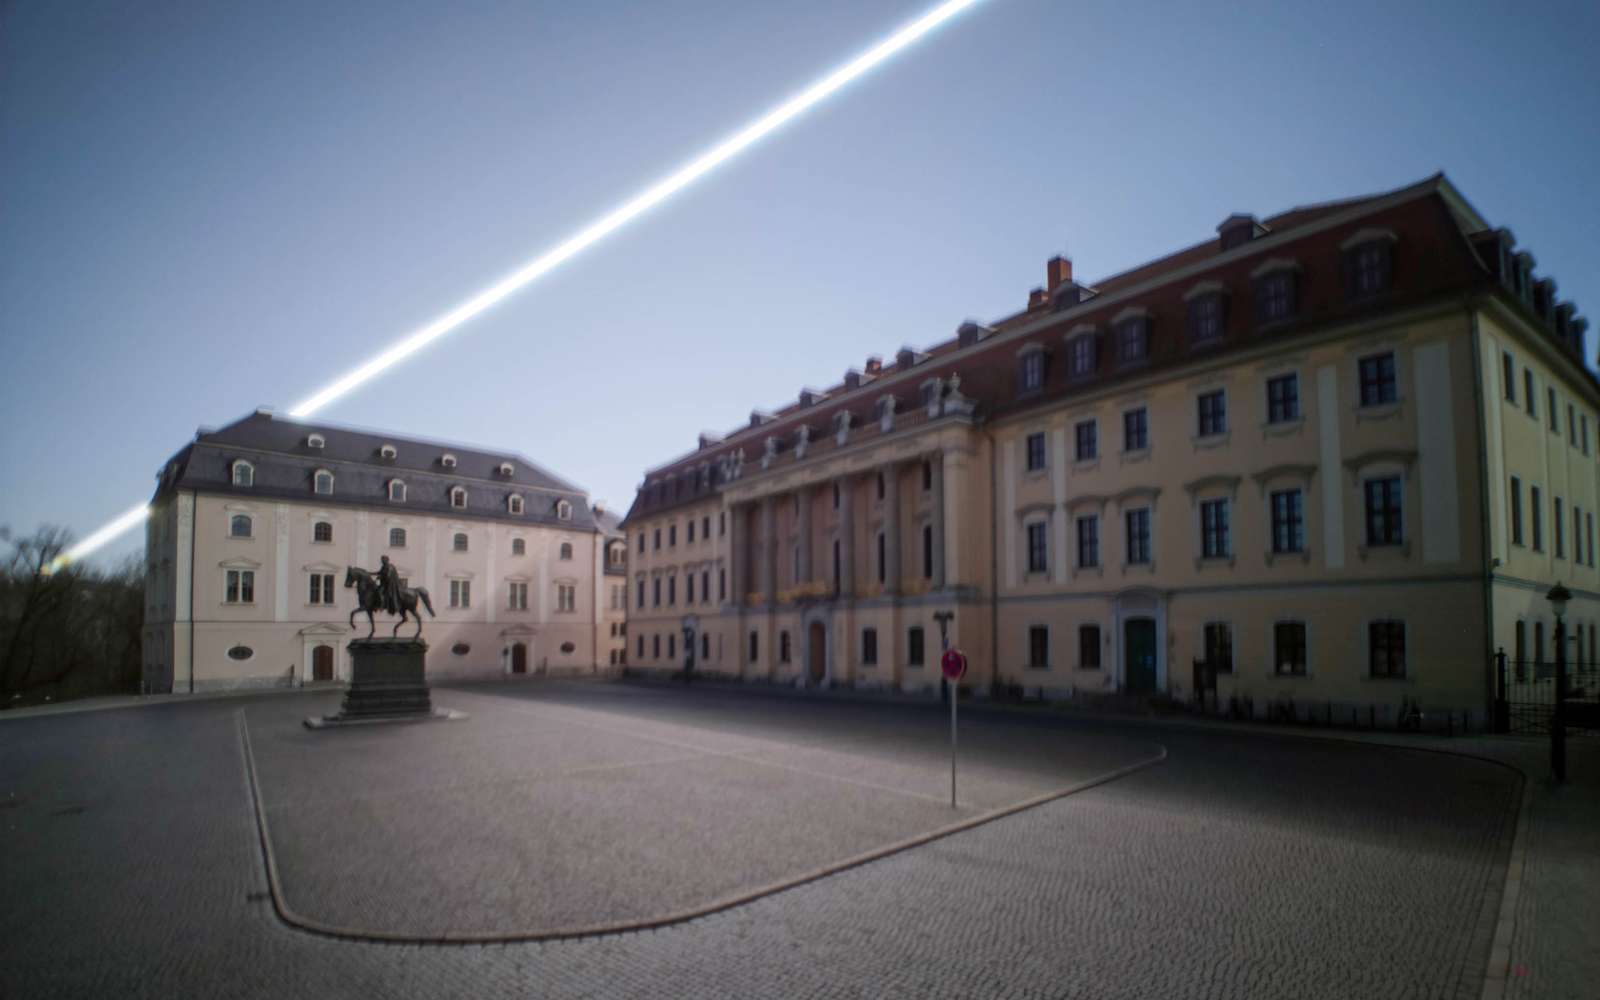
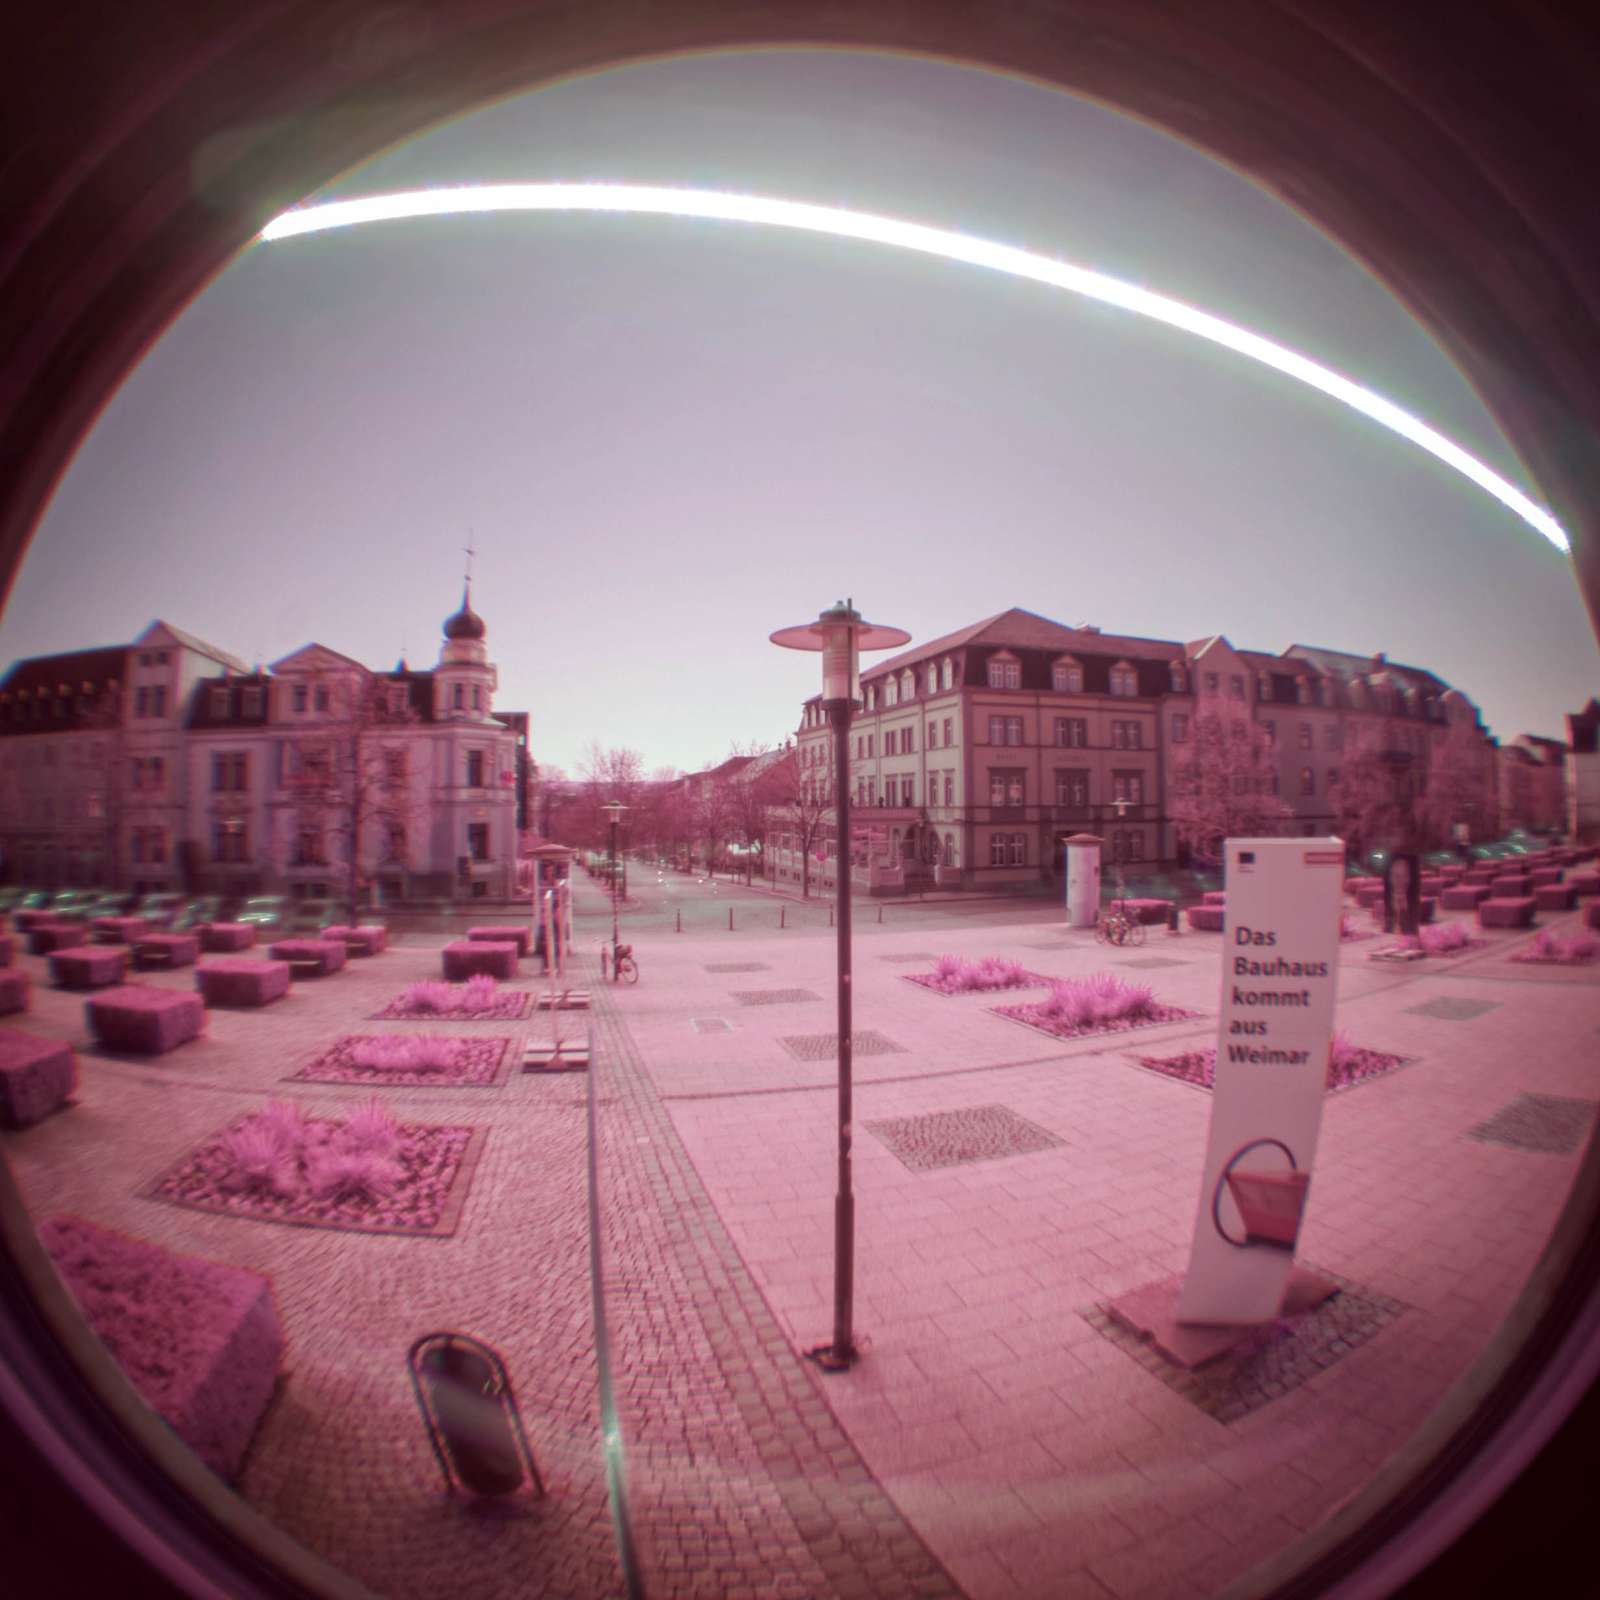
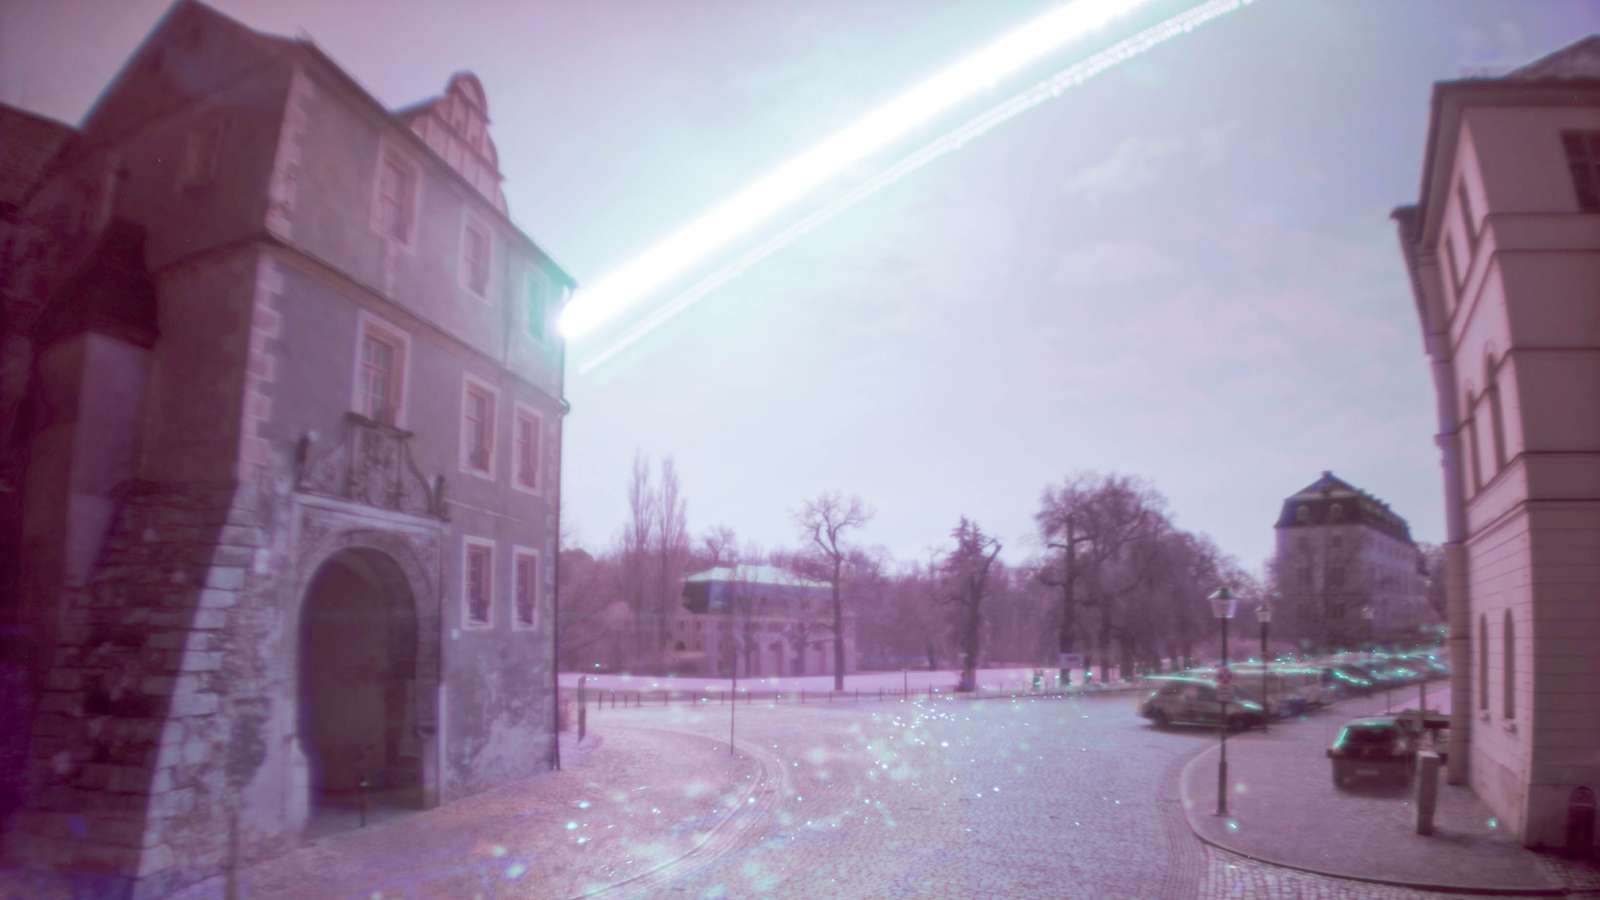
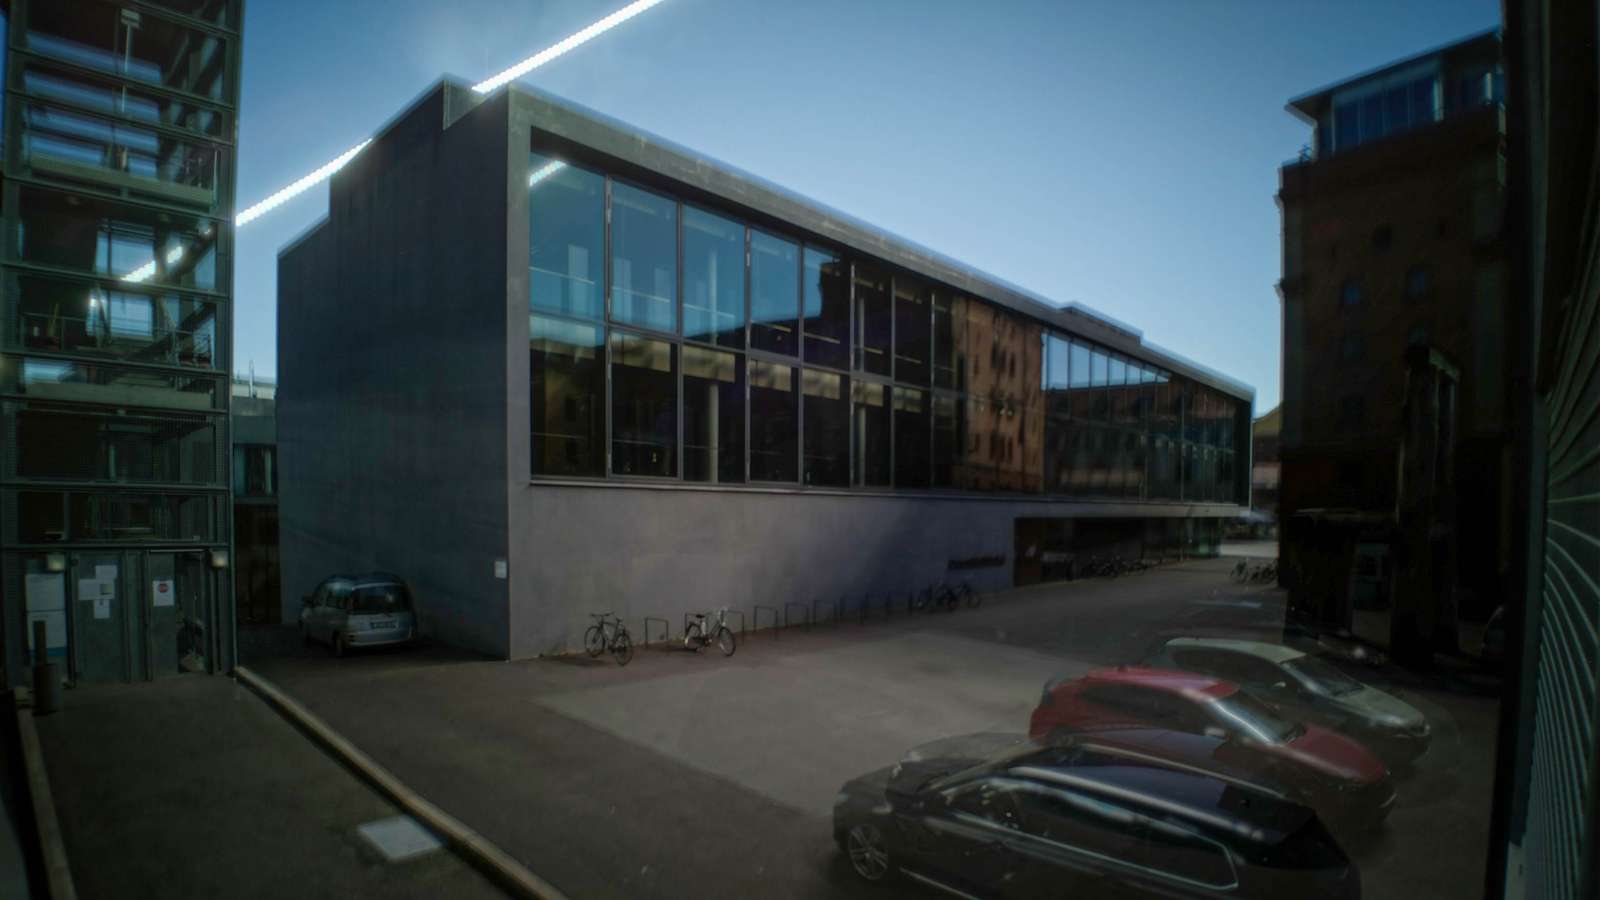
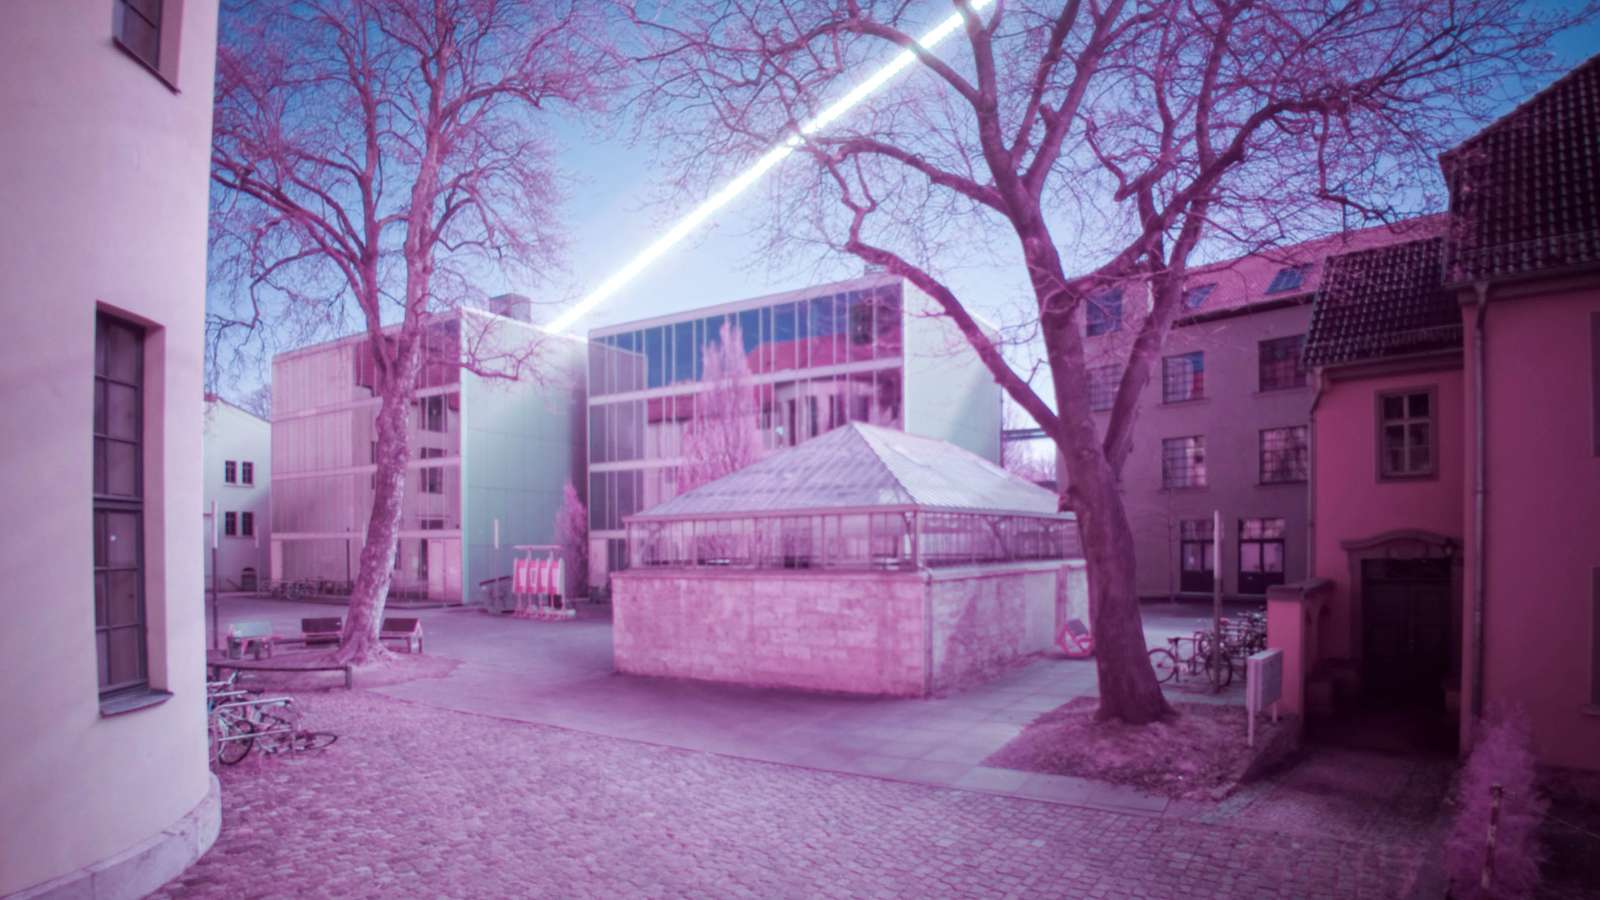
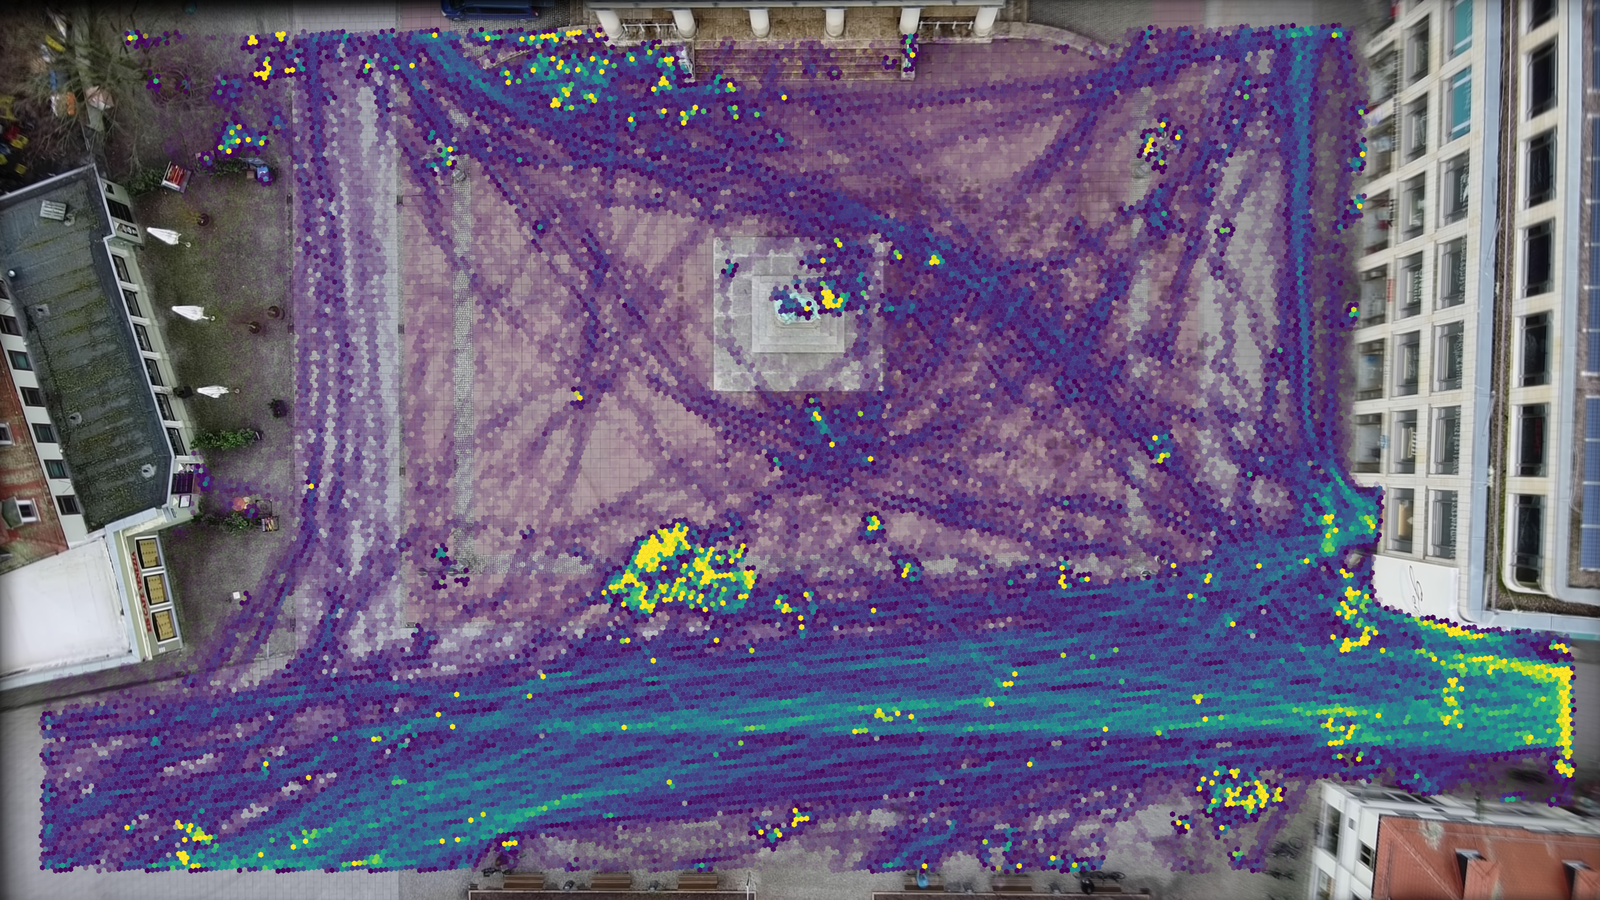

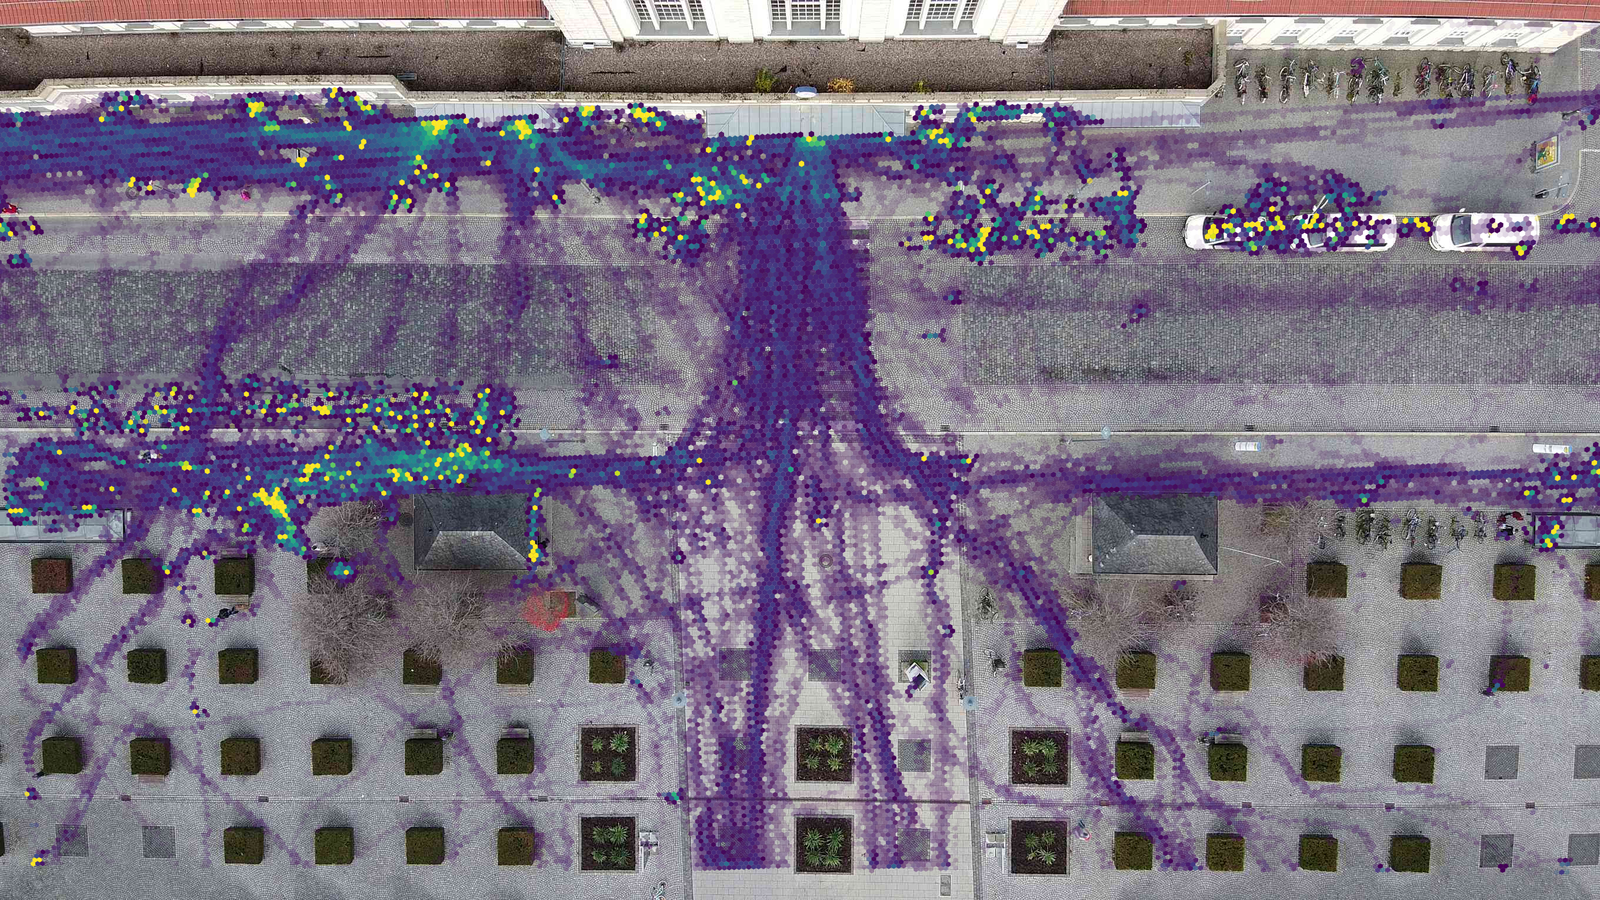
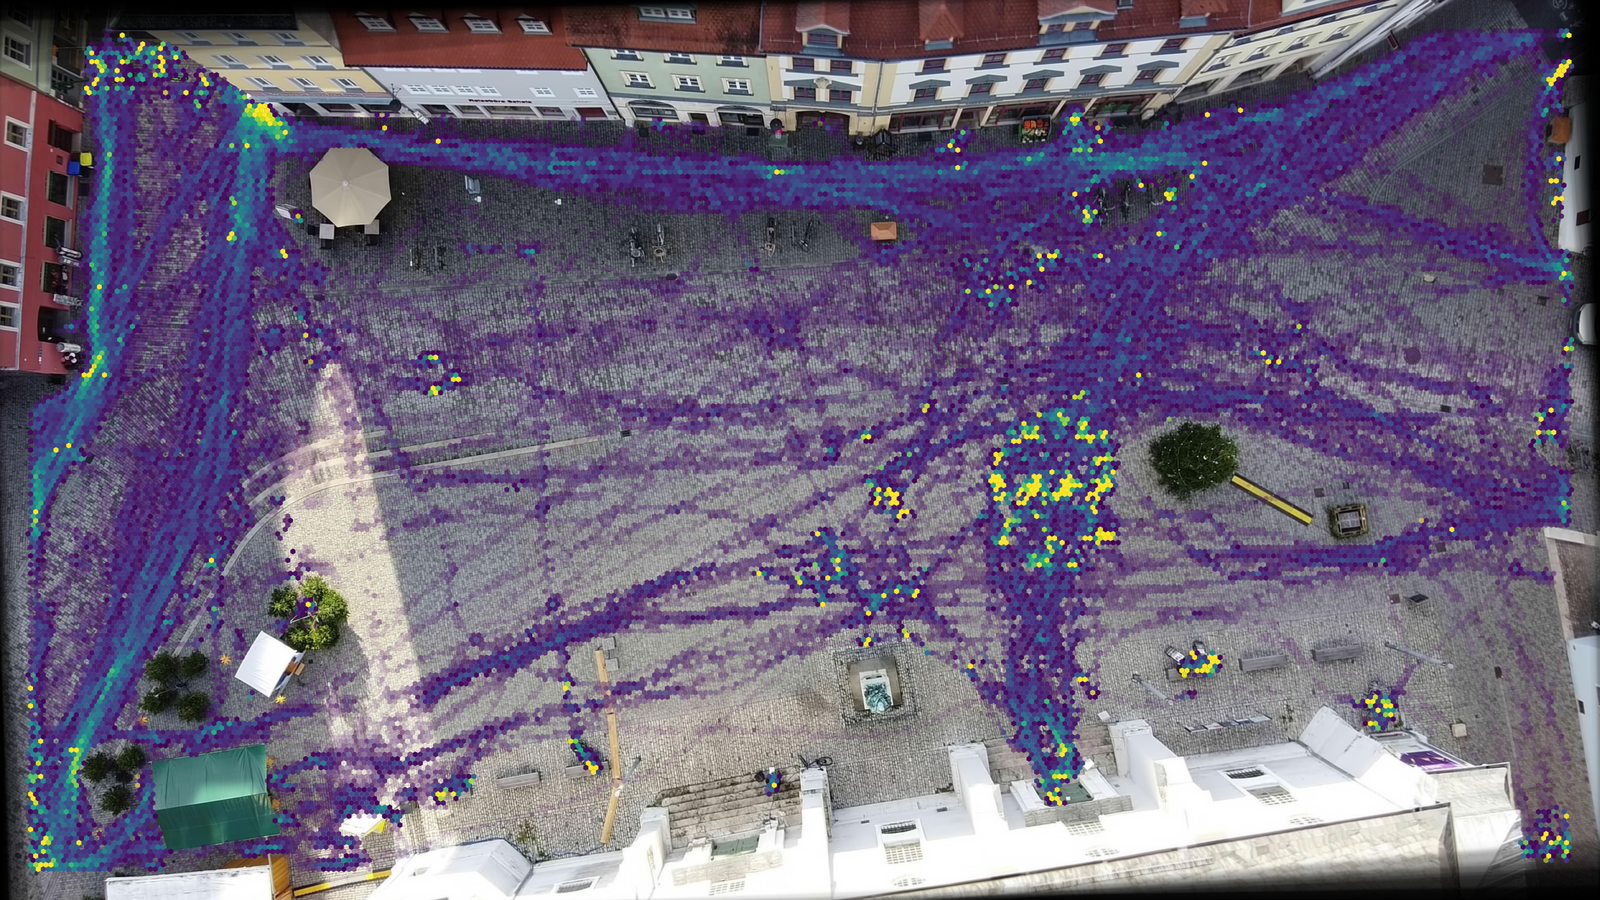
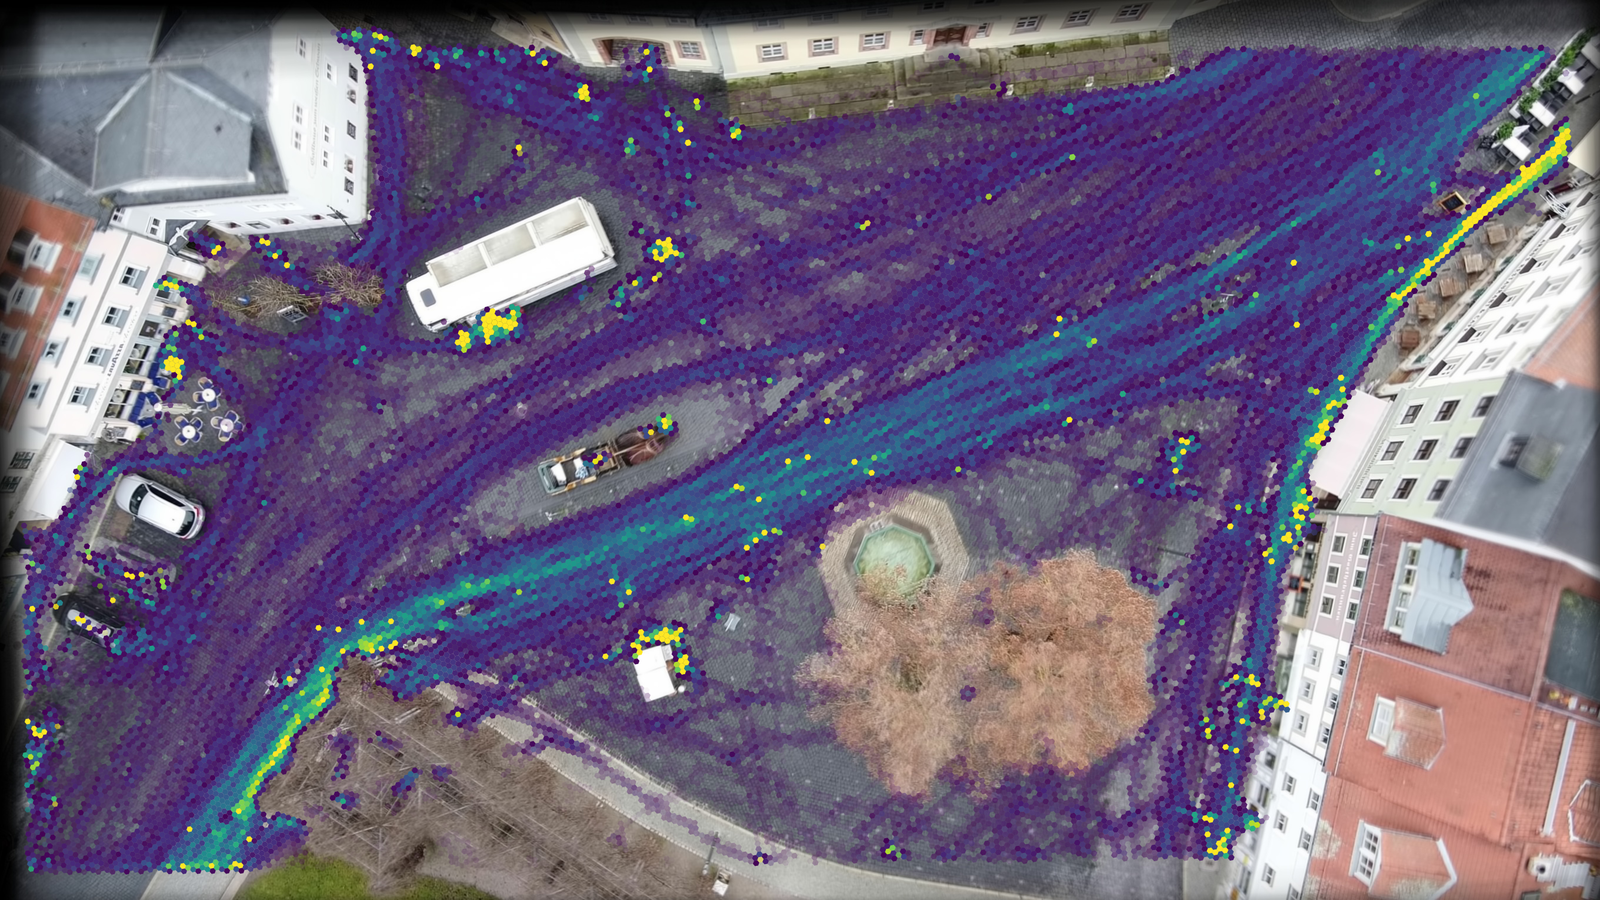

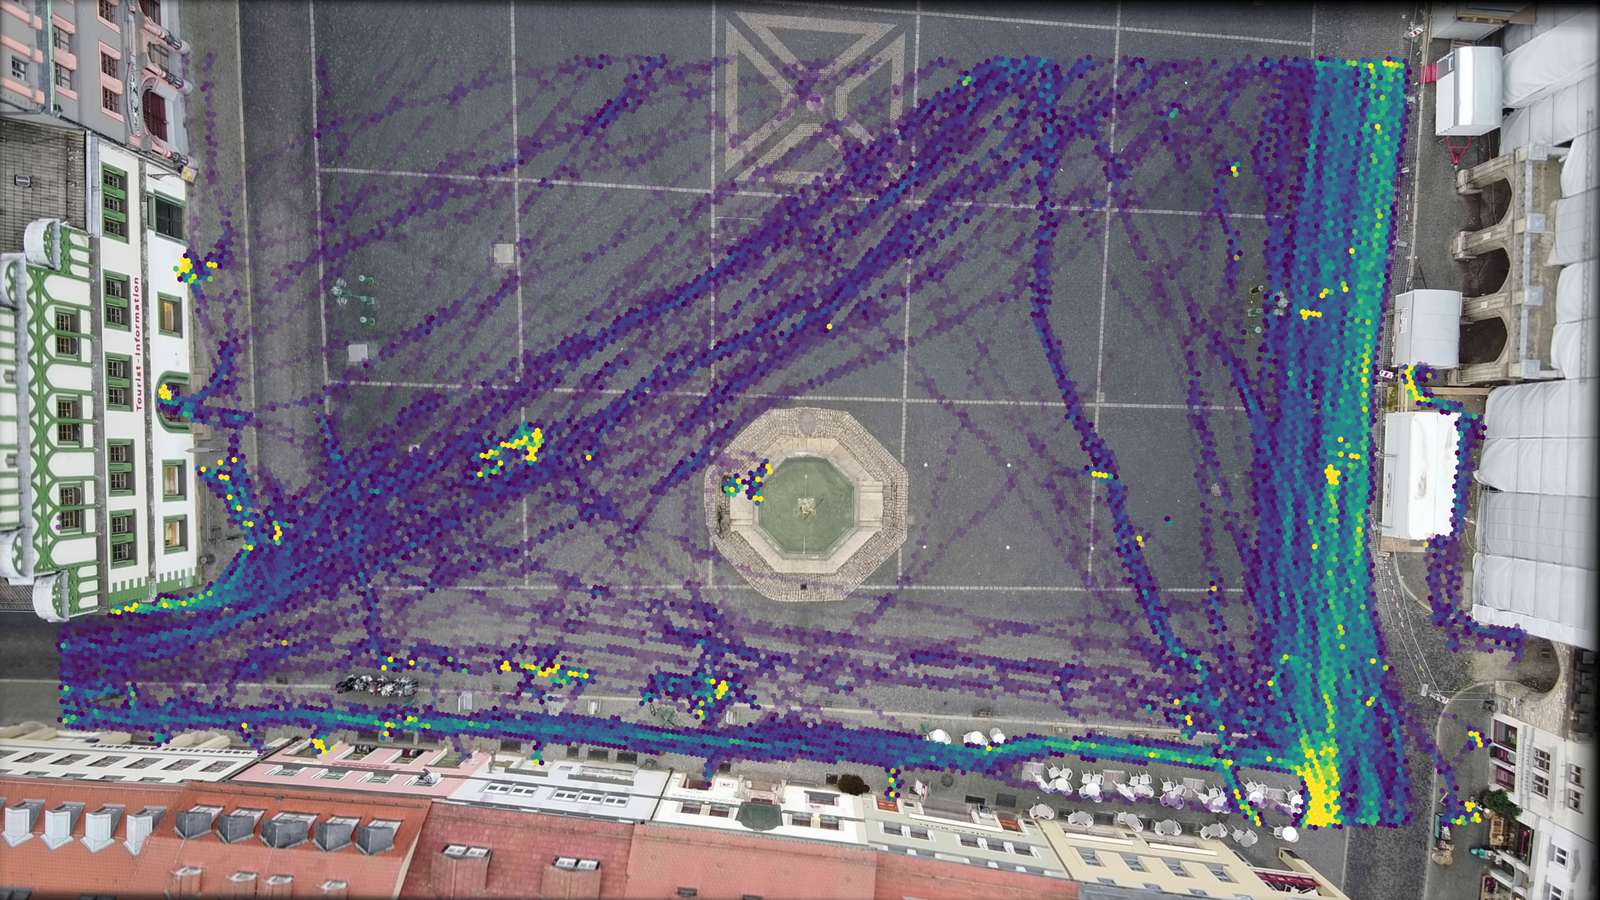
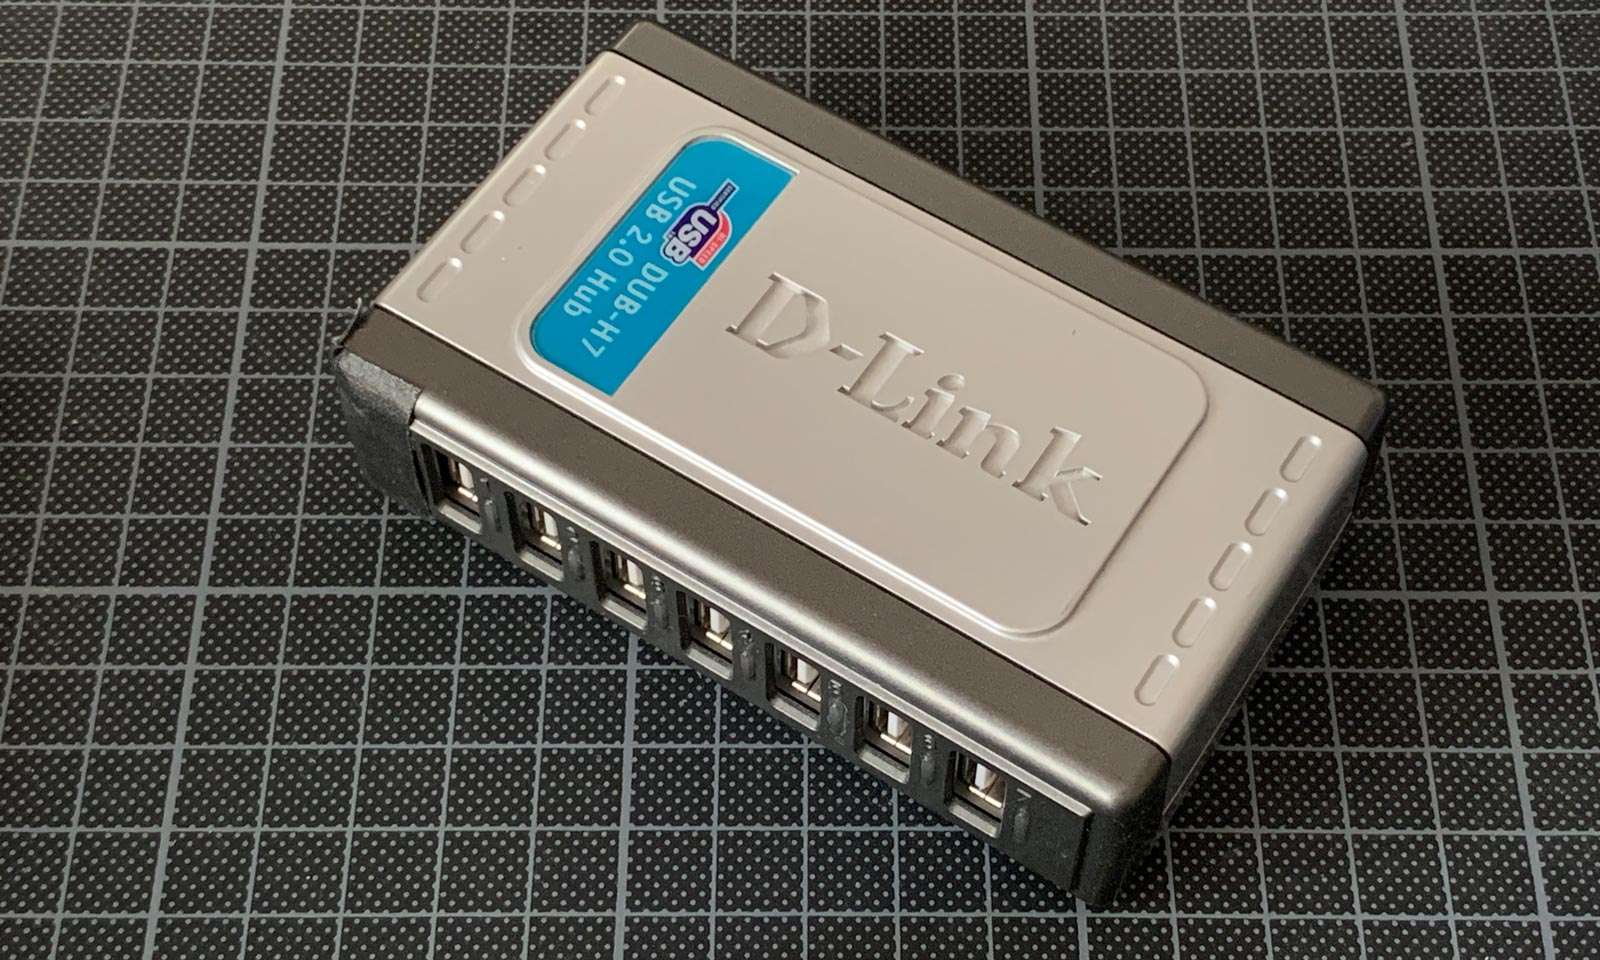
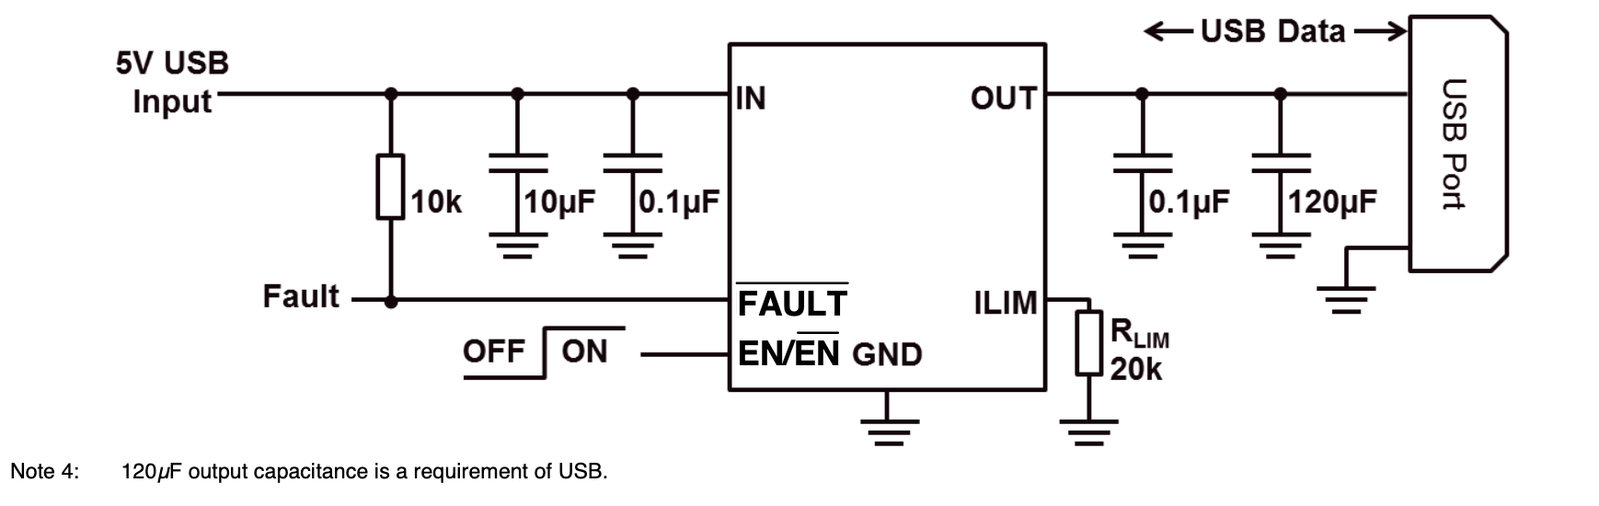
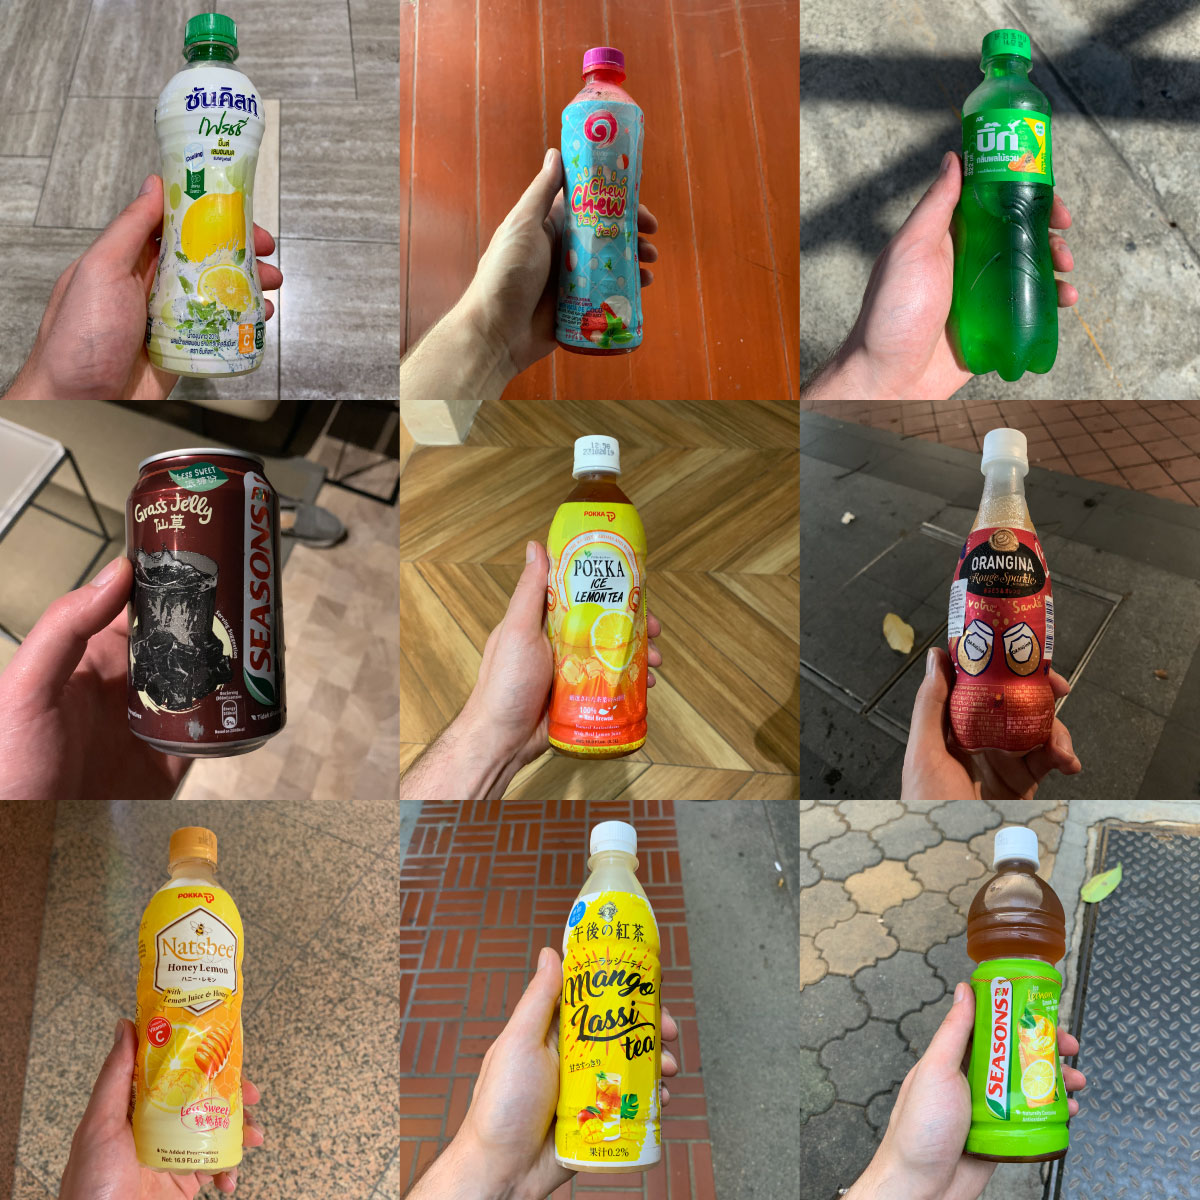 ]]>
]]>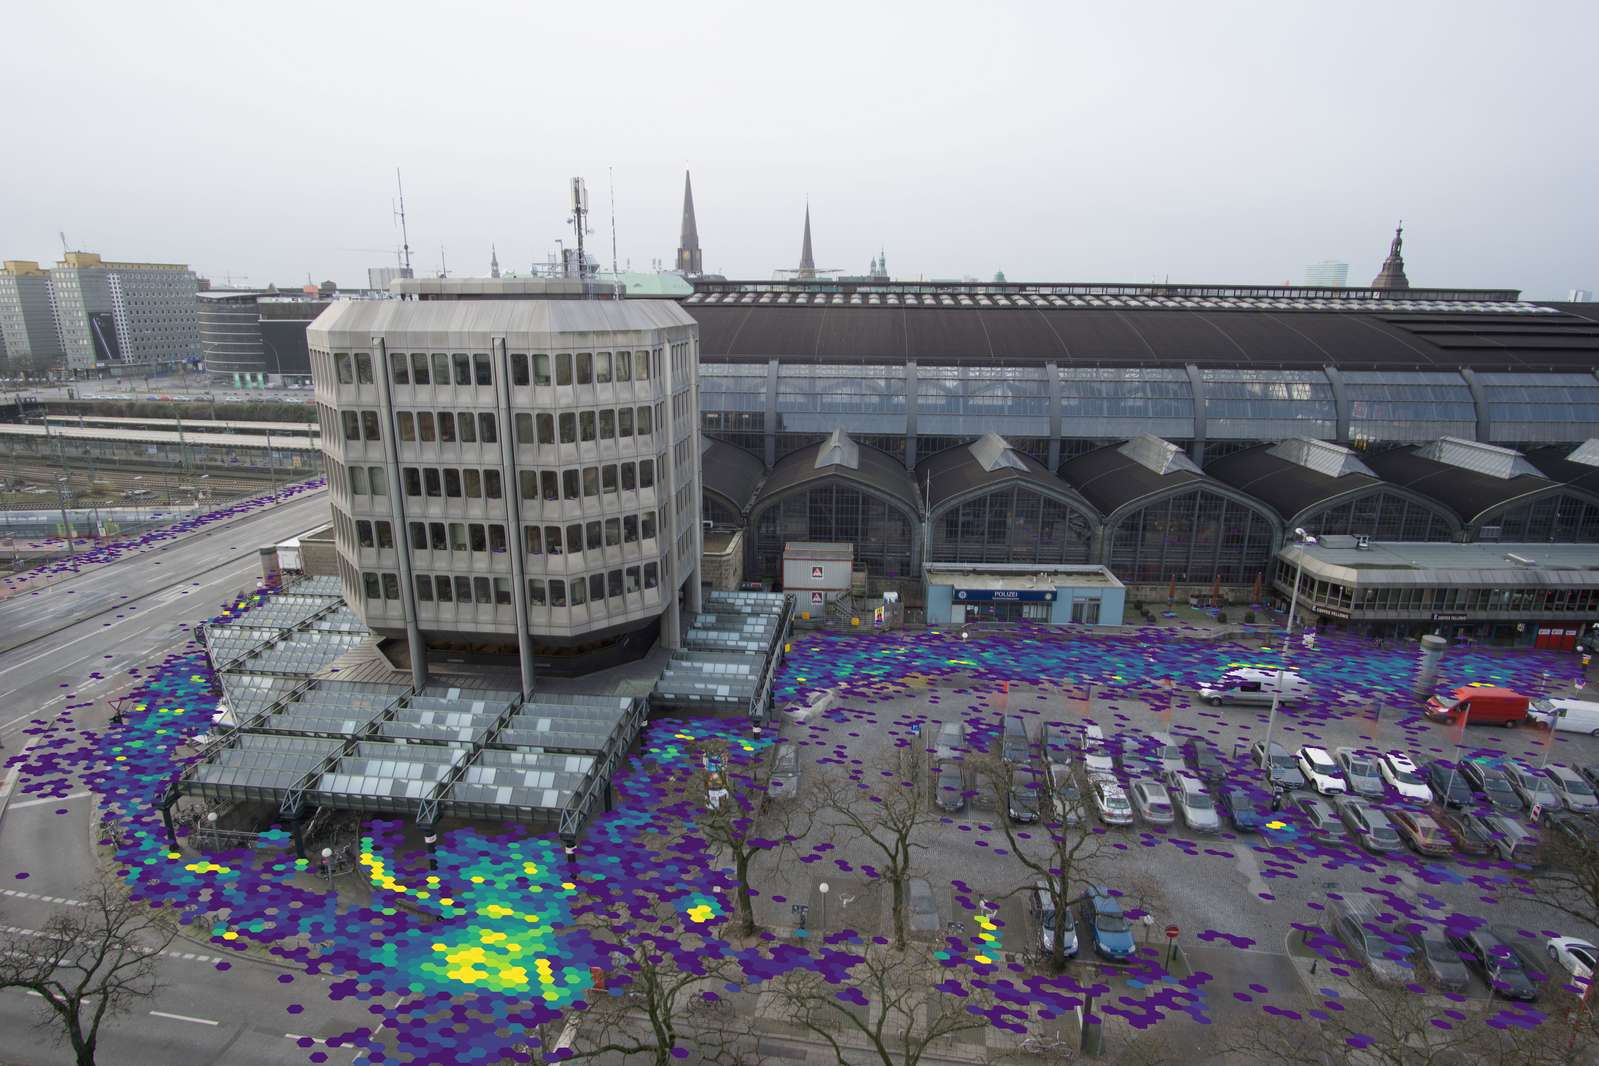
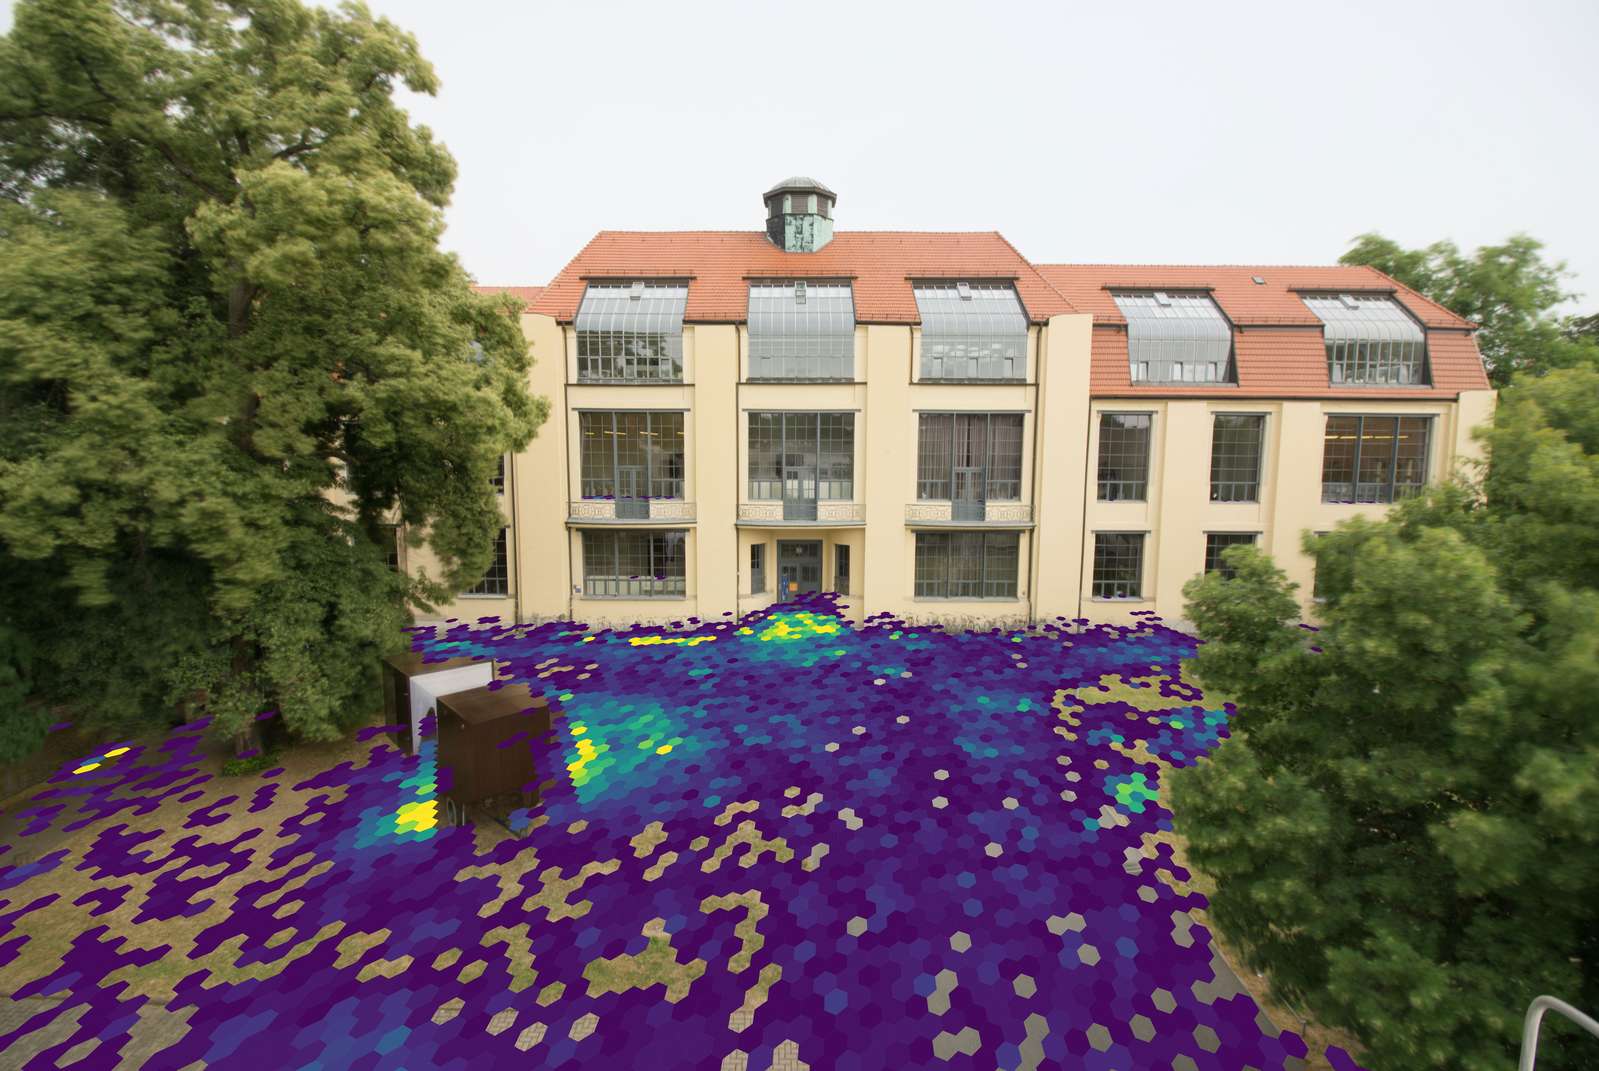
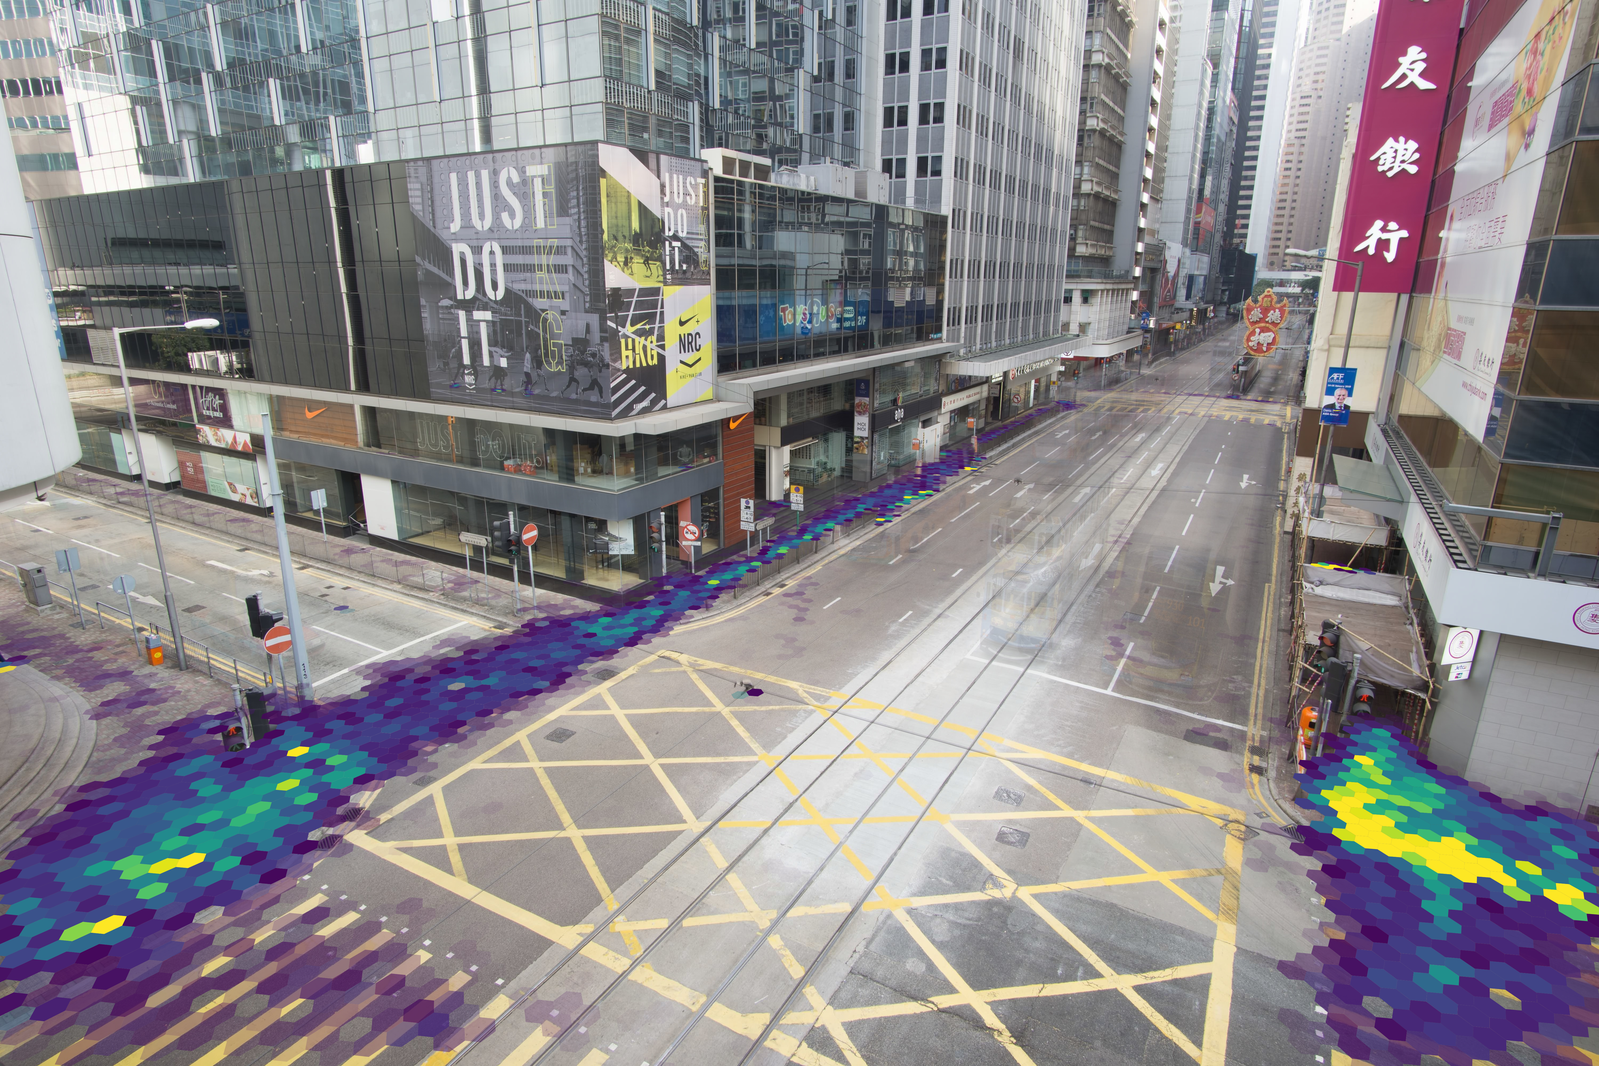
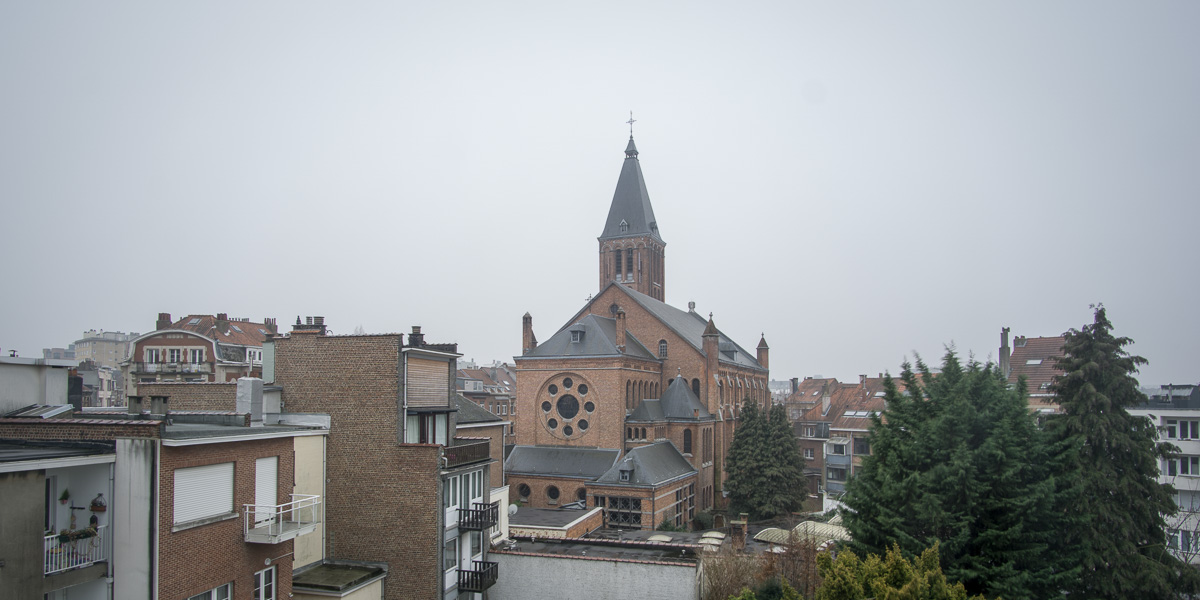
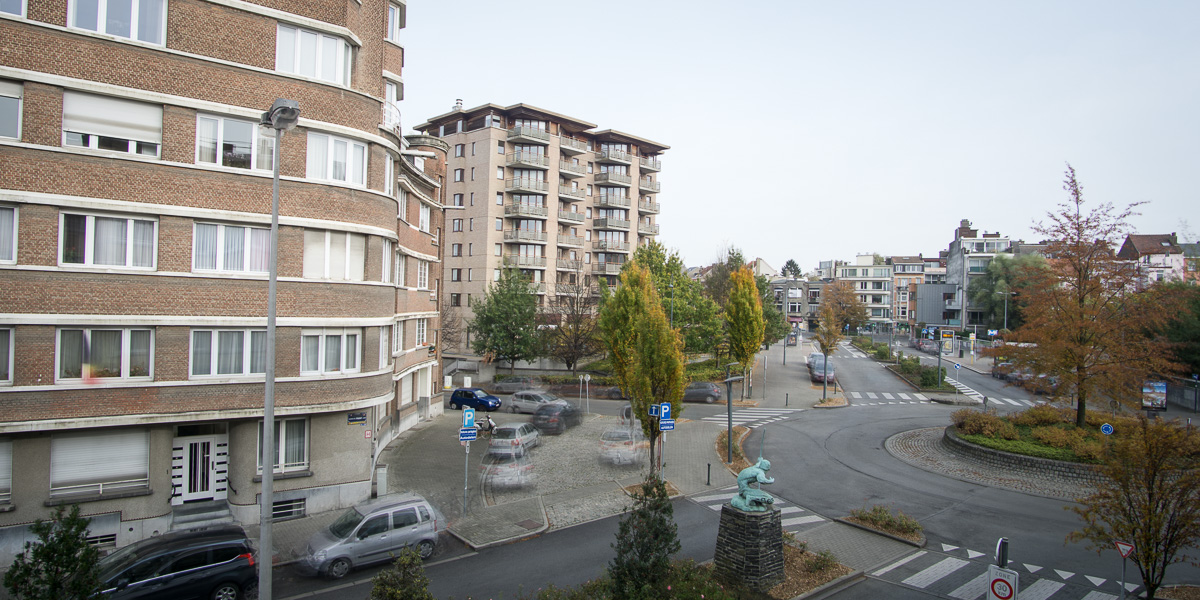

 ]]>
]]> ]]>
]]>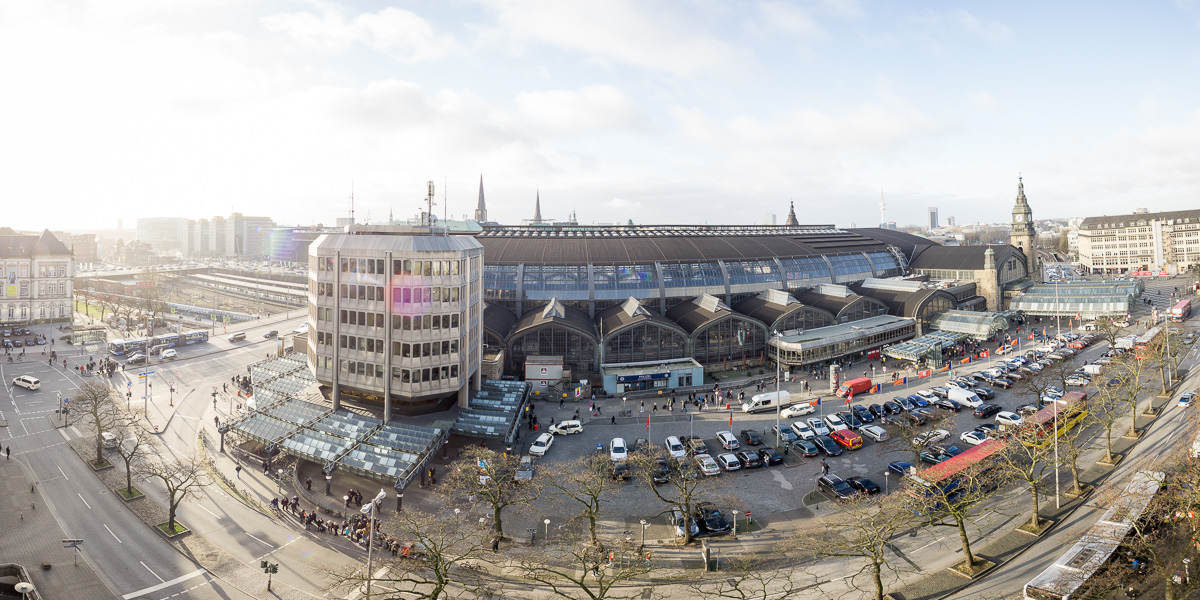 ]]>
]]>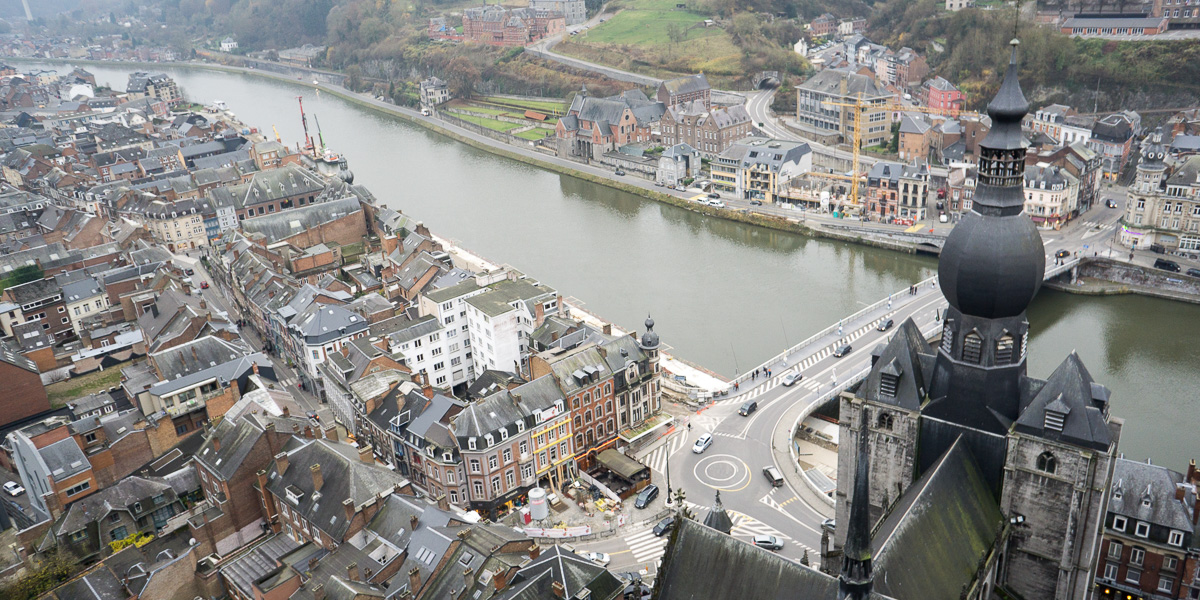 ]]>
]]>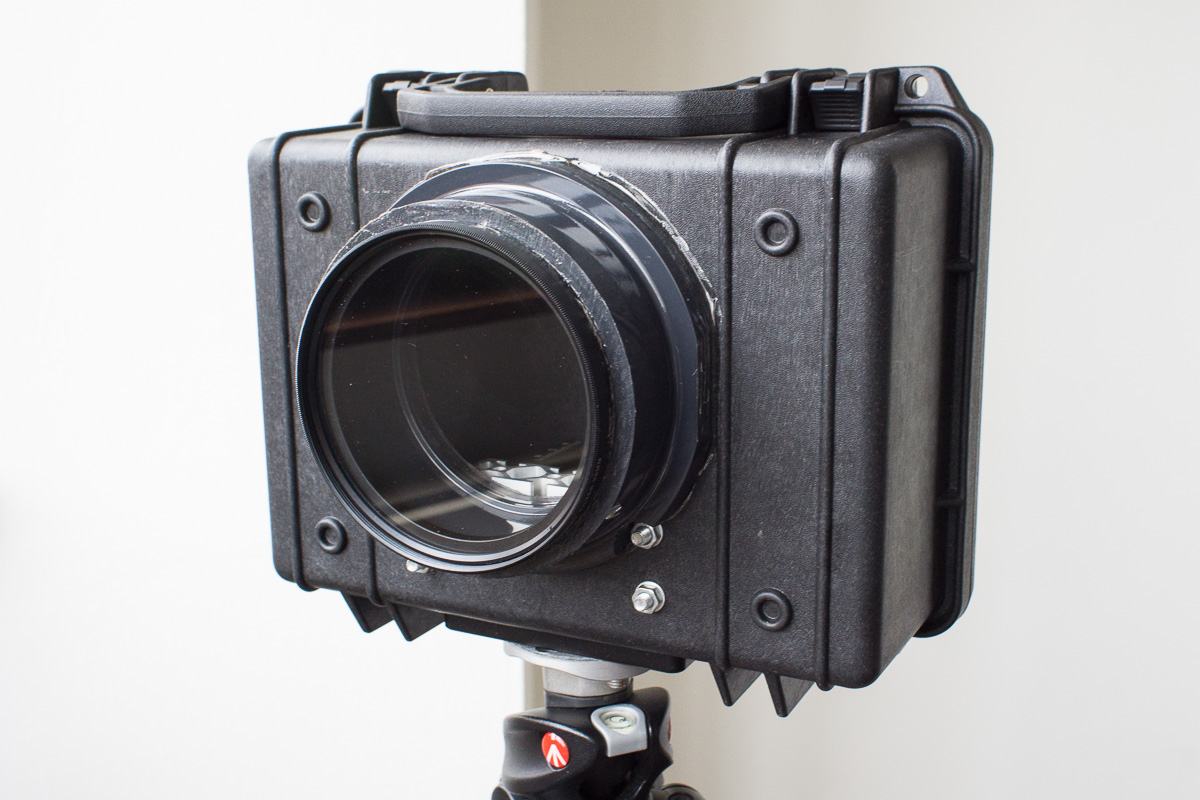
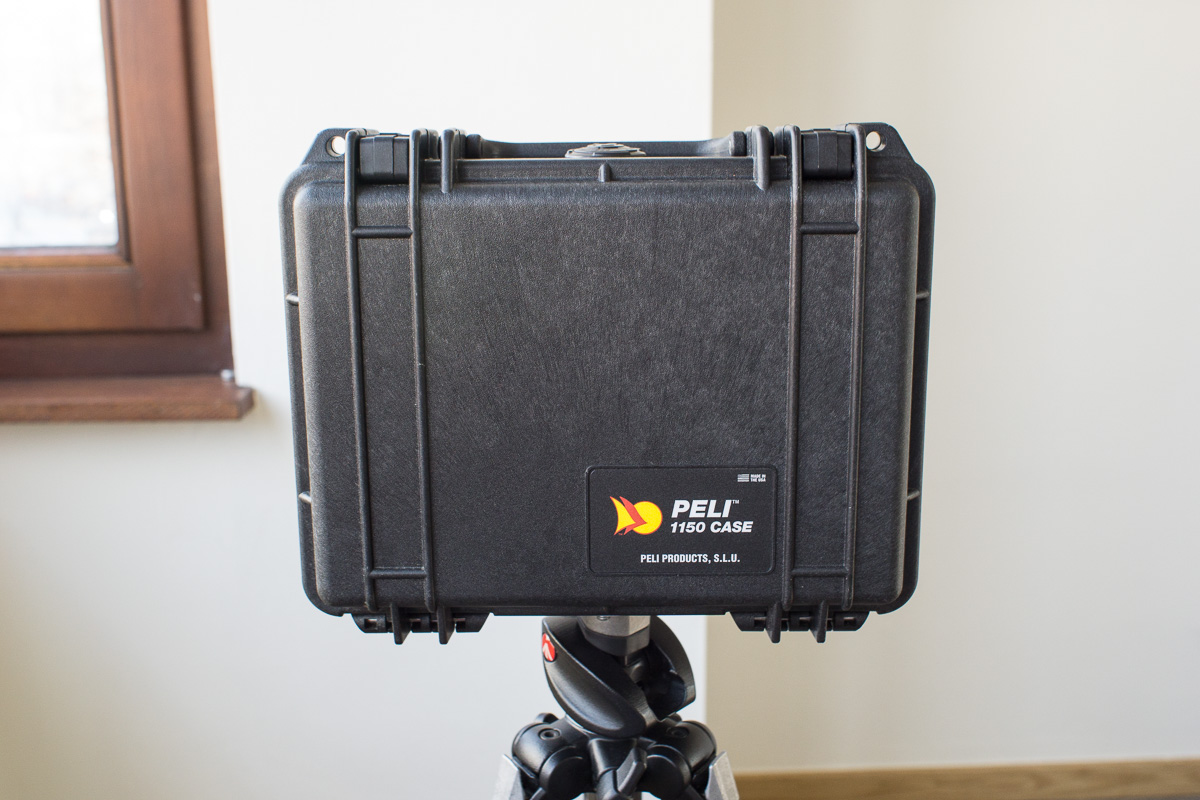
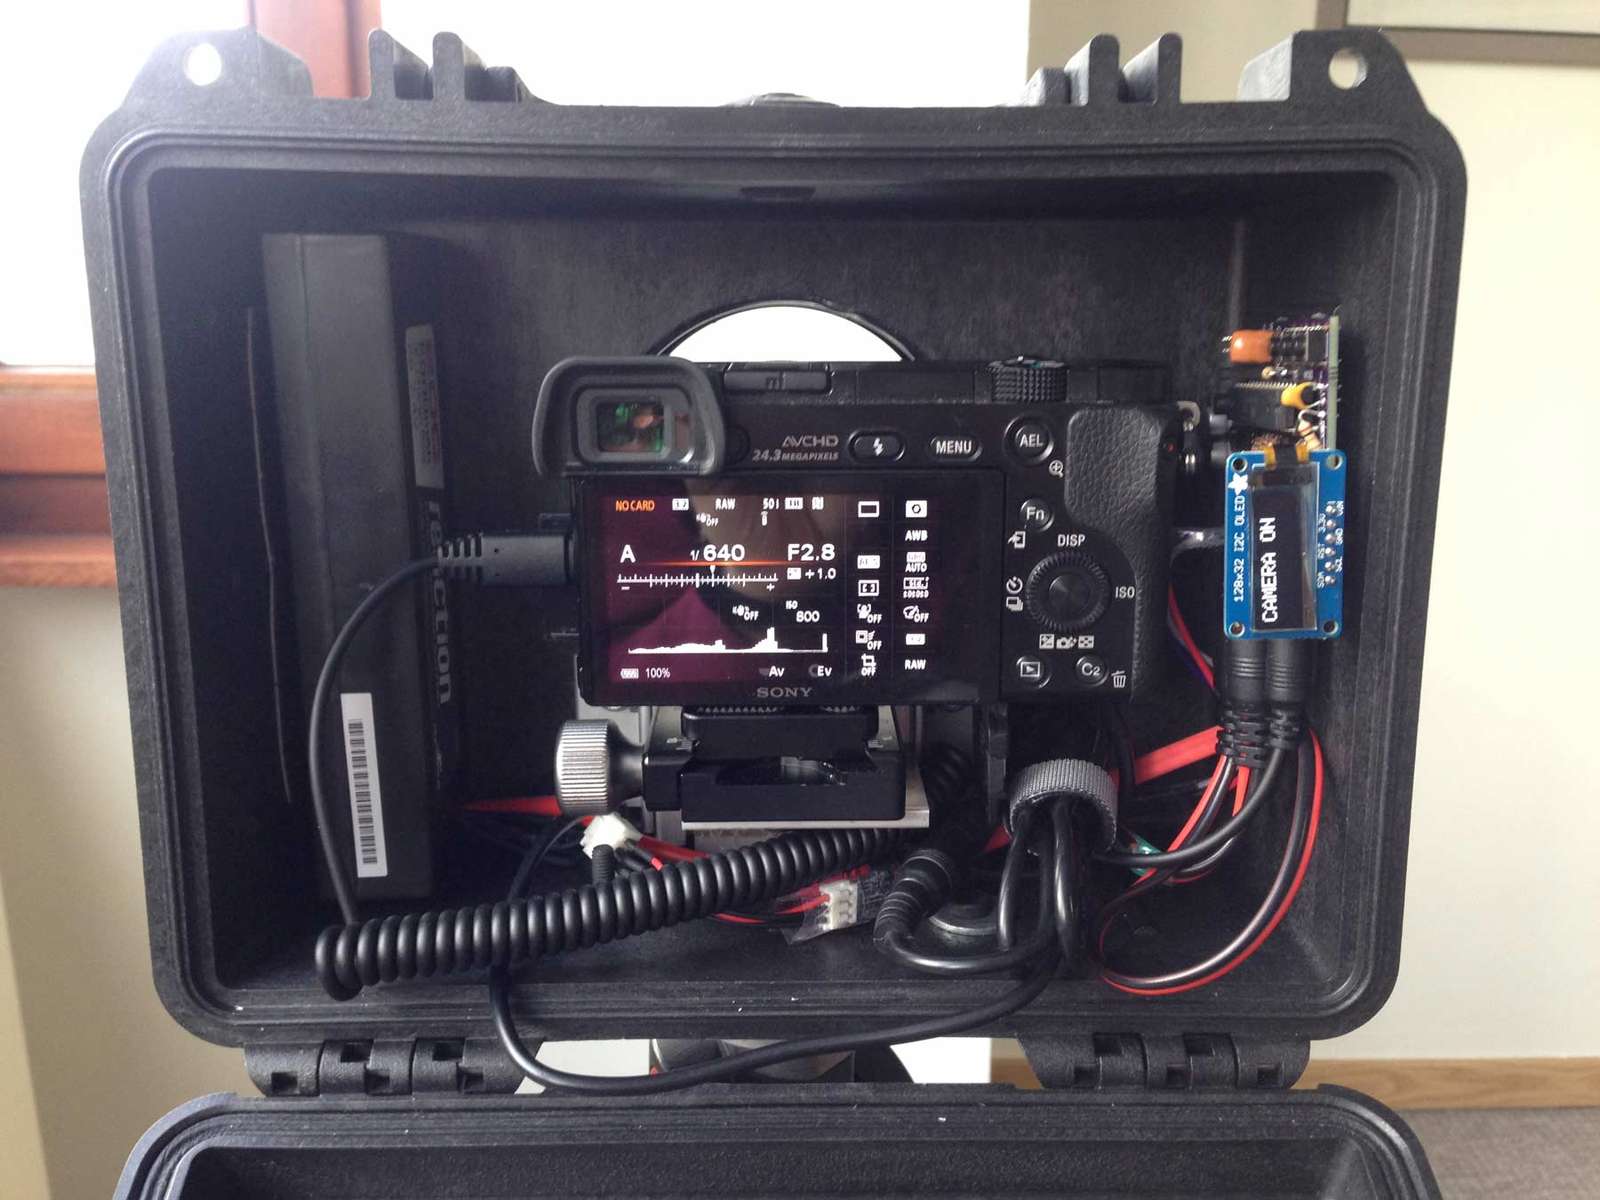
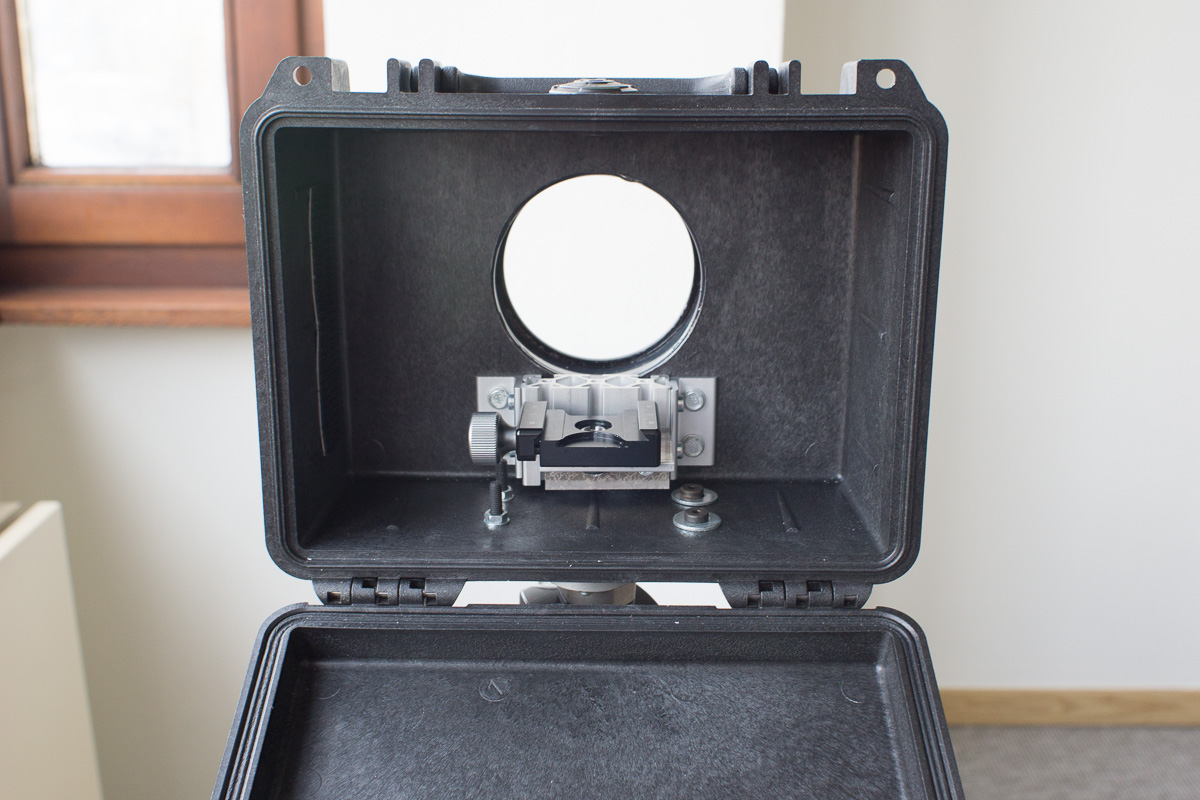
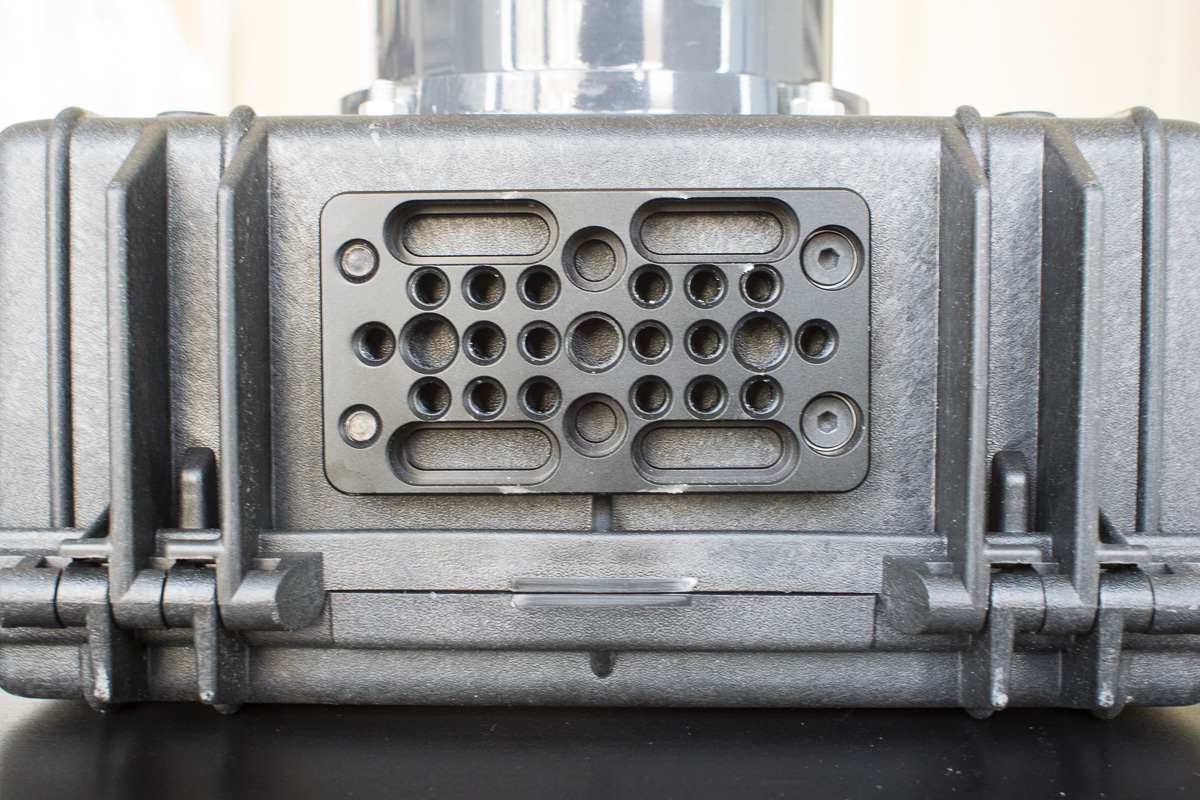
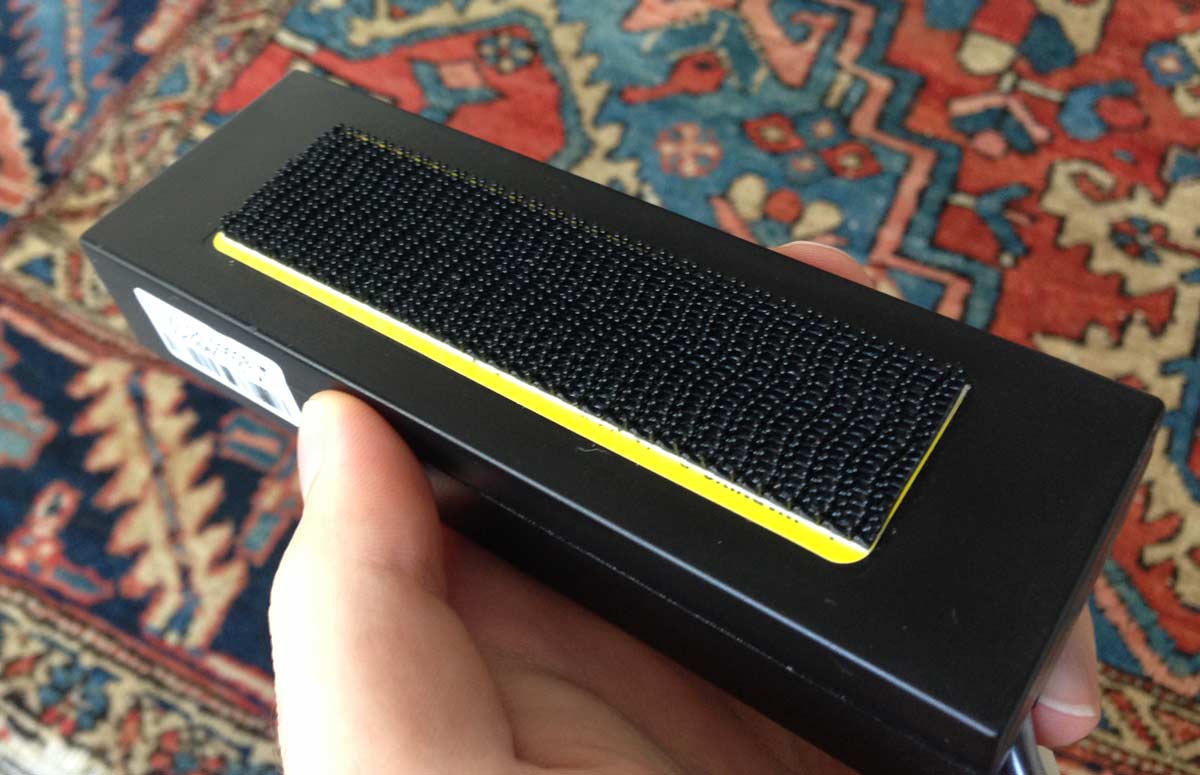
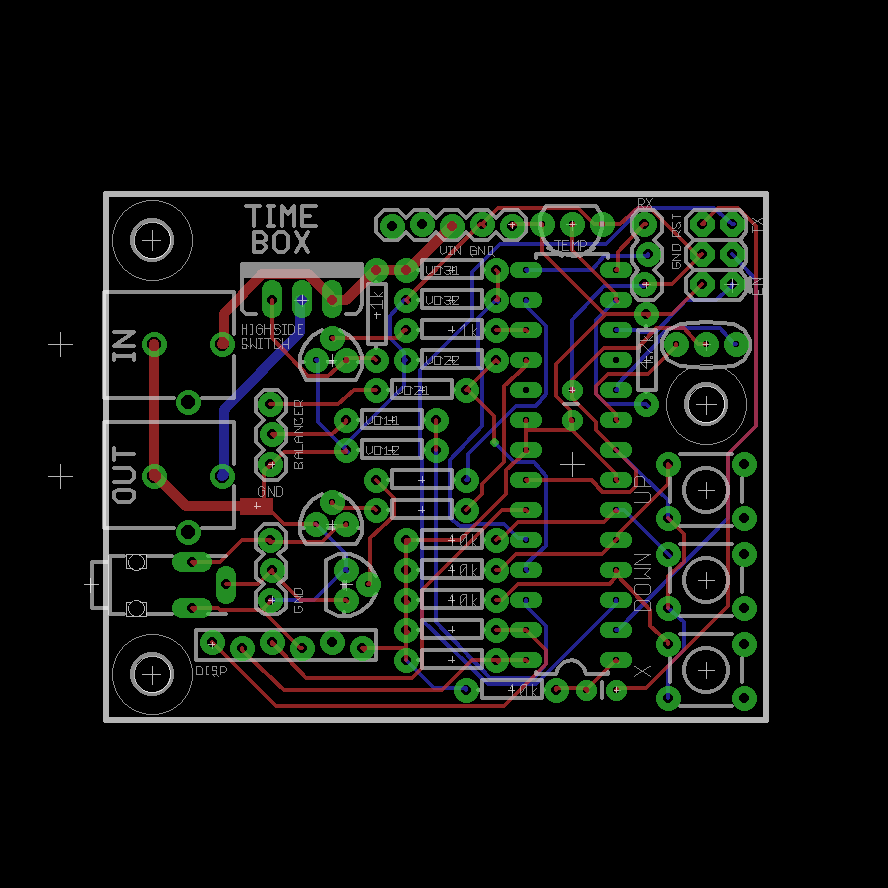
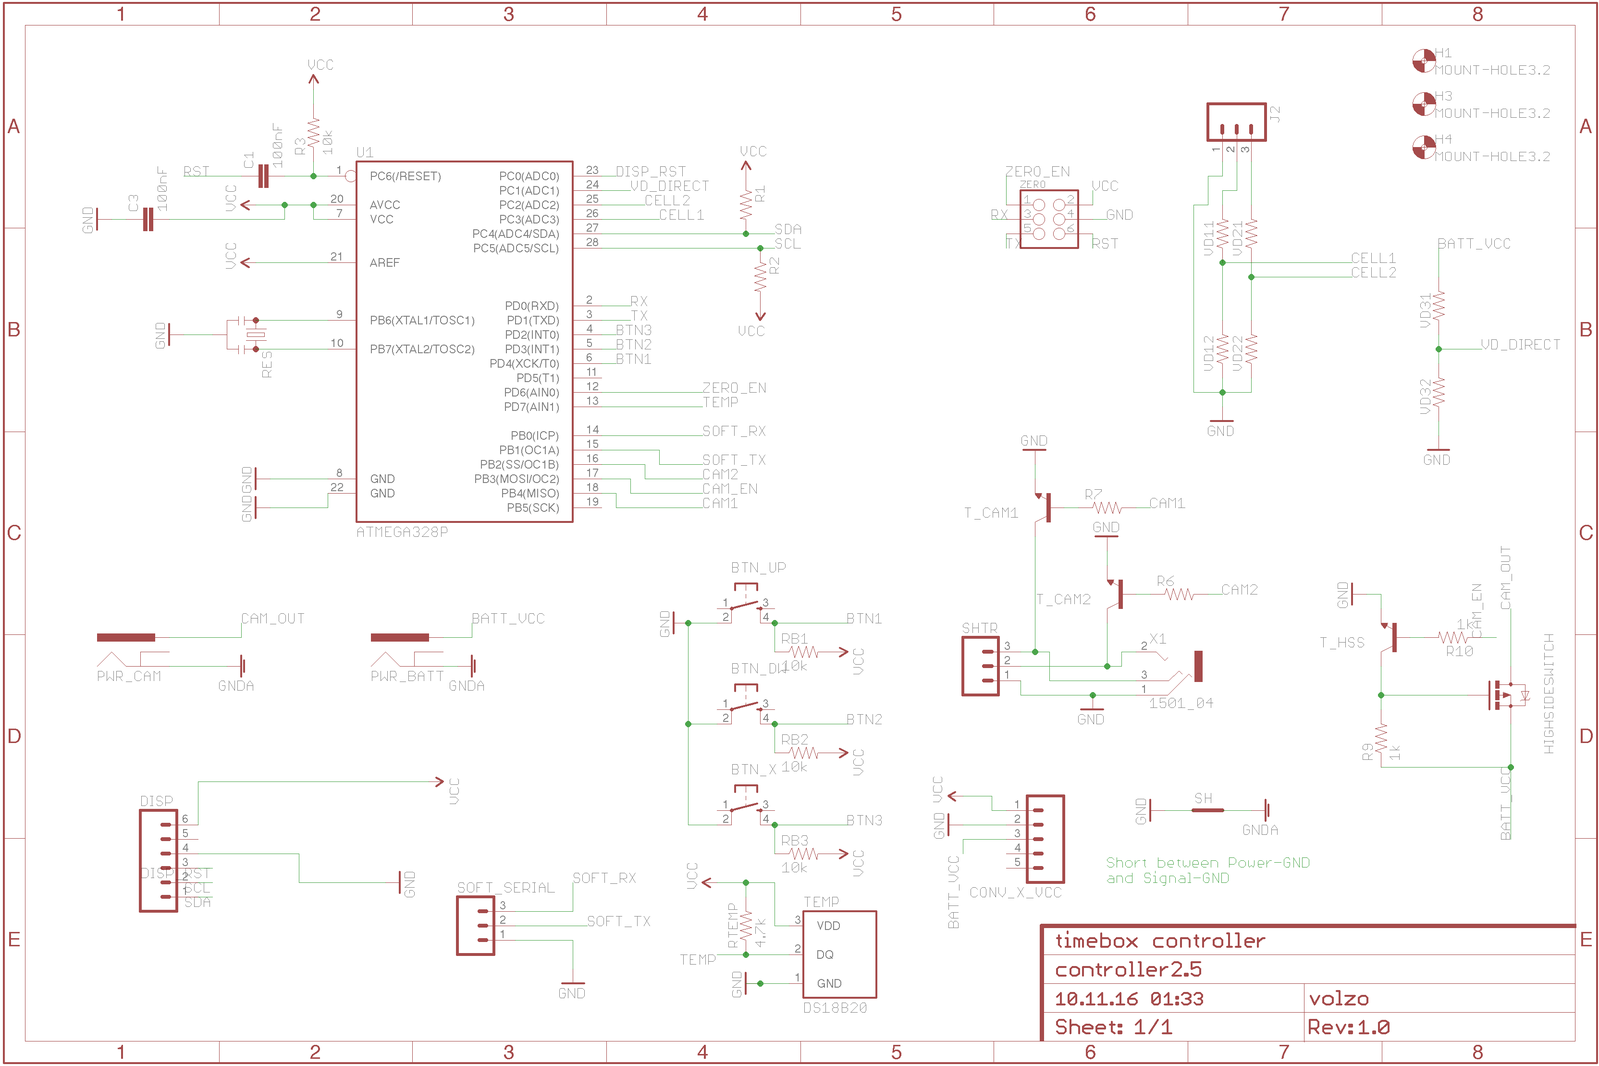
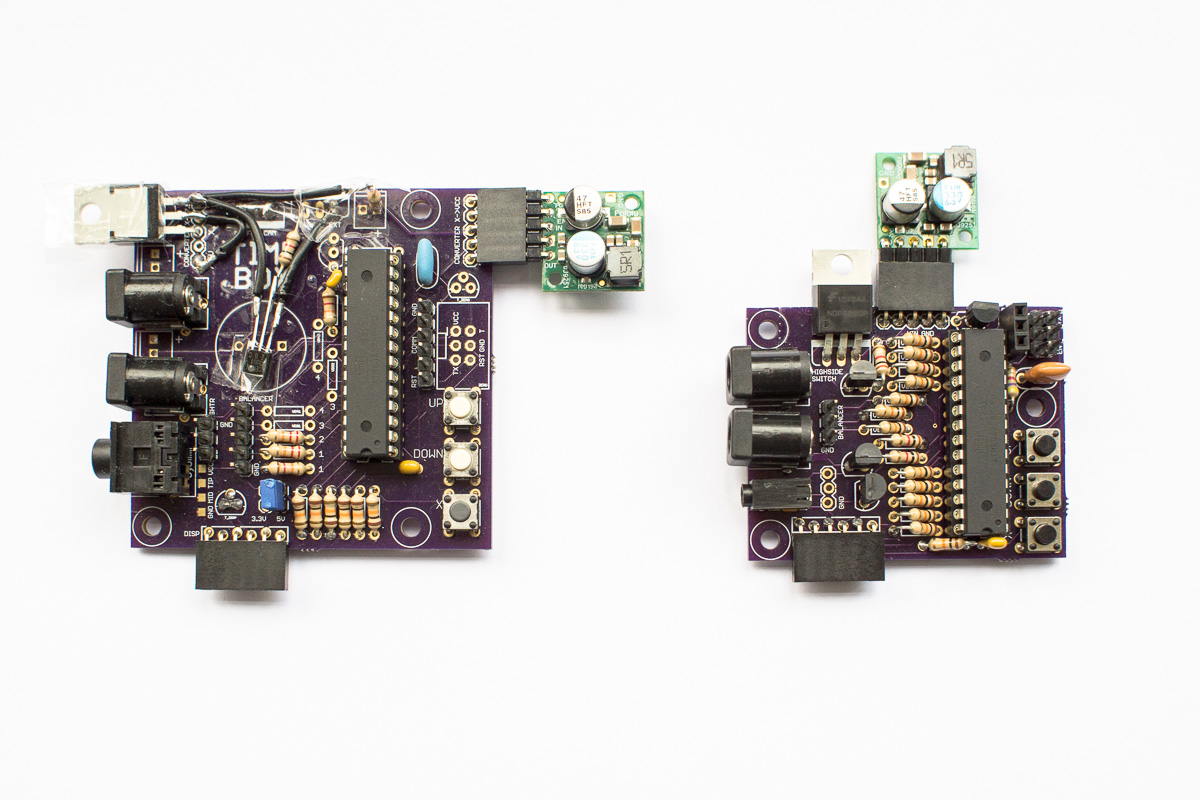
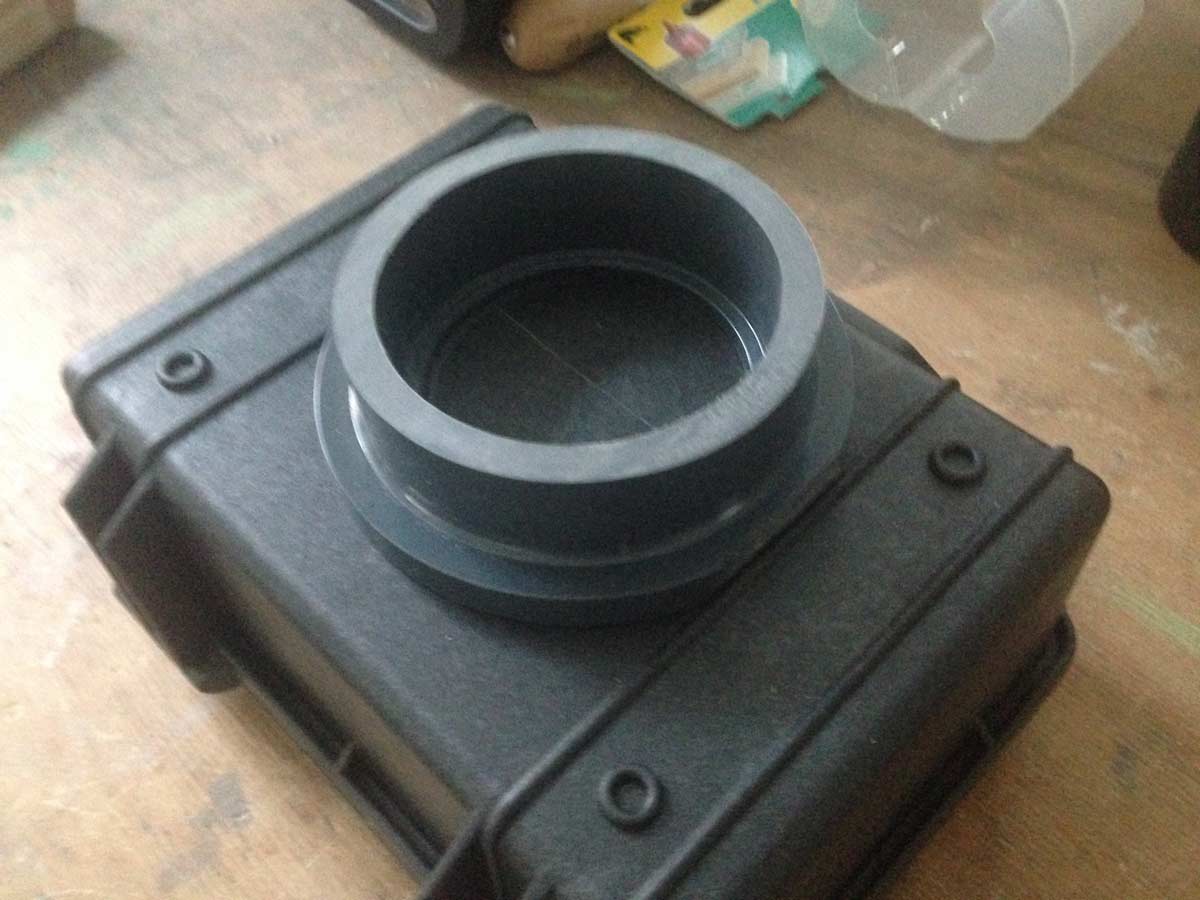
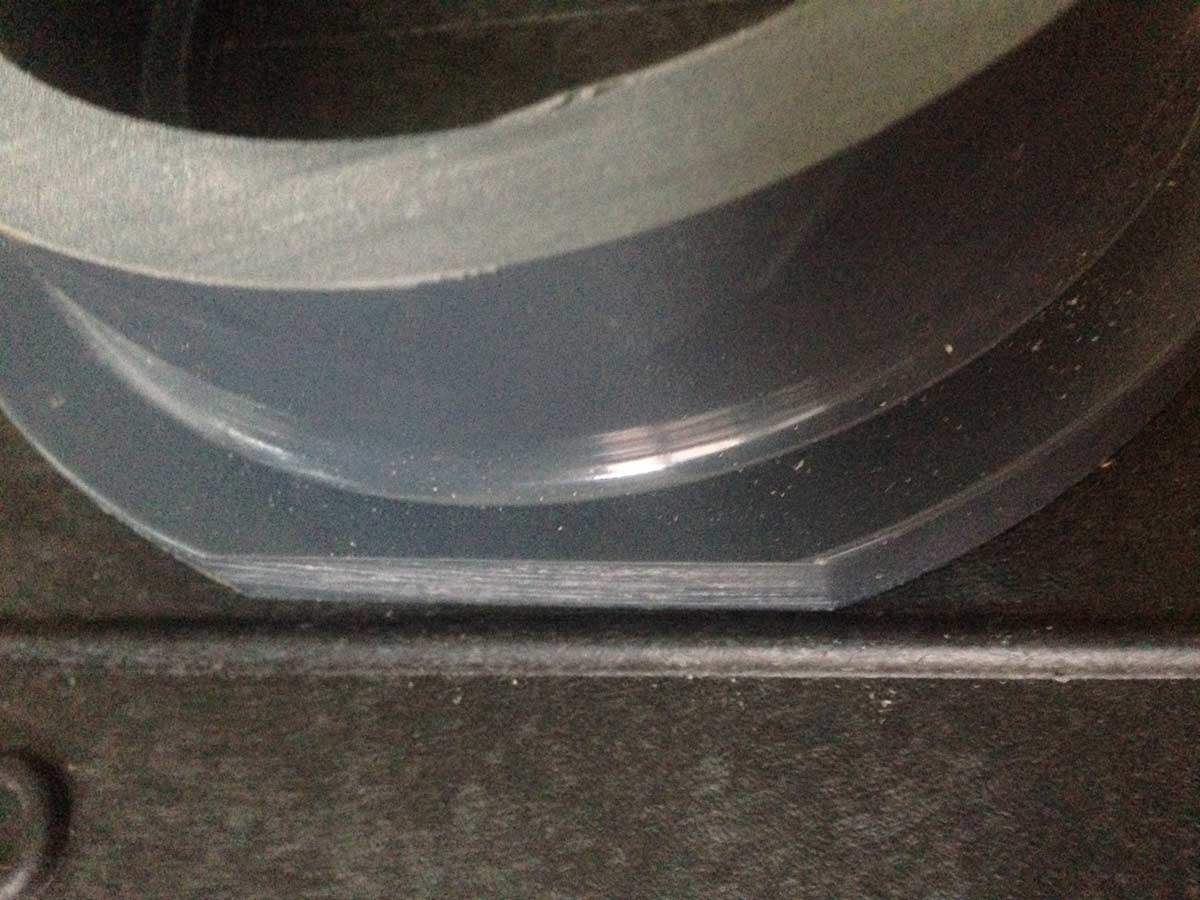
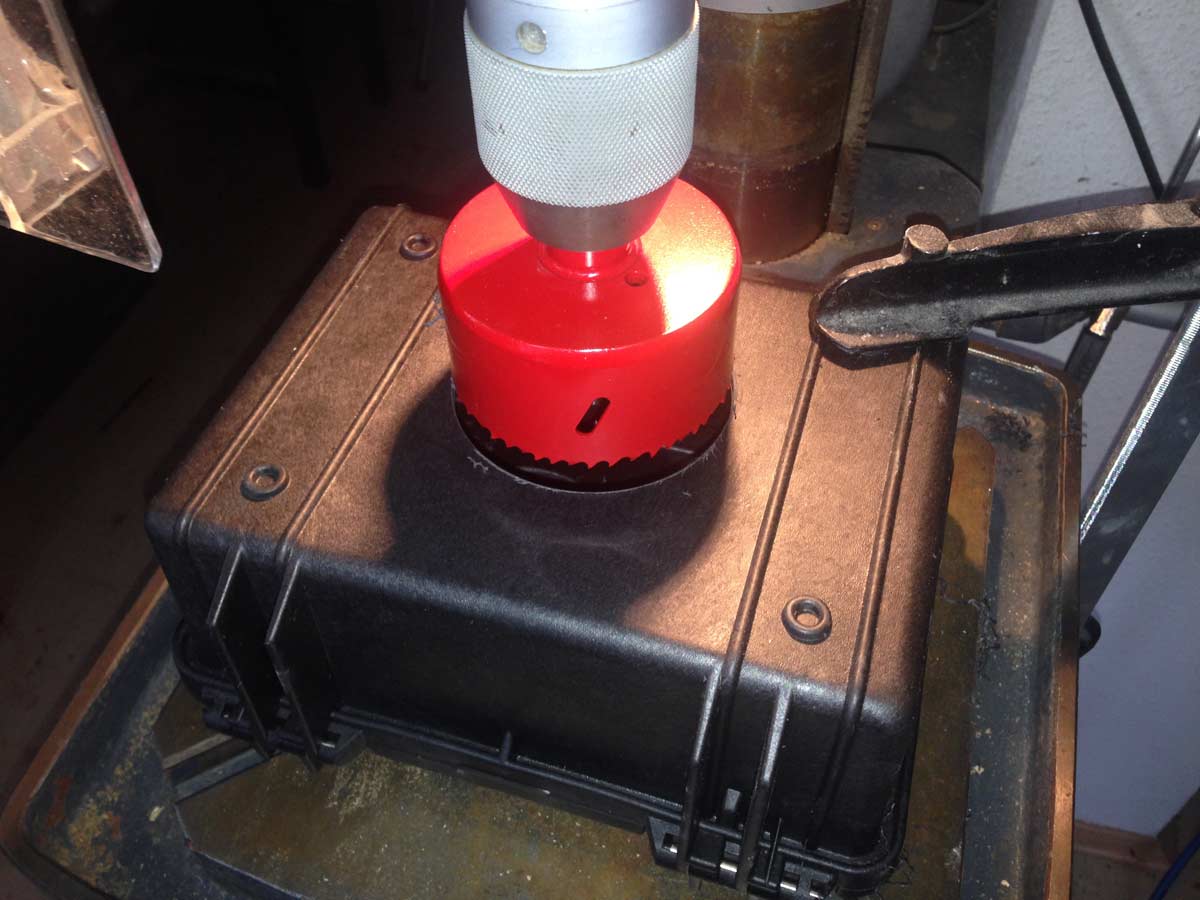
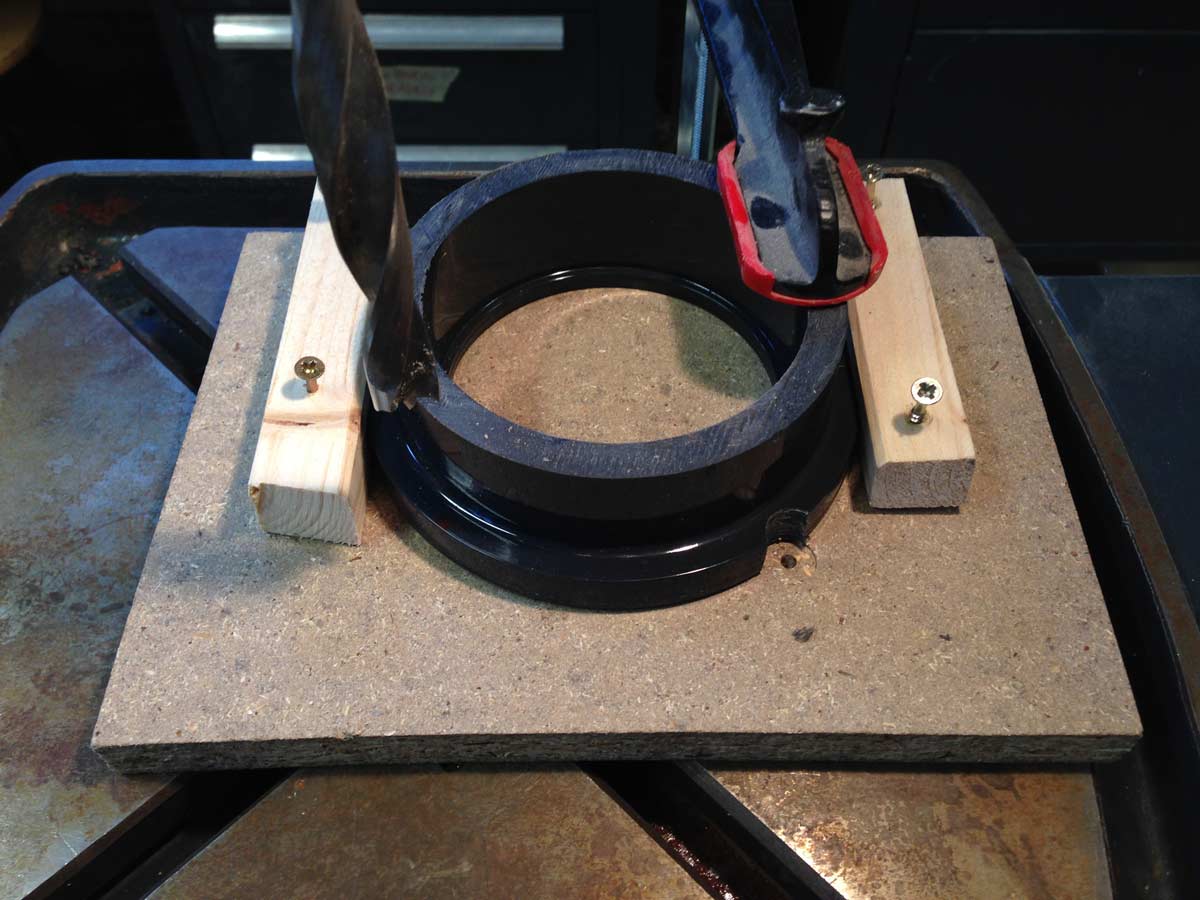
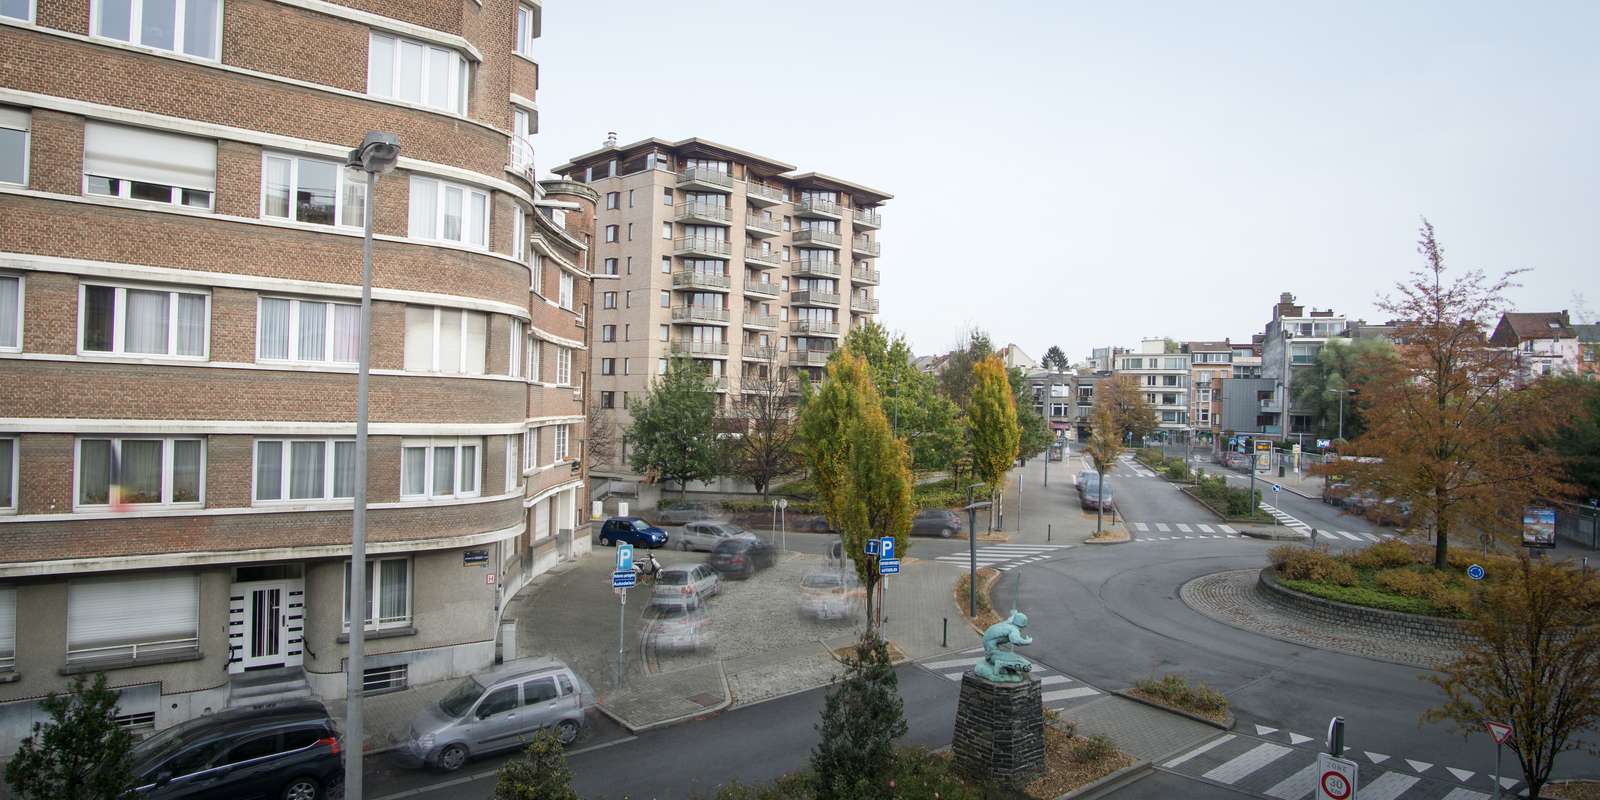
 ]]>
]]>

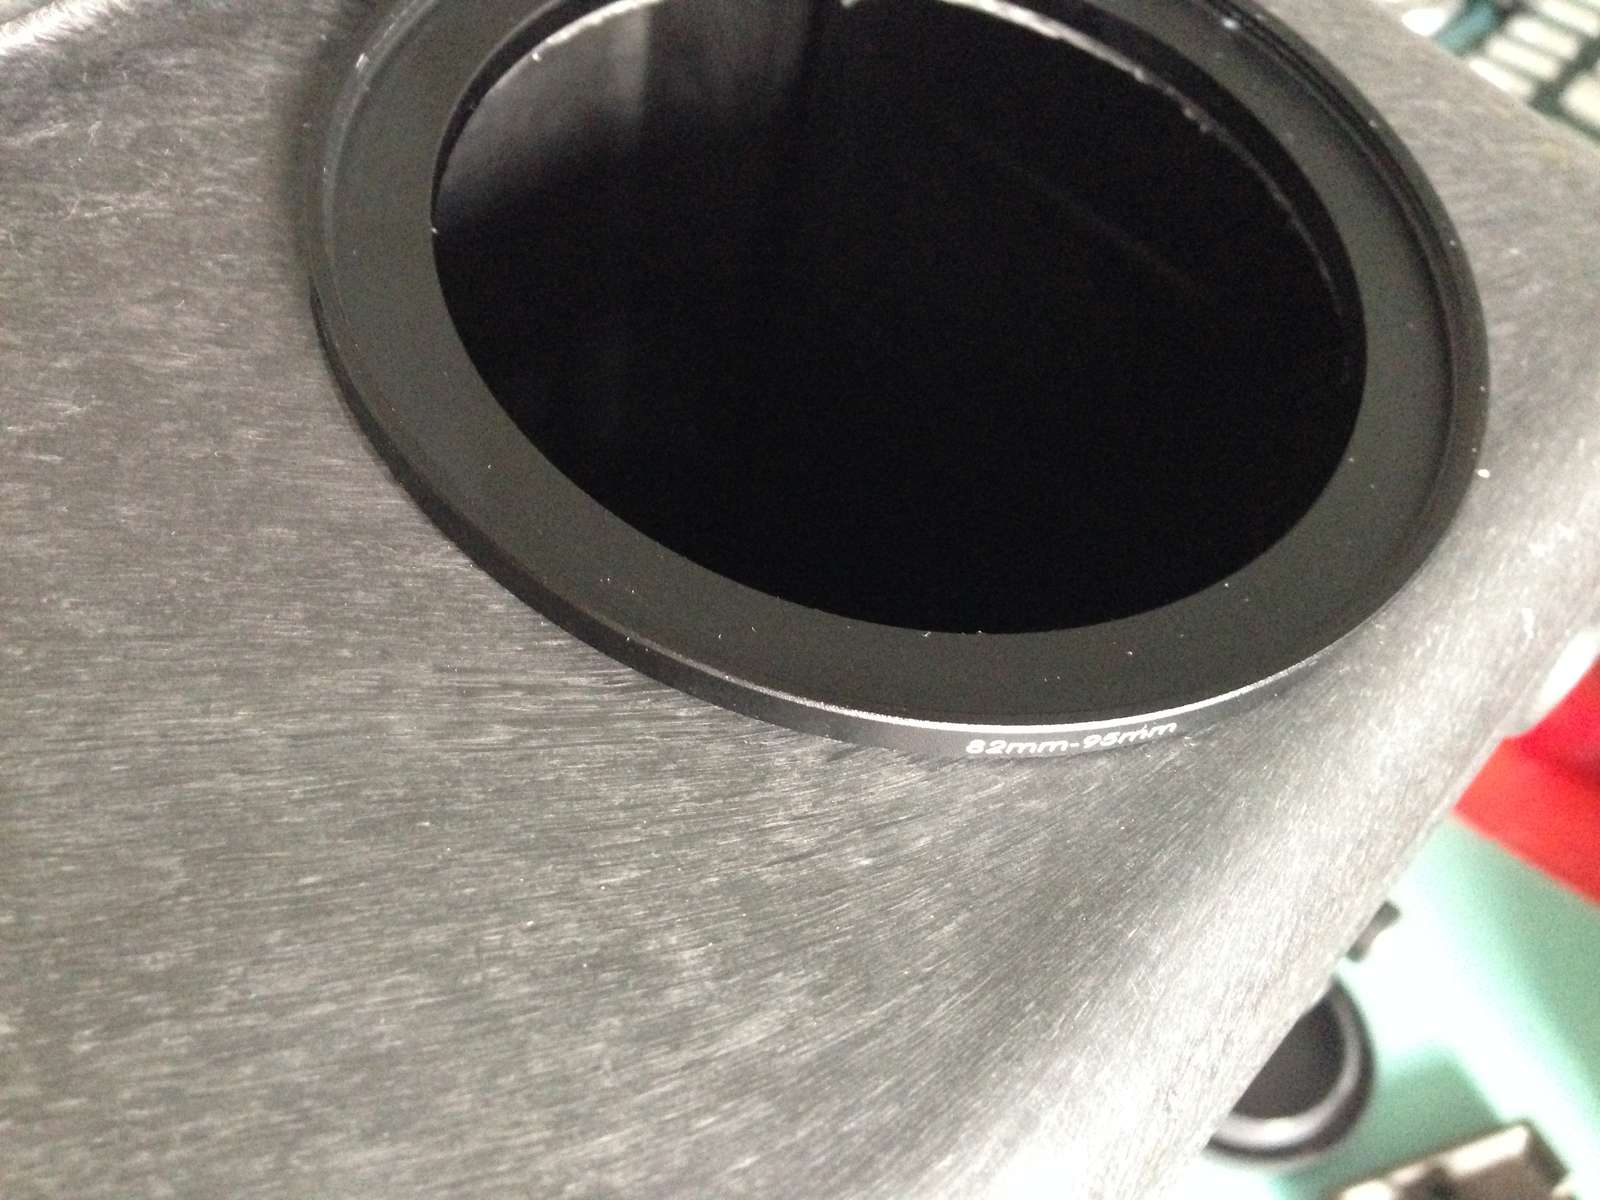
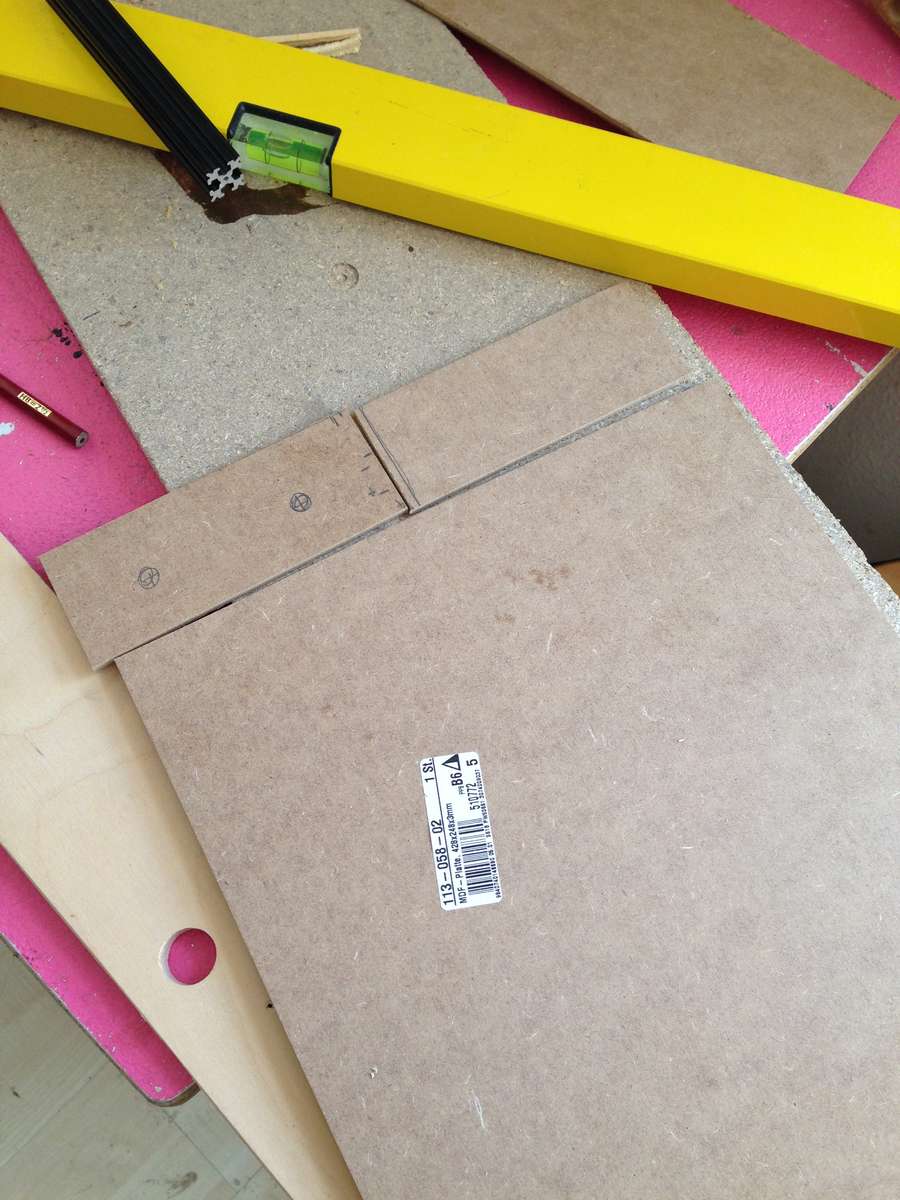
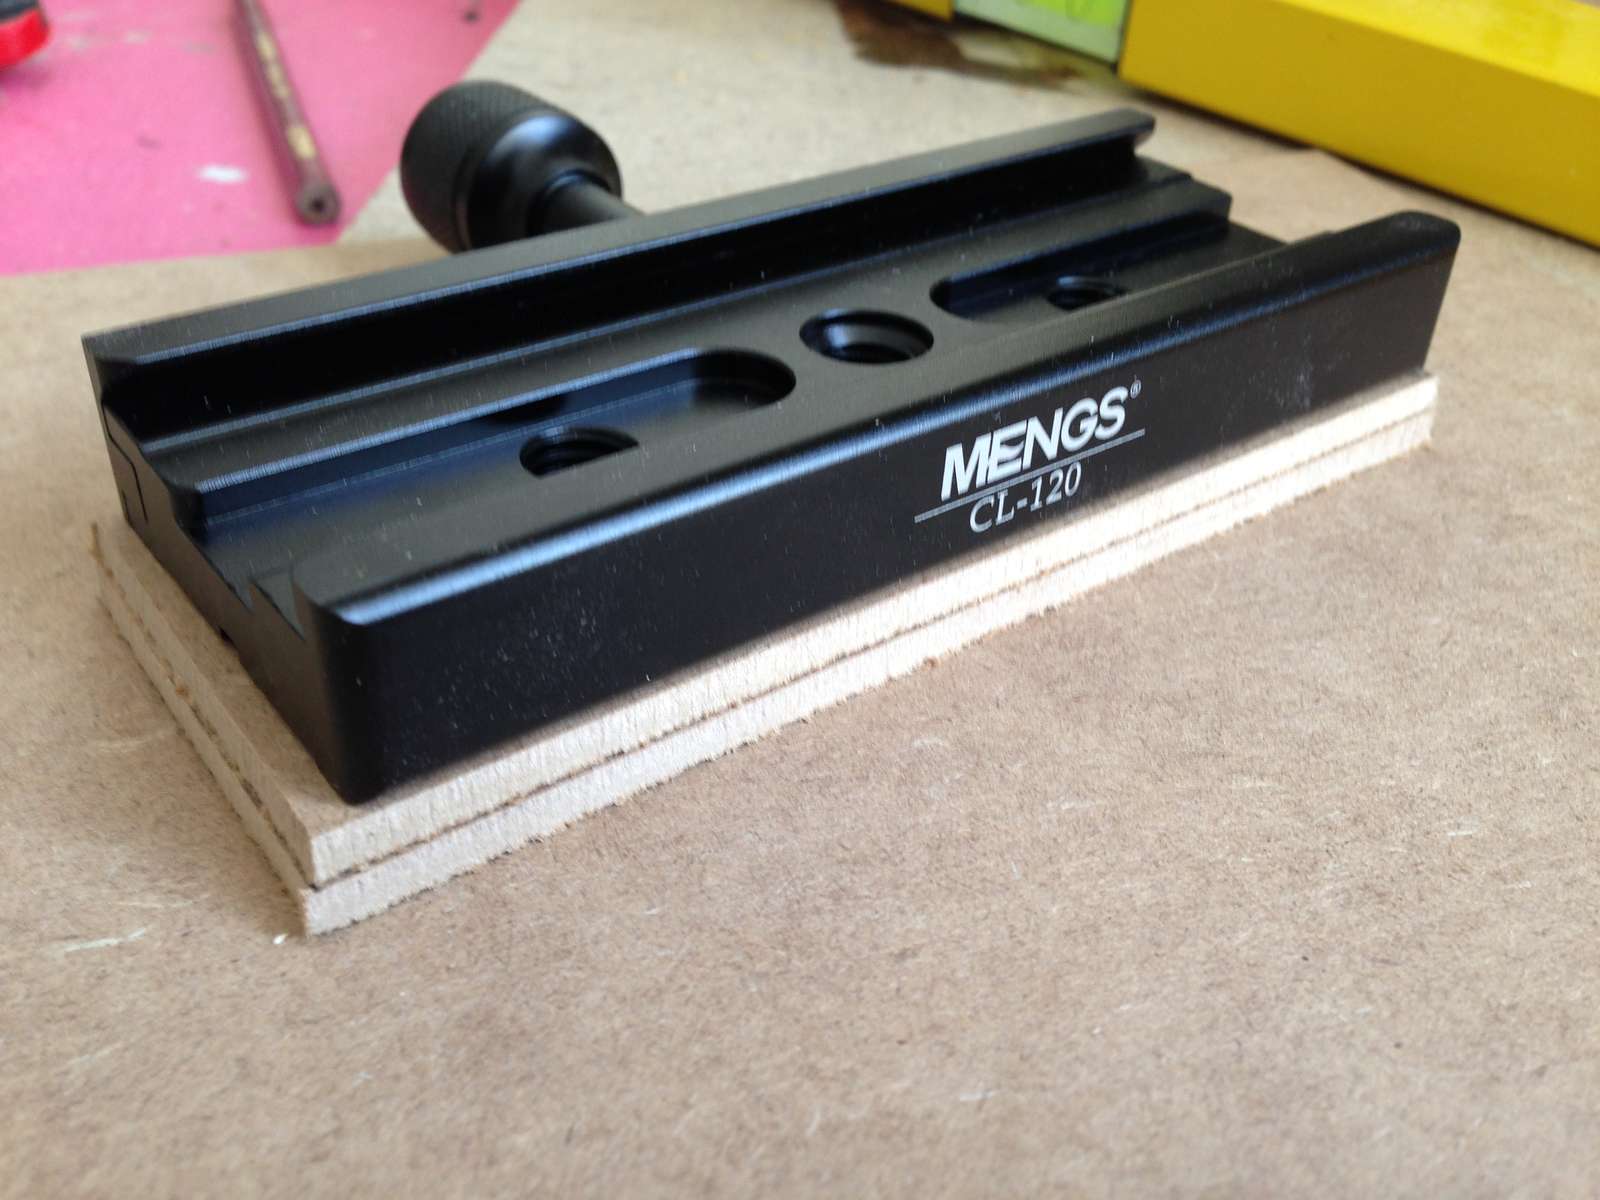
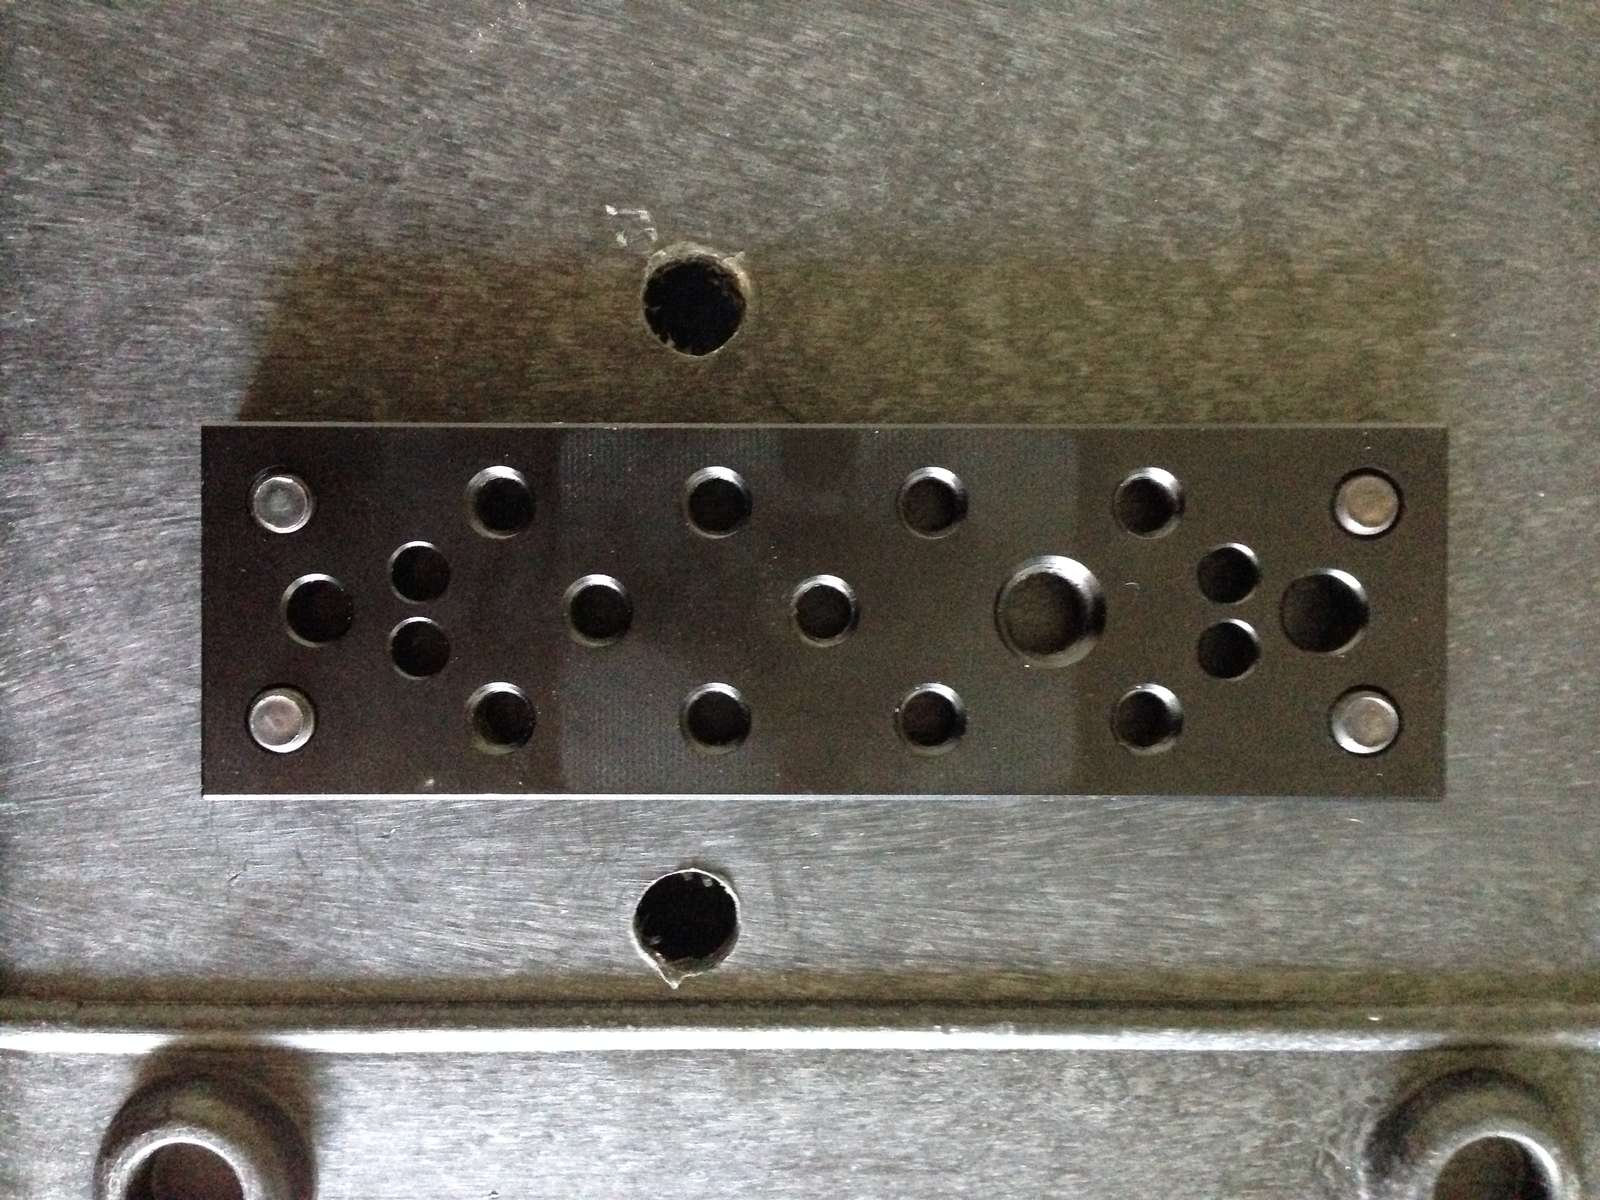
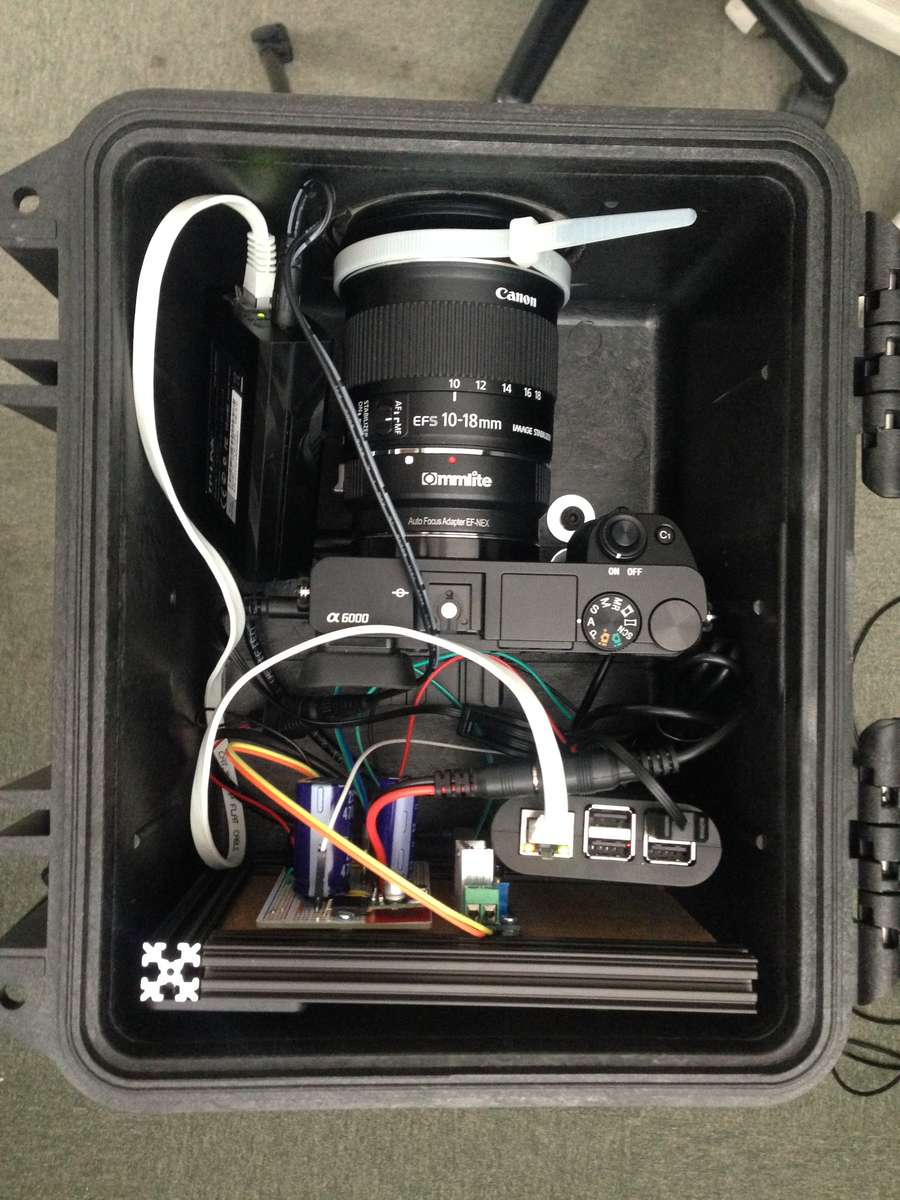
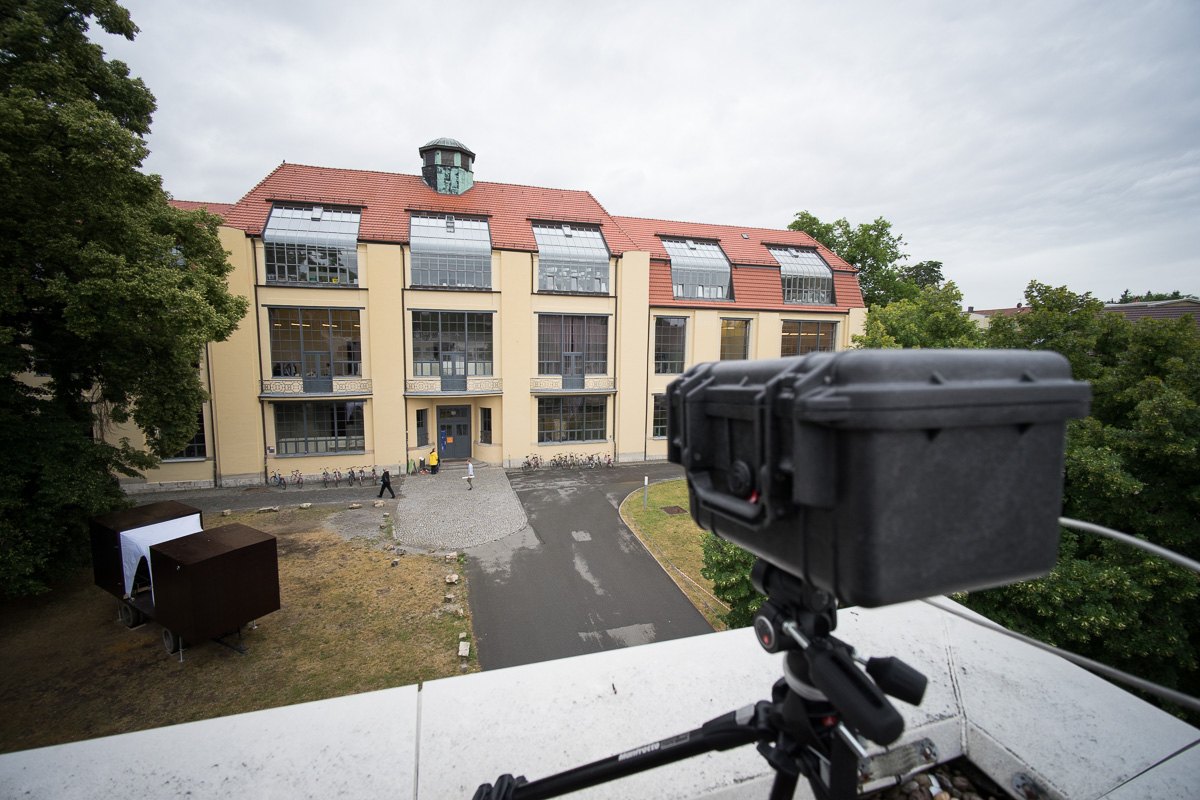 ]]>
]]>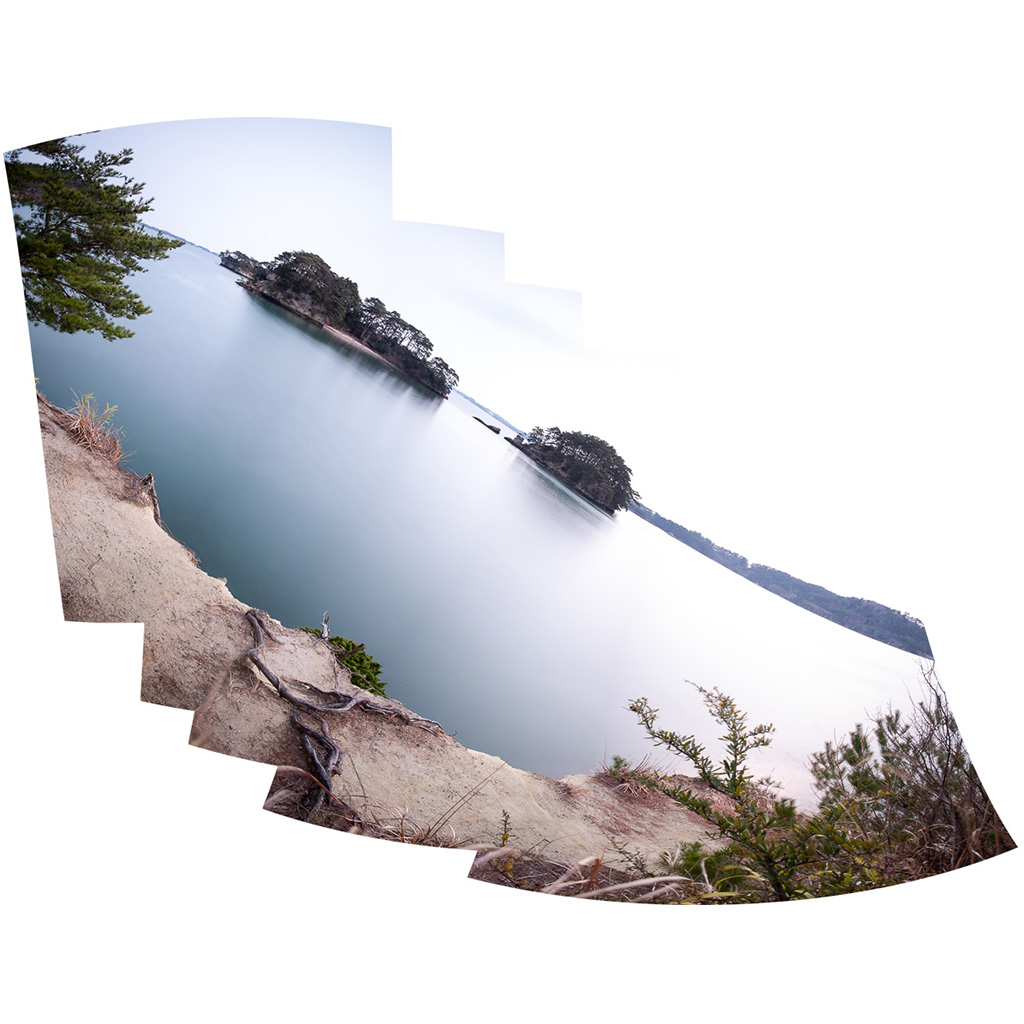 ]]>
]]>
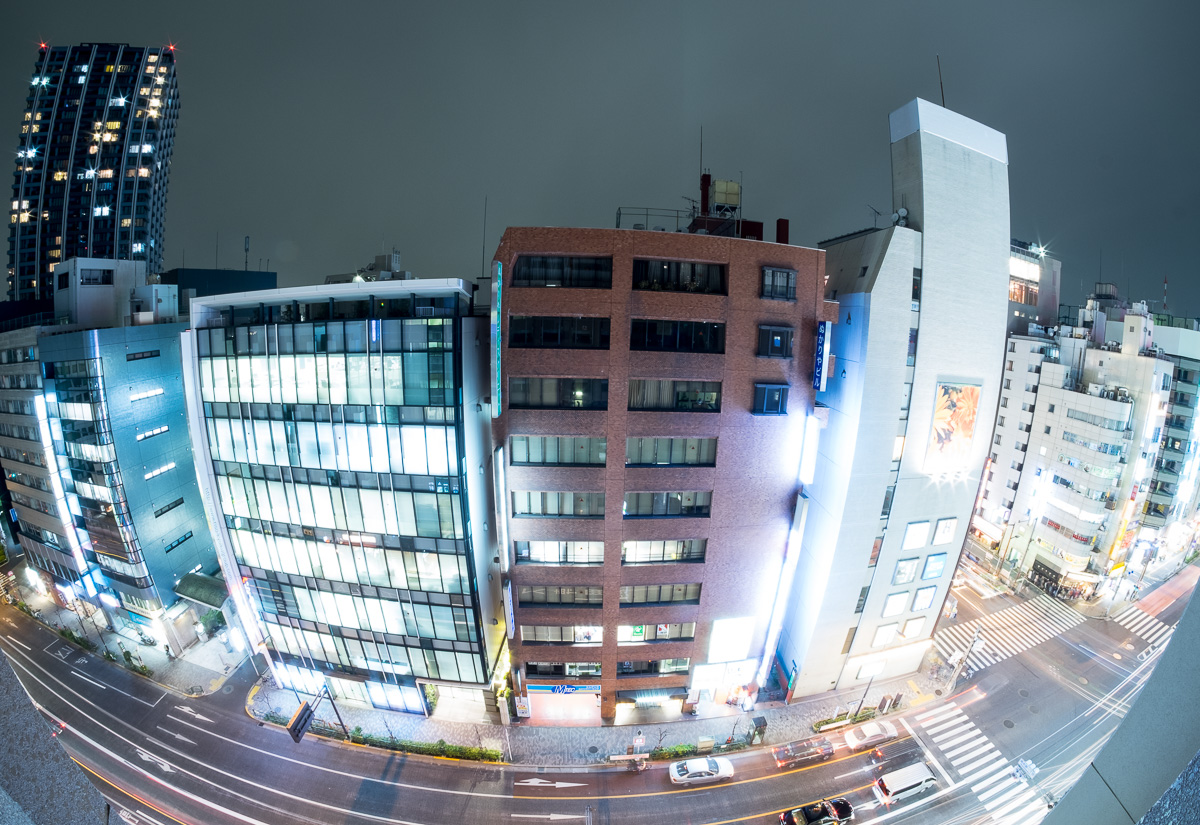

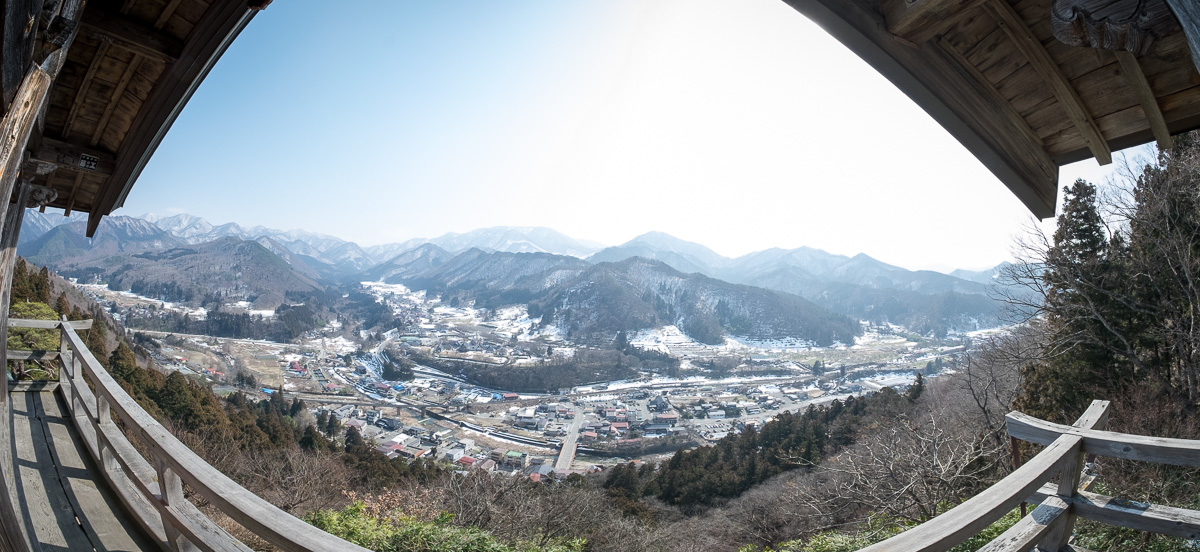
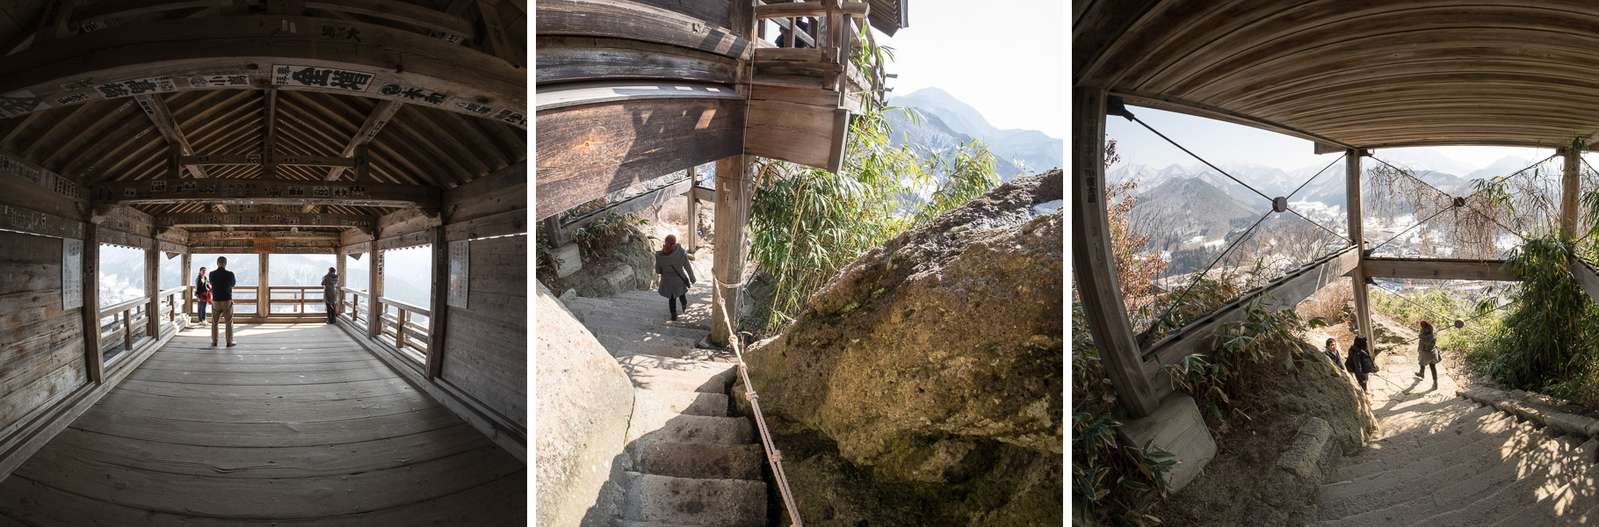
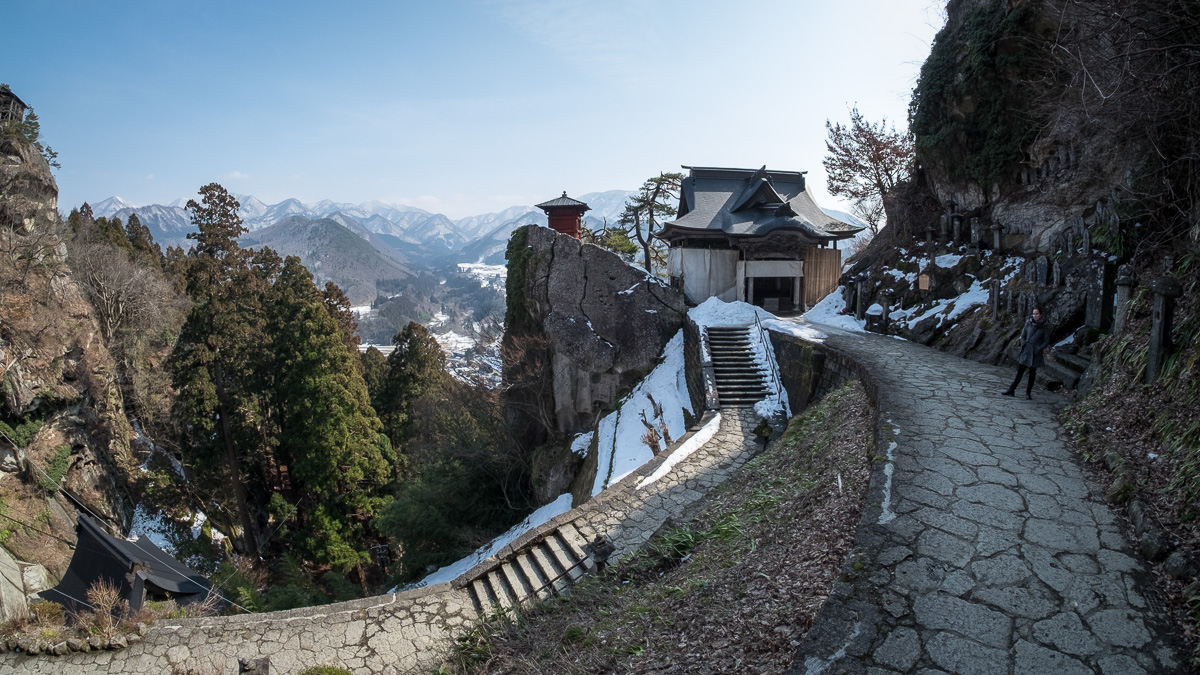
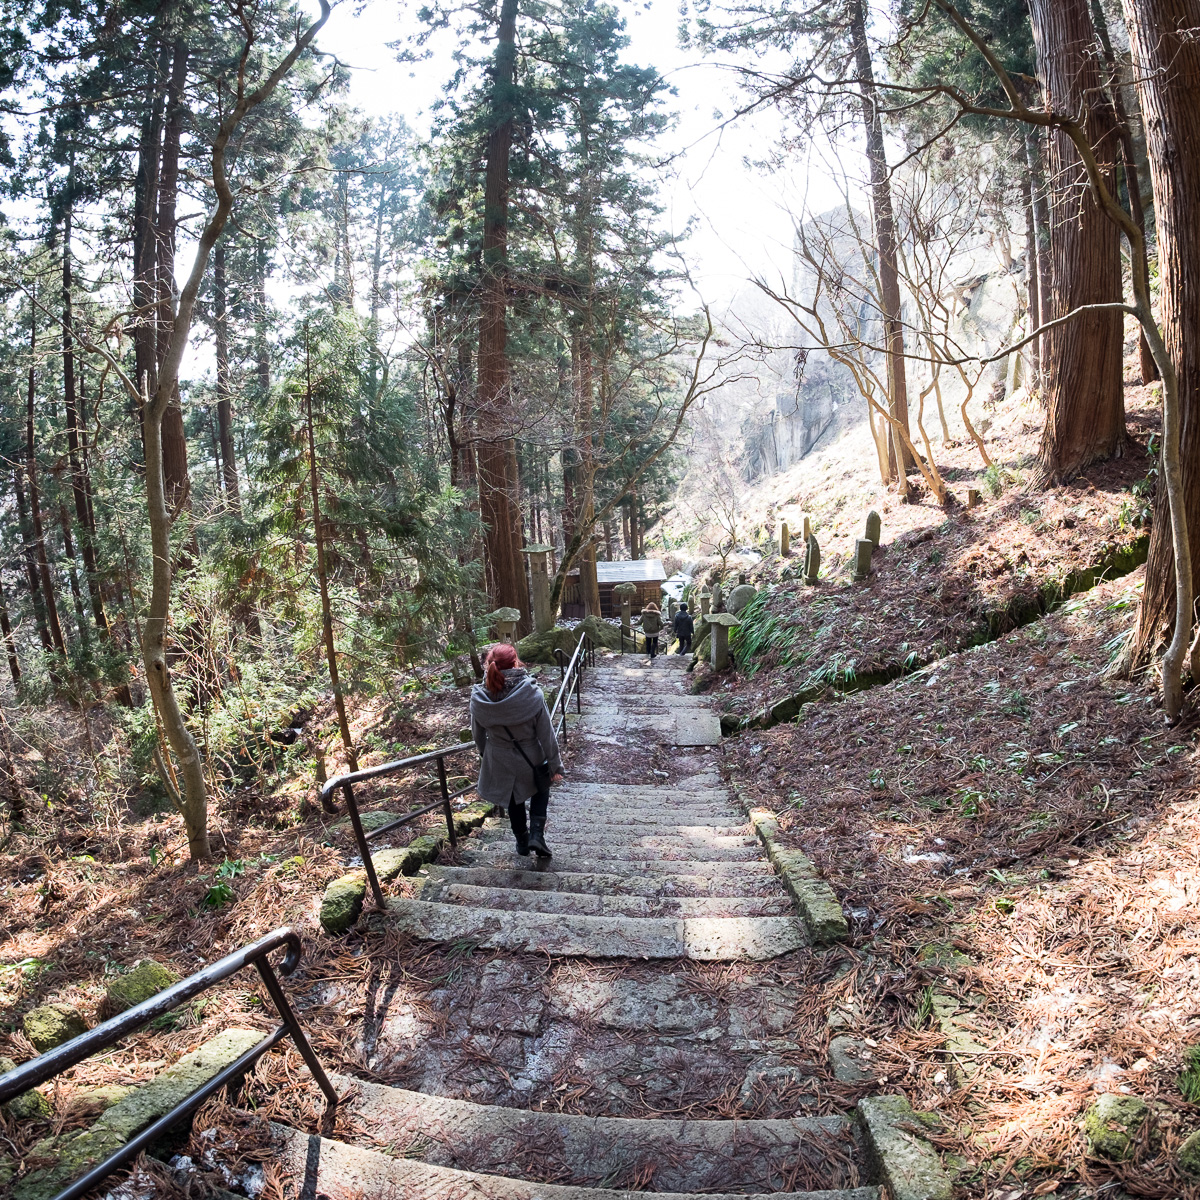 ]]>
]]>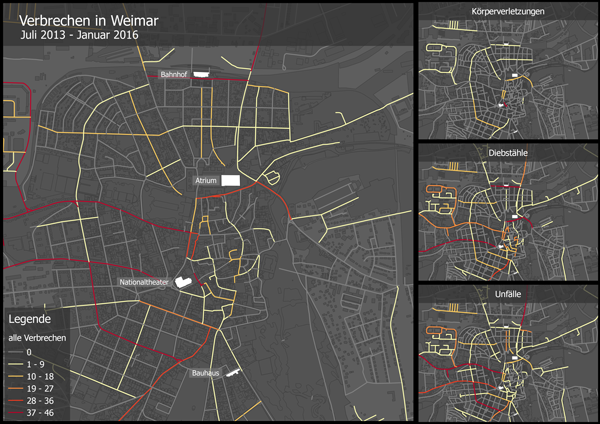

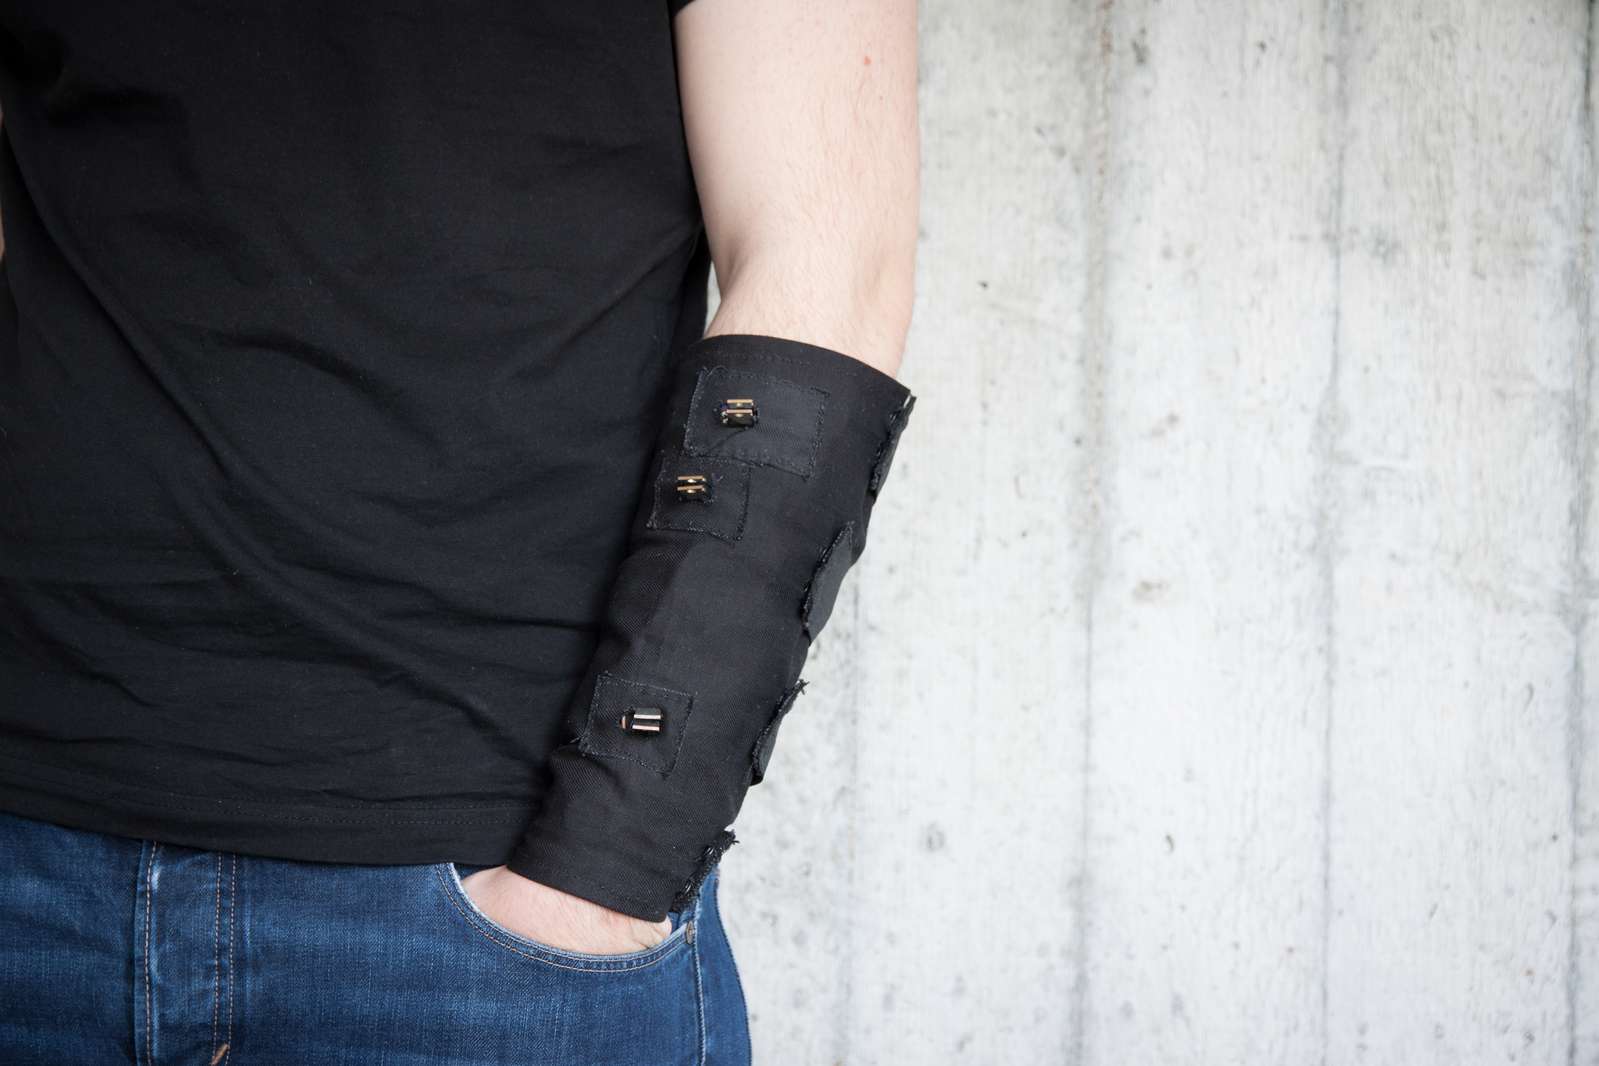
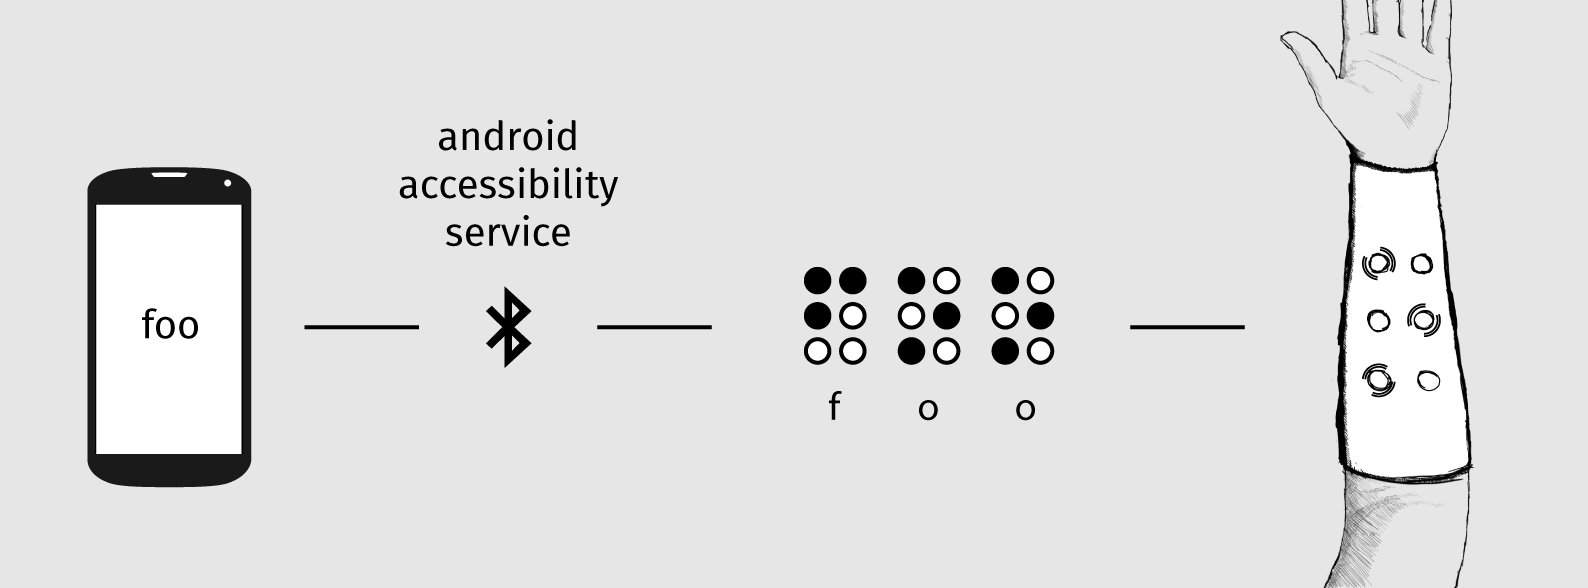


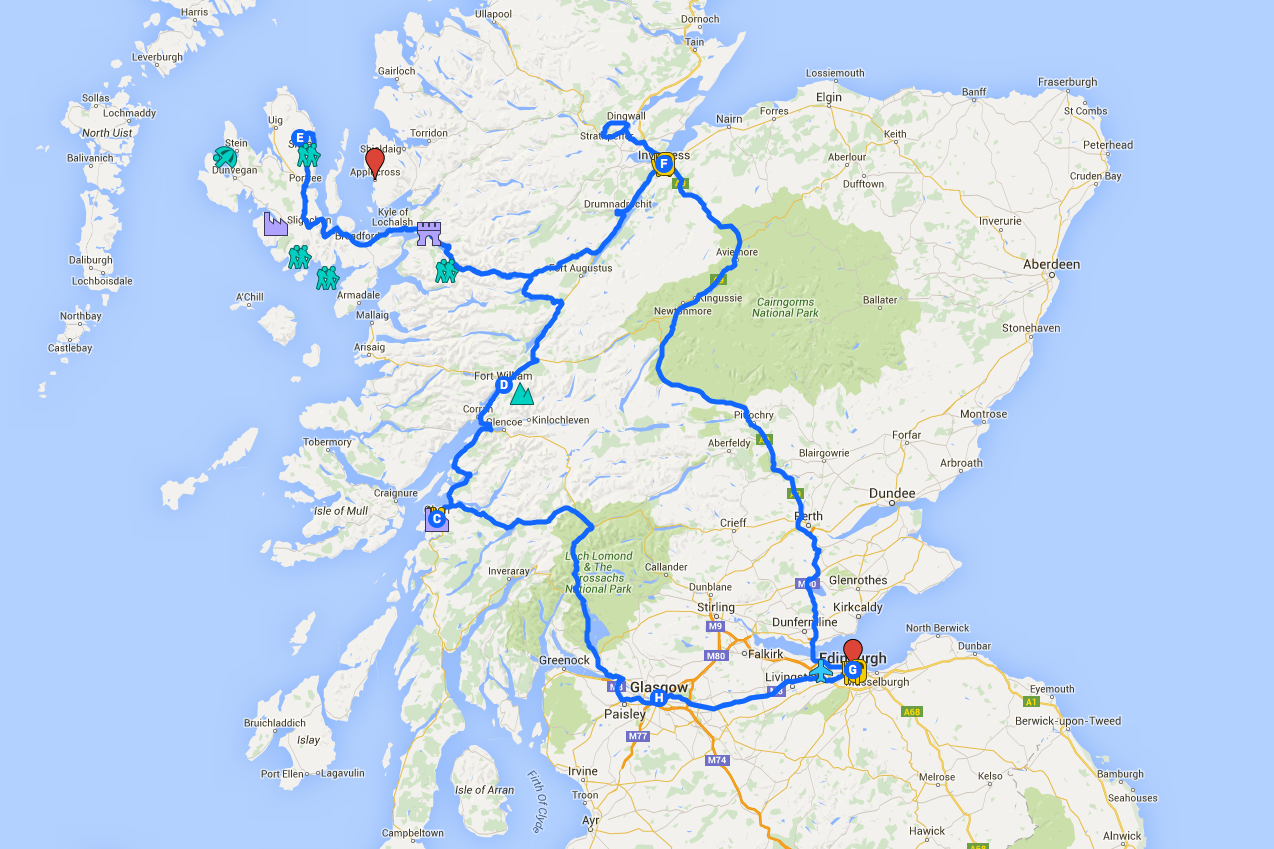


.jpg)